Tunisian Crochet 101: Changing colours (forward pass)

IMG_0118

It has taken a while but I am finally back with another tunisian crochet tutorial. I am taking a break from stitches and will teach you how to change colours, simply because my new pattern requires this and I thought it would be easier if there was a tutorial available.

There are a few ways of changing colours in tunisian crochet and I will only go through one today, changing colours at the start of the forward pass. This gives a clean colour change and it is what you would use for stripes. I will cover the other types of colour change in the future but this is the most basic one.

I will also explain how to change colours and stitch at the same time as part of this tutorial, it will be useful for my next pattern. If you are following any tutorial of course you will have the instructions for each row and this will tell you when to change to each colour and what to do if you are also changing stitches but this tutorial will help if you are playing with stitches and decide to create something by yourself. I think tunisian crochet is quite good for creating your own scarves by just changing stitches and colours, it gives a very nice look.

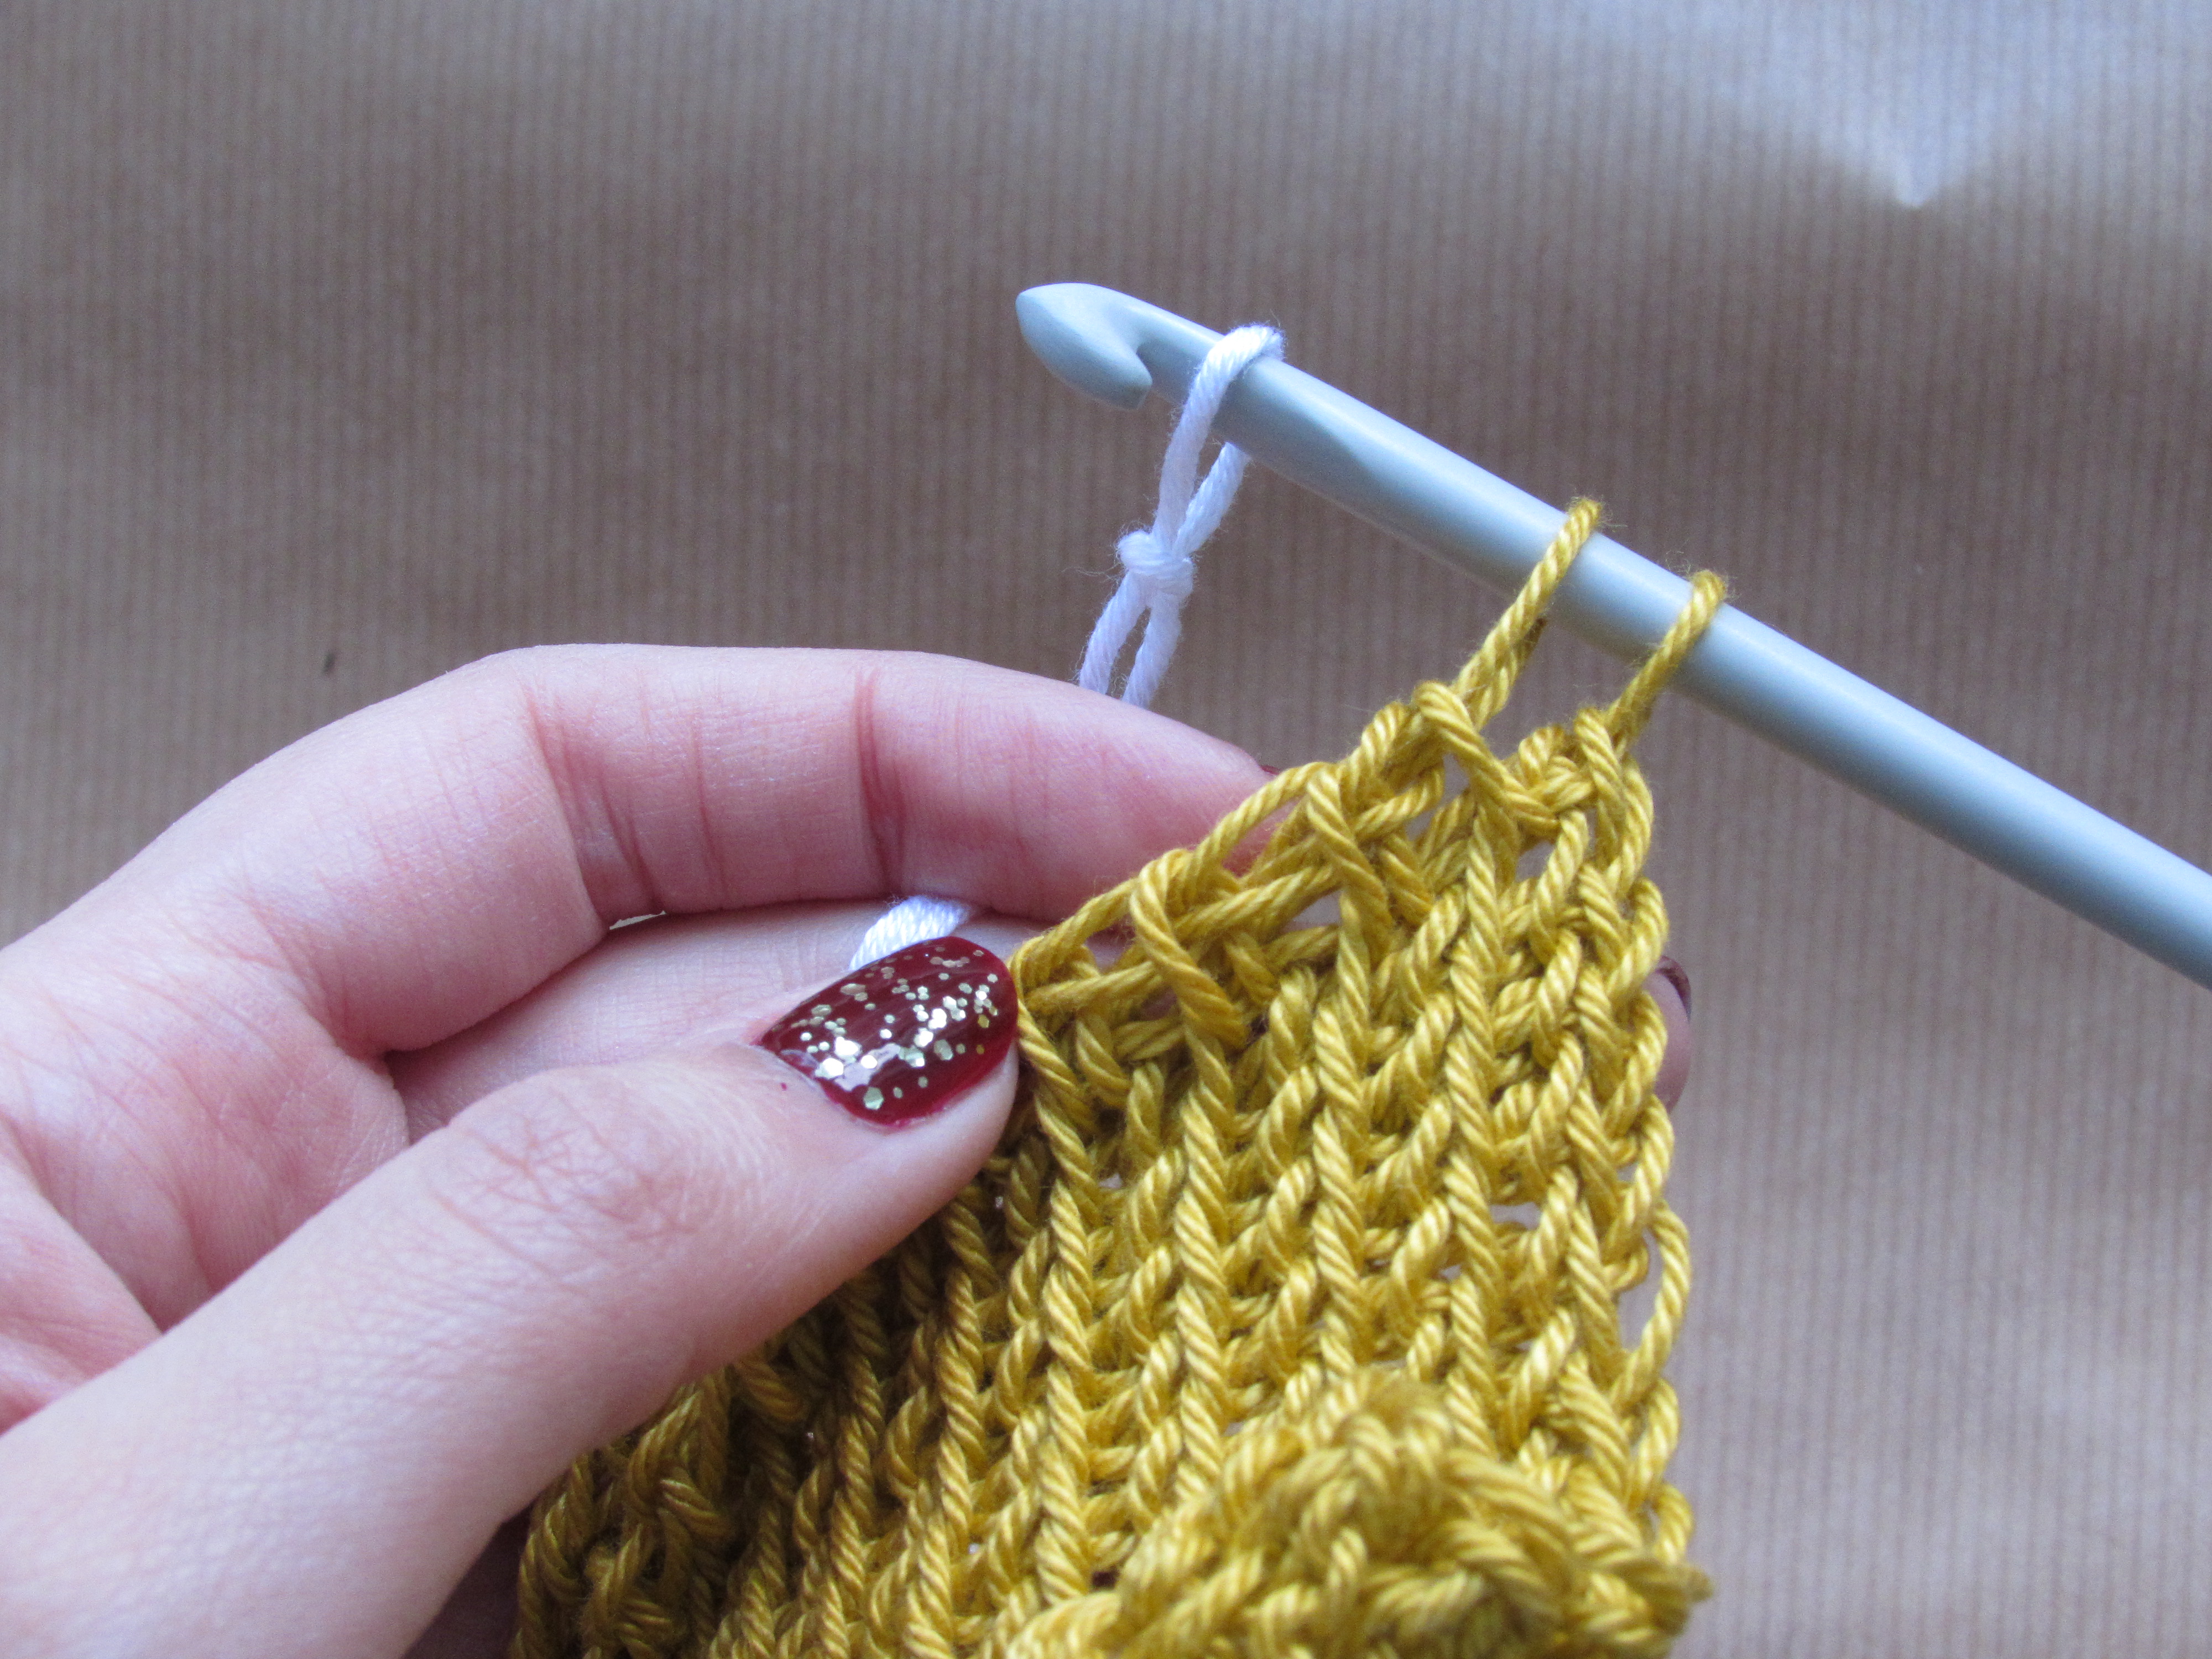
So let’s look at our sample so far!

We left off with a few rows of tunisian knit stitch (Tks), I can see six rows defined as Tks in my sample. Let’s say then that I want to work seven rows of Tks and then change colour and change back to tunisian simple stitch (Tss) at the same time for a couple of rows. If you only want to learn how to change colours then this is not important of course.

IMG_0079

First, I need to work the return pass on this row.  So yarn over and pull through one loop.

IMG_0082

IMG_0083

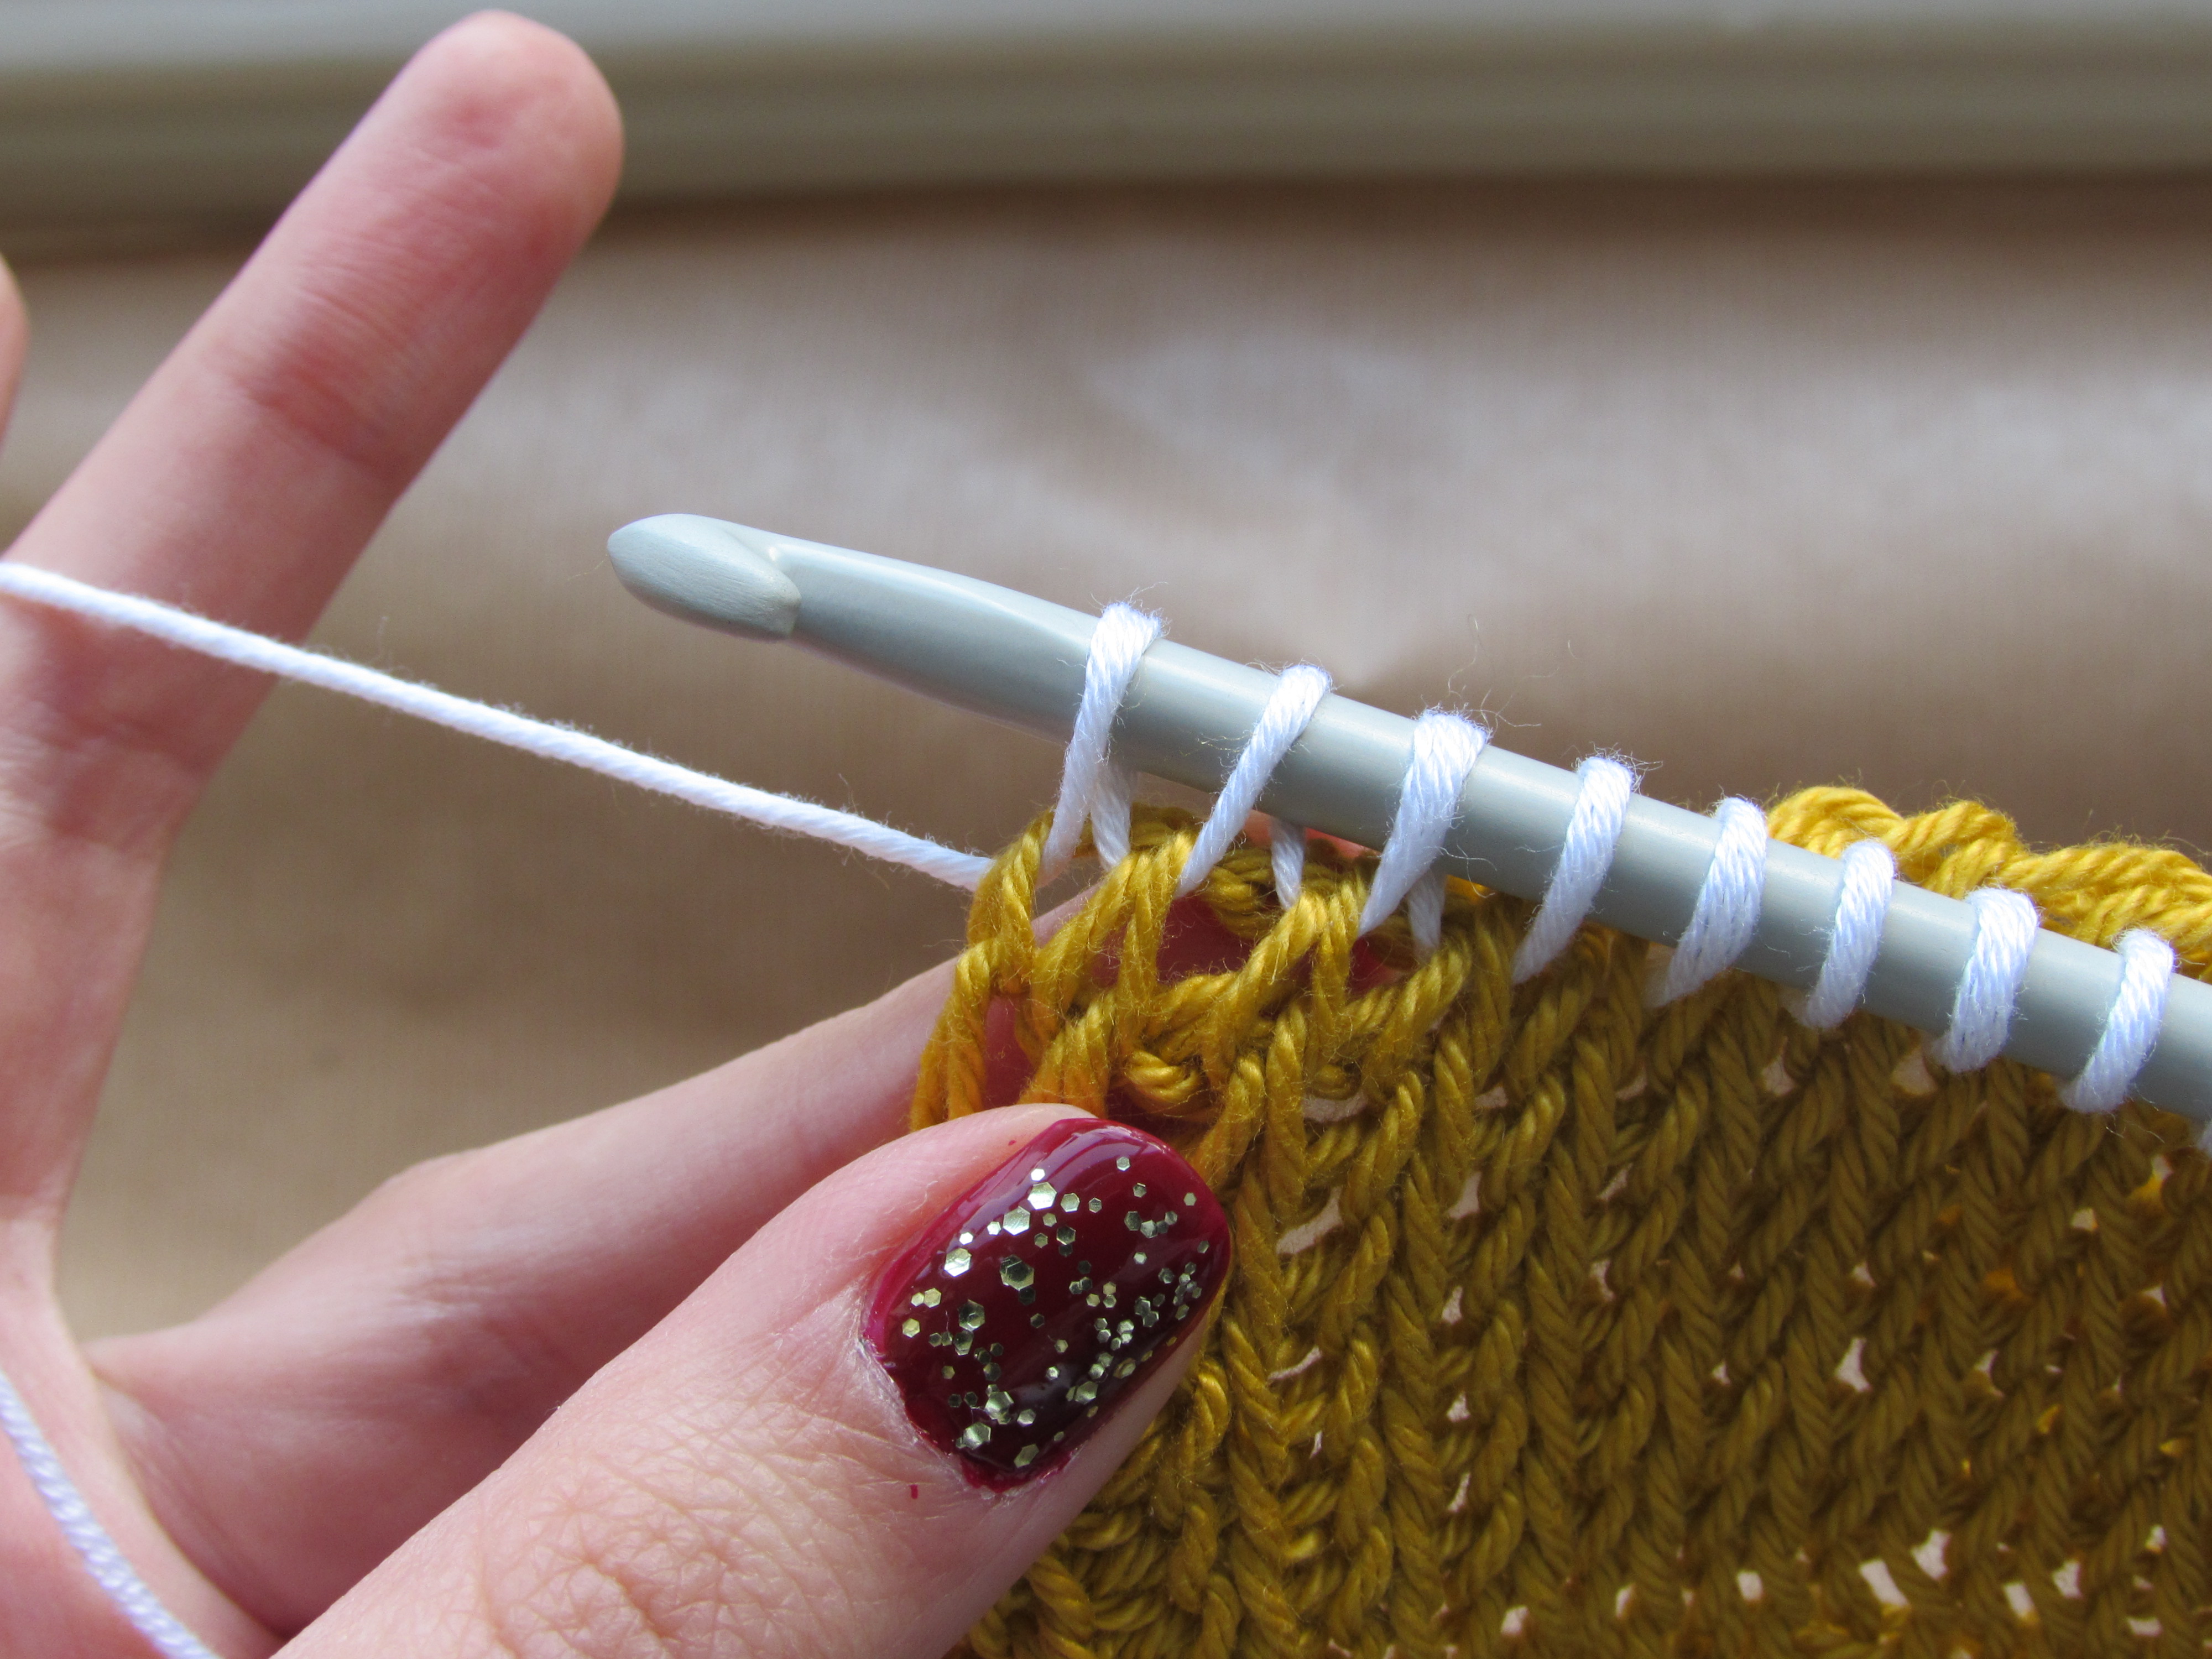
Yarn over and pull through two loops, repeat until you have two loops left of your hook. This is the difference when changing colours: in a normal return pass you yarn over and pull through one loop and then yarn over and pull through two loops all the way until you have just one loop left on your hook. In this case we are stopping just before working the last part of the return pass.

IMG_0085

IMG_0086

You do this because if you want to have a different colour at the beginning of the next forward pass you need to change colours at the end of the return pass. Now, keeping those two loops on your hook do a slip knot (this is not strictly necessary but I still do it) with the new colour.

IMG_0087

Pull the loop with the new colour through the two loops on your hook finishing the return pass.

IMG_0088

If you just wanted to know how to change colours and you are not changing the stitch as well that is it! You just continue working your stitches with the new colour.

If you want to know how to also change stitch at the same time then stick with me for a little bit. We said we wanted seven rows of Tks in yellow and two rows of Tss in the new colour. If you work normal crochet you would probably think that since you are now working with the white and you want Tss for this colour then that is what you should work now. But no! If you look at the sample you will see that even though we have the seven rows in yellow, not all of them are defined as Tks.

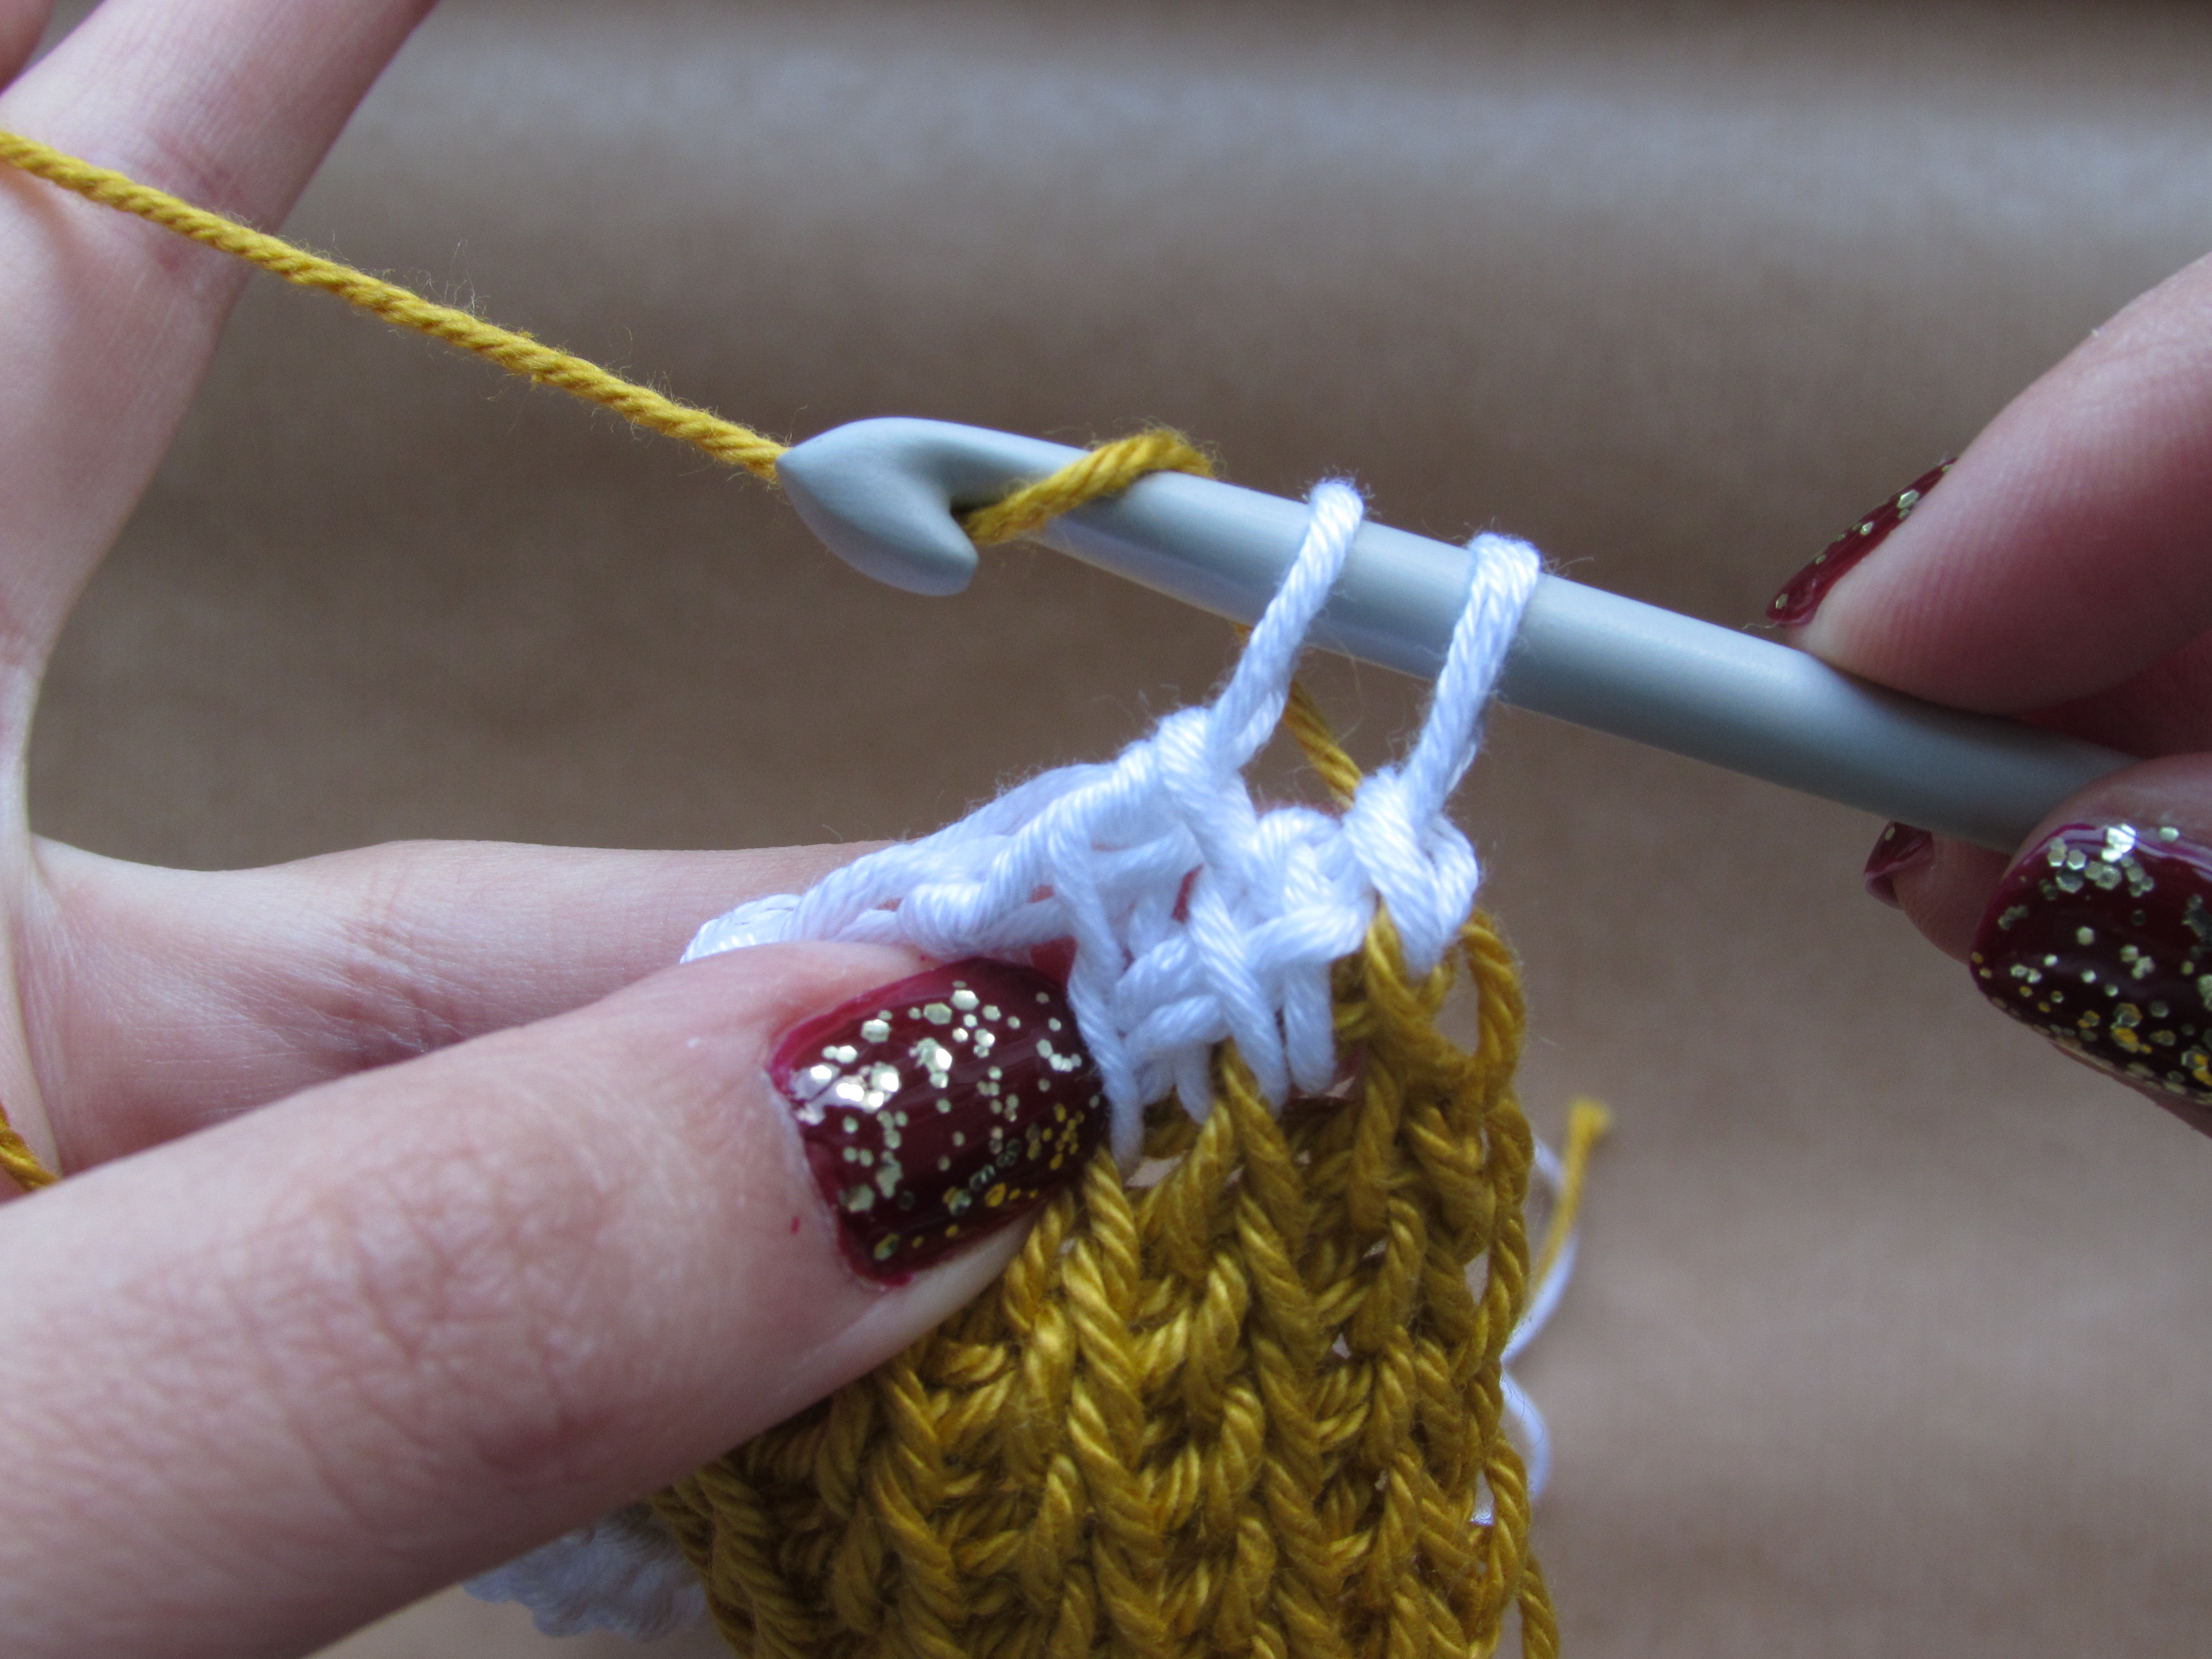
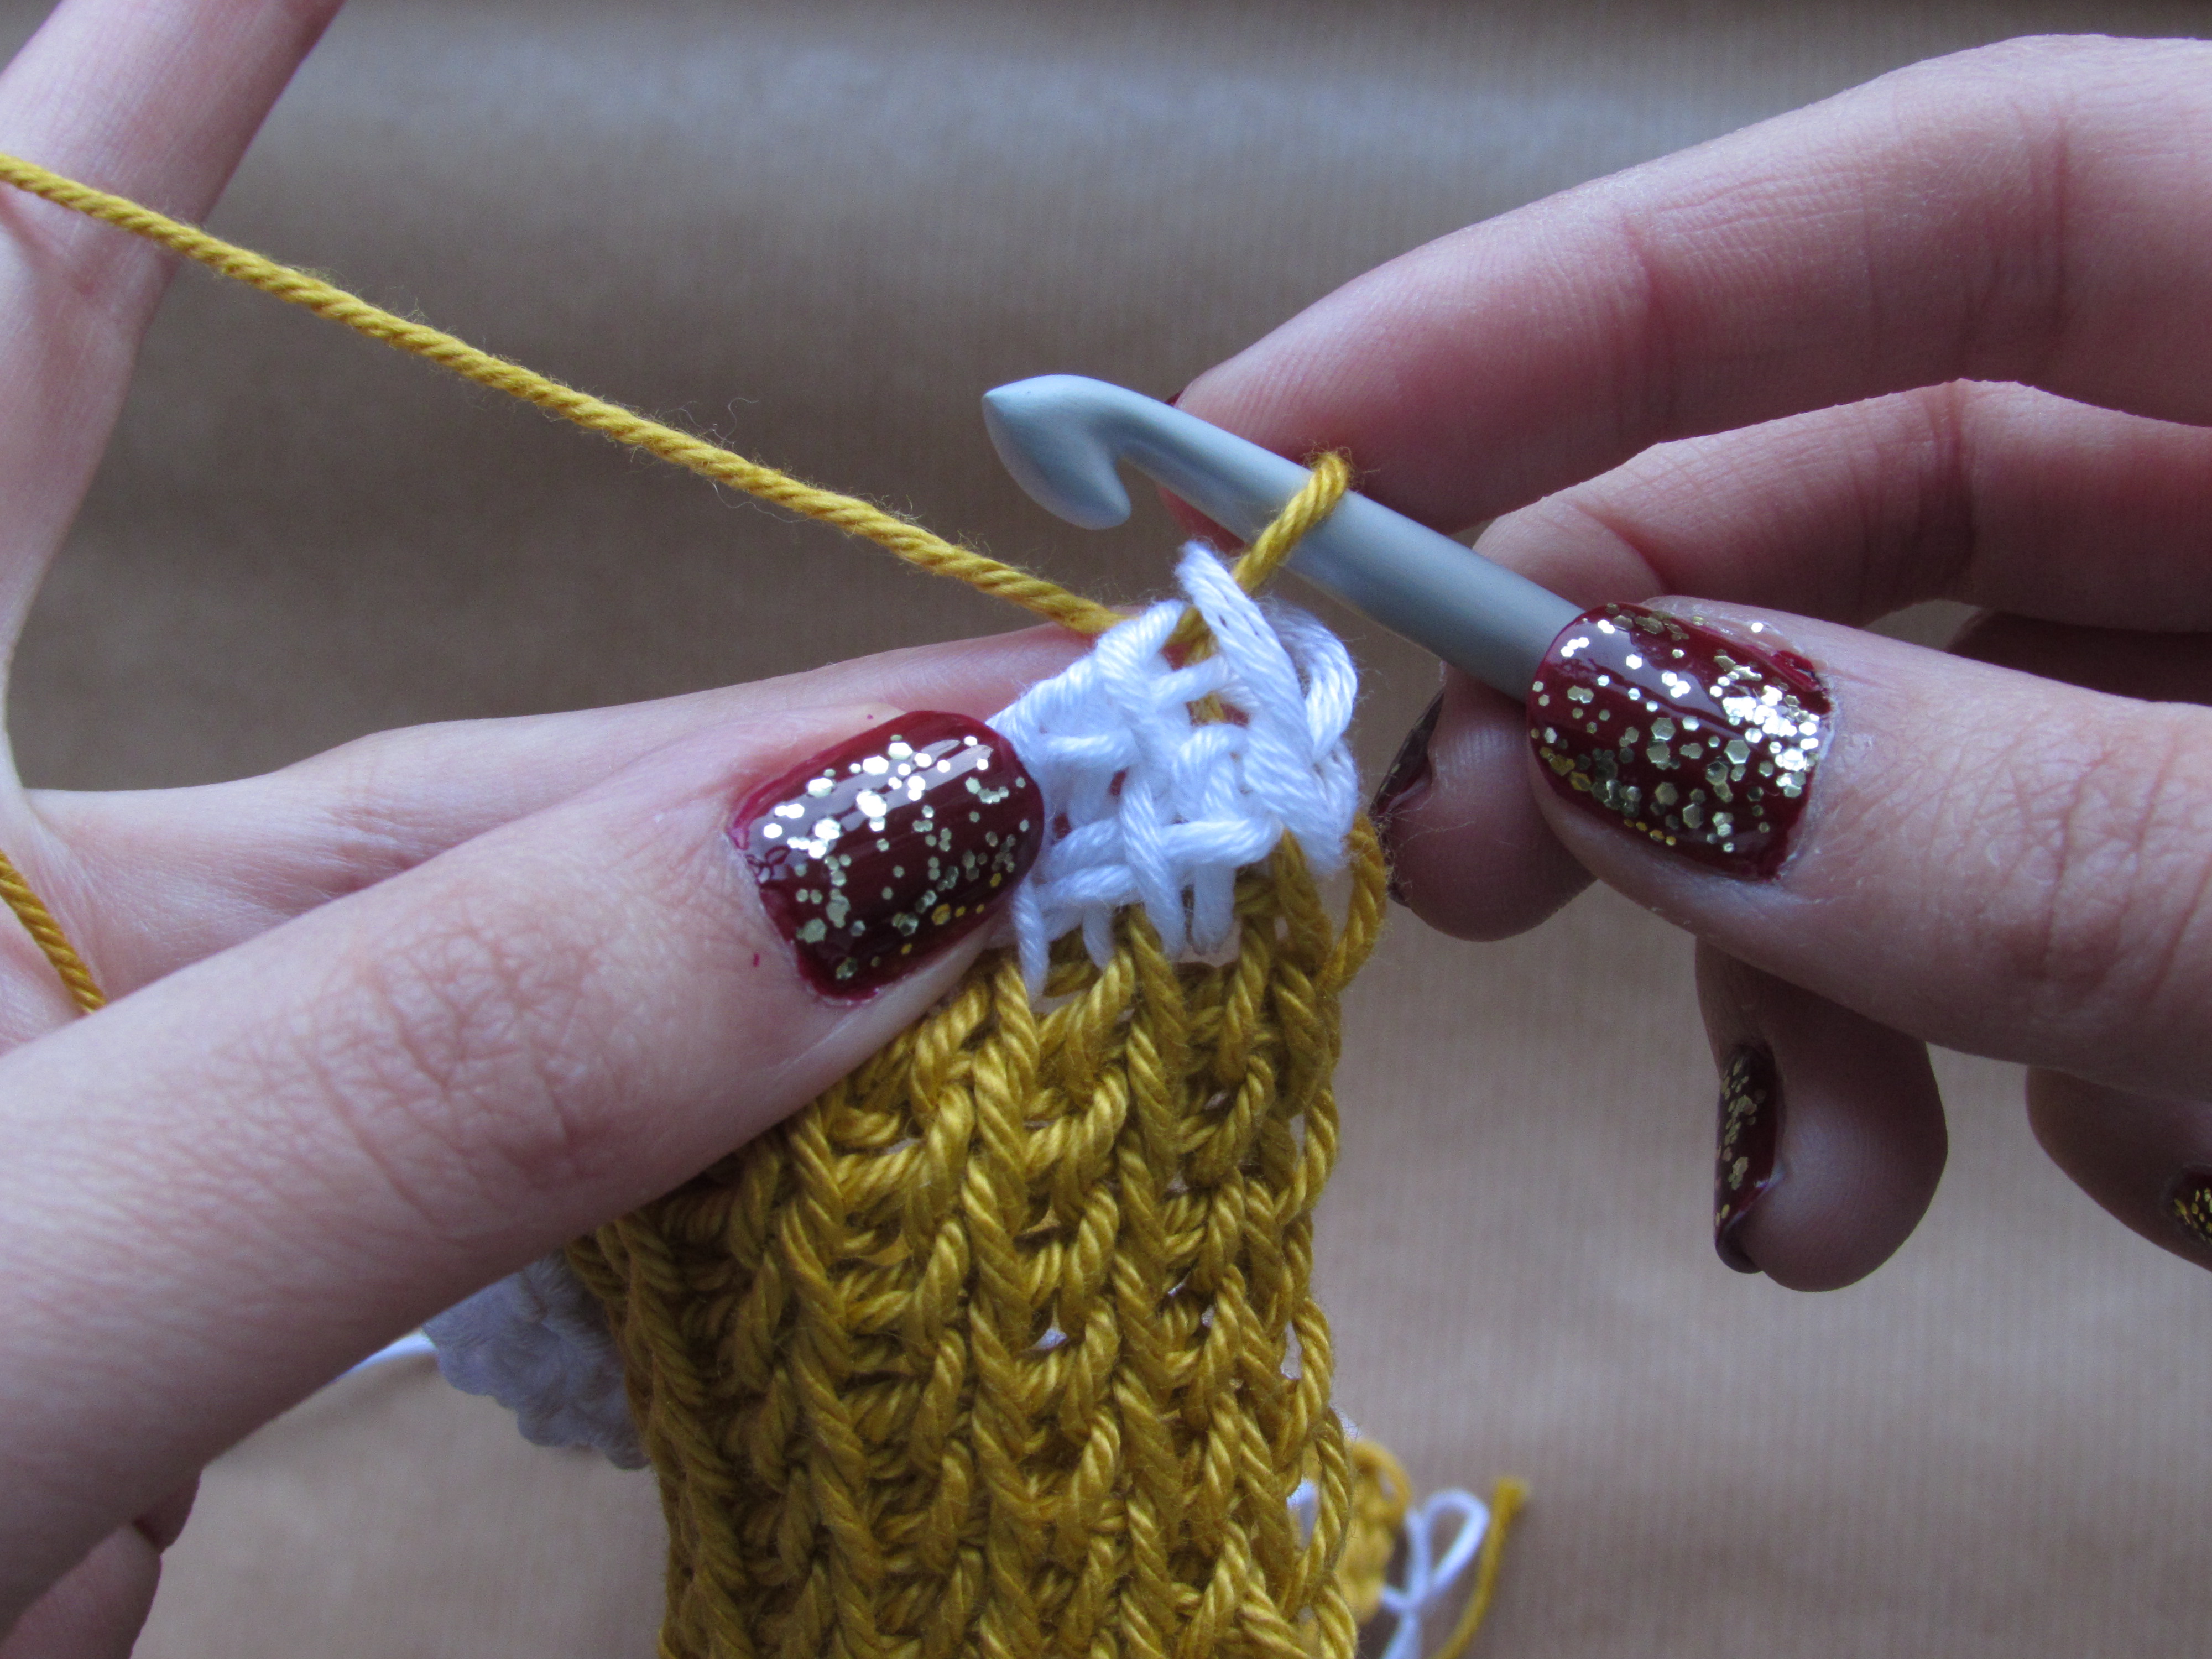
So… even though you are working with the white yarn, you will work this row as tunisian knit stitch because as I have said before what you do in each row will define the stitch of the previous row and create a new undefined row for you to work next. Therefore, insert your hook on the next stitch (remember we always skip the first one) as Tks between both vertical bars.

IMG_0089

Yarn over and pull up a loop.

IMG_0091

Continue all the way through until the last stitch, which you know by now is worked the same regardless of which type of stitch you are using. Insert your hook under two loops (I explain this in detail on my tunisian simple stitch tutorial) yarn over and pull up the last loop of the row.

IMG_0092

IMG_0094

IMG_0095

IMG_0101

Work return pass normally. So now you will have seven rows of Tks in yellow as you wanted and one undefined row in white. Since you know that what you do next will define that undefined row then you will have guessed that it is now that you start working Tss.

IMG_0102

So insert your hook as Tss.

IMG_0103

Yarn over and pull up a loop.

IMG_0104

IMG_0105

Continue working Tss until the last stitch, work last stitch normally.

IMG_0107

We said we wanted two rows of Tss in white. If I worked the return pass normally now I would actually see two rows in white: one defined as Tss and one undefined. Since two rows is all I need then you will need to change colours at the end of this return pass.

So work the return pass until you have two loops left on your hook. You now see your two rows in white and this is what tells you to change colours, it doesn’t matter if that last row is not defined yet, you will define that next.

IMG_0108

Drop the white, yarn over with the yellow and pull through the last two loops. For two rows I wouldn’t bother cutting the yarn, you can just carry it along in the back if it works for you.

IMG_0111

IMG_0112

You now need to work Tss, since that is what you want for that last white row. So insert your hook as Tss on the second stitch.

IMG_0113

Yarn over and pull up a loop.

IMG_0114

IMG_0115

Continue until last stitch, work last stitch normally.

IMG_0118

You can see now that we have what we wanted! Seven rows of Tks and two rows of Tss in the new colour. If you work the return pass you will have a new undefined row in yellow, ready to become any stitch you want.

IMG_0119

That is it for today everyone, hope that is clear and as usual let me know if you have any questions. Will post the pattern for the first chunky cowl soon now that you know all about changing colours!

x

Sol

Tunisian Crochet 101: Introduction and Tools

double ended hook

Welcome to a new series of posts to share the love of Tunisian Crochet! This post will give you a short introduction to this technique and show you the different tools you can use. I will also let you know the materials you will need to follow the upcoming tutorials for tunisian stitches.

So what is Tunisian Crochet? Many people say it is the perfect combination between knitting and crochet and it definitely has a bit a both. It is worked using a hook but you pick up stitches and collect them on the hook like knitting.

bernhard64-afghan-stitch

Before I go into more detail, let’s look at the history of this technique. I did some research and it looks like no one really knows where or when tunisian crochet came to exist, but only that it was practiced in Western Europe and the British Isles in the mid-nineteenth century. There are theories that it originated from Africa or Central Asia but nothing is for sure. The name “Tunisian Crochet” apparently was given by the French and may not be an indication that there is any relation to Tunisia. To make things more complicated, this technique is known by different names such as Afghan crochet, tricot crochet, railroad knitting and Sheperd’s knitting. Tunisian Crochet seemed to lose popularity and went off the radar after the 1930s and it is now experiencing a comeback.

winter nocturne
Winter Nocturne Shawl by Yuliya Tkacheva

We will go into the detail of the stitches in the tutorials but here are some basic facts about tunisian crochet:

  • It is worked in two steps: the forward pass and the return pass. You pick up stitches and leave them on your hook in the forward pass and you work them off in the return pass.
  • You don’t turn your work when doing tunisian crochet, the front is always facing you.
  • The front and back of the fabric are different when working tunisian stitches. This doesn’t mean that you get an ugly back to your work, just that it is different to the front.
  • You should use a bigger hook than the recommended size for a specific weight of yarn, usually two sizes bigger. For example, if you have a DK yarn that calls for a 4mm hook, you should use a 6mm when working tunisian.
  • The only thing you need to master before starting tunisian is how to crochet a chain.
  • Tunisian fabric can be dense and heavy, or light and airy. It all depends on the stitches you use and the weight of your yarn.
  • You can mix tunisian crochet and regular crochet in one project very easily.
Cirque Cardigan by Dora Ohrenstein. © Interweave Crochet 2014

What tools do you need? Hooks of course! I am sure you will be wondering if you can use regular hooks and the answer is: it depends. Some designers like Aoibhe Ni produce patterns that allow you to use normal hooks as long as the shaft is the same size throughout (it doesn’t widen in the middle). But generally this is not the case, and most patterns will require a tunisian hook. Since you pick up stitches and keep them on the hook you can crochet a piece as wide as the amount of stitches that will fit on it, which will be wider than the hook but not much wider. This the reason why tunisian hooks are usually 30cm or longer if using cables.

Let’s look at the types of tunisian hooks:

  • Tunisian hook with stopper: This is basically a straight knitting needle which instead of ending in a point it ends with a hook. The stopper keeps the stitches from falling off the other side, they are usually around 30cm long which makes them a good size for scarves and cowls.

hook stopper


  • Double ended tunisian hook: these have hooks on both sides. You can use them the same way as the ones with the stopper (just with a bit more attention to not loose stitches) but they also allow you to do tunisian crochet in the round.

double ended hook


  • Tunisian hook with extension: These hooks allow you to attach a cord to a 15cm hook to make it as long as 1.5m or even longer. It is the same concept of interchangeable needles but with hooks. The cable ends in a stopper which prevents the stitches from falling off.

interchangeable hooks

So which ones should you get?  Well, if you don’t want to spend too much money I would go for the double ended hooks. They have the same use as the ones with the stopper but they give you the possibility of working in the round if you ever wished to try it out. However, if you have wrist or shoulder pain when crocheting and can spend a bit more money I recommend buying the interchangeable hooks. I suffer from shoulder pain when crocheting and I have to say with tunisian crochet its worse because the hook is heavier and you keep the loops on the hook which makes it heavier still. Interchangeable hooks are much lighter and have given me no problems since I started using them. if you want to check them out Knit Pro and Aldi have some good ones in plastic and bamboo which are sold by sets so that it ends up a bit cheaper.

What do you need to follow the tutorials? I have been scratching my head to figure out how to make this as accessible and useful as possible, and have decided a few things:

  • We will do a stitch sampler, adding one stitch per tutorial to the sampler. I thought at first to write up a pattern so that the finished product had a use but decided that the whole point of this is to learn and you can keep the stitch sampler to go back to whenever you want to remember how a stitch looks like and how it behaves compared to others.  If I were to do a pattern I would choose stitches that work with each other and would skip others and that is not the point.
  • It would be ideal if you can get a 30 cm tunisian hook but it is not strictly necessary. You can still do your sampler in a normal hook (with a straight shaft) but it will be a narrower sampler of course of about 10-15 stitches and you will want to add more rows for each stitch so that you can practice them enough times.
  • It would be ideal to work with a yarn that is DK or heavier, this will make the stitches easier to work into. Remember you need a hook 2 sizes bigger than the size the yarn calls for.

So in summary you will need:

  • 30cm tunisian hook if possible, or normal hook with straight shaft. It should be 6mm if using a DK yarn, or two sizes bigger than the normal size required for your yarn.
  • Yarn DK or heavier, in 2 colours (we will learn to change colours as well). Something nice and sturdy would be ideal, but that it doesn’t split easily. Use light colours so that you can see the stitches better.

That is is for now, I will be back soon with the first tutorial so stay tuned!

x

Sol