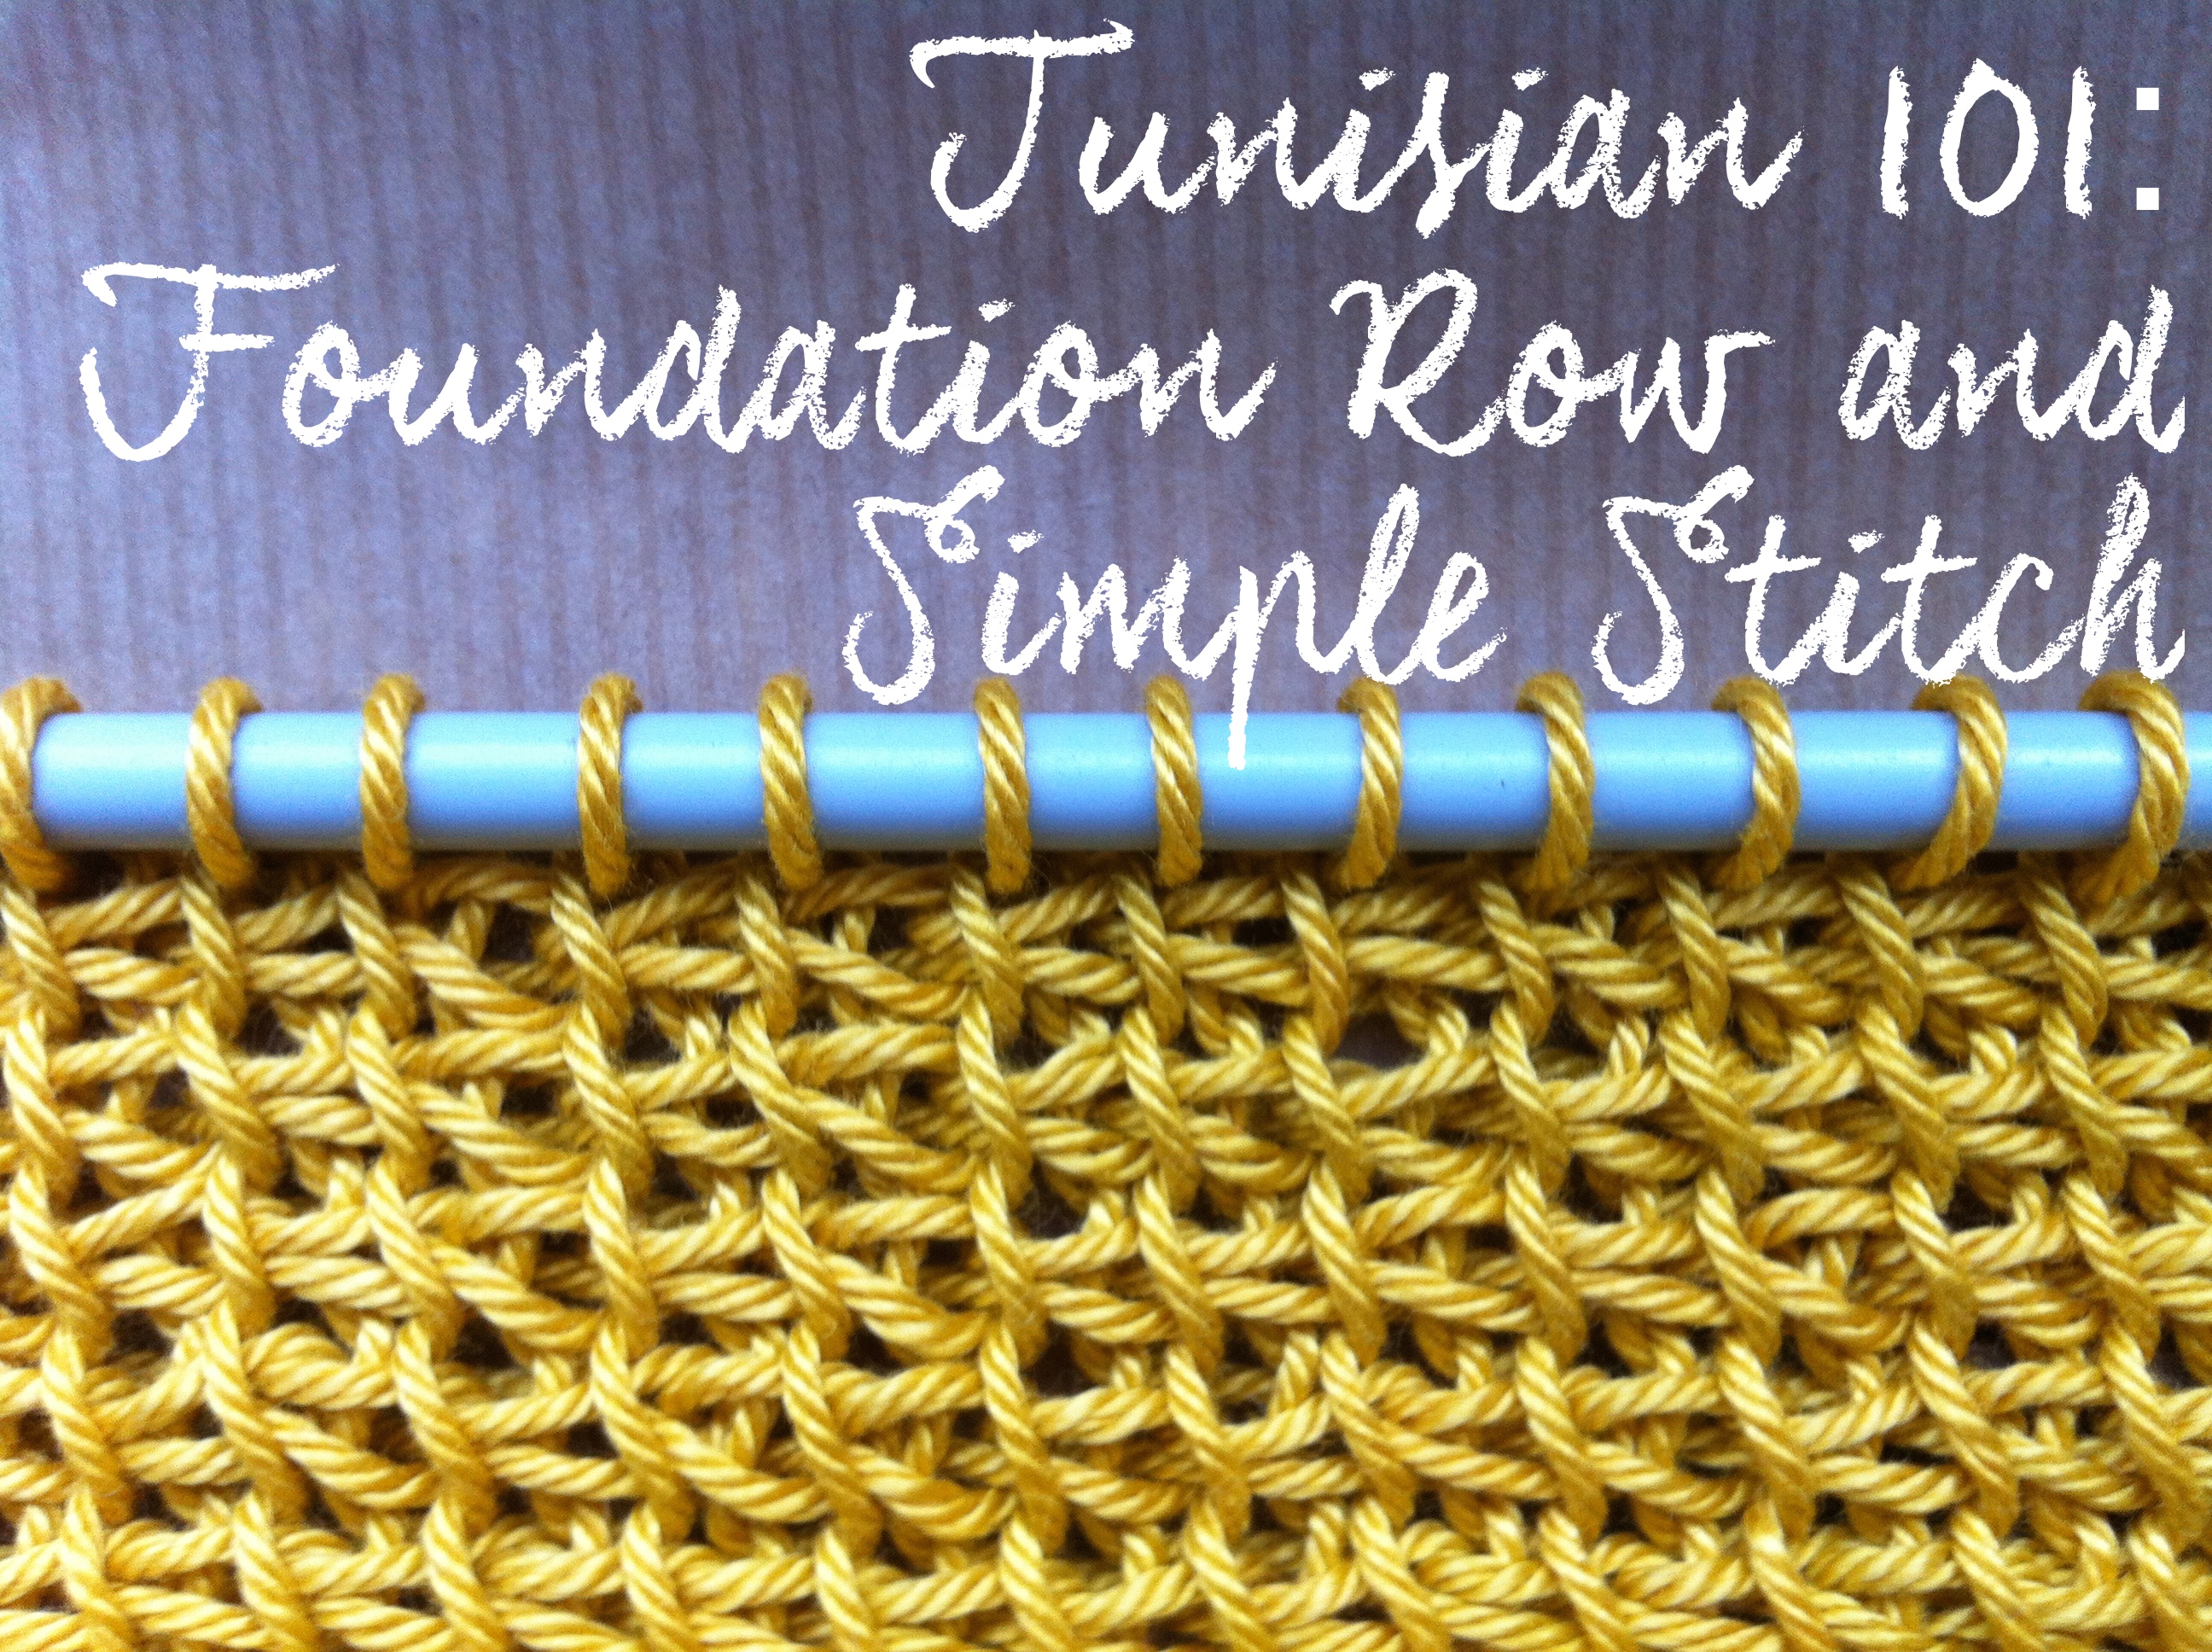
Hello my dear readers! Welcome to a new post on this Tunisian Crochet 101 series (click here for the first post if you missed it). You better have your materials ready because today we are learning our first tunisian stitch: tunisian simple stitch (Tss). This is the most basic of tunisian stitches and it has a beautiful woven effect on the fabric. We will be doing a sampler of stitches, make sure you don’t unravel your rows of Tss once finished since we will be adding stitches on top of that so that you can see how each compares to the other.
Before we dive into the stitch itself I will show you how to do the foundation row which is the same for any stitch (at least for all the ones I have encountered so far). As I mentioned in the first post of this series all you need to know for these tutorials is how to crochet a chain, we’ll go through everything else.
Regarding materials, grab any yarn (DK or heavier is ideal for learning) and a hook that is two sizes bigger than the one recommended for the yarn you are using. If you have a long tunisian crochet hook that is perfect, if not a standard hook will do as long as it has a straight shaft and bear in mind you will probably not be able to fit many stitches but you can still practice with it.
Ready? Let’s do this!
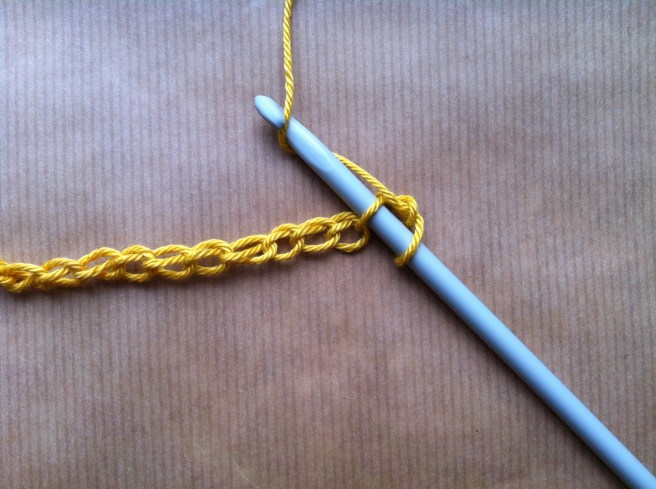
Chain 30. You can chain more if you have a long hook or less if you are using a regular hook, it is not important for the purpose of this tutorial. You should note that unlike regular crochet, in tunisian crochet there is no turning chain. So if you need 30 stitches you should make 30 chains. Simple, no?

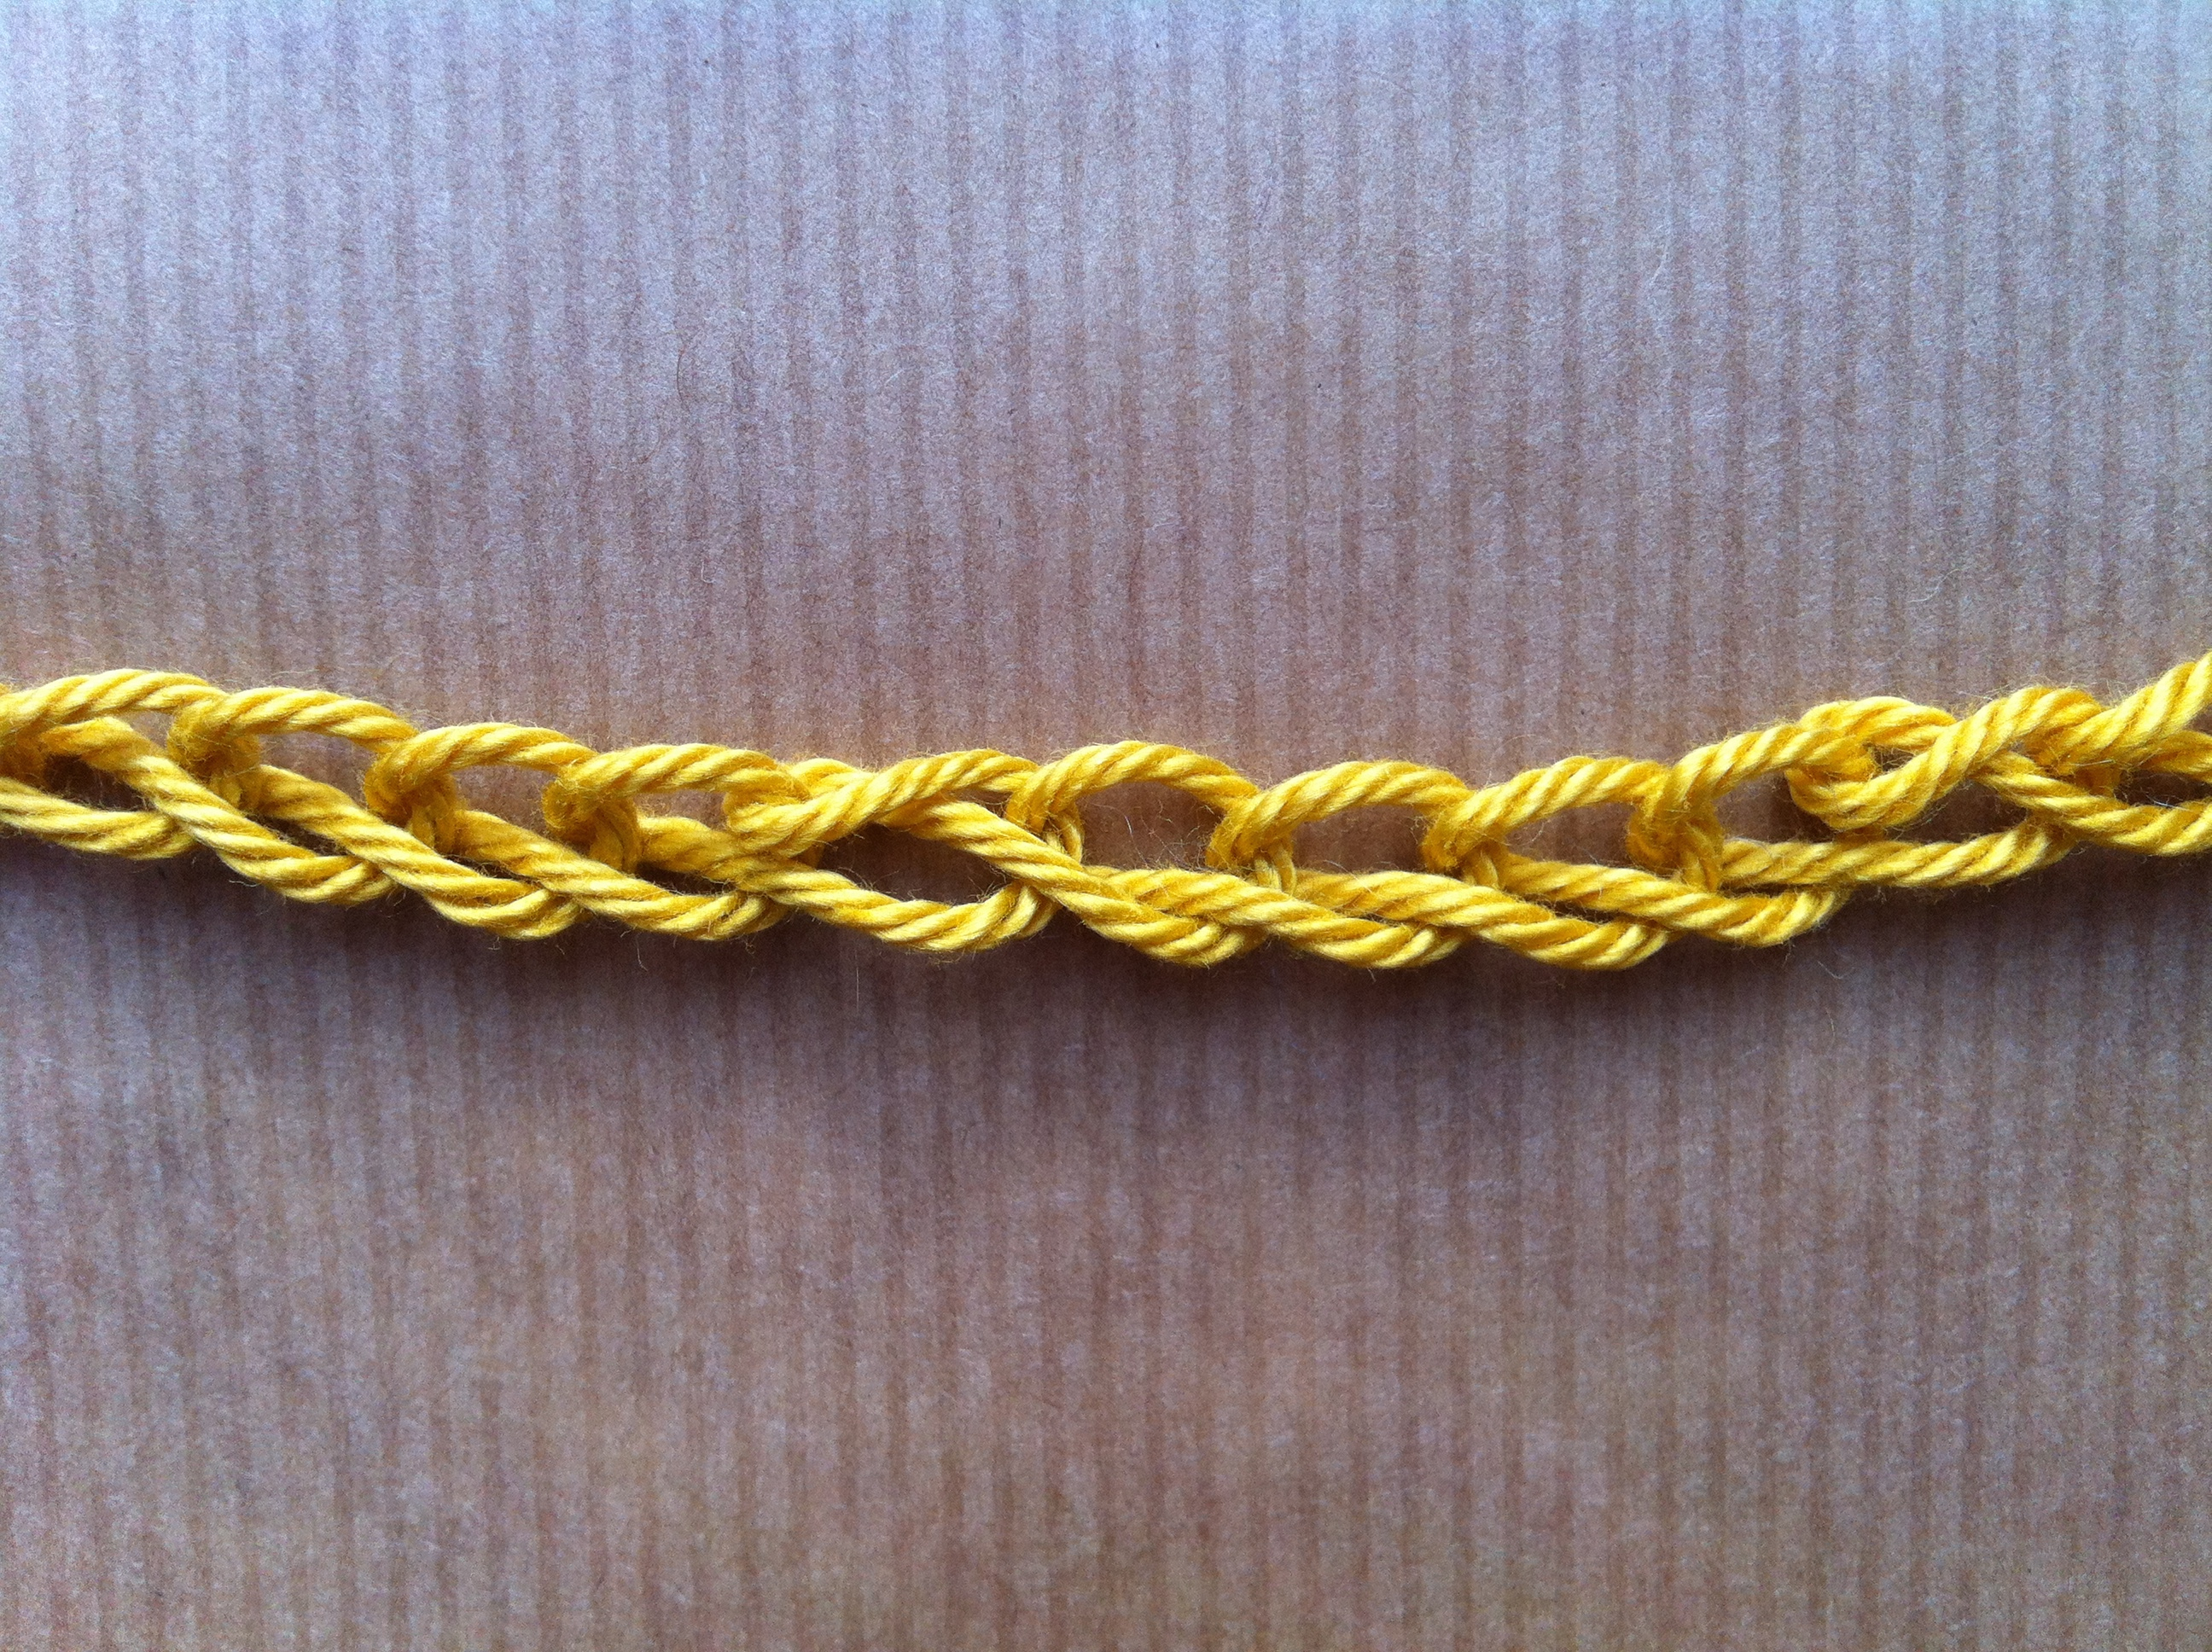
Now let’s take a look at that chain for a minute. A chain actually has two “sides” to it, and each chain stitch is made up of 3 strands. What I would call the front of the chain is where you see the two strands that look like, well like a chain 🙂 as in the picture below.

If you turn it around you will get the “back of the chain” as in the picture below. Now, the back has one these strands that are like bumps, a friend of mine once called it the “spine of the chain” and I think that is quite a good name actually.

So why all this talk about the anatomy of a chain? Well because we will use those back bumps to start our foundation row. To be honest, you could start your foundation row using any of the 3 strands that make a chain stitch (the two on the sides and the bump on the back) and you are welcome to try them out but I recommend using the back bump. It gives a nicer edge and it helps a bit with the curling that happens with tunisian. So, if you have your front side of the chain looking at you as in the picture below…

…turn the chain around so that the back bumps are facing you.

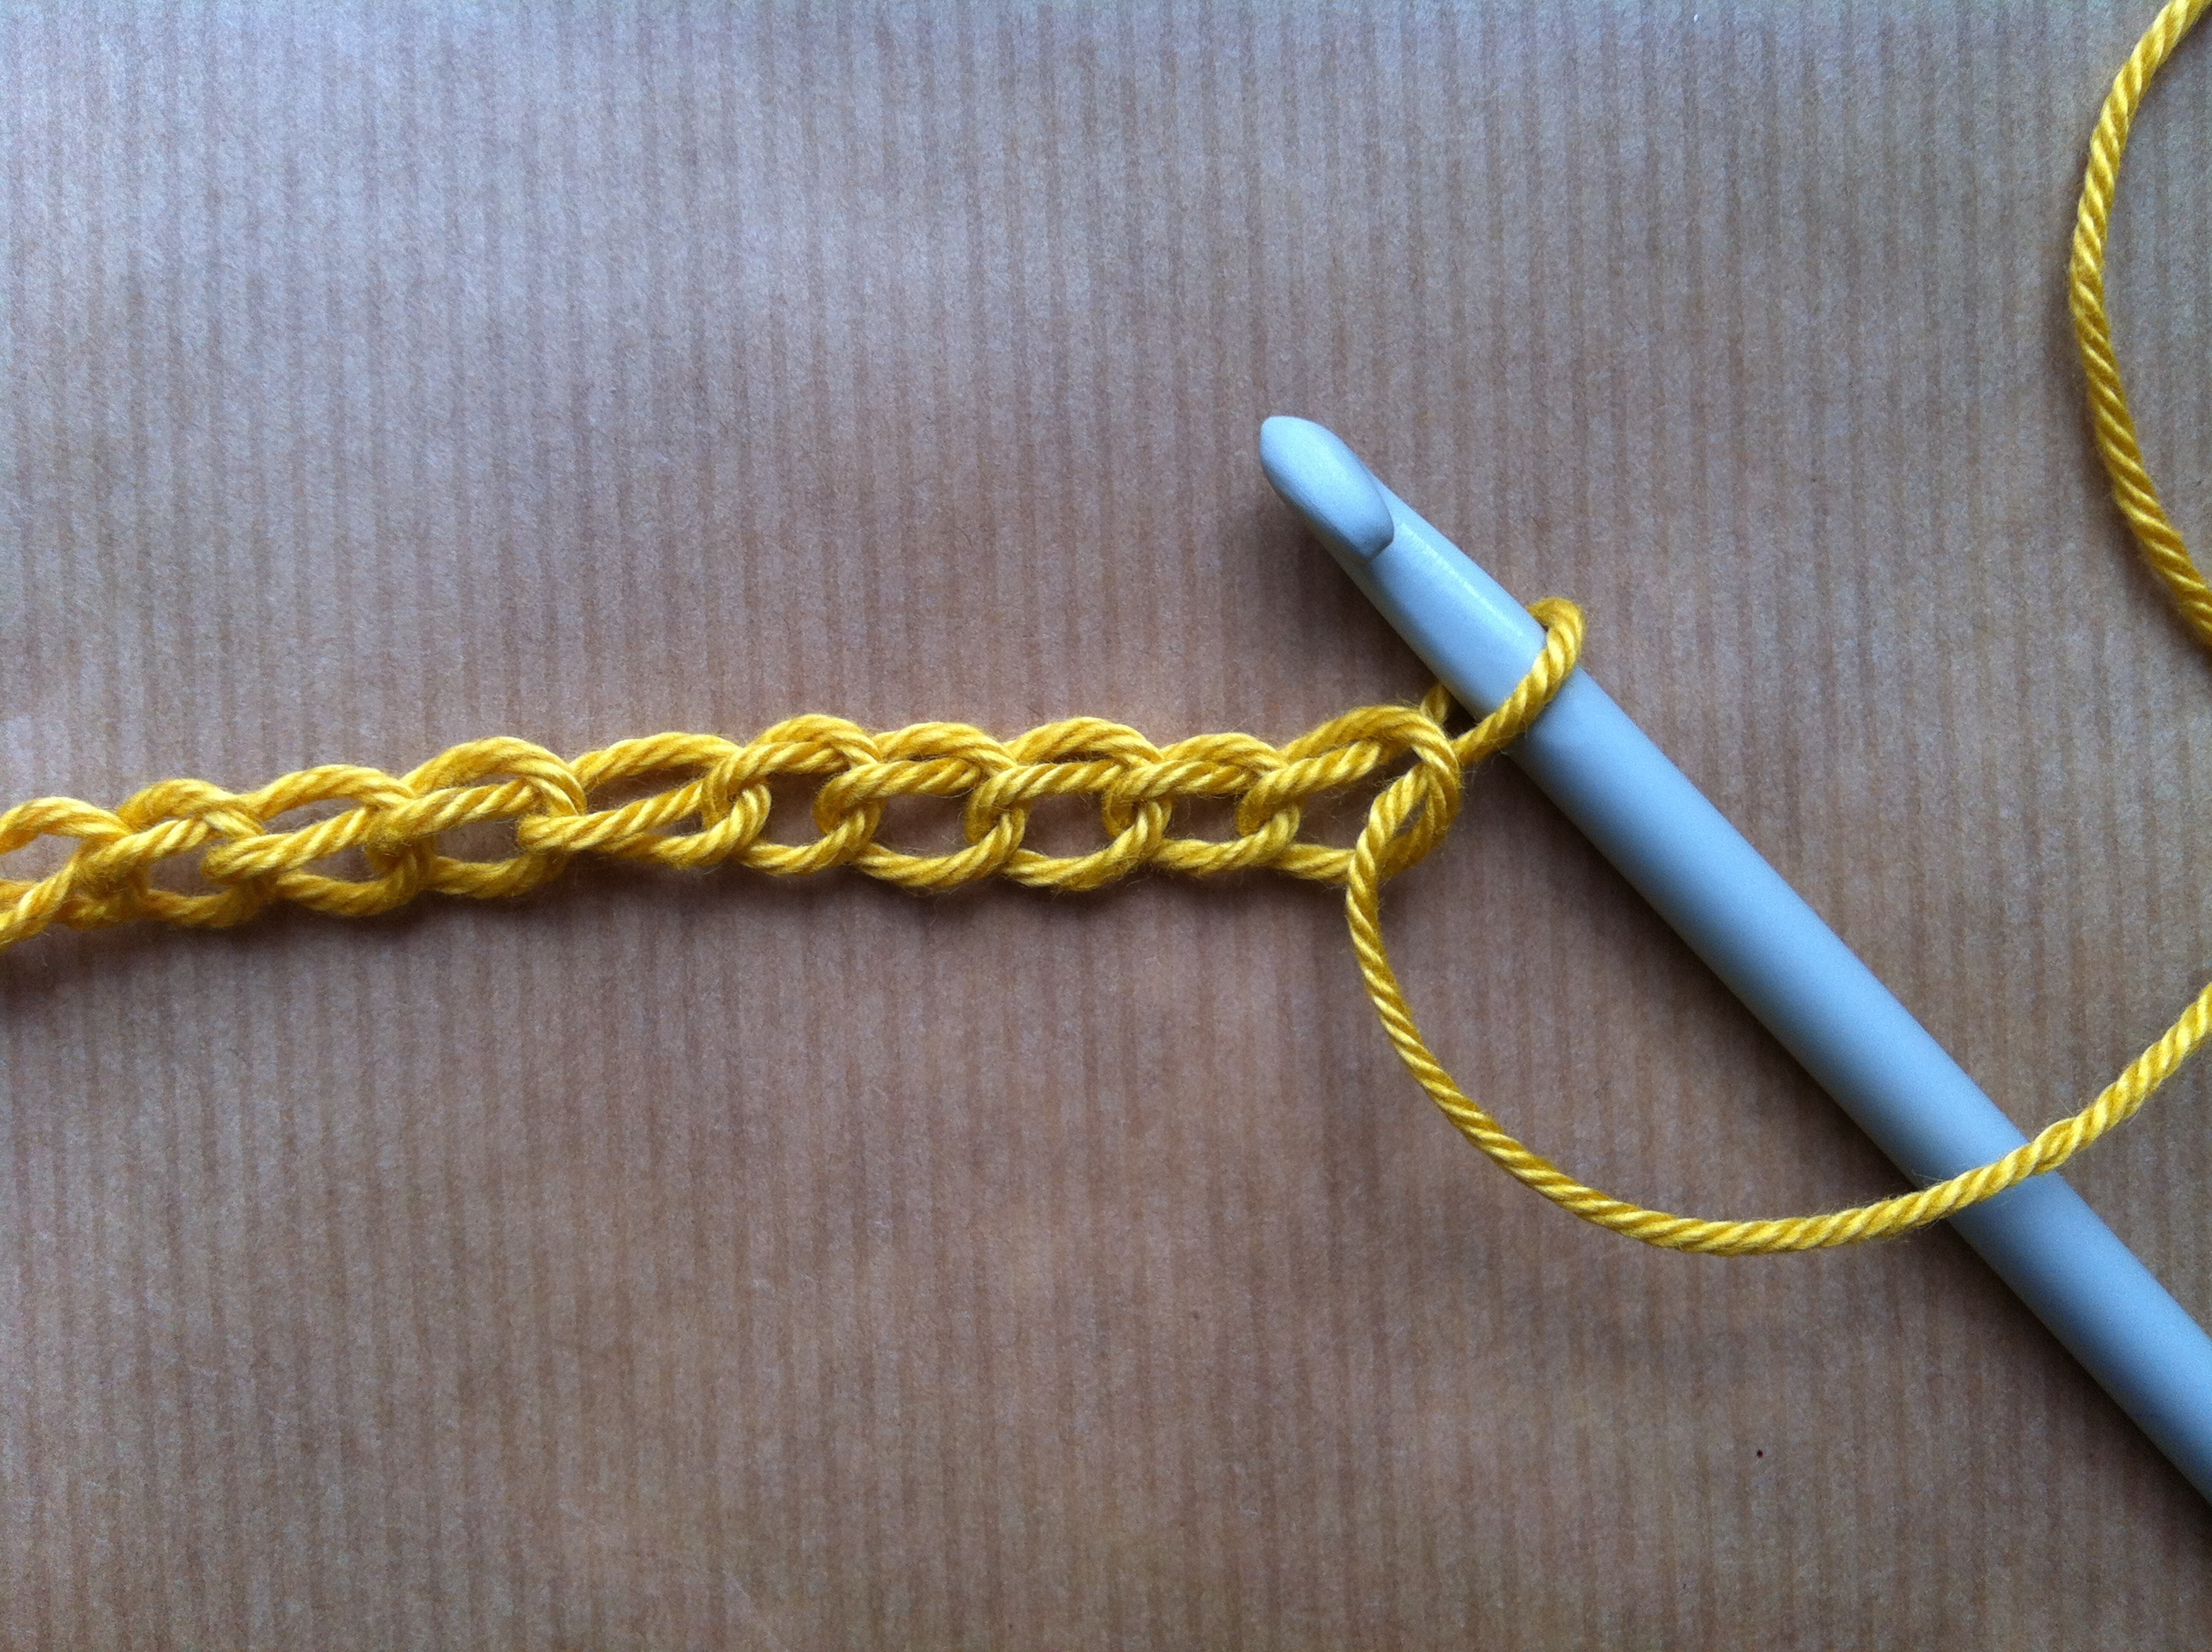
Now we begin the forward pass of our foundation row. Remember each row in tunisian crochet has two steps: a forward pass where you pick up stitches and a return pass where you work them off. So it should be no surprise that the foundation row must also have a forward pass and a return pass. One last advice before beginning: be very loose! Tension is quite important with tunisian, and being loose will mean less curling of the fabric and it will be easier to work the stitches. So, skip the first chain (the one closest to the hook) and insert the hook under the back bump of the next chain (second chain).

Yarn over and pull through one loop on the hook. You will now have two loops on your hook.

Continue with the next chain in the same way: insert the hook under back bump, yarn over and pull up a loop, until the last chain. In tunisian crochet each loop on the hook is a stitch, so once you reach the end you should have as many loops in your hook as the amount of chains you made. In my case, I have 30 loops since I had 30 chains.

Do you see that the bottom edge looks quite nice? That is because we worked the back bump of the chain. You may also see already some of that curling I mentioned if the edge is looking at you instead of looking down as in the picture below. Remember to crochet loosely, it will make your life easier while learning.

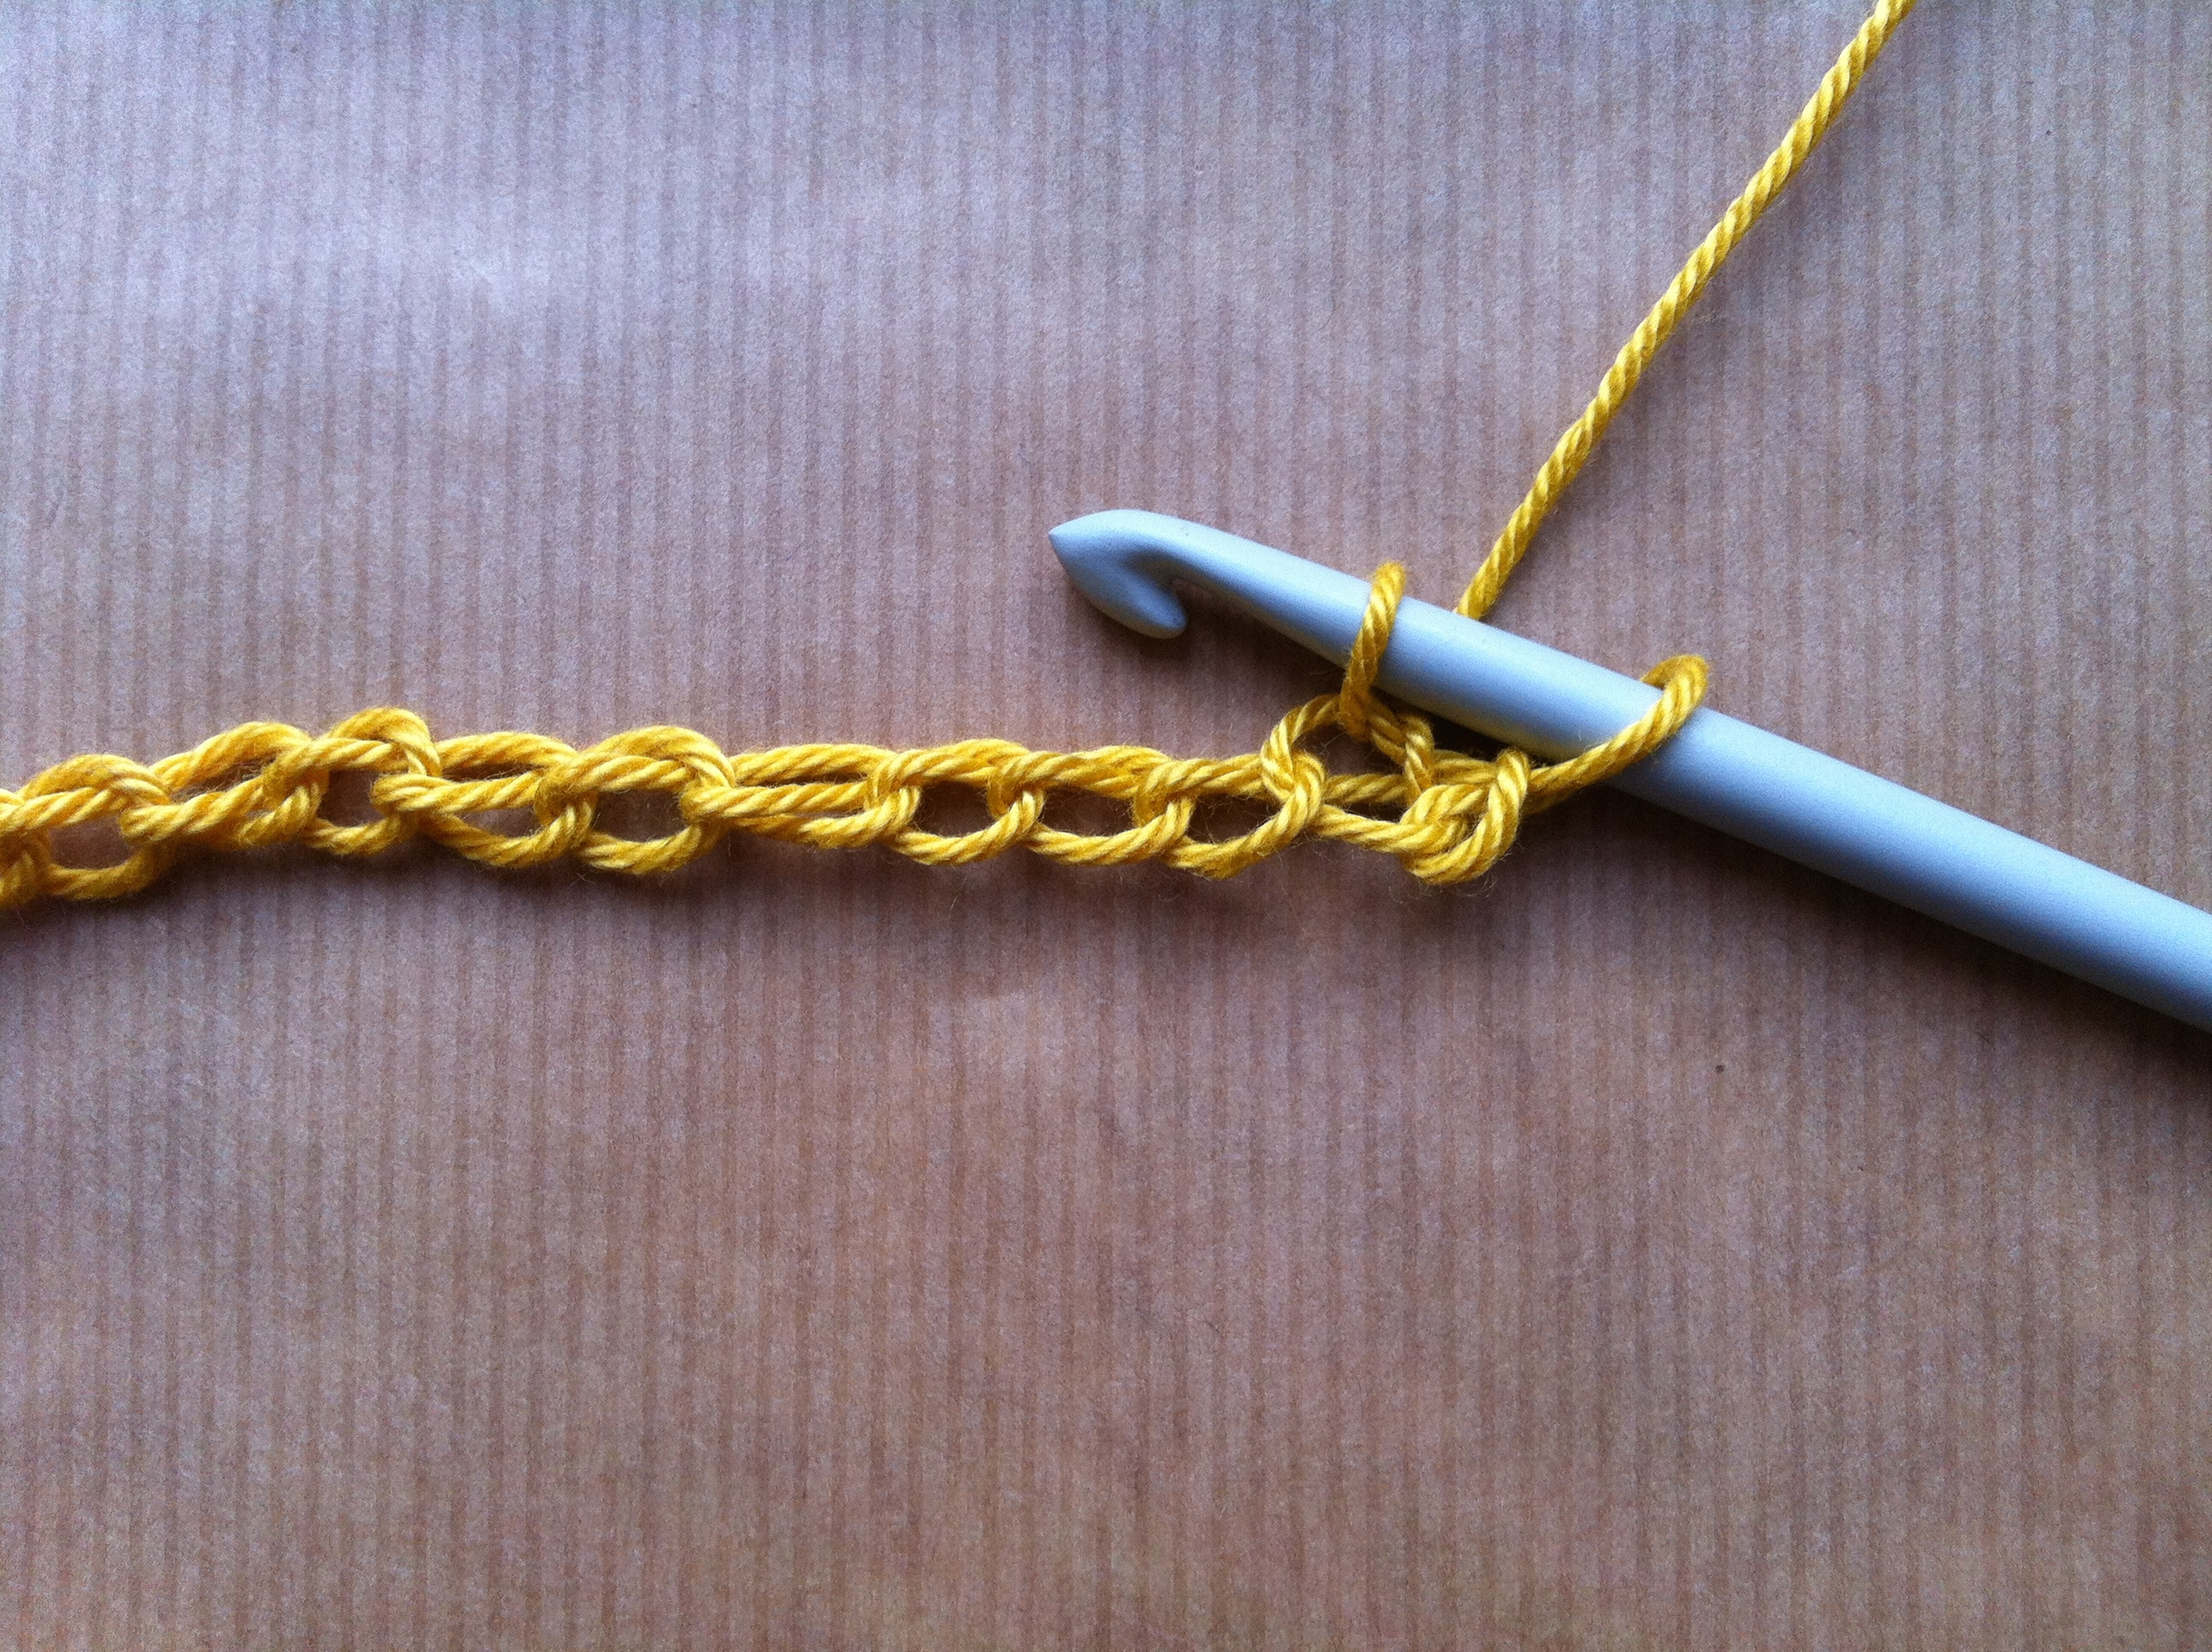
So forward pass done, now we have to work the return pass. The beauty of the return pass is that it is always the same no matter what stitch you work (again, at least for the stitches I have used). You start with yarn over and pull through ONE loop on the hook.


Now yarn over and pull through TWO loops on the hook.


Yarn over and pull through two loops, yarn over pull through two loops… all the way to the end until you are left with one loop on your hook.


Foundation row finished!
Before we move on there are a few things you should note. First, the row you have done is an undefined row, meaning it is still not any particular stitch. With tunisian crochet a row is only defined once you start working into it, which you do in the next row. I know, it’s a bit confusing but trust me, you will see what I mean soon. All you need to understand for now is that this is an “embryo” row at the moment, and it won’t be a Tss row until you define it as such on the next row.
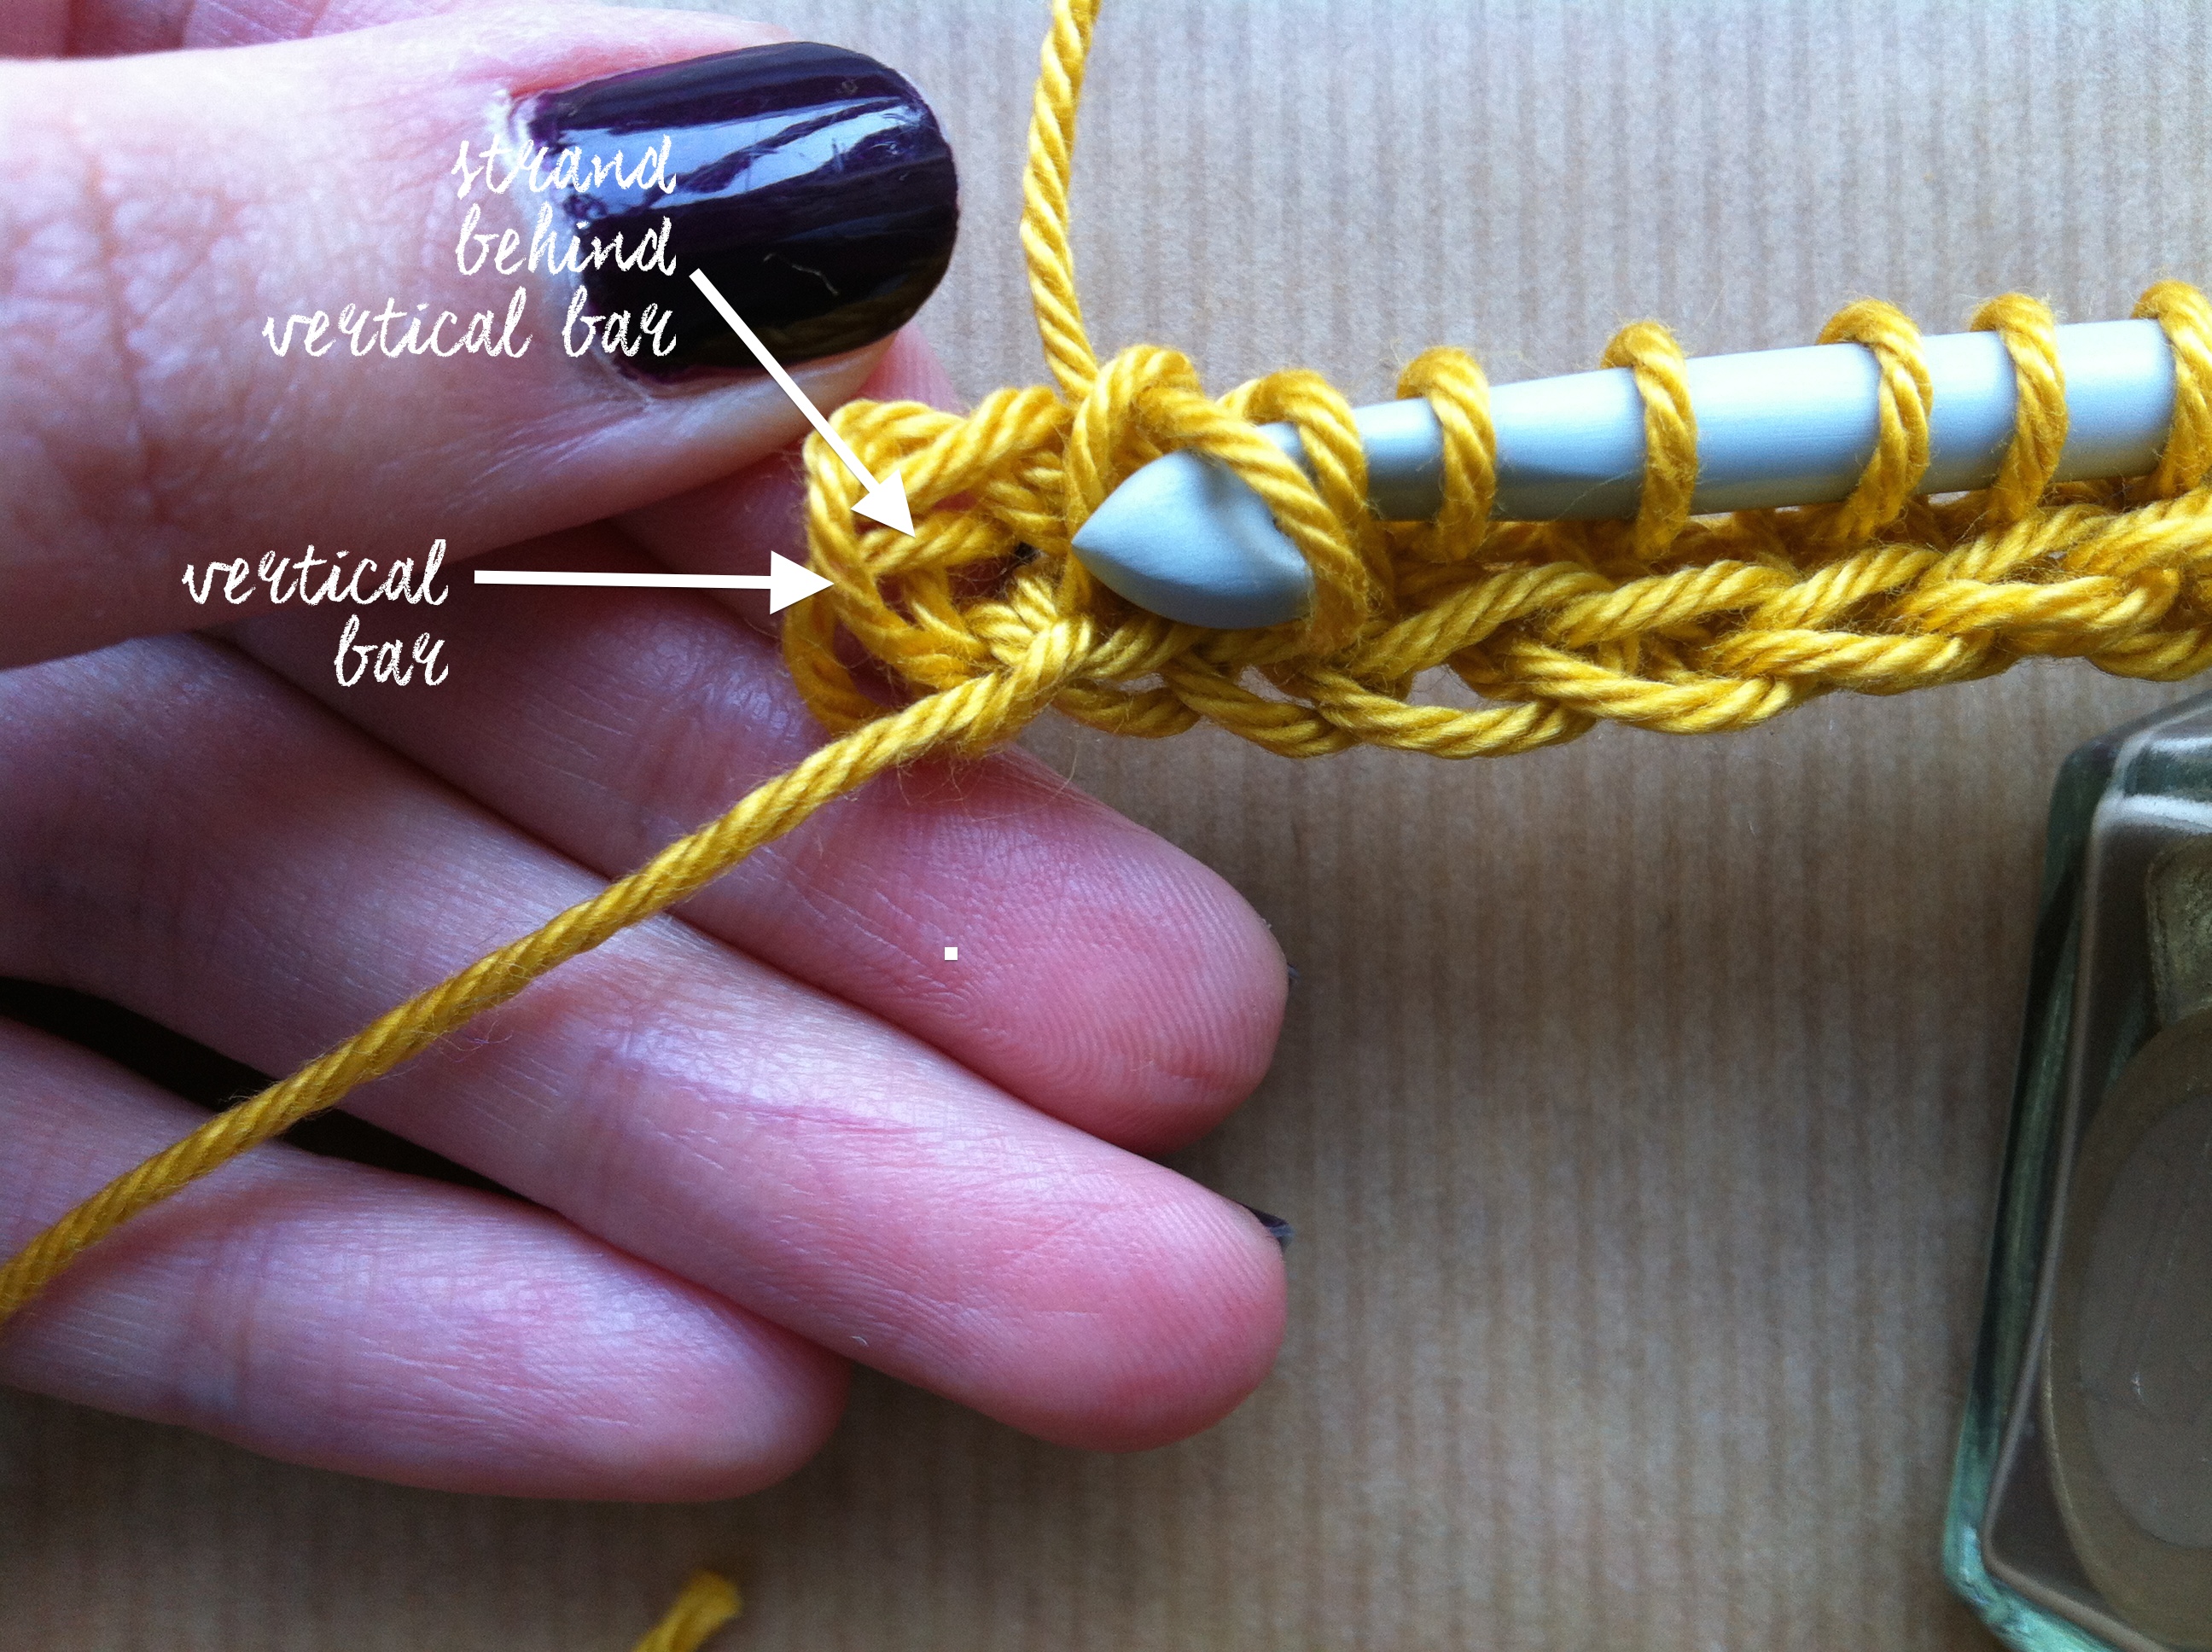
Second, tunisian stitches are defined depending on where you insert your hook, so let’s look at this undefined row a bit more closely. The first thing you see are the front vertical bars, which are quite easy to identify. There are also back vertical bars, which are right behind the front ones. Finally there is a sort of horizontal chain going through inside the stitches, which is the result of the return pass.
The first vertical bar is actually the first stitch, and note that it looks a bit larger than the rest of its sibling vertical bars. This can be easily fixed so that you don’t get the right side of your work much larger than the left side, I will go into this a bit further in the tutorial.

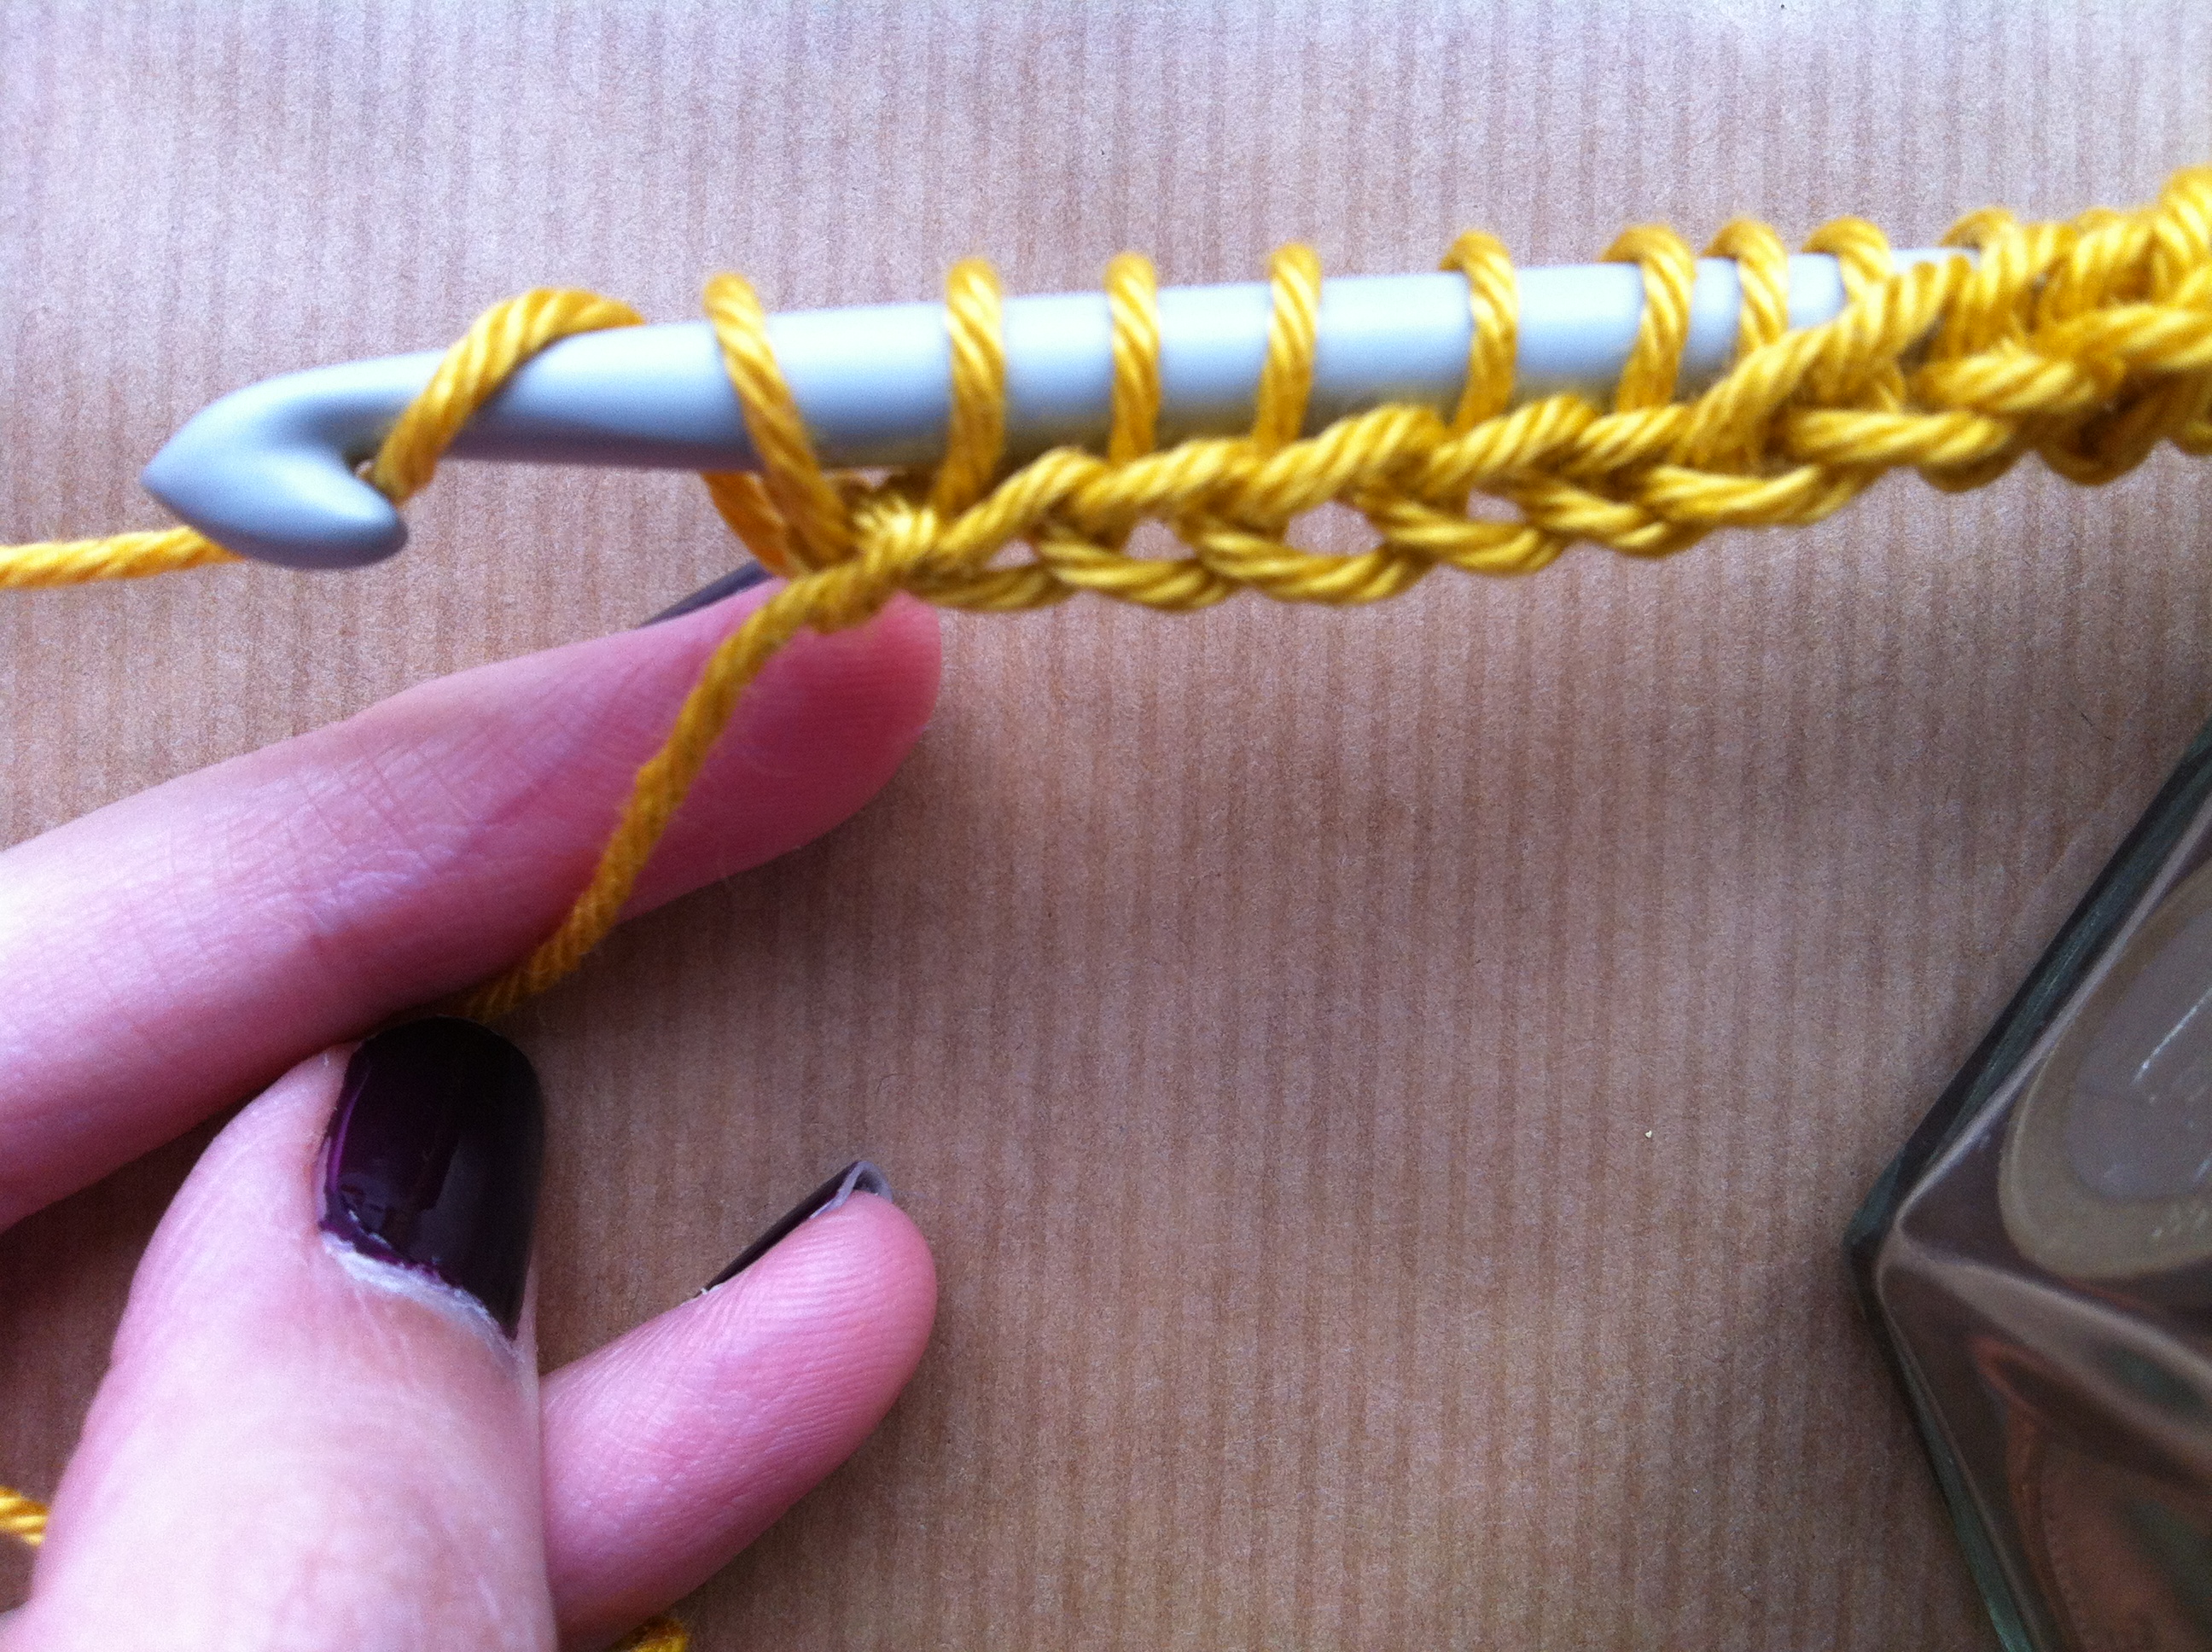
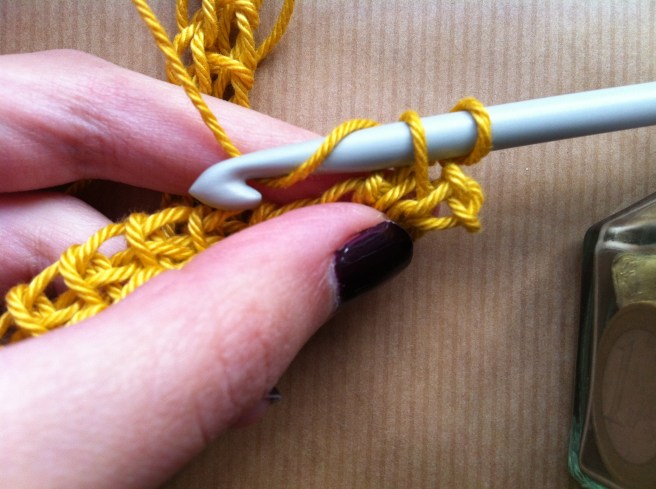
Now you are ready for the next row, which will be done working tunisian simple stitch, but remember that it will define the first row we have now as a tunisian simple stitch row and not the second one. As usual we will have a forward pass and a return pass. To work the front pass of tunisian simple stitch (Tss) you need to identify the front vertical bars. You ALWAYS skip the first vertical bar (first stitch), no matter what stitch you are doing. So look for the second one which is the one the hook is pointing at in the picture below.

Insert your hook from right to left under the front vertical bar.


Yarn over and pull through one loop on hook.

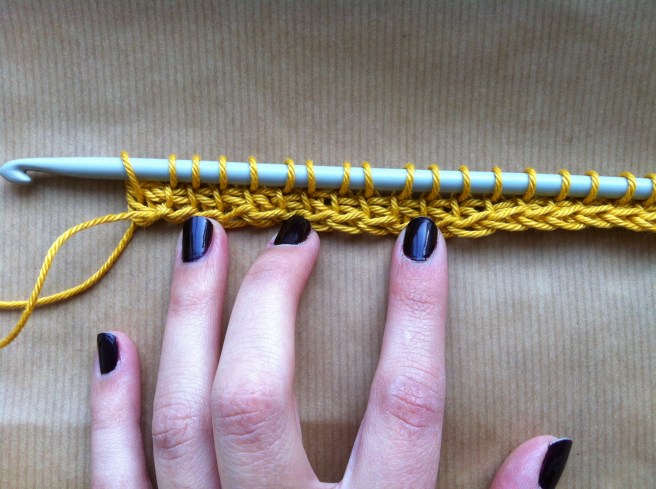
Tss done! Now continue to the next vertical bar, which I am pointing at with that horrible nail (apologise for my horrible manicure!)
Just like before, insert hook from right to left under front vertical bar, yarn over and pull up a loop.


Continue this way until the last two stitches, like the picture below.

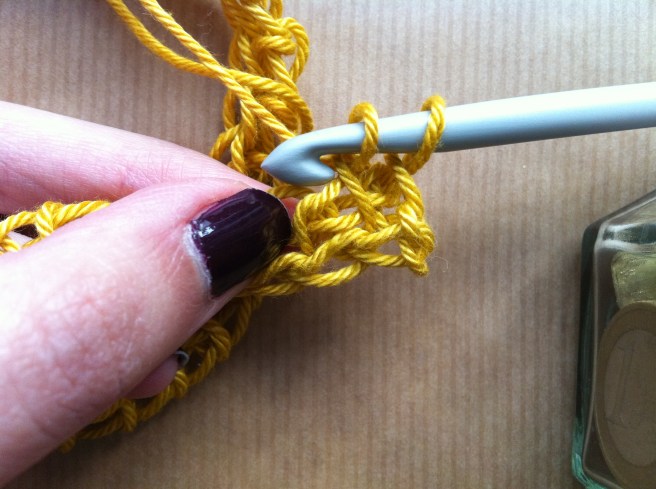
The stitch before last is worked normally (the one I am pointing), insert hook under front vertical bar, yarn over and pull up a loop.

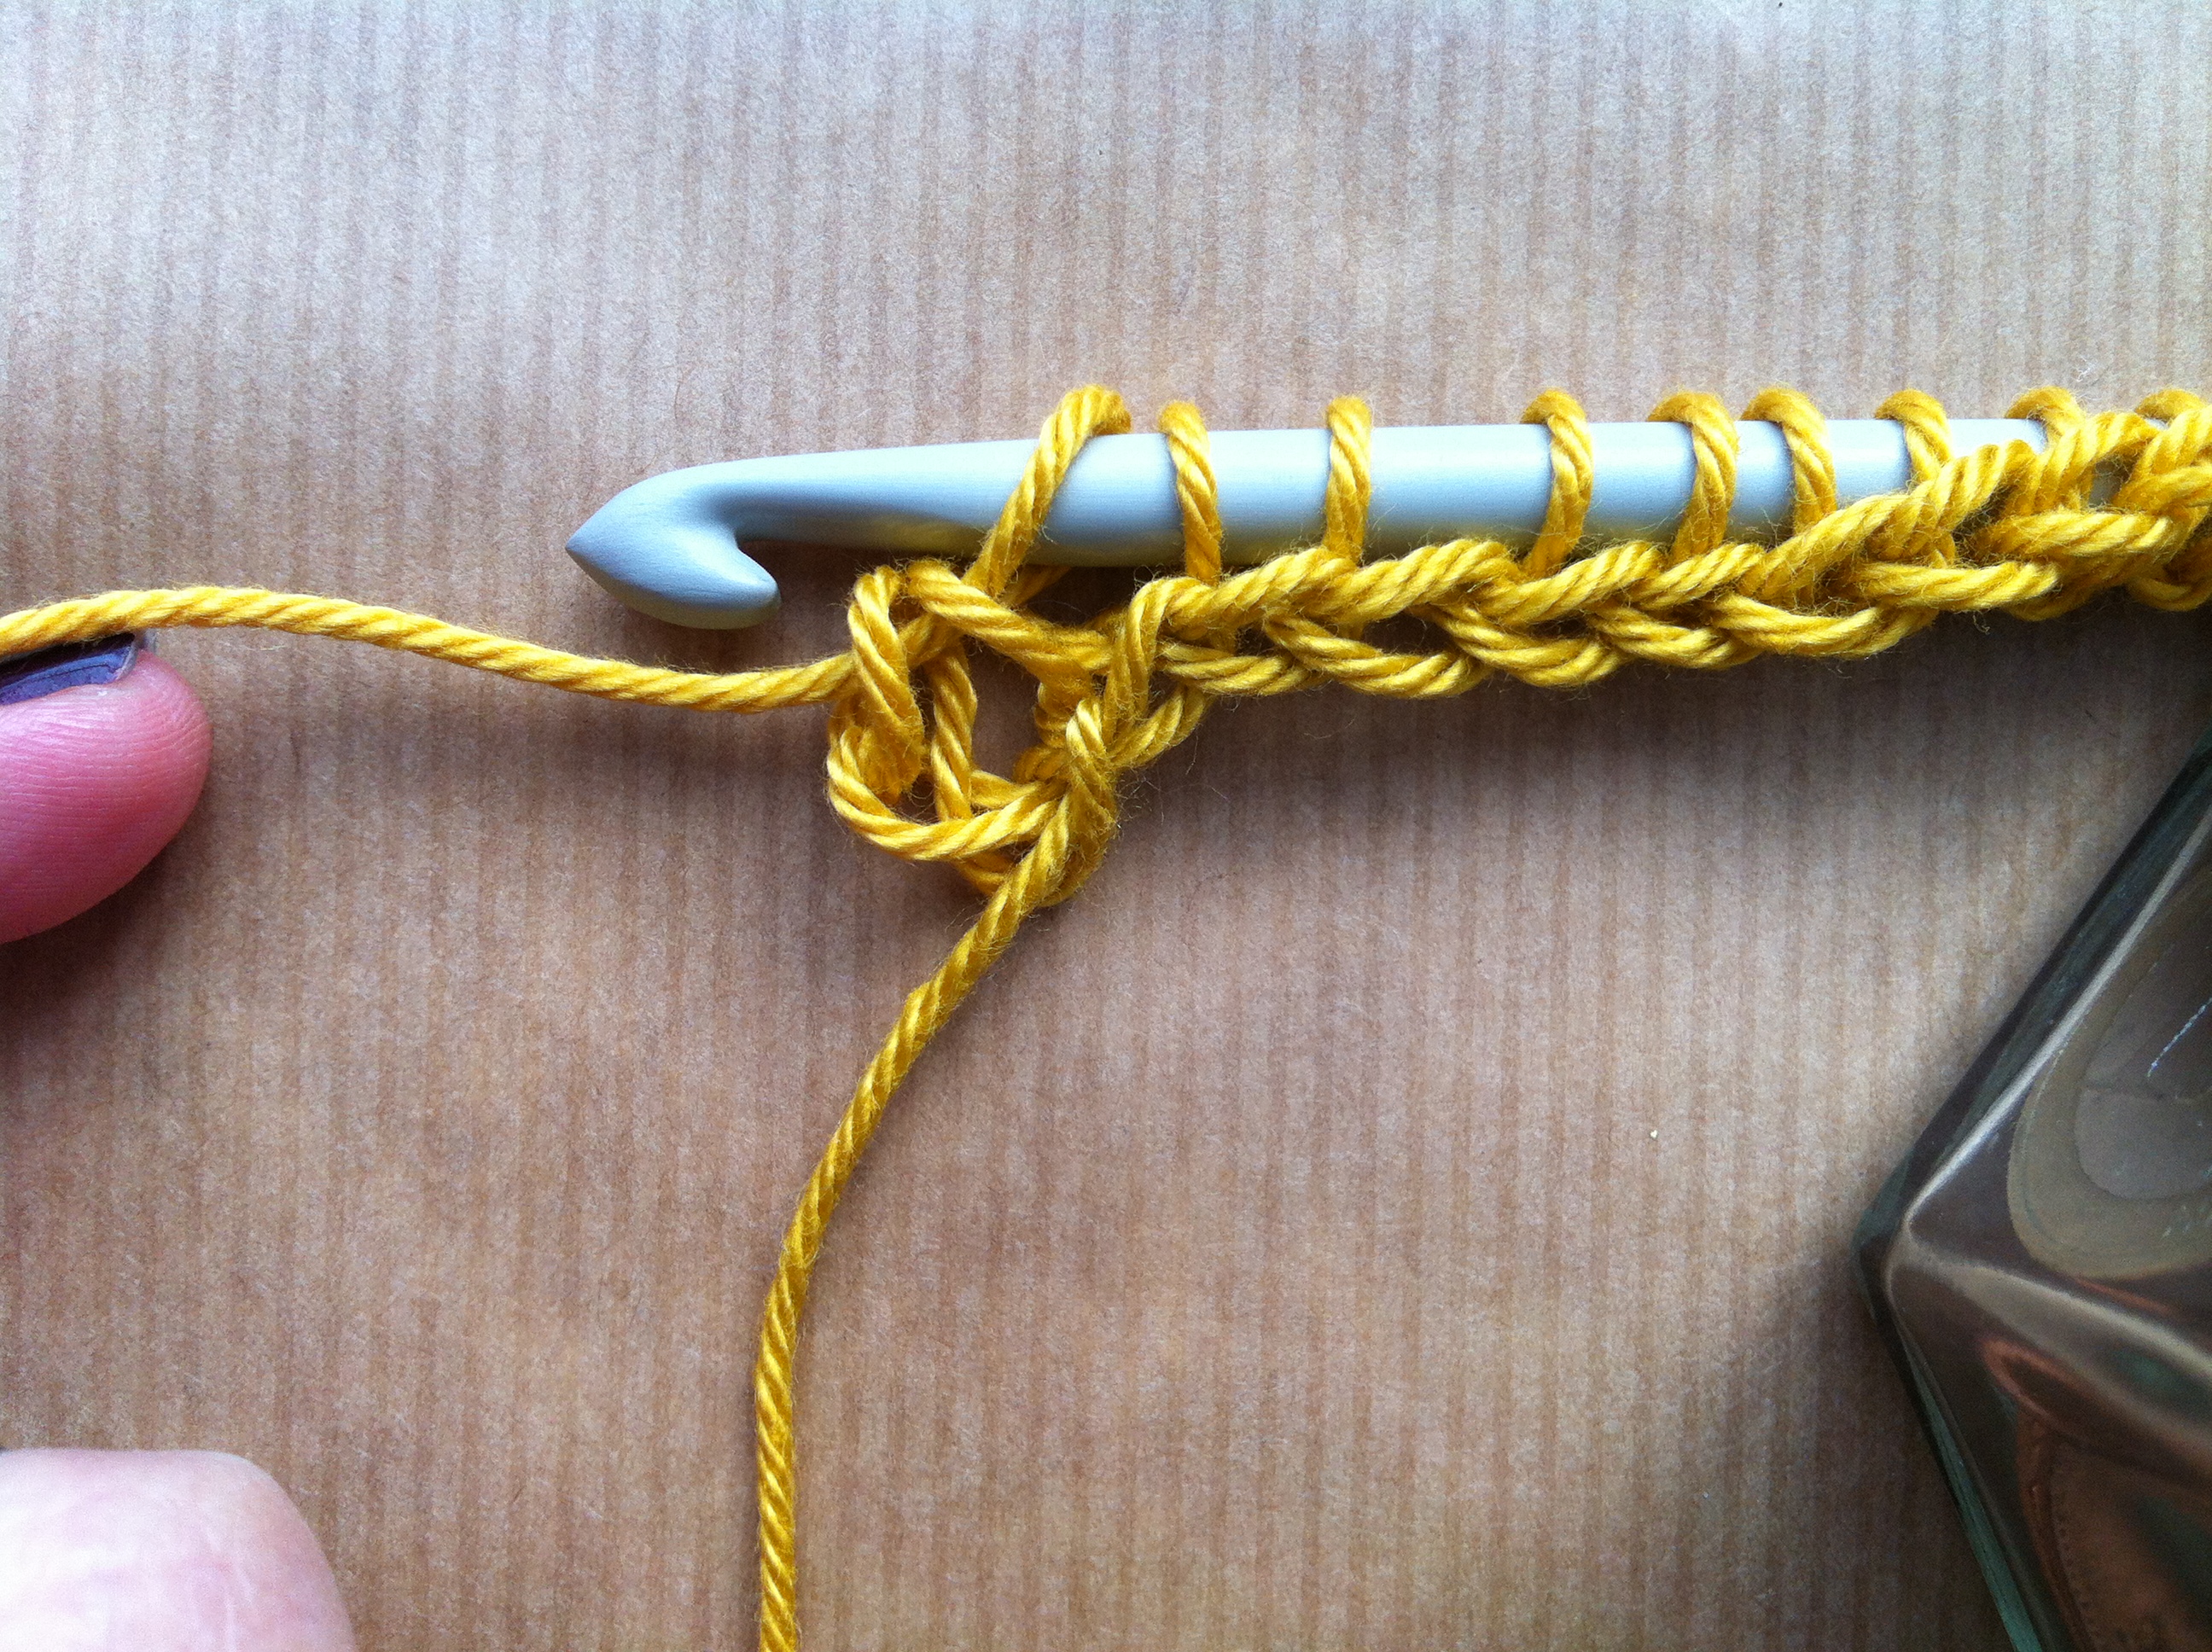
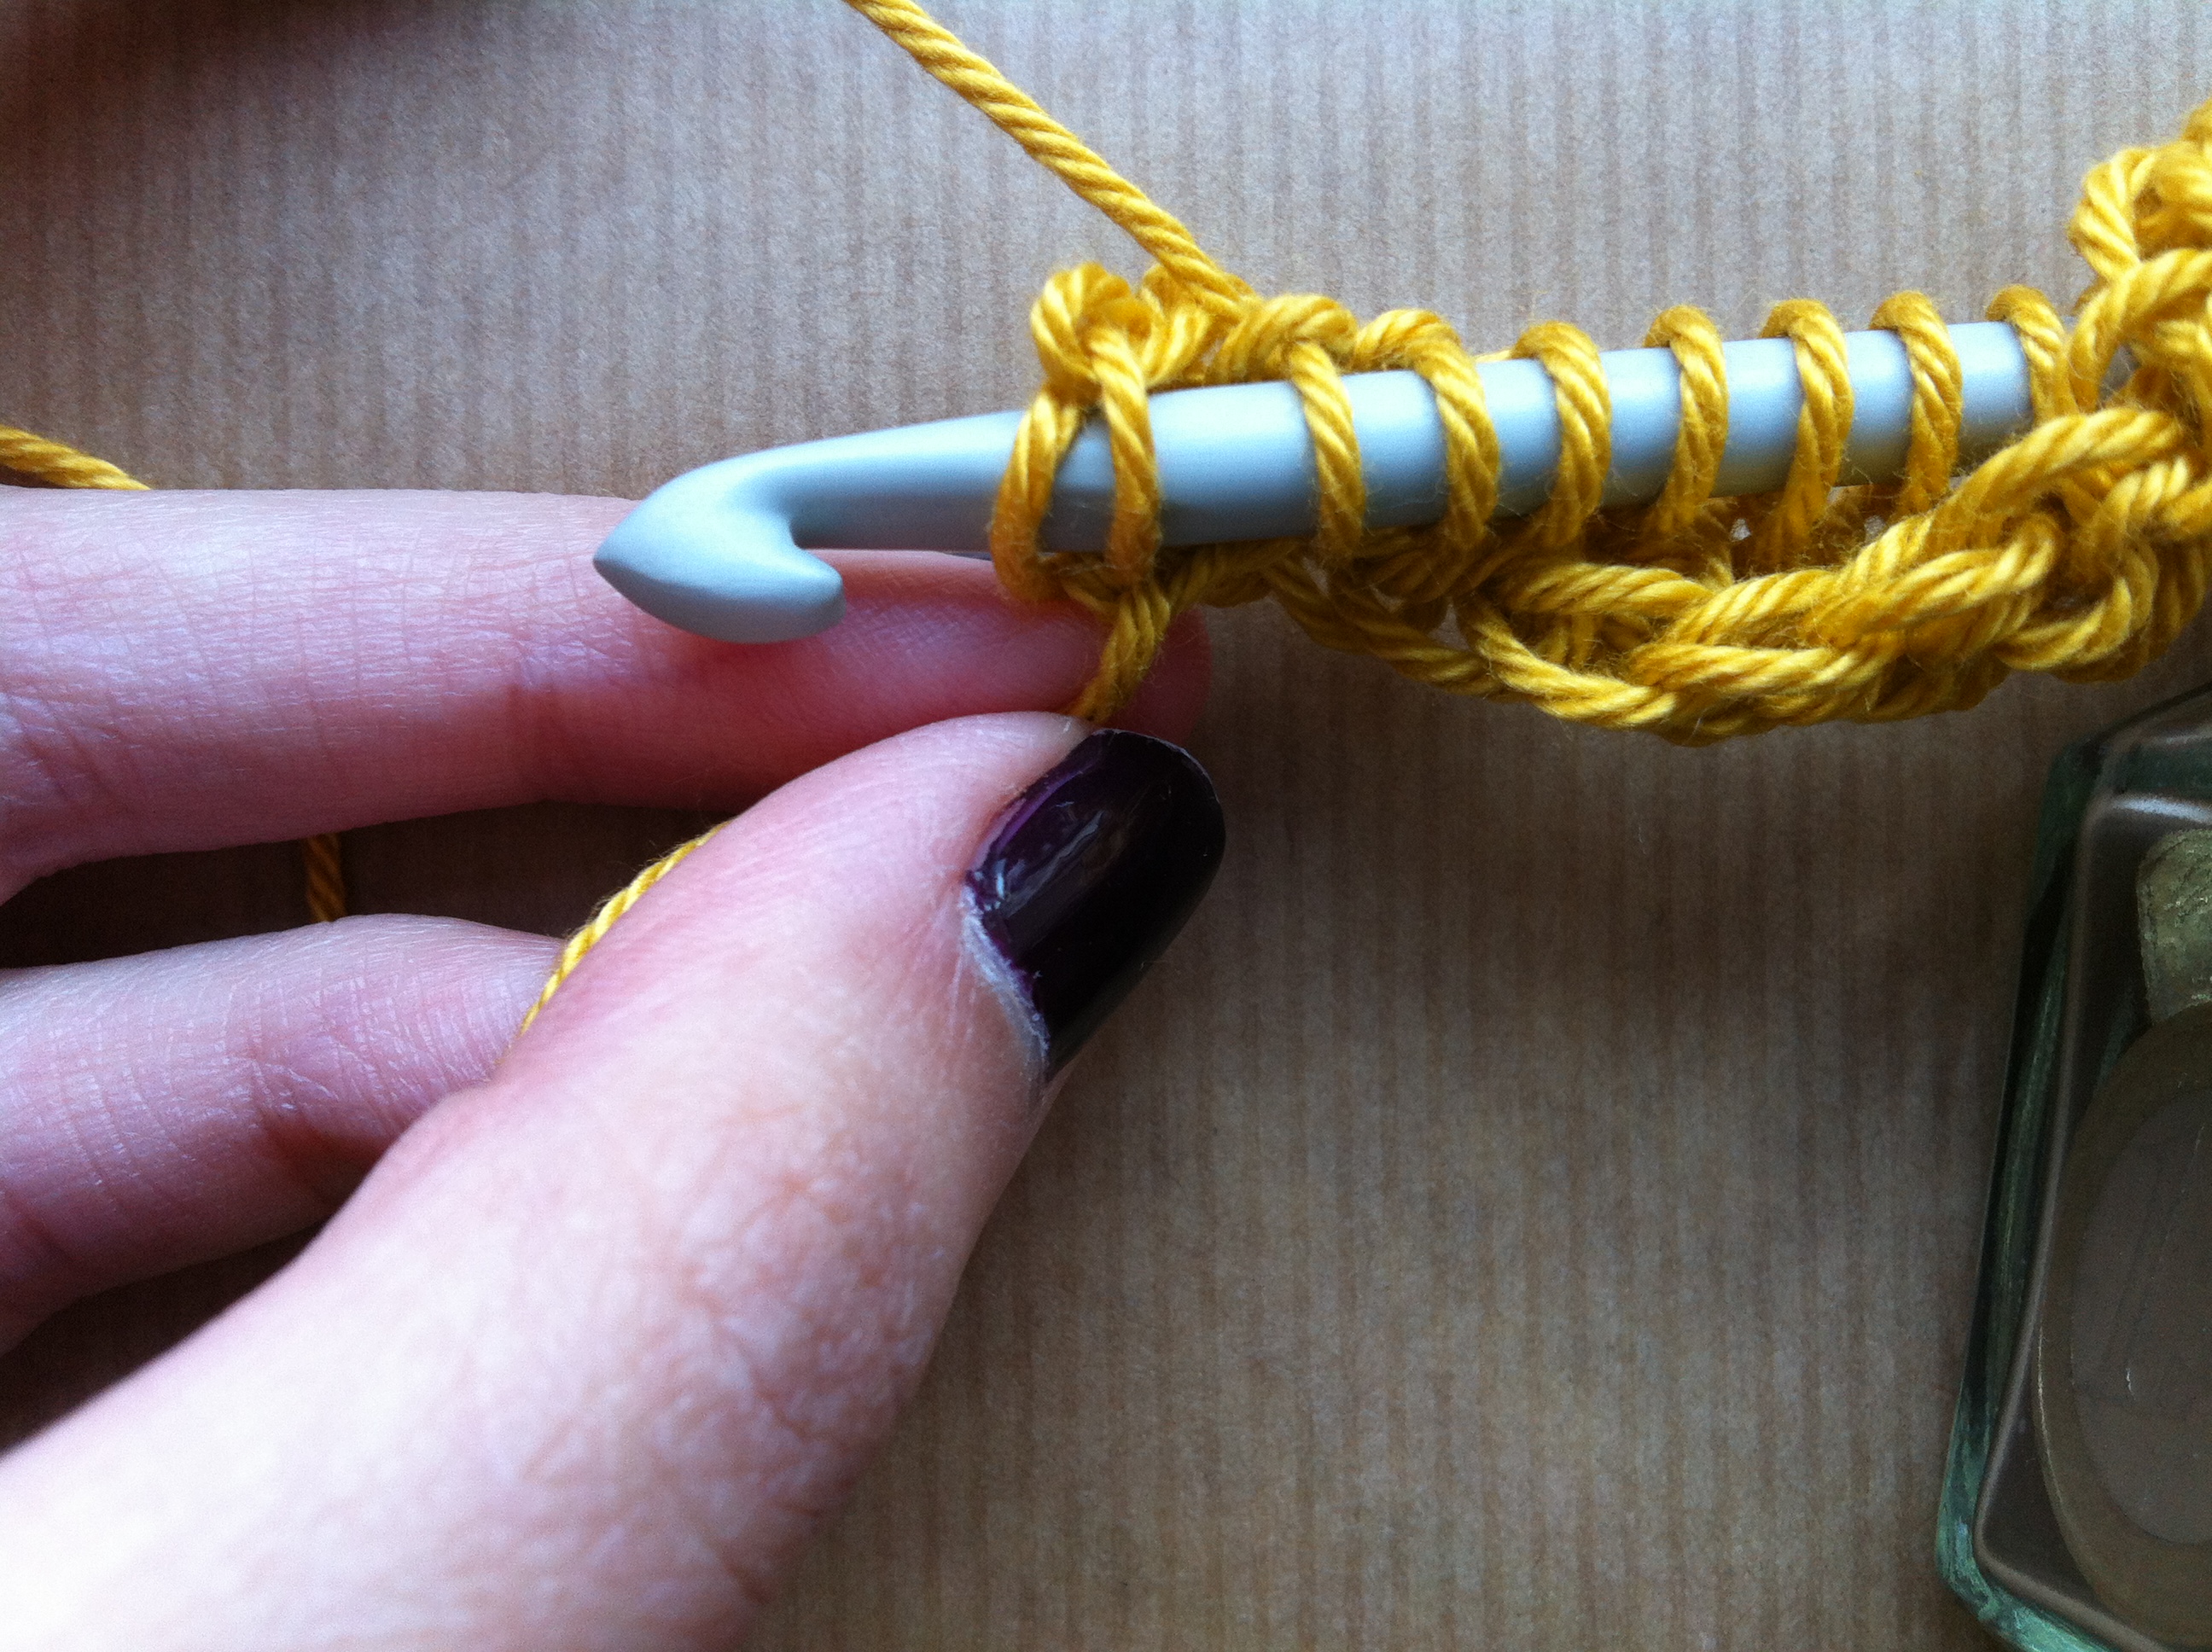
The last stitch is worked differently, and it is always worked the same no matter what type of stitch you are using. It has, like all the other stitches, a front vertical bar (the one I am pointing on the picture below) but we won’t work it like the other stitches.
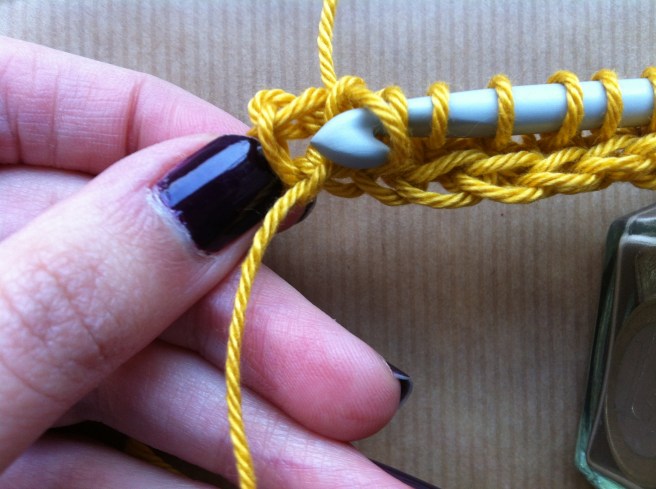
It is harder to see on this first row, but behind the front vertical bar of the last stitch there is a strand that later curves to the right and looks like an inverted “L”. For the last stitch you will insert your hook under both strands: the vertical bar and the one behind it.


Yarn over and pull through two loops. Last stitch and forward pass finished. If that last stitch was a bit confusing I will show it again for the next row so don’t worry.
The return pass is worked as usual. Yarn over and pull through one loop, yarn over and pull through two loops all the way through until you are left with one loop on the hook.


If you look at your work now you will see that the first row of the work looks different, it is now defined as a Tss row, the second one is undefined and you should be able to see the difference clearly.
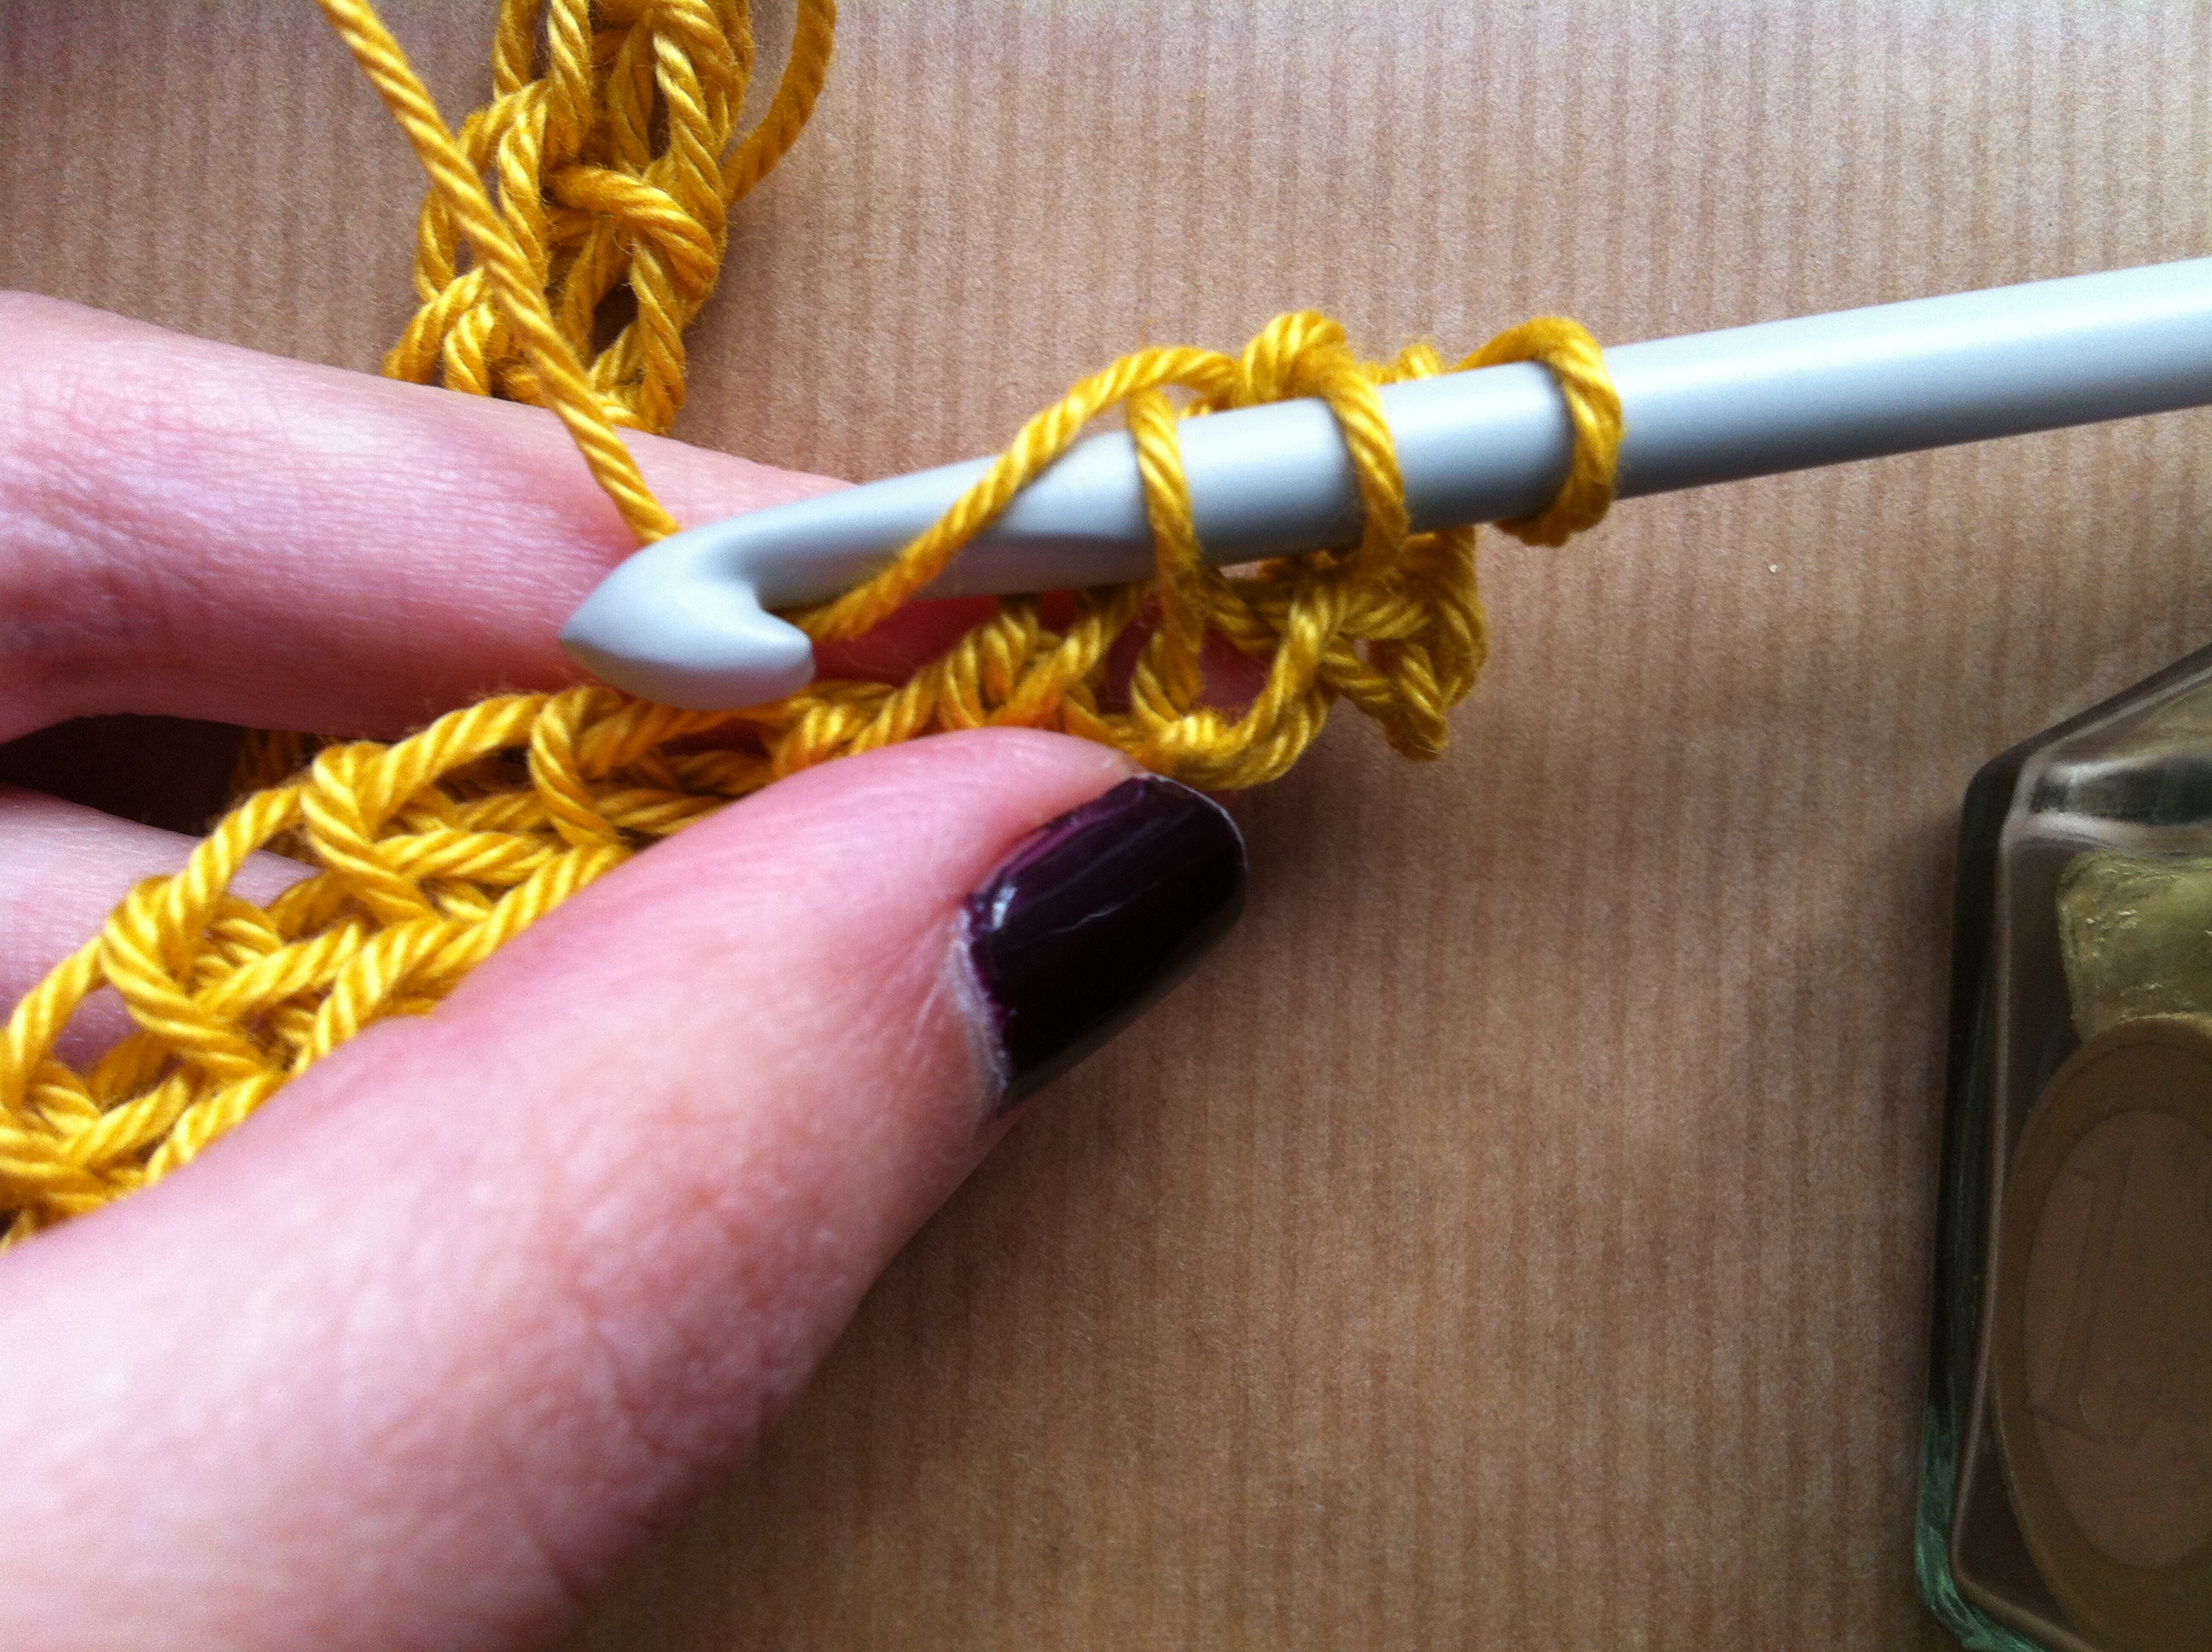
Let’s do one more row in Tss so that we can get that last stitch a bit clearer. Before we begin though, remember when I noted that the first stitch looks a bit looser than the rest? Well you can start fixing that now. Before you begin working a row, make sure to pull the loop on the hook so that it is tighter, this will make that first stitch smaller. Also, remember you ALWAYS skip the first stitch in tunisian crochet.
Skip first st, insert hook from left to right under second vertical bar and pull up a loop. Continue until last stitch. Now identify the vertical bar on the last stitch, and the strand behind it that later turns to the right and appears at the front.

Insert hook under both strands.

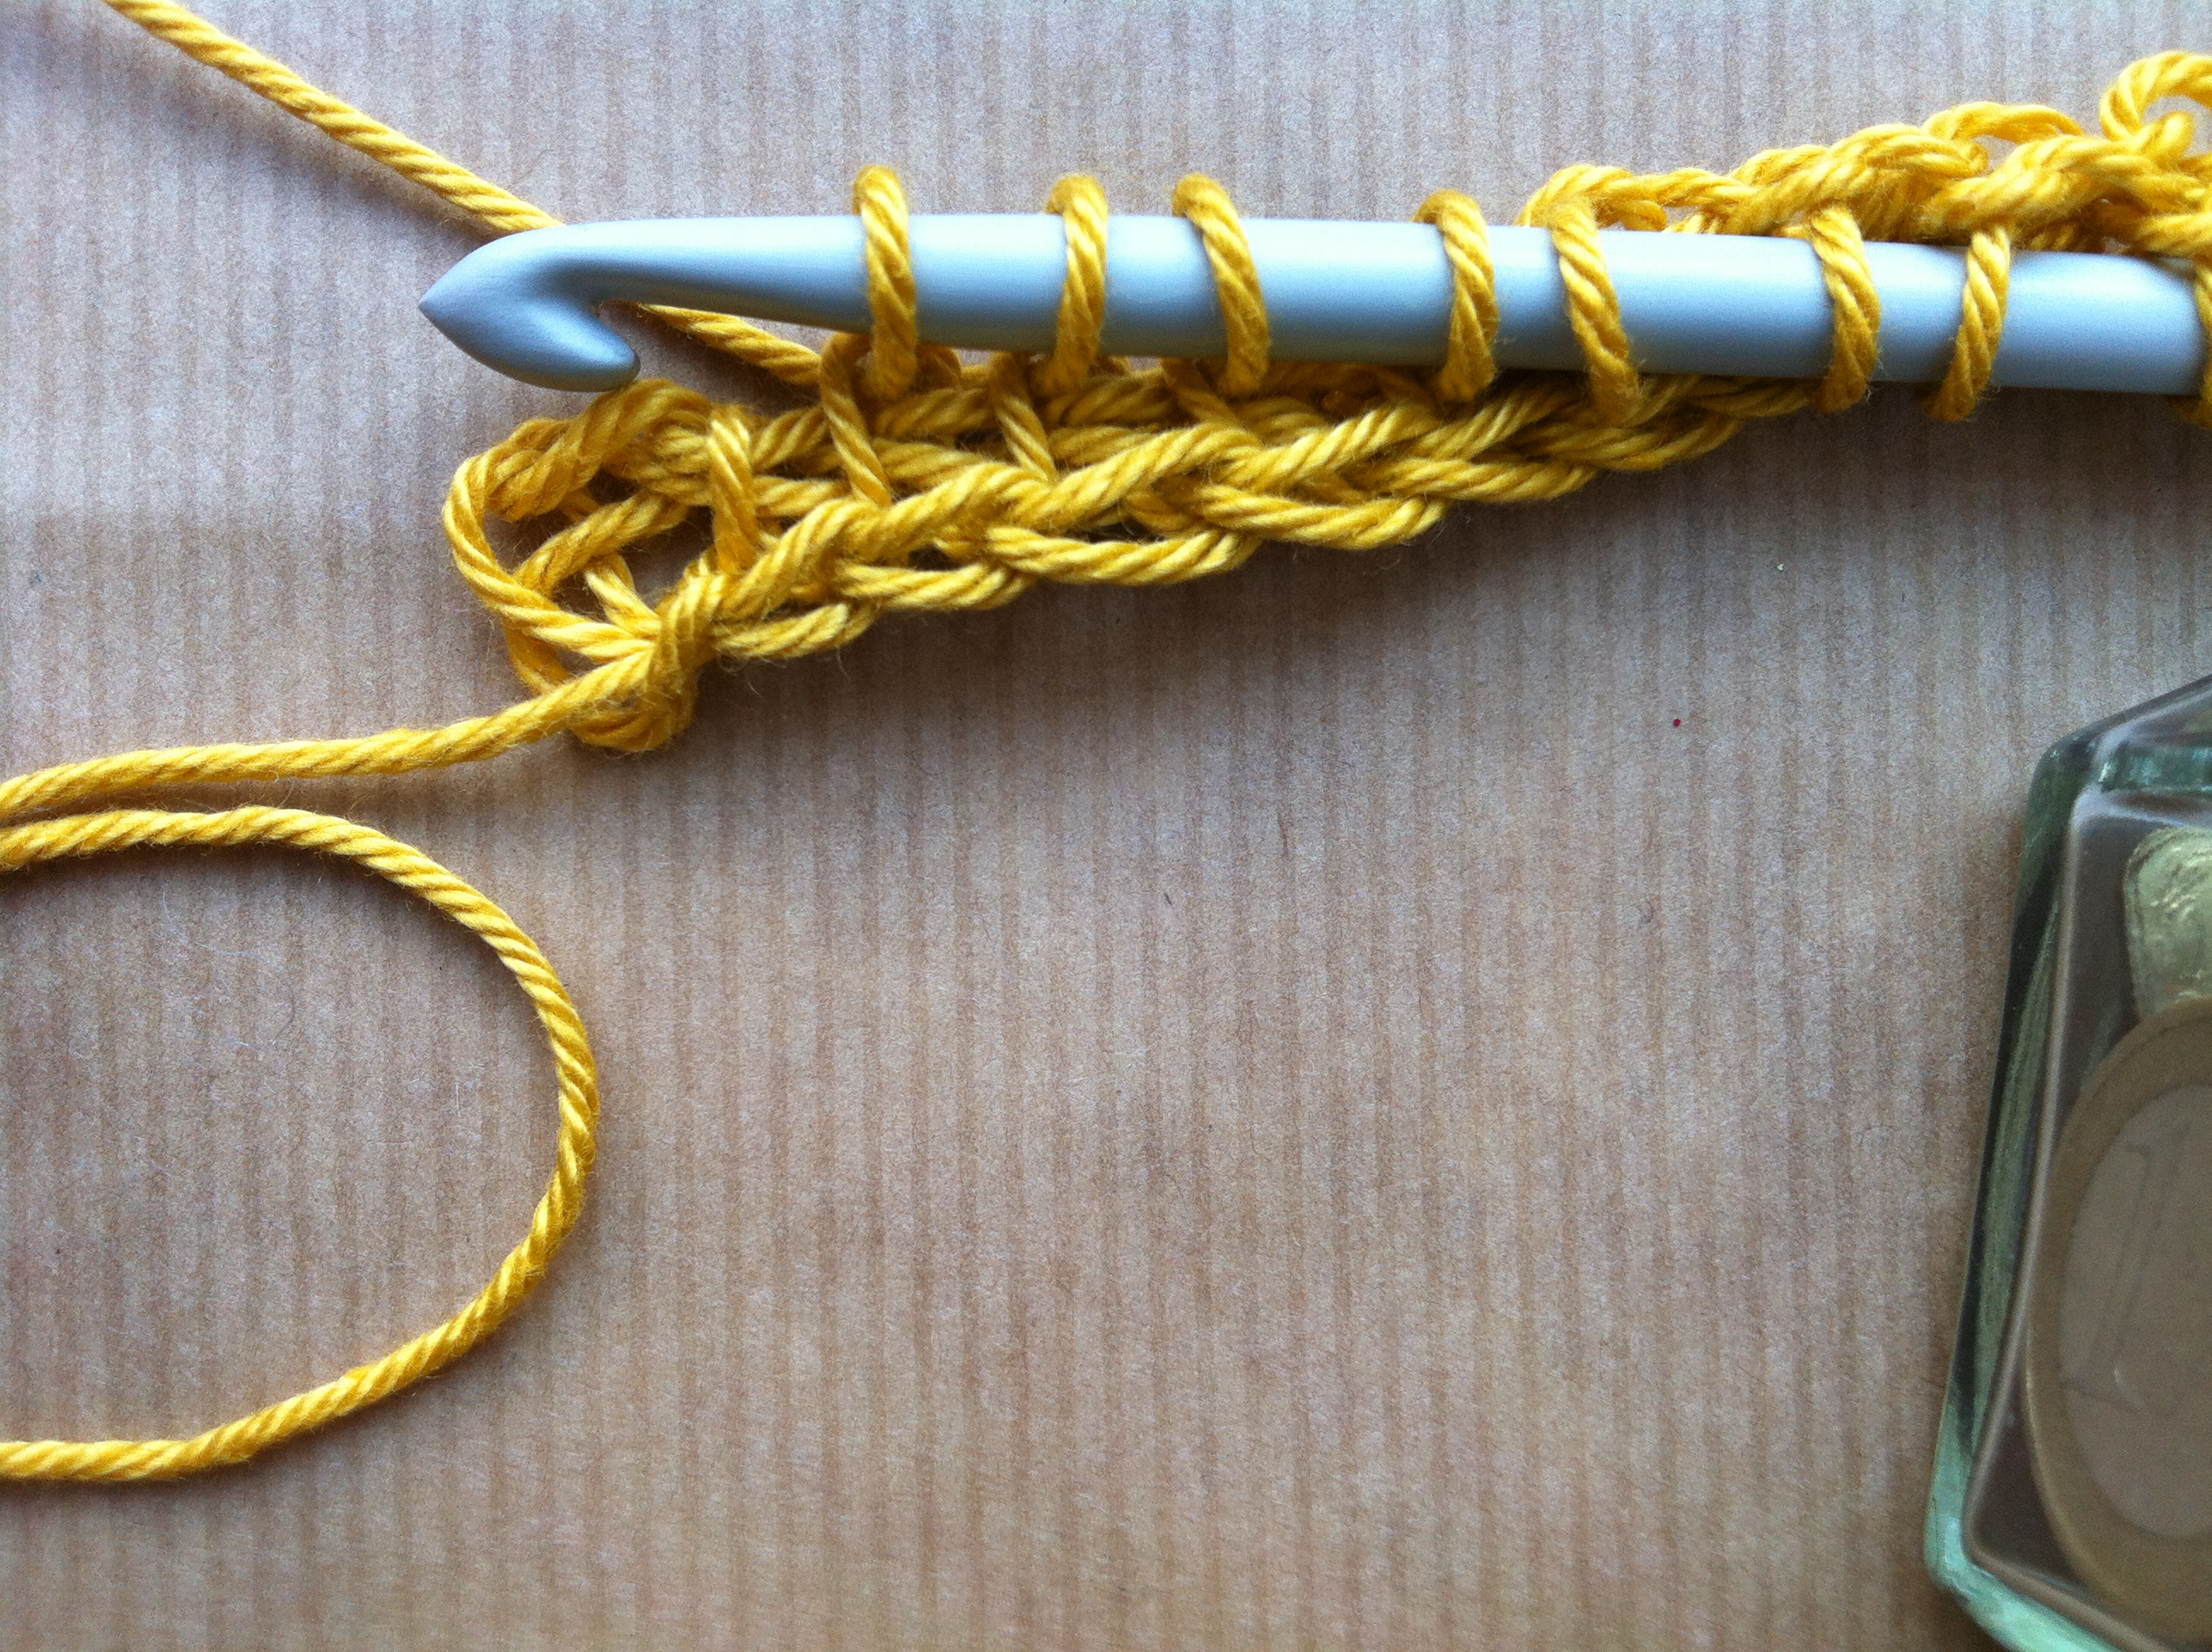
Yarn over and pull up a loop. Work the return pass normally (yarn over pull through one, yarn over pull through two until the end).
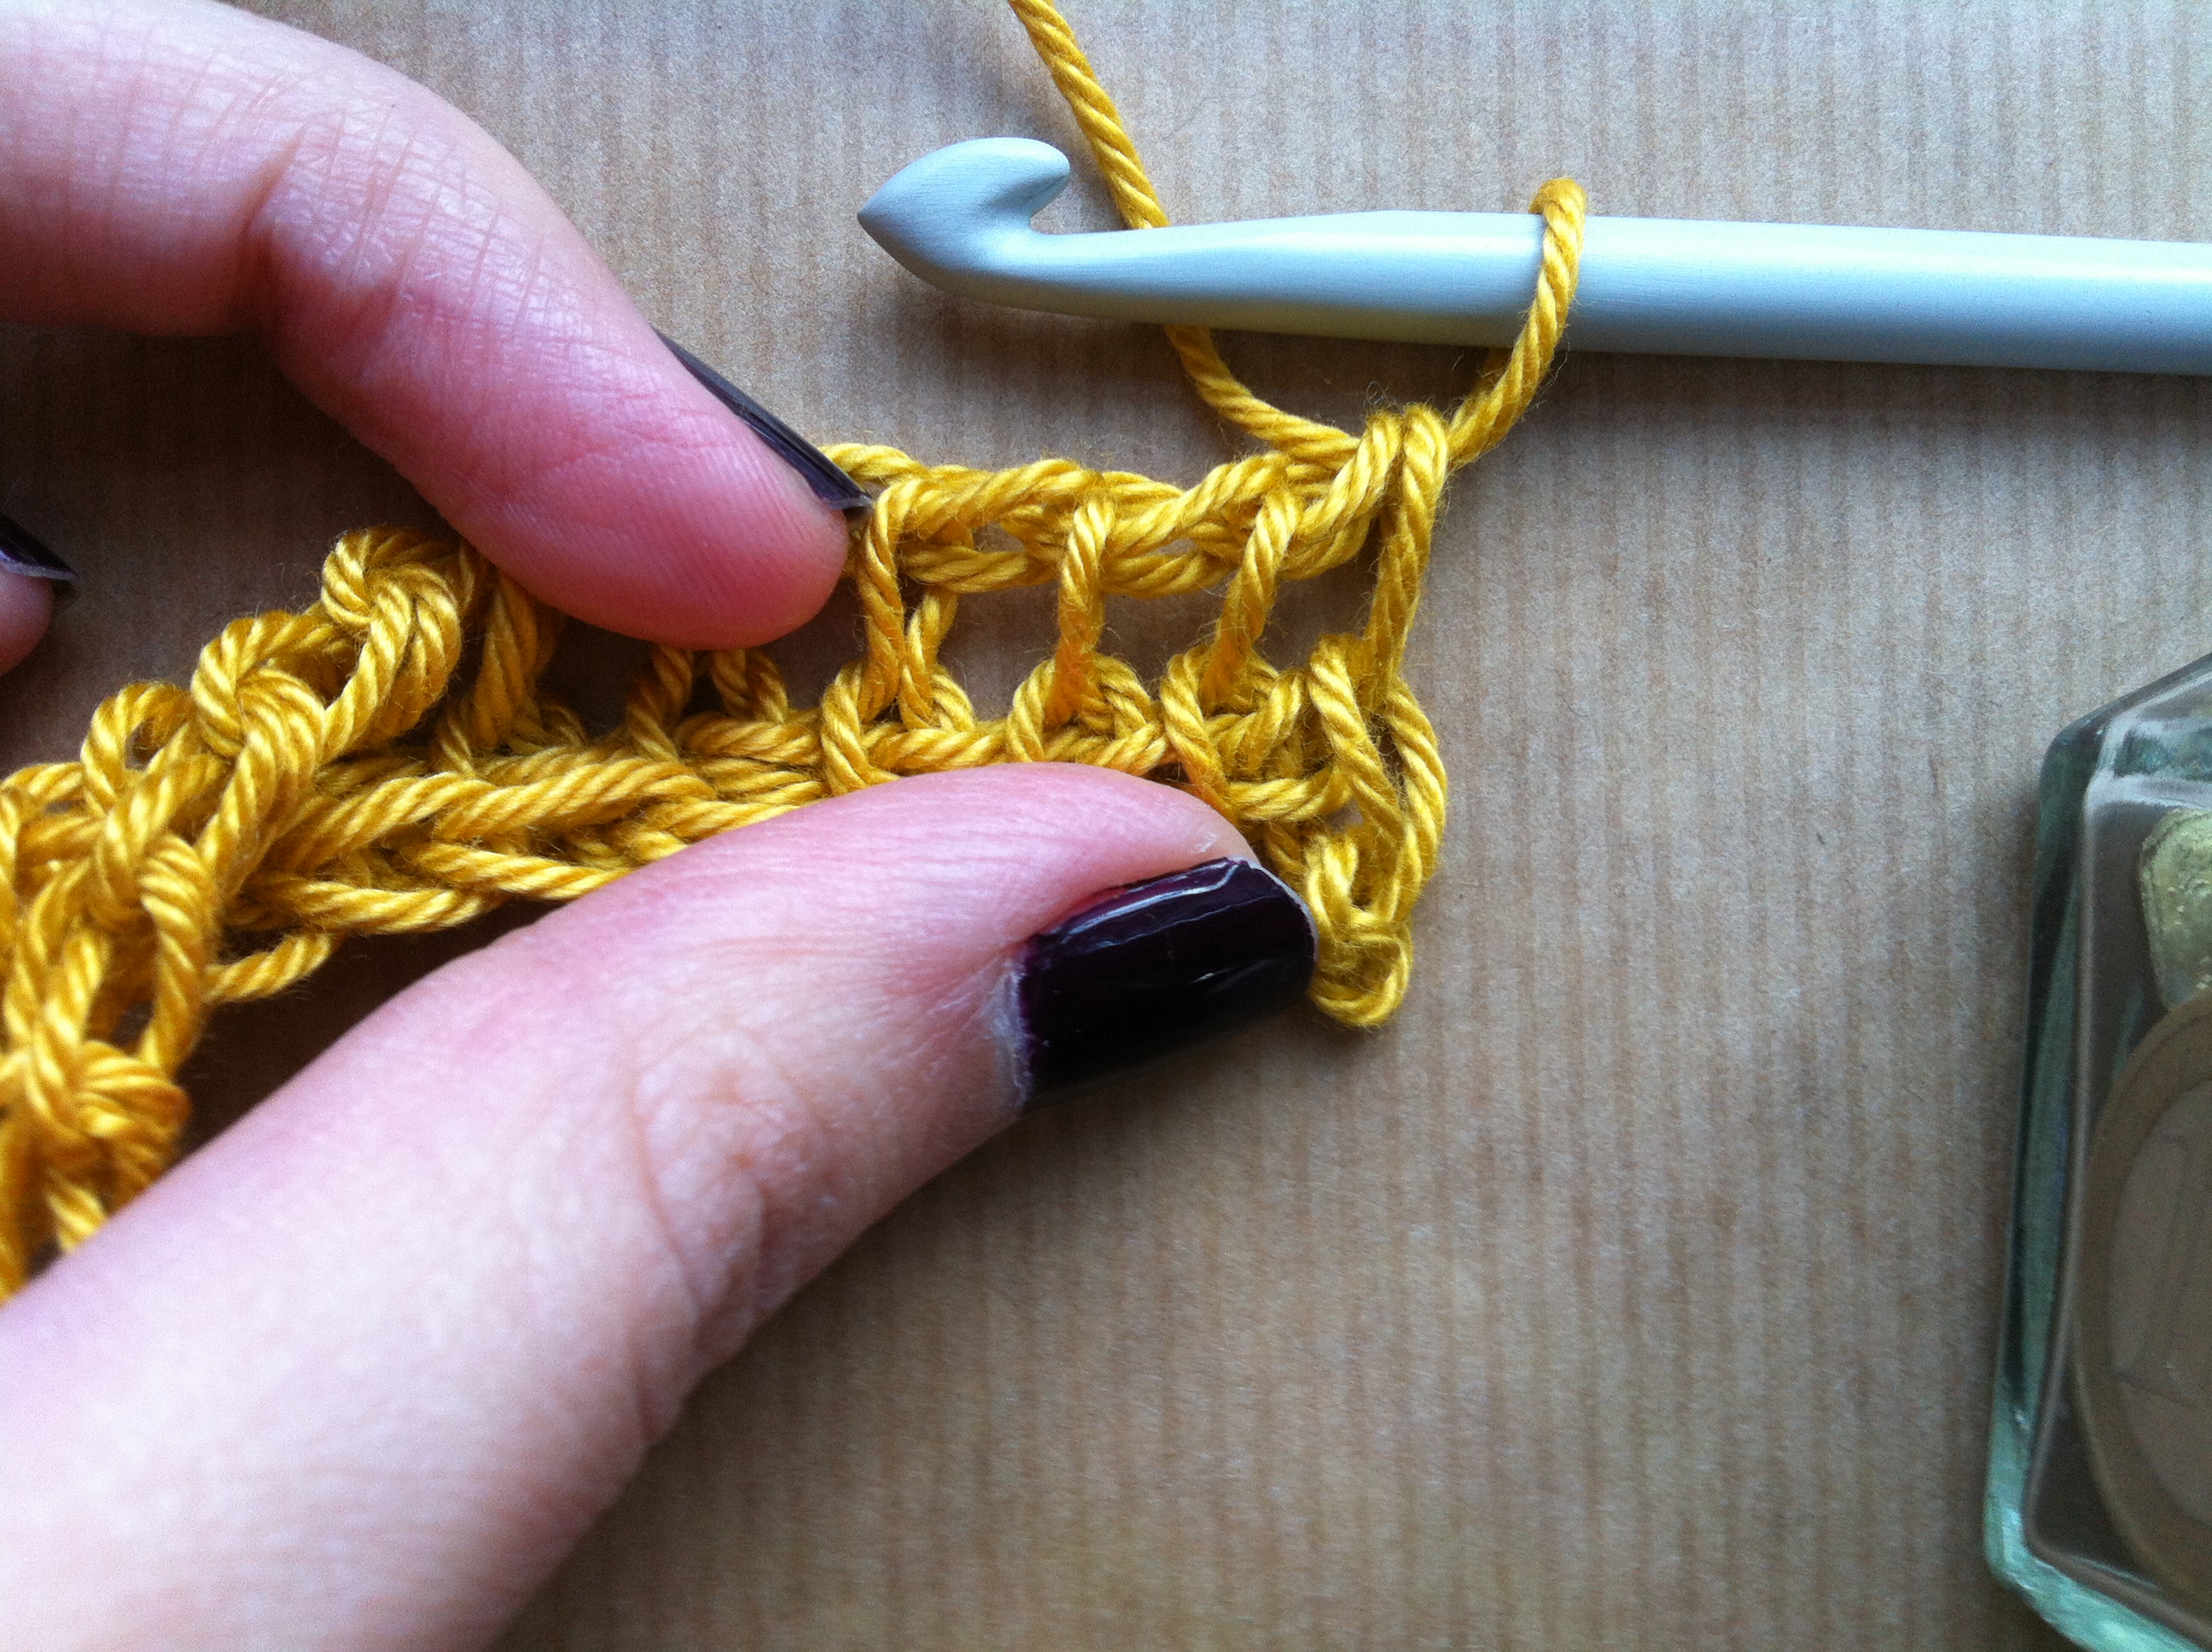
So that is all you need to know for Tss guys, I would recommend you to do as many rows you need until you feel comfortable with it. This is how my sample looks after a few rows.

It does curl, so don’t worry about this. One last thing, look at the right edge. I started with that big first stitch on the first row and look at the difference once you start pulling the loop on the hook before starting a row, much neater! You can avoid that first big stitch by pulling hard on the loop before picking up stitches on your chain, but have done it here so that you can see the difference.

The left edge will have that nice chain-looking finish if you are going through the two strands on that last stitch.

And that my dear readers is the end of this tutorial 🙂 I will add a stitch guide at the end of each tutorial with the stitches we have learned. Please let me know if you have any questions, will be back soon with another stitch!

Stitch Guide
Foundation Row – Forward Pass: Chain number of stitches needed. Skip first chain, insert hook under back strand of next chain, yarn over and pull up a loop. Repeat until last chain.
Return Pass: Yarn over pull through one loop on hook, yarn over and pull through two loops on hook until you have one loop left on hook.
Last stitch of any forward pass: Insert hook under last vertical bar and strand behind it, yarn over and pull up a loop.
Tunisian Simple Stitch: Skip first st, insert hook from right to left under next front vertical bar, yarn over and pull up a loop until last stitch, work last stitch normally. Work return pass normally.
x
Sol