Isle of Skye: Shopping guide for yarn and craft lovers

IMG_1541 copy

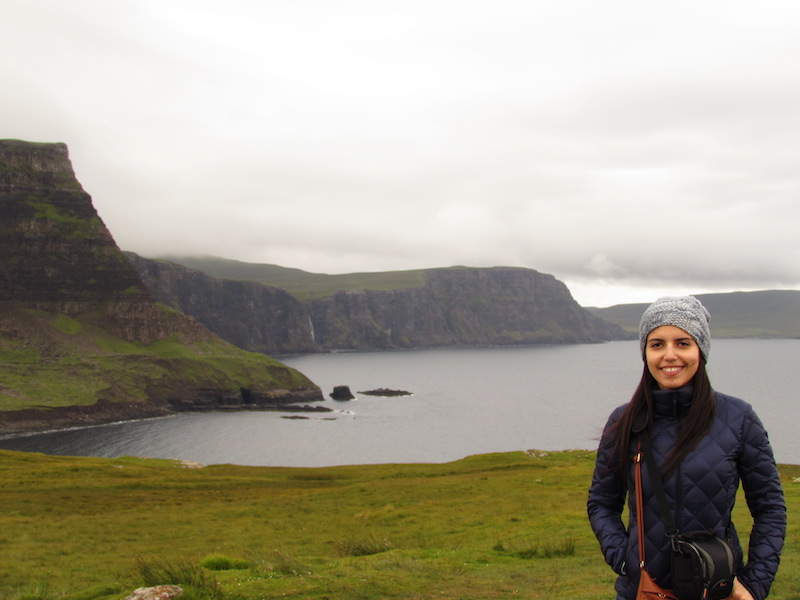
When we decided that we would go to the Isle of Skye for our holidays my sister went immediately to her Lonely Planet guides to find all the places we should visit, while I went to Google and typed “yarn shops isle of skye”. In my search the only shop I found was Shilasdair, which I had seen at the Edinburgh Yarn Festival this year with their beautiful naturally dyed yarn. Once we got to the island however, I was shocked to find a thriving crafts and arts community with little shops spread all around Skye, each one more hidden and remote than the last. All I could think of was: “I need to write a post about this!” So here I am, finally sharing my tips for those of you who may be interested in exploring a different side to the island that does not include hiking! (in case you may not have guessed by now, I am not exactly the “hiking type”…).

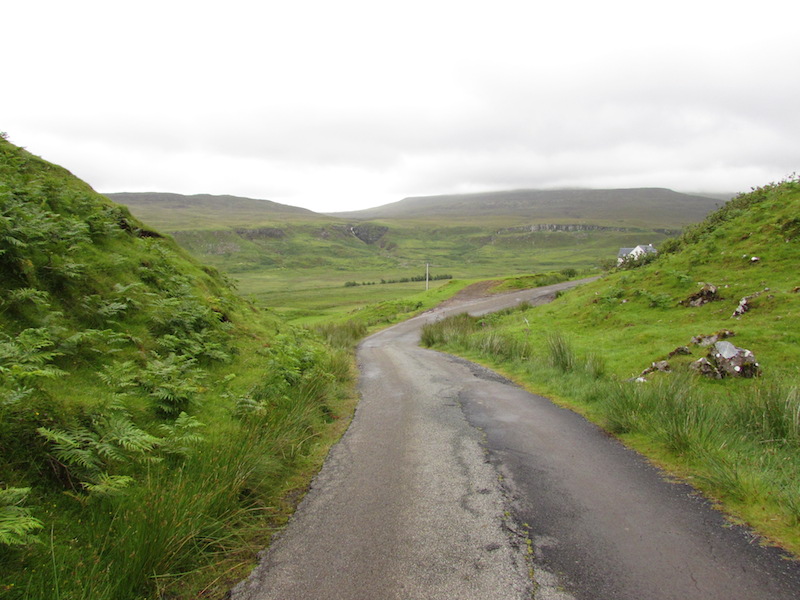
The following list includes a wide range of shops for those of you interested in crafts and local products, and also a few recommendations for places to eat while you are there. If you decide to go to the island YOU MUST RENT A CAR. There is no other way I’m afraid, and a GPS is also very useful if you can get one. Please be careful in the roads which some are hellish single-track roads with passing places and very little visibility, we witnessed a horrible car accident while we were there so I urge you to be cautious and drive slowly. That way you will also be able to enjoy the most amazing scenery you have ever seen, it is really breathtaking.

IMG_1487 copy

The list is in no particular order, I tried to group the shops that are close to each other though. There are much more shops in Skye but these are all the ones I visited and can recommend. You can also check out www.art-skye.co.uk for a great craft and arts trail.

I was not smart enough at the time to think of taking any pictures of the shops, my apologies… I guess you will just have to go and see them for yourselves!

  • Skye Quilt Studio (5A Upper Milovaig, Glendale, IV55 8WY): This shop is on the way to Neist Point, a very popular spot in Skye. Here you will find beautiful fabrics and notions along with very attentive service, my sister bought there this gorgeous multicoloured thread that even I fell in love with and I don’t do patchwork! A must stop for those who love patchwork and quilts.
  • Red Roof Café Gallery (Holmisdale, Glendale, IV55 8WS): We stopped at this little cafe for lunch one day, I recommend it if you are looking for something a bit different using fresh and local ingredients, but probably not if you have any children since I didn’t see any child-friendly food on the menu. They had lovely cakes, scones and my sister had a very nice salmon and cheese.

IMG_1538 copy

  • Wheatear Textiles (19 Fasach, Glendale, IV55 8WP): If you like Harris Tweed then this is your shop! Lovely handcrafted accessories, garments and homeware. I got some pretty Harris Tweed buttons from here.
  • Skye Weavers (18 Fasach, Glendale, IV55 8WP): This shop is run by a lovely couple who create the most stunning woollen products with their pedal-powered loom. I loved their designs and use of colour, it is quite unique. Also, you can give the loom a try yourself! What could be better? You can find them on Instagram by @skyeweavers.
  • Raven Press Gallery (Colbost, Dunvegan, IV55 8ZS): This shop has some incredible prints made with wood engravings, the detail on them is astounding! Really worth a visit.
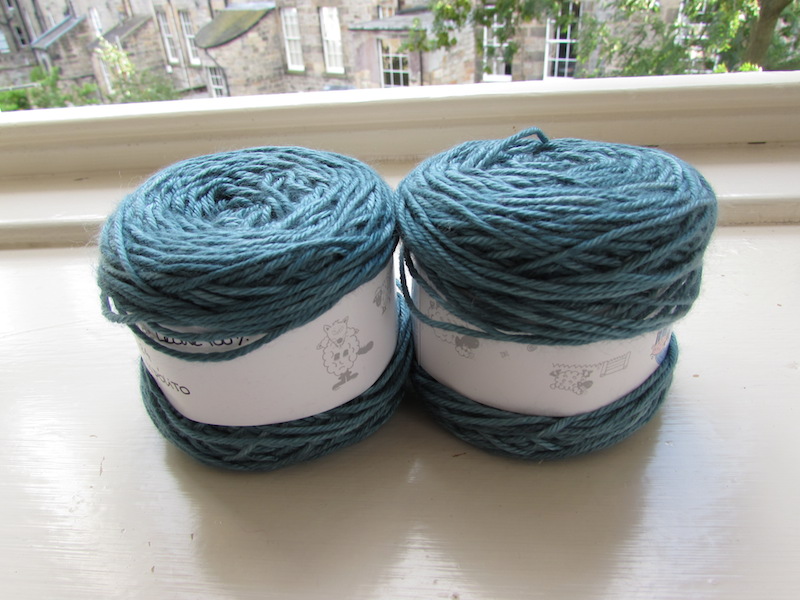
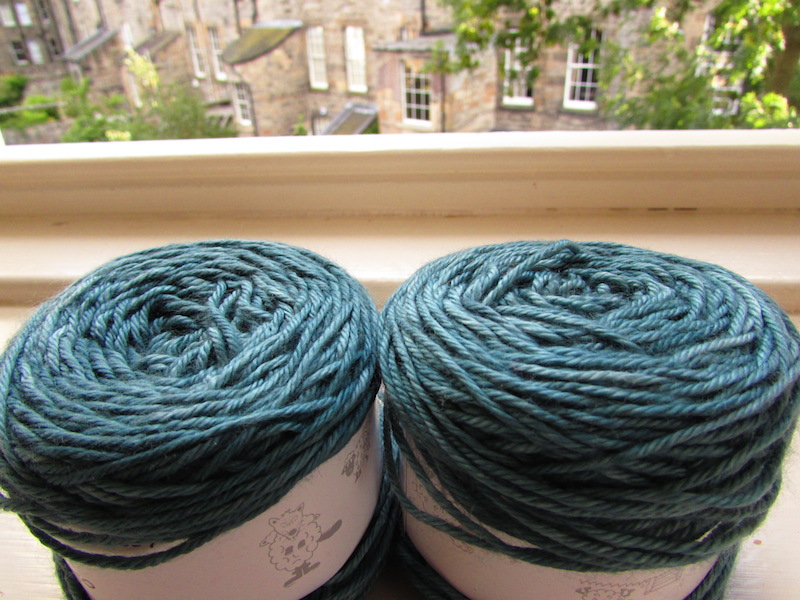
  • Dragonfly Studio (Brunigill Farm, 3 Skinidin, Dunvegan, IV55 8ZS): I must admit this was my favourite shop of the trip, I actually had to go there twice! We met Ann at this lovely studio who sells a huge range of textile crafts and artwork, including handspun yarn from their own flock. The yarn is labelled with the name of the sheep it came from (I almost cried!), and it is so beautifully soft and squishy, I just can’t get over it. To top it all, Ann was so nice and welcoming to us both times we were there, you just can’t get any better than that. I will do a separate post of the project I am doing with this yarn, it deserves its own post!
  • Skyeskins (17 Loch Bay, Waternish, IV55 8GD): Another one of my favourites was this awesome tannery located in Waternish. If you love sheep… you will love this shop. First, you get a free tour where a member of the staff takes you through the entire tanning process, here they explain that they only use sheepskin from sheep which are used for meat, that they are one of two commercial tanneries in the UK, and that the process is mostly by hand. They are also very conscious about sourcing locally. Next you get taken to their shop where you can buy rugs, throws, garments and other leather products. I bought a pair of sheepskin slippers and they are OH-SO-WARM, and to top it even the sole is made in the UK. Needless to say, I really wanted to get myself a rug… hopefully one day. Oh, if you can’t wait until you visit you’ll be happy to know you can buy online at www.skyeskyns.co.uk.
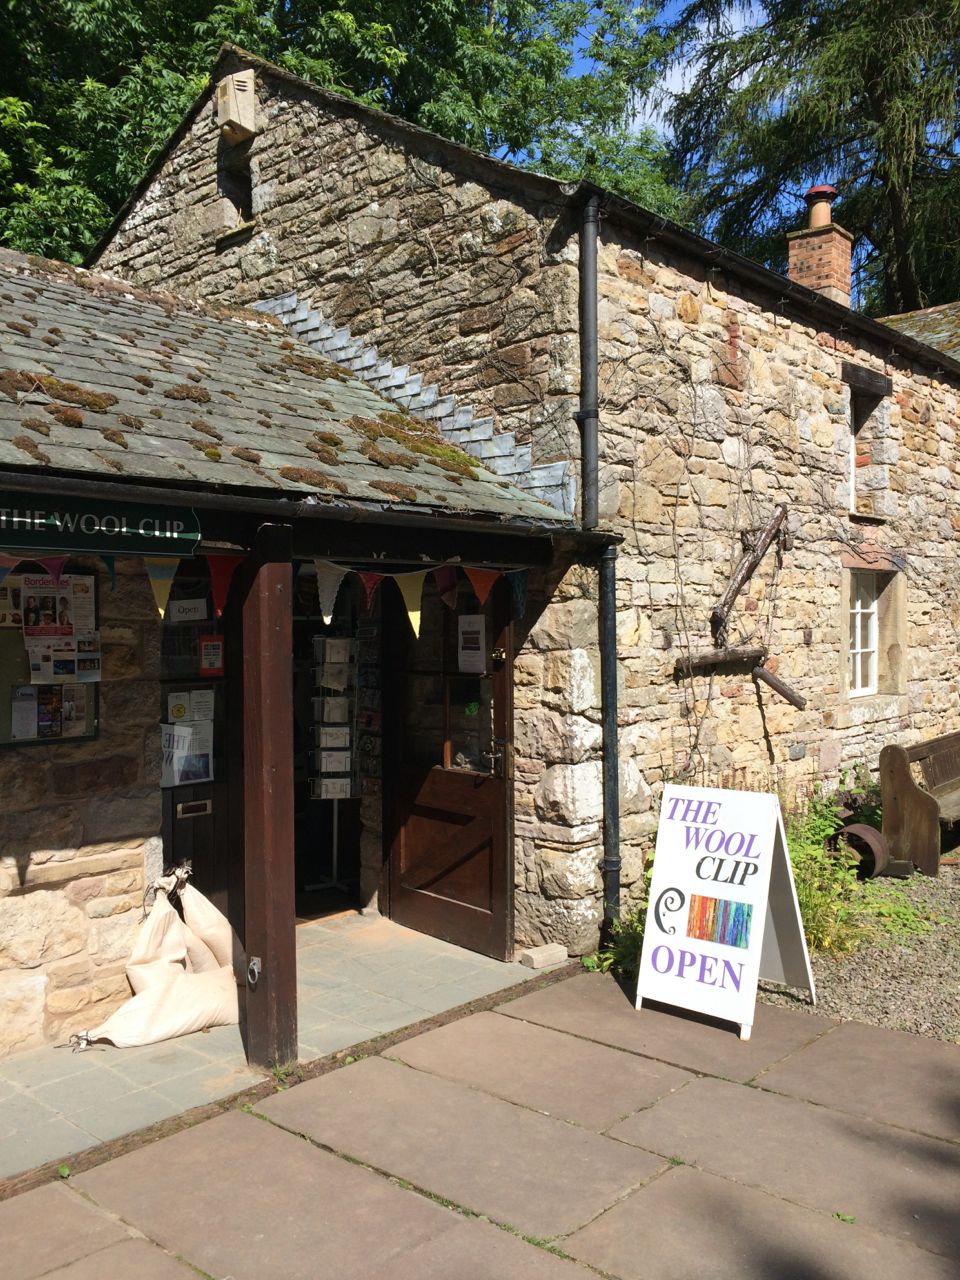
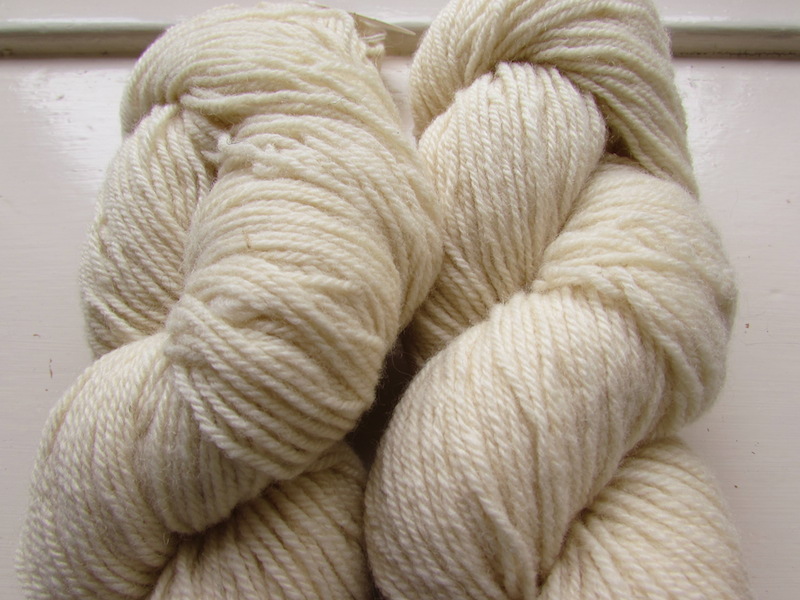
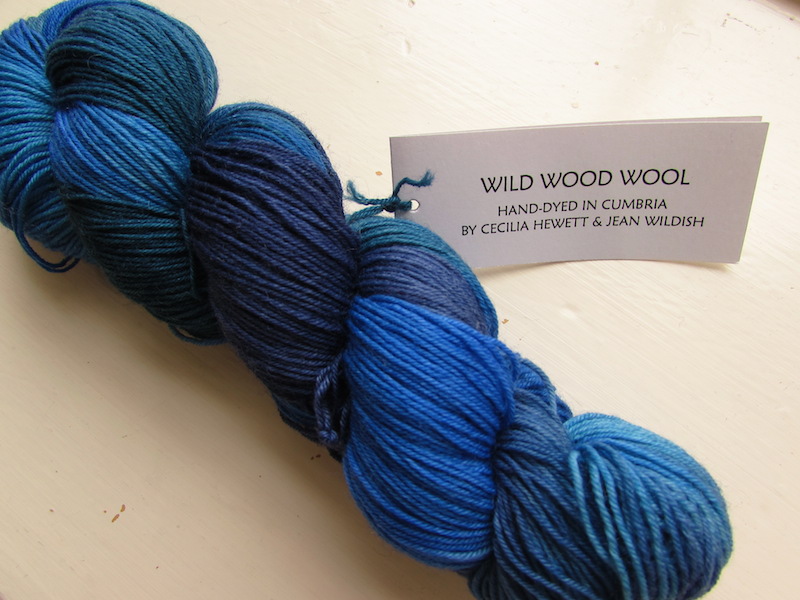
  • Shilasdair Yarns (10 Carnach, Waternish, IV55 8GL): Of course, if you are in Waternish you must stop by Shilasdair. Beautiful yarns dyed with natural dyes in the most amazing setting. They have quite a big selection of colours and also quite a few of patterns and books.
  • Sam Peare Textiles (Loch View, Endinbane, IV51 9PW): This shop may be tiny, but what lacks in space it compensates on beauty. Sam creates unique embroidered pieces with a vintage feeling, and they are all stunning. She didn’t have much stock on her shop when I visited but it is definitely worth to stop by. You can visit her website at www.samanthapeare.co.uk.

IMG_1522 copy

  • Glenview Gallery at The Skye Pie Cafe (Culnacnoc, Staffin, IV51 9JH): I loved this gallery and cafe and it is near the very famous Old Man of Storr. The whole space is decorated with beautiful details all around, the cafe has a really good menu, delicious pies and soups, and they also do takeaway. In the gallery you can find unique pieces including some local yarn and vintage finds. My sister left with the most beautiful set of vintage tea cups, and I am still so jealous she saw them first. A definite must if you are in the area.
  • Handspinner Having Fun (Old Pier Road, Broadford, IV49 9AE): If you are a yarn addict then you will LOVE this shop. Filled with lovely hand spun and hand dyed yarns, as well as some rare breeds and beautiful notions, I was running around in circles like a chicken trying to decide what to get. It is also next to the best bakery in the world… make sure you stop for some bread to take on your journey, you won’t regret it! If you are heading over to Yarndale this year (you lucky people!) then you will be glad to hear the shop will have a stall there, or you can also check the website at handspinnerhavingfun.com.
  • Love from Skye (Main Street, Broadford, IV49 9AE): Just across the road you will find this jewellery shop filled with beautiful pieces created at their own workshop or by other Scottish artists. There is something for every budget, worth a stop.

IMG_3224

We were only there for three days and there was still so much more to see, including more talented people selling their creations. It was so inspiring to see this community of artists and what they bring to the Isle of Skye, it makes it even more magical and I can’t wait to be back there. Hope this guide is useful for those of you planning a trip there, given that I didn’t find much information until I got there.

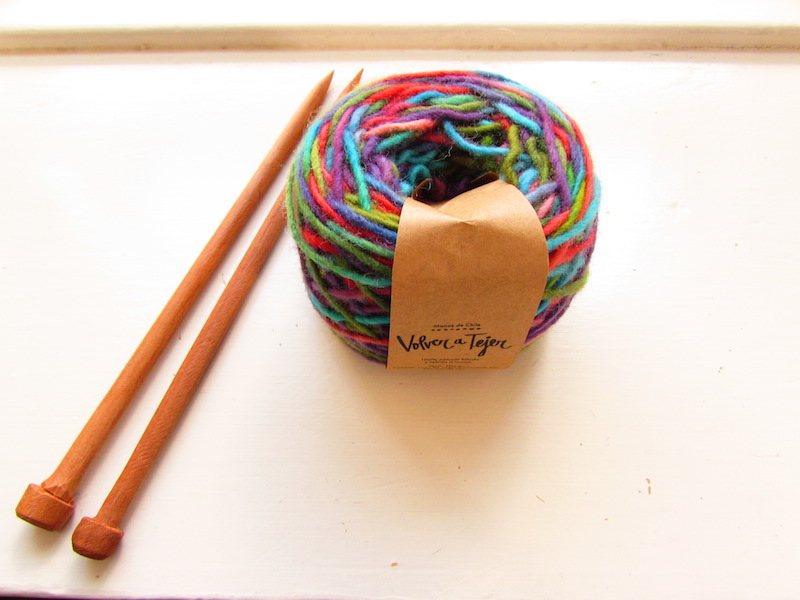
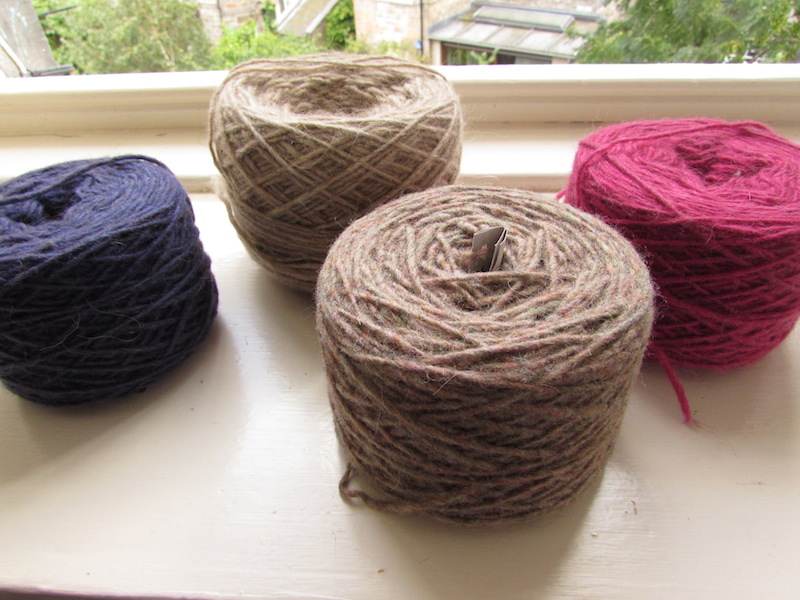
As you can imagine, I came back with quite a lot of things from my road trip around Scotland, including a vintage 1930 Singer sewing machine I bought at a car boot sale in a small town near Aberdeen (yes… I am that kind of people, I can’t stop myself). I will share my yarn purchases and Lydia (and yes, I name things as well) on a separate post as soon as I can.

Hope you all have a great weekend!

x

Sol

Yarn stash update: gifts from home

IMG_1726

My yarn stash has grown considerably in the last few months and yarn is sort of taking over the flat. When my sister came to visit this month she brought with her quite a few balls including some lovely handspun, alpaca and wool blends and even milk fibre yarn (first time I had ever seen anything like it before!).

IMG_1708 IMG_1713

First let me show you this lovely handspun Corriedale yarn. This was the product of an inspiring initiative to train 215 women from rural communities in Chile in the art of handspinning and dyeing. They spun and dyed 15,500 of these balls which were then put on sale in a large department store in Chile. The packs also included a small booklet with patterns and a pair of wooden needles handcrafted by a local artisan. You can see a video (in Spanish) of the project here, even if you don’t understand the language it is worth watching these talented and hard-working people, and see how proud they are of preserving the heritage of our ancestors. I am so happy to be able to work with this yarn and continue this chain of love for tradition and fibre, their faces will be on my mind as my own hands work on what was created with their skilled hands.

Next I have some beautiful alpaca and wool blend from the south of Chile, I just love these colours and they come in quite big cakes so I am definitely thinking of getting at least one sweater out of this yarn.
IMG_1700 IMG_1703
Finally, my mum sent this milk fibre yarn she purchased at a local yarn festival. The colour is so stunning and it is the-softest-thing-ever. I am very intrigued by it and may do a separate post to tell you how these types of yarns are produced once I have knitted or crocheted a sample of it to also tell you how the fabric behaves. So far I don’t know much except that after a quick Google search it appears it is not the most environmentally friendly of yarns and therefore I don’t believe I would purchase more of it, however knowing this makes me want to make sure that it is put into good use.
IMG_1716 IMG_1718
That is all I have for today, next will be my guide for shopping for yarn and other crafty goodness in Skye so keep an eye out for that 🙂
Happy Friday and have a great weekend!

x

Sol

If you are ever in Cumbria…

IMG_3166

I am a planner. I can’t really start a day without listing what I want to do and what needs to get done, not only because it helps with my anxiety but also because I have a horrible memory 🙂

So when things happen like getting a stomach virus that won’t leave you after a week, it really messes my whole system up. I had planned to write quite a few posts this week, clean my flat, hang out with friends and family that are visiting, but instead it has been work and bed, work and bed. I have been trying to stay positive and not complain or feel sorry for myself, but it is so hard! I know it is not the end of the world, but is so much easier to just feel down. If you have any tips or advise on how to stay positive please share in the comments, would love to hear from you!

Since I am feeling a bit better this evening I am improvising in my usually organised routine and I decided to write a blog post that I have been wanting to share for weeks now. I went to the Lake District for a few days last month and happened to find a flyer for a wool shop on a nearby town, so of course my very-supporting-of-my-yarn-addiction boyfriend had to drive me there to check it out. The shop is called WoolClip and I couldn’t believe how many gorgeous things they had!

The shop is located in a beautiful old building in Caldbeck, a cute small town in Cumbria about 30 minutes north of Keswick. Once you go in you are welcomed to a stunning large range of all things wool: knitted and crocheted garments and accessories, tools, kits and yarn. But it is not only the range that makes this shop special, it is the women behind it. The WoolClip is a cooperative set up by 15 local crafters: weavers, spinners, knitters, crocheters, felters and more. All the products are crafted by them and they each spend a couple of days a month at the shop to run it. I found this description at their website:

The Wool Clip began as a co-operative of Cumbria-based crafts people back in 2001. We were all enthusiastic designers and makers but many of us were juggling our work with farming, families and other commitments. We enjoyed working with wool but also understood the threat to British wool and local sheep farming and the loss of traditional craft skills.

By creating a co-operative, we were able to raise the profile of our work and create a shop that we could share – each member spends a couple of days per month in the shop and the commission from sales pays for the upkeep.

Source: http://www.woolclip.com

You can understand my excitement at finding such special place. Quoting my boyfriend: “It was like seeing a kid at a toyshop”. It is such an amazing and inspiring model, I wonder if there are more initiatives like this across the country since I think it is a fabulous idea.

I wanted to get so many things and after much thought ended up getting some fabulous yarn, including some BFL and Shetland in natural colour by Ruth Strong and a beautiful hand dyed skein by Wild Wood Wool.

IMG_1630 IMG_1631 IMG_1637

There was no signal to look on Ravelry so I don’t have a project in mind for them, I think the blue one will have to be a nice summery shawl, maybe one from the Shawl Project? I accept suggestions!

I think that is it for today everyone, my body needs some rest and nurturing so I am off to my couch with a cup of tea and Say Yes to the Dress. I haven’t had much energy for working on my WIPs, I think right now I just need to allow myself to do something I never do: absolutely nothing.

Have a great weekend!

x

Sol

Catch up and latest FOs

IMG_1396b

Well hello everyone! I am writing today to catch up on life, my crochet journey and now also knitting journey after a short break from the blog. It is summer in my corner of the world and even though the weather has not been great I have been trying to enjoy the extra light and just be out and about a bit more. I love being at home so it is always hard to get myself out the door but once I’m out I am always glad I did it. I am also still doing yoga and enjoying every minute of it, it helps with my anxiety like nothing else so really recommend it to everyone if you are looking for a different type of physical activity.

IMG_1410a IMG_1407b

I finished two crochet projects recently that I would like to share with you, the first is my Lorelei Pullover by Dora Ohrenstein. I LOVE this top, it is just so light and summery, the colour is amazing and the stitch pattern is beautiful and unique. Very simple construction so really recommend it if you want to give it a try. I used Ginger’s Hand Dyed Swanky Lace in Girl on Fire which is a blend of baby alpaca, silk and cashmere so you can imagine how awesome this garment feels.

IMG_1403b

The other FO I wanted to share is my Penelope Top by Jenny Reid. I love the romantic look of this top and that stitch pattern is truly stunning. The back is really nice but couldn’t get a nice picture of it unfortunately… not easy to take pictures of yourself!

IMG_1398b

IMG_1386b

I used John Arbon Alpaca Supreme 4ply in Silver Fawn, beautifully soft yarn though I am regretting the alpaca a bit after getting some serious pilling issues with only one wear. If anyone has any recommendations for a good pilling remover please let me know 🙂

I am so happy with these two garments because I really like how they look and have already been wearing them proudly, that is what my handmade wardrobe focus is all about and it makes me want to keep on doing more and more garment patterns now that I know I can make them fit. You know when you are working a pattern and you realise you made a mistake or you have a feeling it won’t be big/small enough to fit you and you avoid it until you are done? Well I have been determined not to avoid those feelings and it has saved the fit of my garments more than once with just a bit more work. Trust your instincts everyone and it will save you a lot of time and effort.

My knitting is coming along, I am taking a Craftsy class that shows you how to make an infinity scarf so I am working my way through that and really enjoying it now that I have found a good position for my hands and yarn when knitting and purling. After this I would like to do a hat and a shawl, so if you have any simple patterns to recommend I would really appreciate it. For the shawl I want to use a beautiful 4-ply skein from Hedgehog Fibres that I purchased when I was in Dublin last month, it is so pretty that I know the yarn would shine in a simple knitted shawl. I thought of doing a crochet shawl but it would have to be a very open and lacy one to use just the one skein and I don’t think the yarn colour changes will show as well so I am glad I am adding knitting to my skills bucket!

What have you been up to? Let me know in the comments 🙂 I will be going on holiday this month and I have family visiting on the following month so I may not be posting as often. I try to post on Instagram a bit more often so you can check my feed there if you want to see what I am up to.

Have a great day everyone!

x

Sol

The (new) beginning of my knitting journey

IMG_1203

A few weeks ago I had an amazing opportunity to be part of a knitting class run by Jules from Woollenflower. If you haven’t checked Jules’ website I really recommend you do, she sells the most beautiful products, including machine-knitted cowls and small bags made out of worn Harris Tweed jackets. I had the pleasure of meeting her at the Edinburgh Yarn Festival and found her to be not only incredibly talented but also such an amazing person, so I jumped at the chance to have her as my teacher.

Now, let me tell you a bit about my knitting journey. I am not sure if I shared this but I learned how to crochet when I was about 10 years old, it was the first craft I learned and it really clicked with me straight away. I have crocheted on and off since then: it is like riding a bike, you really never forget how to do it.

When I was in high school my nanny (the most awesome knitter I know to this day) taught me how to knit and I decided to cast on a scarf with a simple ribbed pattern. It was THE-LONGEST-SCARF-IN-THE-WORLD. By the time I was finished I not only hated the scarf, the colour and everything about it, but also hated knitting. That was the last time I picked up a pair of knitting needles.

IMG_1206

Fast forward to the last year and crochet and the fibre world have become a really big part of my life. For the last few months I have been thinking that I should try knitting again, mostly for the following reasons:

  • I really like how knitted fabric looks like, and that it is lighter than crochet fabric. I believe there are many things you can do with crochet, but just like knitting it has its limitations. The one thing I have never liked in crochet is hats, to this day I haven’t found a pattern that I like. The fabric is too dense and stiff if you don’t want an open stitch pattern (which you don’t if its a winter hat) and the hat ends up wearing you instead of the other way around. Knitted hats on the other hand are beautiful and that is my ultimate goal in this knitting journey: LOADS AND LOADS OF HATS 🙂
  • I love fibre and as I get to understand more and more about how we get from sheep to finished object I have come to be very curious about all fibre related crafts such as weaving, spinning and of course, at the centre of it all is knitting. I don’t think I could call myself a fibre enthusiast if I don’t have at least some basic knitting skills.
  • As some of you know I have started teaching a few workshops at Ginger Twist Studio and I came to realise very quickly that most (if not all) of those who have attended my workshops are knitters and know only a bit about crochet. I feel that I can become a better teacher if I can speak the same language as my students since this will help me understand their issues better.
  • Finally, I love learning and there is SOOO much to learn in knitting.

Even though these sound as very compelling reasons I also had my doubts about whether I should learn how to knit again. Knitting is slow and so much less forgiving when it comes to mistakes. Crochet is awesome in that way, make a mistake and you just rip it off and pick up again but with knitting it is a different story and I am NOT a patient person. Also, I was a bit afraid of immersing myself in the knitting world and not being able to pull out. I am a very obsessive person and there are so many knitting patterns out there that match my aesthetic, much more than crochet patterns. Could I keep crochet as my main craft with so many patterns calling for my attention?

IMG_1196

In the end, I am glad I decided to learn. Crochet will always be my main craft but knowing how to knit will allow me to create some special items that crochet may not do so well. I see many hats in my future, simple shawls that allow me to show-off that very special skein of yarn and maybe one day a simple sweater (I say only one knowing that it will take me a lifetime to finish). Crochet is still faster and more comfortable so I know I will never lose it and right now I am just really enjoying being a beginner and learning a new skill that can only add more inspiration to my creative journey.

I still haven’t done any projects, I am just practicing my stitches for now. I will be casting on something soon, an infinity scarf from a Craftsy class I purchased. It doesn’t look simple, but I do like a challenge! If you have any tips of nice beginner projects please share them in the comments, would love to hear your suggestions.

Thanks for stopping by!

x

Sol

Crochet month!

front-green-side

Hello everyone! I want to share some crochet news and events with you, I am so excited that this passion of mine is opening up some great opportunities for me to grow and explore. I have always been someone who moves from craft to craft never sticking to one in particular. I have tried crochet, sewing, knitting, cross stitch and so many more, and I was always teased in my family since I would get so excited at first to only give it up completely in a few months. I think this time is different, I know now that I will always be involved in a fibre art. I have become so passionate about yarn and would like to try all crafts that honour such an amazing resource: knitting, spinning and weaving are definitely on the list!

So first, if you are in the Edinburgh area the Indie Burgh Yarn Crawl is happening on the 13th and 14th of June. Three local yarn shops (Ginger Twist Studio, Kathy’s Knits and Be Inspired Fibres) participate and you can make your way around them on your own or sign up for a lucky dip group and get a tour guide as well. There are workshops and an after party on the Sunday so make sure to check the Facebook page for details. Yours truly will be at Ginger Twist Studio on the Sunday with all my samples, would love to meet some of you if you can make your way there.

IMG_1064

I also wanted to let you know that I am doing workshops at Ginger Twist Studio. The next one will be a crochet colourwork class in which you will learn about the different techniques and learn how to work tapestry crochet by making an adorable little purse. This is the technique I used to make my Moroccan bag so if you liked that pattern this might be of interest to you. The workshop will be held on the 19th July from 12pm to 3pm at Ginger Twist Studio, check her website for details and booking. 

IMG_1129

Finally, I am excited to announce that I am Designer of the Month at Ginger Twist Studio during June! My samples will be on display at Jess’s shop this month along with other crochet designs by Anna Wilkinson so I am really happy to be part of her lineup (can you spot my Moroccan tote in the window? Love it!)

That is it for today, hope you are having a great week!

x

Sol

June WIPs

IMG_1101

Hello everyone, how are you? I thought it would be good to start the month by sharing what has been on my hook lately and what I plan to start soon as well. I have so many projects I want to work on (and so much yarn waiting to be used), particularly all the summer garments that are on my queue since I want them finished by those two weeks in July that are called “summer” in Scotland.

First, I thought I should show you how my Freyja shawl is coming along. Last time you saw it I was starting my repeats and I am afraid there is still long to go. This shawl is beautiful but oh dear how much time it takes! I am about a third of the way but hope to finish it this month, have some travelling to do for work next week and have decided to bring this project along to make sure I work on it.

IMG_1105

What has been taking most of my crochet time is this awesome Lorelei Pullover by Dora Ohrenstein. It appears in a tunisian crochet book by Dora called The New Tunisian Crochet: Contemporary Designs from Time Honoured Traditions, it is a great book for learning new stitches in tunisian crochet but unfortunately the patterns didn’t really catch my eye, except for this one. I knew I had to make this as soon as I saw it, and after I found the perfect yarn for it it wasn’t long until this was on my hook.

IMG_1107

The yarn I am using is Ginger’s Hand Dyed Swanky Lace which is a beautiful blend of 70% baby alpaca, 20% silk and 10% cashmere in the colour Girl on Fire. This is the most luxurious yarn I have ever worked with, Jess has a great eye for colour and this one is no exception: it is just beautiful. It is definitely more on the bright side of what I usually wear but the colour suits me (after doing a quick poll in the shop) and since it is a summery item I think that is the best bet to go a bit more colourful.

The stitch pattern for this pullover was adapted by Dora from a vintage magazine, and it is very special and unique. As you may have noticed I love working on things that don’t look like crochet at first sight, and this definitely fits the bill. Gauge is tricky since the length of the stitches are determined by how much you pull that loop in each stitch, and it can vary a lot. Halfway through I realised that even though my swatch had a very loose row gauge I was now crocheting a lot tighter, so I am having to add a few more rows to make sure it is not too small.

IMG_1113 IMG_1114

This is also a project where you can see the magic of blocking. It makes SUCH a difference, from an uneven fabric with a huge bias to beautiful and drapey. It is hard to see how it fits before blocking so I am just trusting that it will all work out in the end, a bit of crochet faith!

So that is what is on my hook just now, very proud to have only two projects on. I am eager to start more and so I will start swatching soon for my next garment to make sure I can start as soon as I finish one of these two WIPs (definitely the pullover). Here is a sneak peak at what I will be working on next!

IMG_1123

What are you guys working on? Let me know in the comments!

Have a great week,

x

Sol

Thank you!

IMG_0563

I have been so overwhelmed this last week by the response to my Moroccan tote pattern that had to write a post to say a simple but huge: THANK YOU!

I enjoyed so much while working on this design, as those of you who follow my blog may know this project was my companion through many train journeys as I travelled for work at the beginning of the year. That gold colour really did brighten up my mood every time I worked on it, isn’t it stunning?

I could not have predicted though what the response to the pattern would be and I just wanted to let you know how happy it makes me to know that I have inspired you or brighten up your own day as a result. I couldn’t find a better motivation to keep designing than that.

Thank so much to all of you who have stopped by, favourited or left a comment to let me know how much you liked the pattern. I am eager to see your projects and how your totes come to life so please post them on Ravelry or send me an email with your pictures.

I had a busy week at work so I will start catching up with the blog again now, I have some WIPs to share with you, news and events and some more summer crochet top patterns for you to check out. Will be back soon!

x

Sol


Free pattern: Moroccan tote

IMG_0545

*Ravelry link

I know, it was so long ago when I first shared my Moroccan tote and promised to write a pattern for it. Life has been busy as usual and I have been focusing more on crocheting than designing lately since it was getting a bit too crazy: full-time job, blogging and pattern design weren’t leaving much time for anything else! So I took my time, posted a tutorial for the technique I used and now I can finally share the pattern with you. As usual, it is for free, but please refer back to me if you post it online or sell a finished product, including the chart which I created myself from the picture I used as inspiration.

Royal Design Studio Stencils

The pattern is for a tote and therefore it doesn’t have a big base for it. If you want it more as a handbag you can adapt the pattern to make the base bigger, just make sure you get a final count of stitches that is a multiple of 12, which is the stitch repeat for the pattern. I added leather handles, fabric lining and a magnetic clasp and I think those finishing touches really made the difference. You can find the handles and clasp I used here. The yarn is Cascade Ultra Pima, it has a beautiful shine to it which I really love and that gold colour is my favourite.

IMG_0395

IMG_0544

Before getting to the pattern I wanted to note that tapestry crochet can be tough on the hands. This bag is crocheted using a 2.5mm hook with a DK yarn, which is a lot smaller than what you would use for that yarn weight. If crocheting causes pain in your hands or wrists then please be aware that this pattern may be difficult for you, the stitches are very tight and you have to put more effort to get the yarn through so make sure you use a crochet hook that is comfortable for you. You could go up a hook size, but that will make the fabric a lot less dense and sturdy, which is what makes it good for a bag. It’s up to you, I just thought it would be good to make it clear from the start.

Moroccan tote pattern

IMG_0551

This bag uses tapestry crochet to create a nice dense fabric for a small tote. A small base is crocheted first and then the rest of the bag is worked in a beautiful moroccan pattern. The bag is worked in spirals all the way through, meaning that you don’t join each round which eliminates that sometimes noticeable slip stitch. Leather handles and a fabric lining complete the pattern to create the perfect summer tote.

IMG_0553

The tote measures 36cm x 30cm, with a gauge of 28 stitches and 22 rows in a 10cm square. You don’t have to get exact gauge, I prefer it tight like this since it creates a stiff fabric but see what works for you.

Materials

Cascade Ultra Pima DK, 2 skeins in Gold, 1 skein in Natural.

2.5mm hook

Tote leather handles

Magnetic clasp

Thread to match the colour of your handles

Fabric for lining

Stitch marker or yarn in contrasting colour

Abbreviations

Ch – Chain

St – Stitch(es)

Sl st – Slip stitch

dc – UK double crochet

Instructions

*If you don´t know how to work tapestry crochet you can check my tutorial here.

Base

The base is not worked in tapestry crochet, I find it a bit difficult to carry the other colour inside for these first few rounds but you are welcome to try if you prefer a thicker base.

As I have mentioned before, the hook size and yarn weight for this pattern create a very tight fabric, which makes stitches a bit more difficult to work. I find the easiest way to work a dc when working with a small hook like this is to always work one loop at a time, meaning: insert hook on st, yarn over and pull a loop. Now instead of yarning over and pulling through the two loops in one step you can do the following: yarn over pull through one loop, and now pull that loop through the last loop on your hook.

Ch 79.

Round 1: dc in 2nd ch from hook, place marker in st just made, 76dc, 4dc in last ch, turn and start working on other side of chain, 76 dc, 3dc in same ch where you worked marked st. Don’ turn (160 st)

From here onwards you will work in spirals, meaning that you won´t join the last and first st of each round with a sl st. You will move your marker up each row to know which is the first st of each round. Also, you will never turn your work.

Round 2: 2dc in marked st (remember to move your marker up to the first dc of those two to mark the first st of this row), 76dc, *2dc in next st, repeat from * for next 3 st, 76dc, **2dc in next st, repeat from ** twice (168 st).

Round 3: dc in marked st, move marker up, dc in each st across (168 st).

Body

For the body of the bag you will work using tapestry crochet, meaning that you will always carry the unused colour inside your stitches, even if the round is only one colour (like Rounds 1 and 2). You will also continue to move your marker up to know where your round started and you will ALWAYS work in the back loop only.

Rounds 1 to 77: Follow chart from right to left for each round. Each square is a dc worked in the back loop only, if you don’t know how to change colours in each round check this tutorial. Remember to bring the marker up at the beginning of each round (marked st is St 1 in chart for each round), and to work in spirals without joining each round. I recommend marking the first st of the first round of the body, and using another st marker to move up each round, so that if you forget to move your marker up you can use that first marker to work your way up and know which one is the first stitch (you can tell I am talking by experience here!).

As indicated in chart, repeat Rounds 3 to 18 a total of four times and follow the top chart for Rounds 67 to 77. When finished, sl st to first st of last round.

To create a lining I always follow this tutorial by Futuregirl, just omit the zipper part of the tutorial. Sew on the handles before sewing on the lining to hide the stitches, and use a strong thread for the handles. Finally, sew in the magnetic clasp.

And your tote is finished! Let me know if you have any questions,

Enjoy!

x

Sol

Tutorial: Crochet Colourwork

IMG_0818 Hello there! I am posting today to share a fun tutorial with you. Remember my Moroccan bag? Well the pattern is still in the works but I realised it would be very useful to create a tutorial for the crochet colourwork techniques I use in my patterns and then I can refer you to them whenever necessary.

I currently use two crochet colourwork techniques: stranded colourwork and tapestry crochet. Both techniques allow you to change between two (or more) colours in a single row and unlike knitting it doesn’t matter if your design has long colour changes. You can use these techniques to play with colour in any way you want but I particularly like to use them to create designs based on charts. For working with charts,  UK double crochet (US single crochet) is a good stitch to use, since it is sort of like a small square. Also, for both techniques I work on the back loop only (BLO) since in my opinion it gives the best result.
My Moroccan bag pattern uses tapestry crochet
Stranded colourwork, as its name indicates, creates a fabric where the unused colour is carried at the back of the work as a strand (this is basically what you do for fair isle knitting). If you are working something like a hat or glove make sure your strands are quite short so that you don’t catch them with rings, hair pins, etc. I make my strands 3 stitches long maximum which works for me.
My Night to Day wrist warmers use stranded colourwork
With tapestry crochet the unused colour is carried inside the stitches, creating a bulkier and stiffer fabric, however I have seen beautiful blankets done with this technique so you can adapt it to your needs by changing hook sizes and yarn weights.I leave you with a photo tutorial for each of these techniques, as usual let me know if you have any questions and I hope to post the pattern for the Moroccan bag soon!


Tapestry crochet tutorial (UK terms)

As I mentioned before, I always work on the back loop only (BLO) for any colourwork technique. For demonstration purposes, let’s say that we have a chart that tells us that we need to work 4 stitches in one colour and then 4 stitches on a different colour, alternating them along the row. Remember that with tapestry crochet you always carry the unused colour inside the stitches, and you do this from the first stitch of the row.

I have worked a couple of rows of dc to use as a base and make it easier to show you, but it would be the same instructions if you were working your first row into a chain. It also applies if you are working in the round.

Chain 1.

IMG_0778

IMG_0781
2. Insert your hook on the BLO of the first stitch.
IMG_0821 IMG_0822
 3. Grab your second colour and hold it behind the back loop and over your hook.
IMG_0825
 4. Yarn over and pull up a loop.
IMG_0827 IMG_0828
5. Yarn over and pull through two loops on hook. First dc completed, and the pink yarn is secured inside the first stitch.
IMG_0830 IMG_0833
6. According to our chart we have to work 4 stitches before changing colour so let’s continue in the same way.
Insert hook in BLO, place unused colour behind back loop and over hook, yarn over and pull up a loop.
IMG_0835 IMG_0836 IMG_0837
7. Yarn over and pull through two loops. Second dc completed. Repeat the same steps to complete the third dc.
IMG_0838 IMG_0839 IMG_0840
IMG_0843
8. Now, to get a neat colour change we need to change colours one stitch before: if I need my fifth stitch to be a different colour, I need to change yarns on the fourth stitch.
So let’s begin the fourth stitch as normal, which is still in grey.
Insert hook in BLO, place unused colour behind back loop and over hook, yarn over and pull up a loop.
IMG_0844 IMG_0845
 9. Now drop the colour you have been working with (grey), yarn over with the other colour (pink) and pull through both loops on hook.
IMG_0846 IMG_0847
10. Perfect! We will need some adjustment here to make sure all stitches are the same size so before continuing pull that grey yarn to make that last stitch look nicer.
IMG_0848 IMG_0849
 11. And now we just continue the same way, let’s work until the next colour change to make sure it is all clear.
Insert your hook in BLO, place unused yarn (now grey) behind back loop and over hook, yarn over and pull up a loop.
IMG_0811
12. Yarn over and pull through two loops on hook. Repeat for next two stitches.
IMG_0812
IMG_0813
13. Since we need to have four stitches of each colour we will need to change colour on the next stitch.
Insert hook in BLO, place unused yarn behind back loop and under hook, yarn over and pull up a loop.
IMG_0814
14. Drop the yarn you have been working with (pink), grab unused yarn (grey), yarn over and pull through both loops on hook.
IMG_0815 IMG_0816
15. Now adjust your stitch so that it looks just like the others and you are ready to continue your row! You should have something that looks similar to this on both sides, it creates a reversible fabric.
IMG_0818
IMG_0819


Stranded colourwork tutorial

For stranded colourwork you change colours the same way, you just don’t catch the yarn inside the stitches like tapestry crochet. Because you leave strands of yarn at the back you can only work this technique in the round, however for demonstrating purposes I am using a flat piece to show you the technique just so that it looks more clear.

Let’s assume we have the same chart that tells us to change colour every four stitches for each round (remember we can’t work rows with stranded crochet).

1. Chain one. Work 3dc in BLO.

IMG_0852
2. Insert hook in BLO, yarn over and pull up a loop.
IMG_0853 IMG_0854 IMG_0856
2. Drop the colour you have been working with, grab the second colour (you can do a slip knot here but it is not necessary), yarn over and pull through both loops on hook.
IMG_0857 IMG_0858
 3. Adjust that last stitch by pulling that grey yarn to make it look more like its brothers…
IMG_0859
4. Pick up the pink yarn again to continue with this colour. Work 3dc in BLO.
IMG_0861
 5. Insert hook in BLO, yarn over and pull up a loop.
IMG_0862 IMG_0866
 6. Drop the colour you have been working with, grab the other colour, yarn over and pull through both loops on hook.
IMG_0867 IMG_0868
7. Repeat the previous steps to finish your round. You will have something like this on the back of your work.
IMG_0869


Finally, I want to show you how to make those strands shorter if you wanted. The strands are as long as the stitches between colour changes (in this case four) but this may not always be the case or maybe you think these strands of 4 stitches are too long for you. To shorten the strands we simply use the technique we already learned for tapestry crochet to “catch” the yarn inside the stitch. Let me show you.

If we continue with the round we are working with, let’s say we want to the strands half as long, meaning we need to “catch” that unused strand between two colour changes.

1. Work one dc in BLO.

IMG_0871


2. We want to catch the yarn in the next stitch. So, insert hook in BLO, place unused yarn behind back loop and over hook, yarn over and pull up a loop. Yarn over and pull through two loops.

IMG_0872 IMG_0873
 3. Continue normally until next colour change and then catch the yarn again before the following colour change. I caught the yarn on the second stitch of each set of four stitches, but you could do it on the third or wherever you want. You will get something like this on the back. Shorter strands!
IMG_0877


Uf! That was long, hope it is useful 🙂

x

Sol