
*Ravelry link*
Hello there! As promised, I have taken some time to post my latest pattern because I wanted to make a tutorial for you guys. Since it was turning out to be quite a long tutorial I decided to post it in two parts, and here is the first one! I ended up taking the photos by myself so they are not perfect but I hope they are clear enough and I promise the next tutorial will be better.

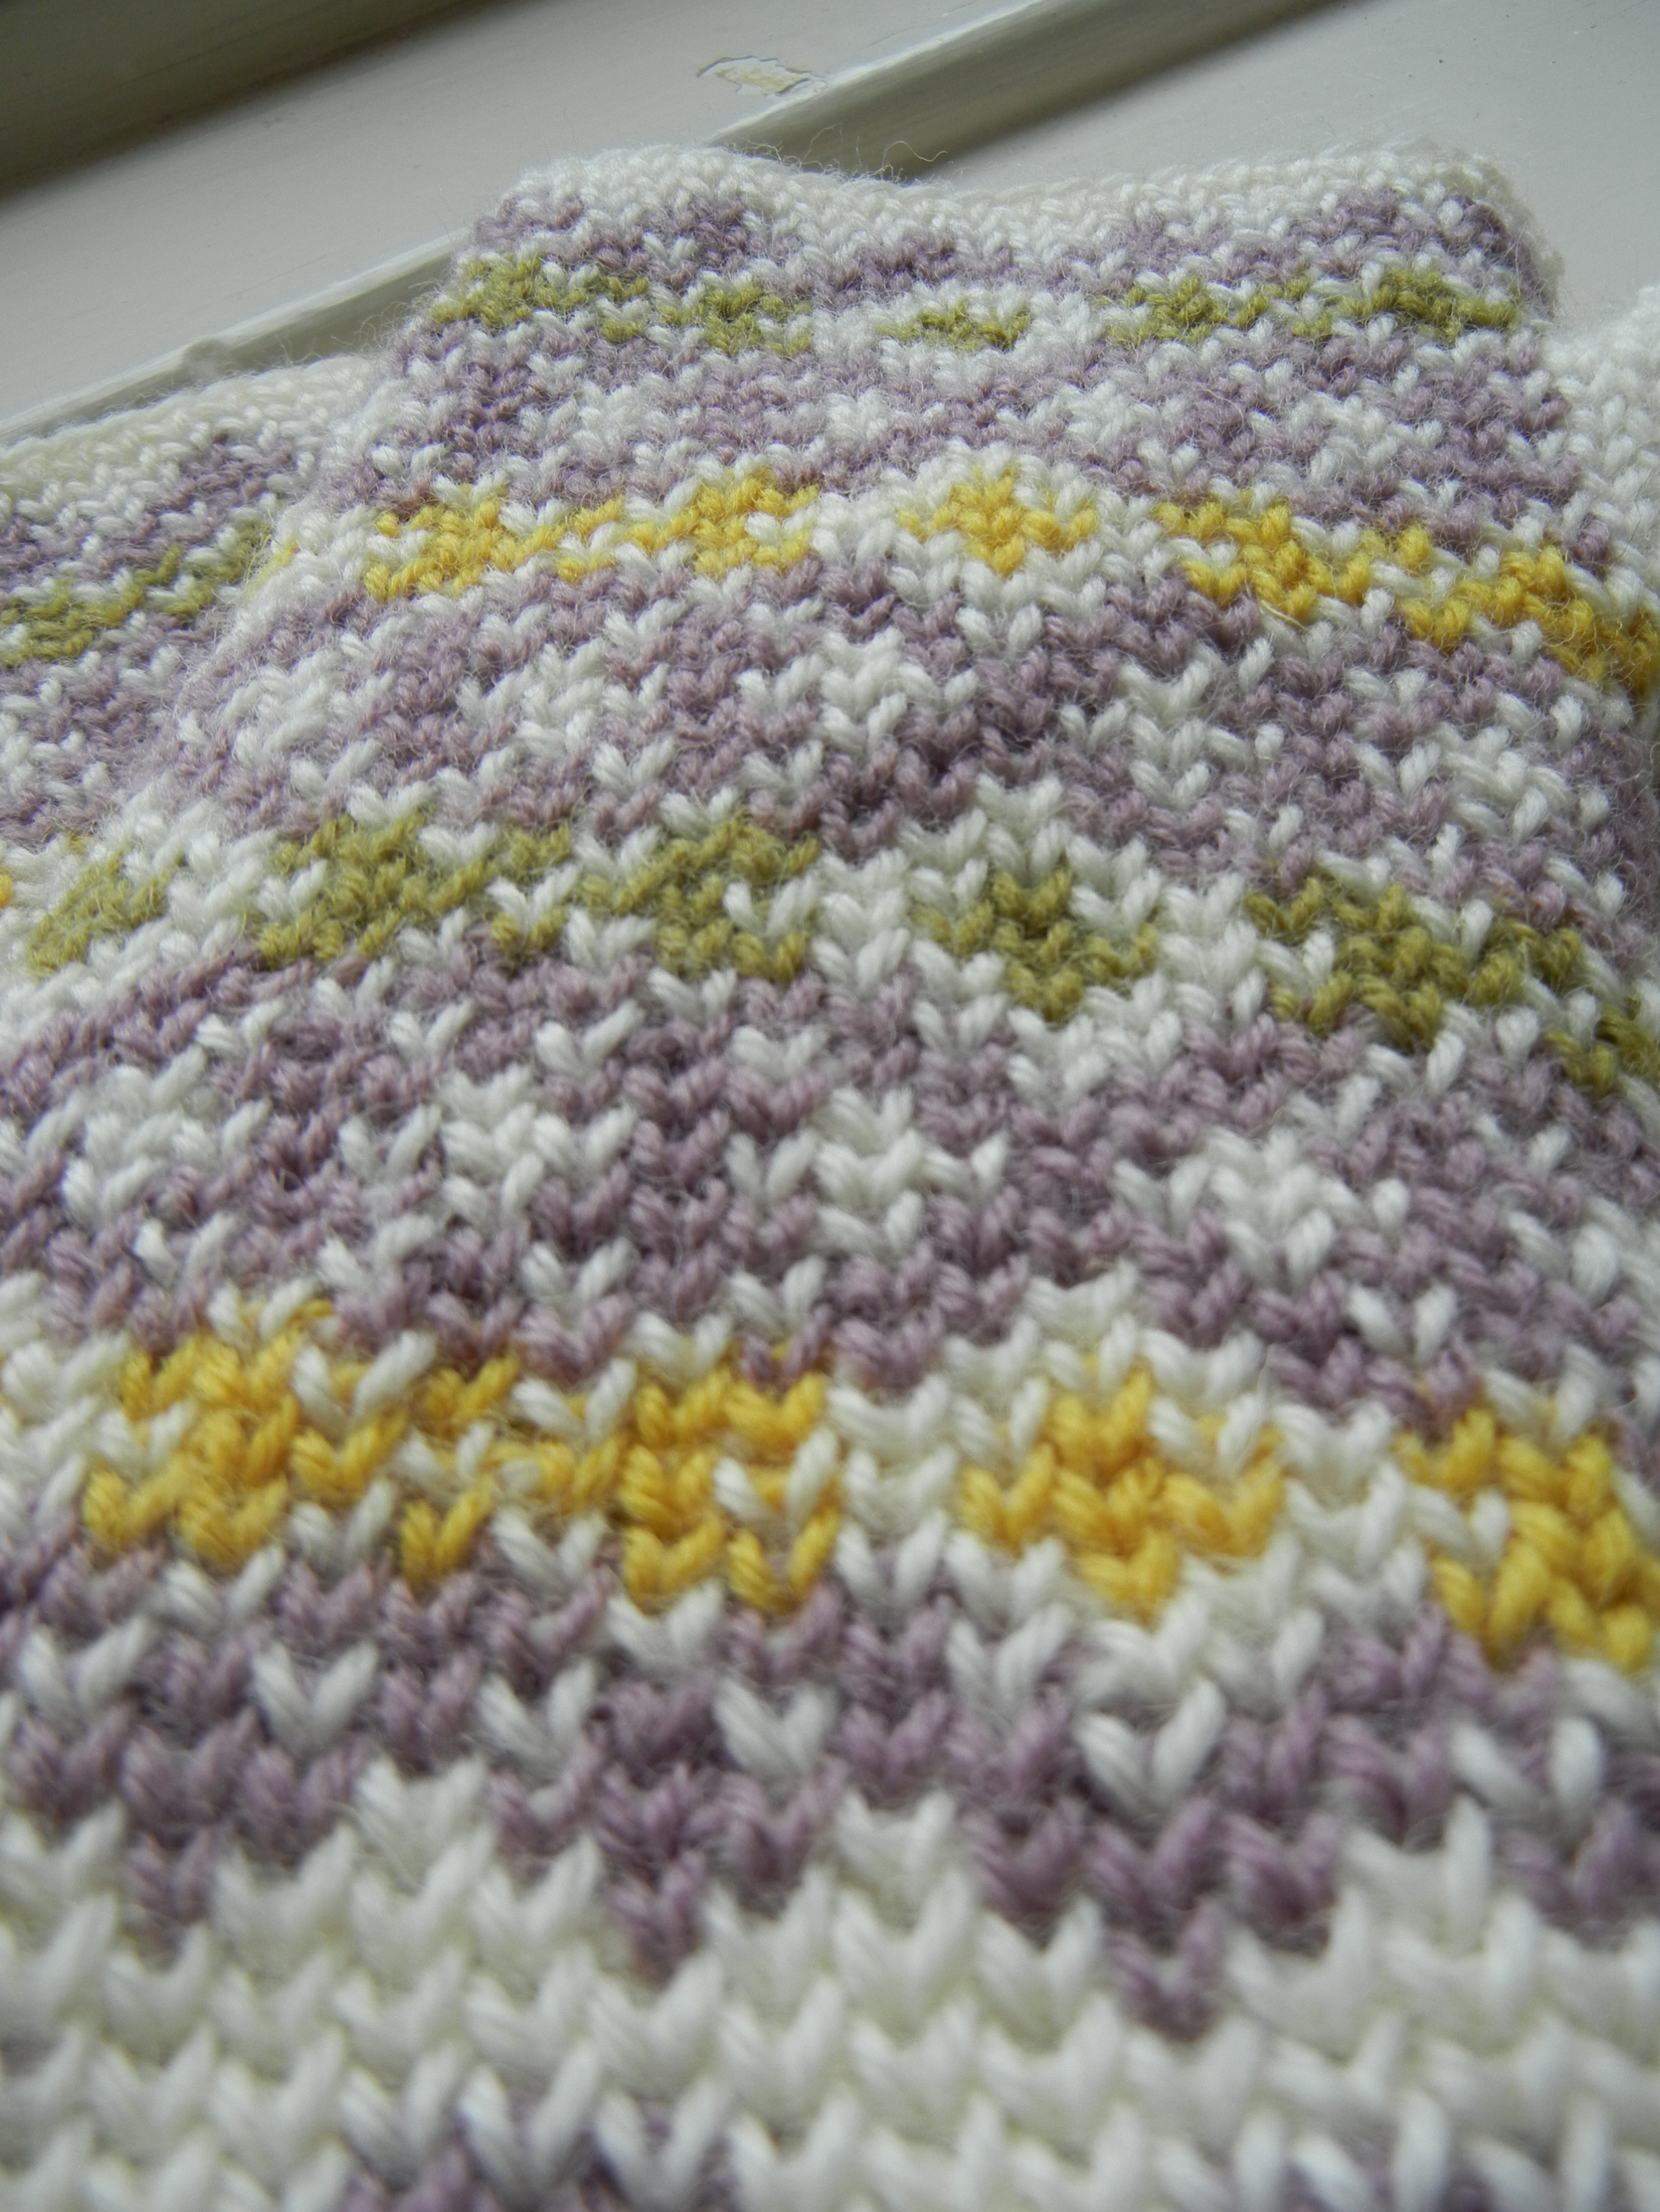
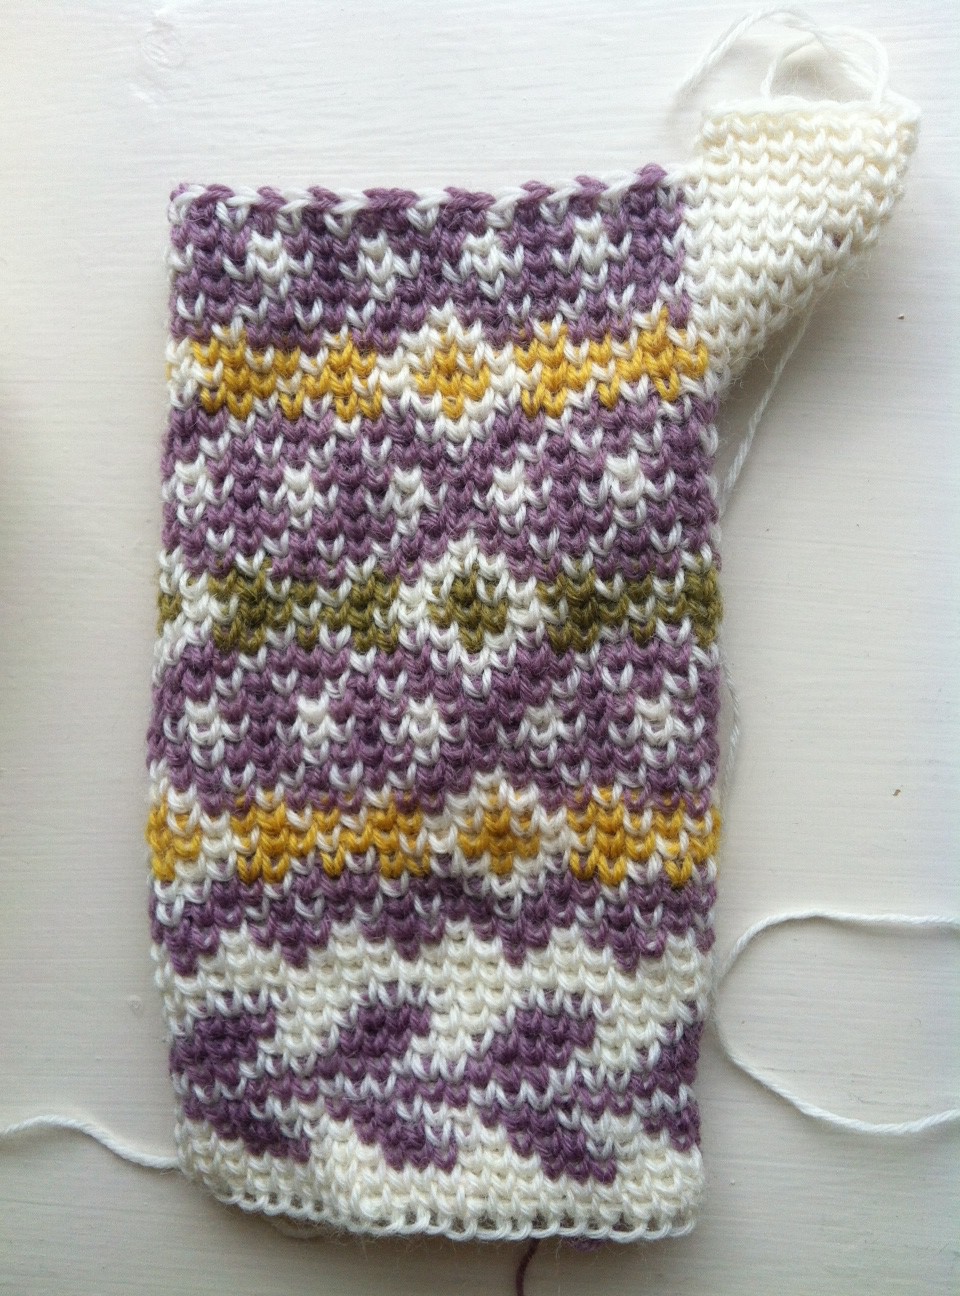
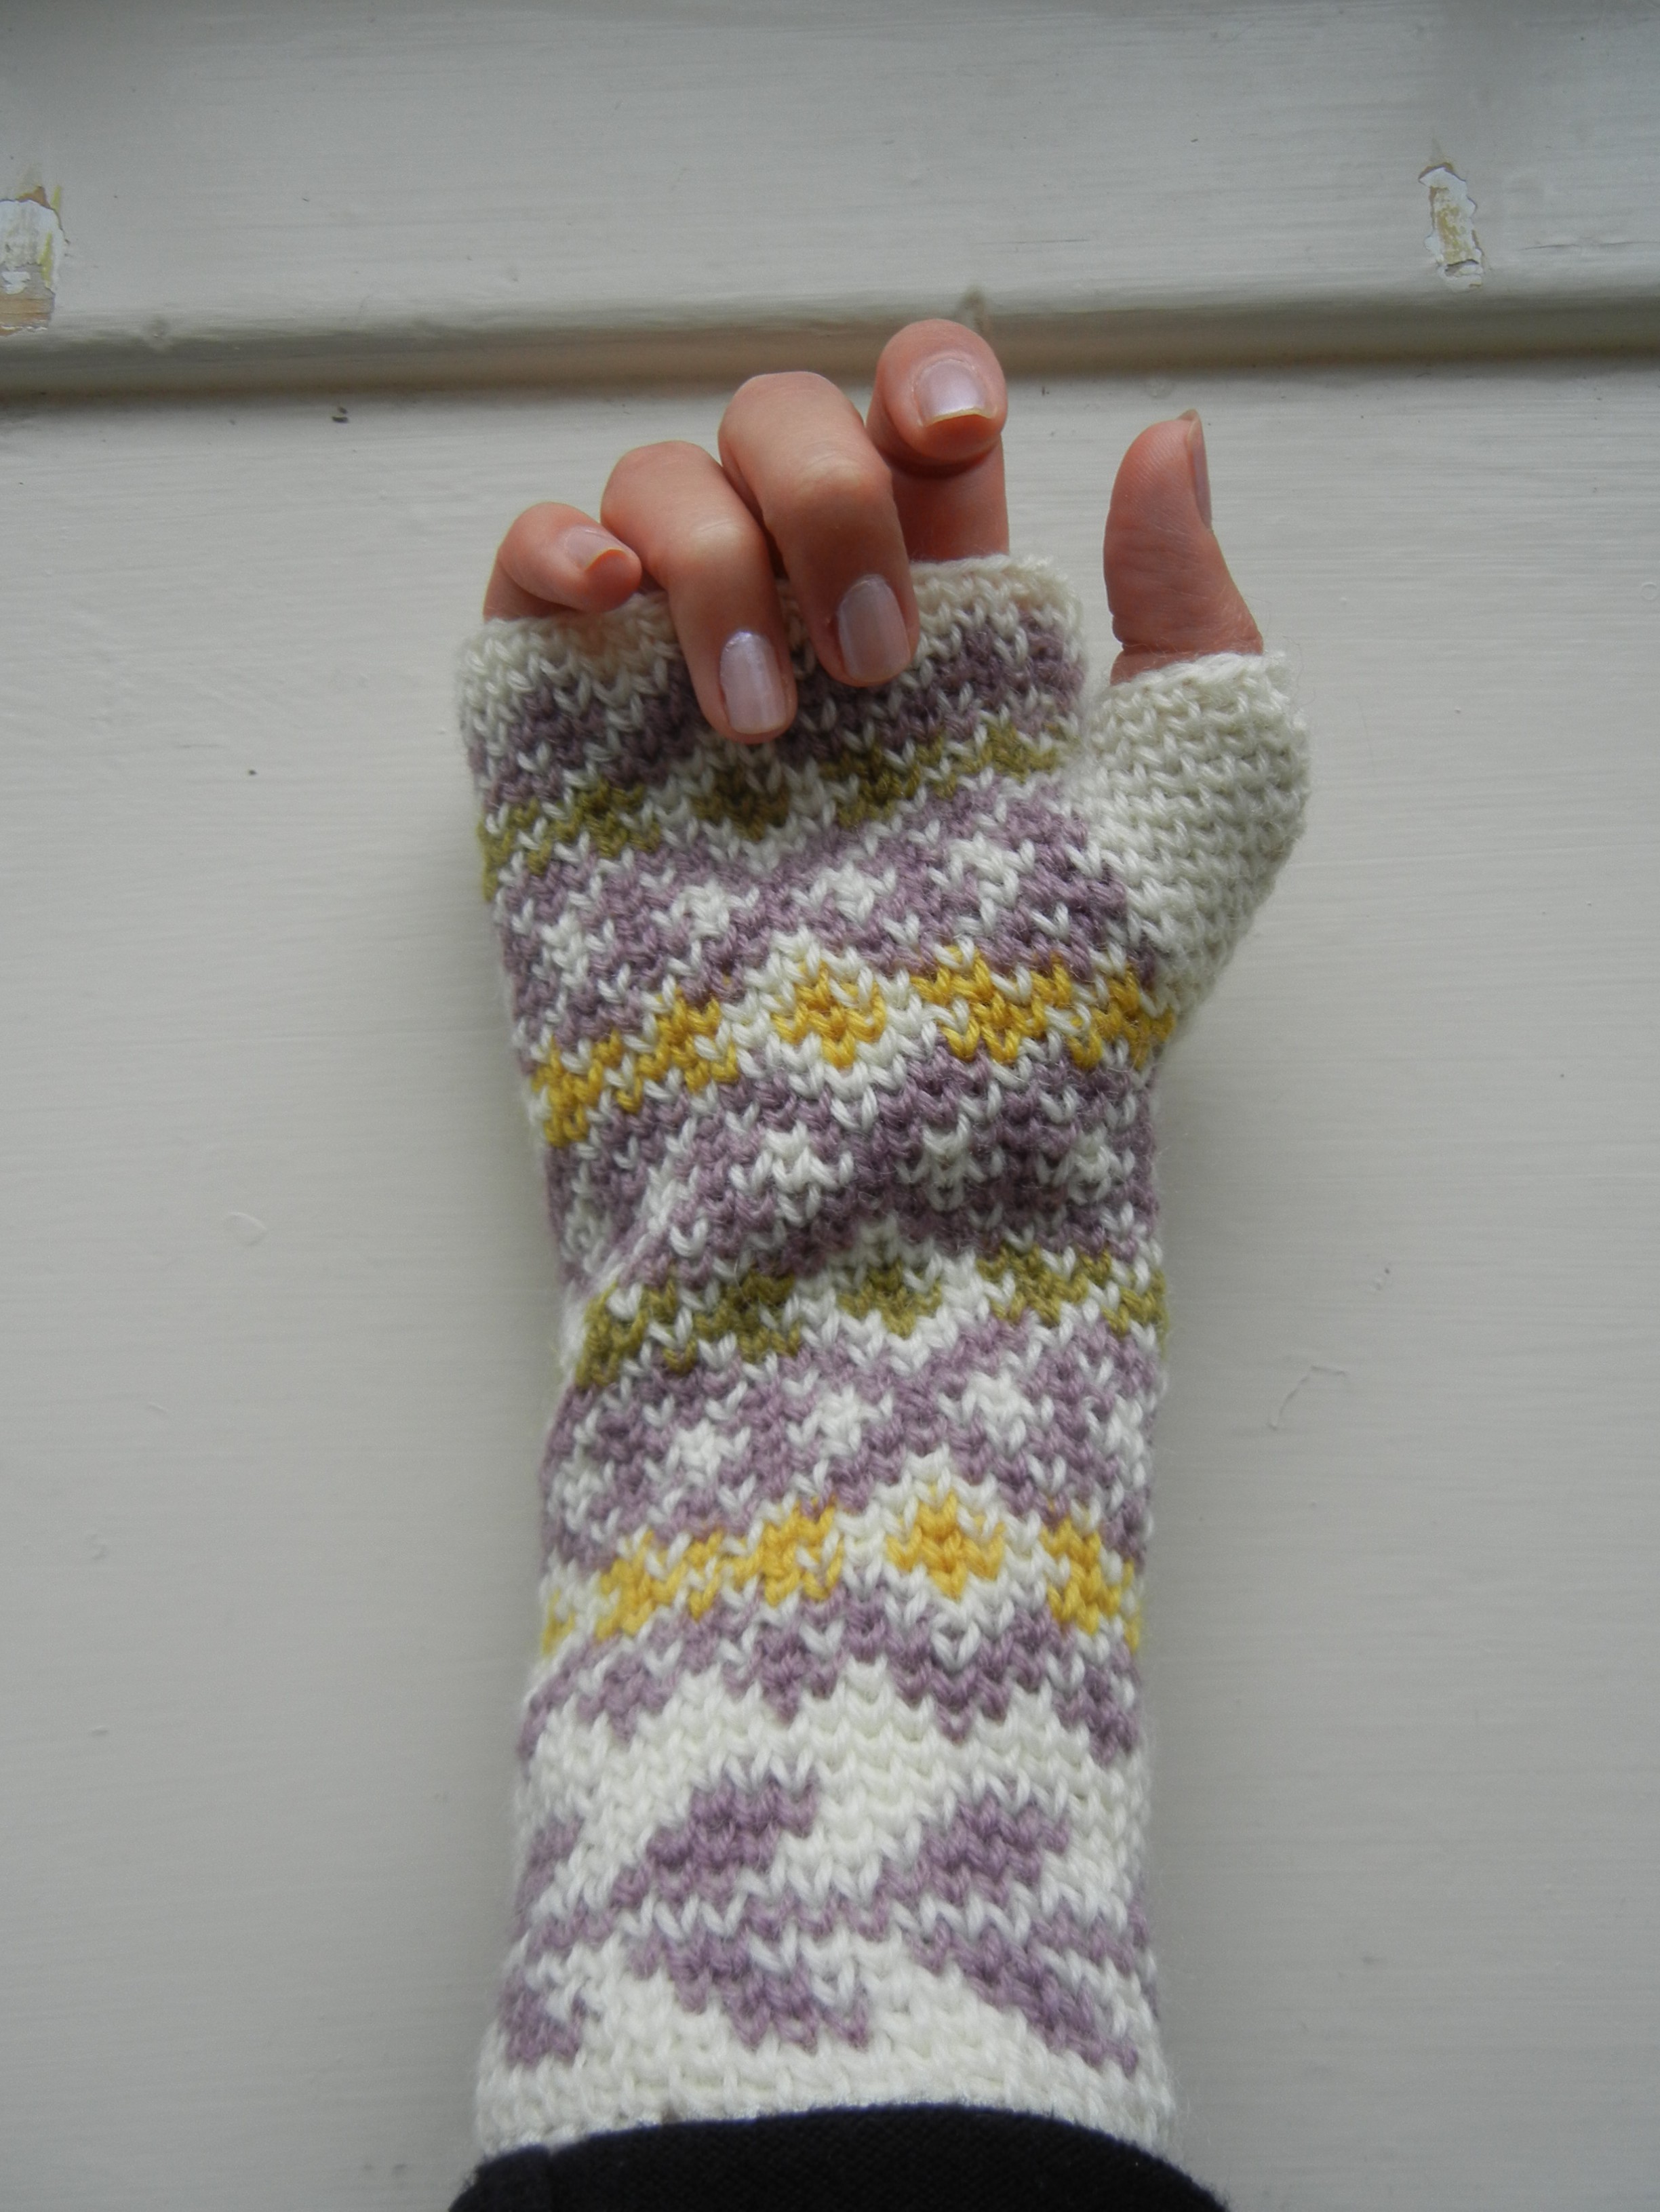
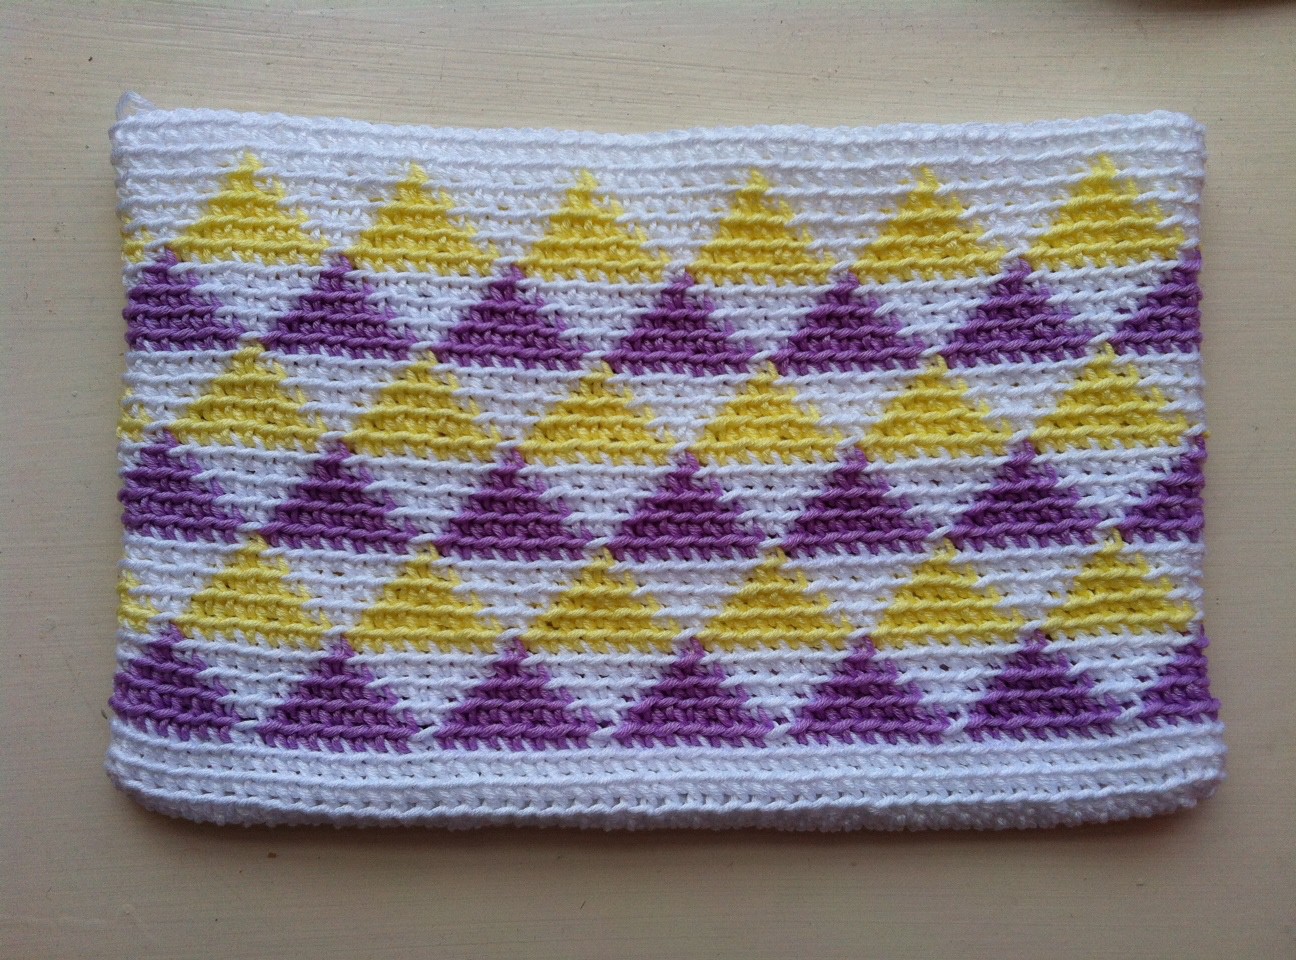
About the pattern, they are fingerless mittens with fair isle motifs using waistcoat stitch. I came across this stitch while looking in Google for ways to work fair isle patterns with crochet. I found a very nice and detailed explanation of the stitch here if you want more information, and it is a lot better than my tutorial 😛 The pattern is worked in the round and leaving the unused colour as strands in the back.

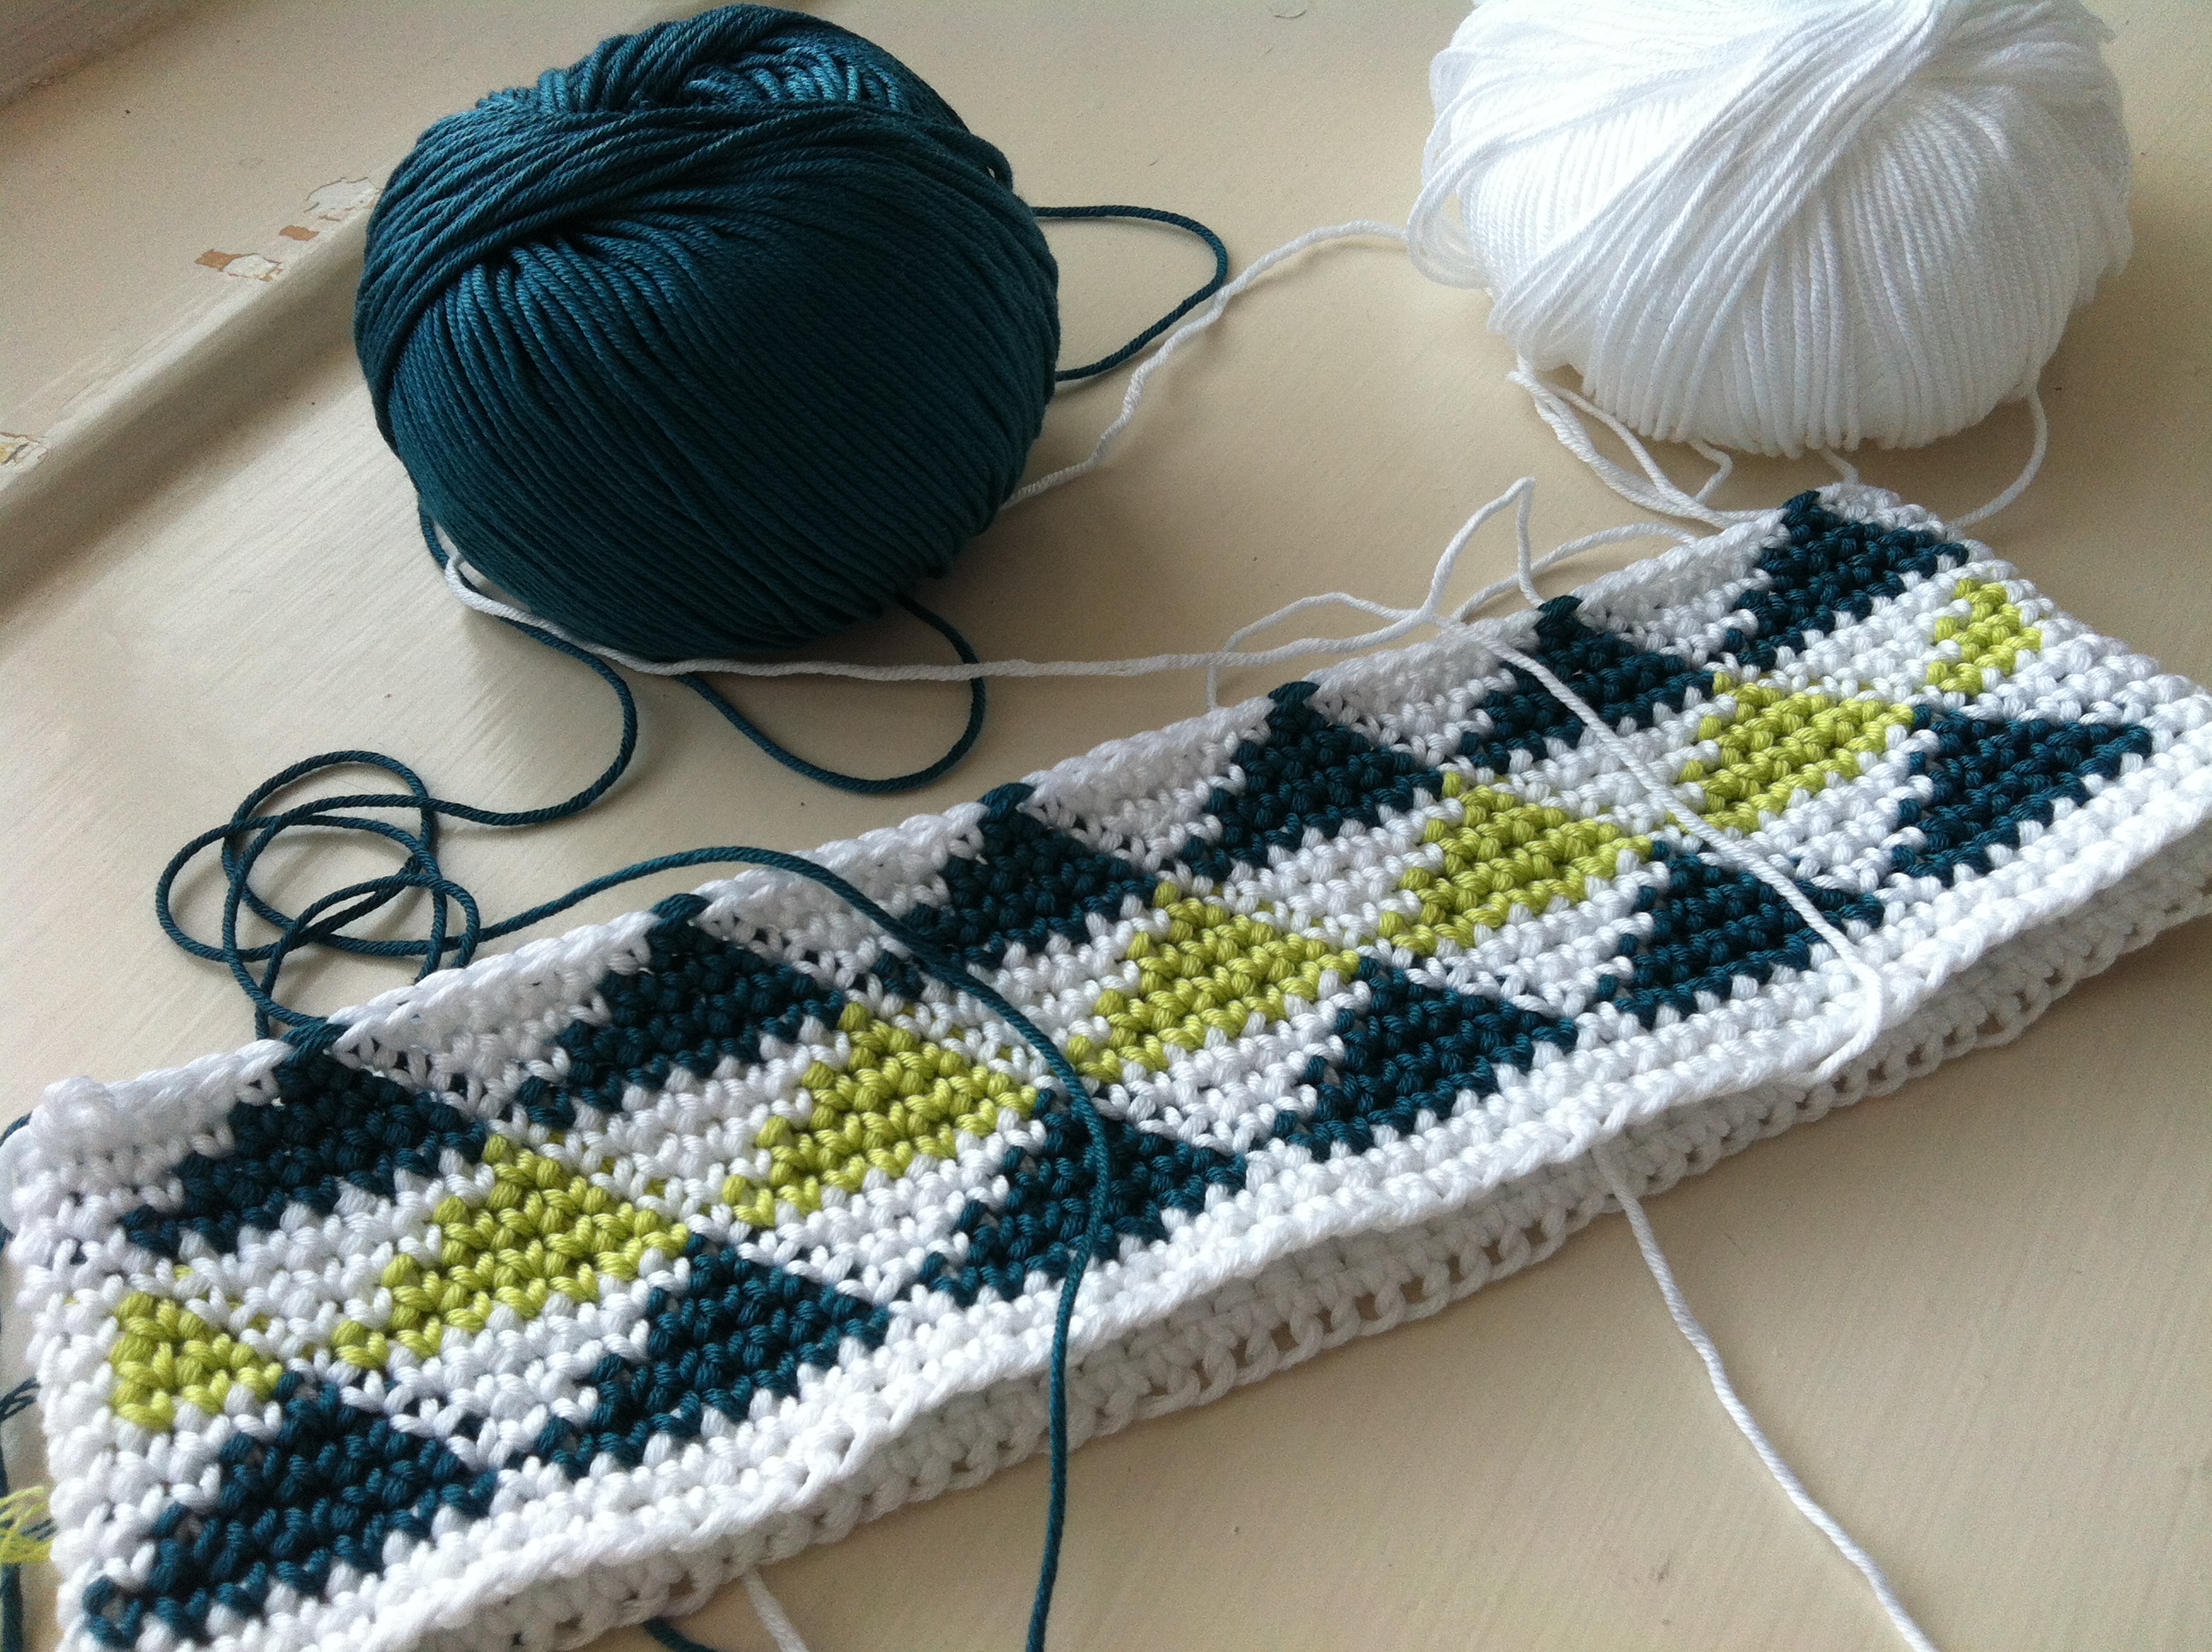
The yarn is West Yorkshire Spinners in 4 ply and King Cole Merino. If you are in the Edinburgh area you can get it from Jess at Ginger Twist Studio. The pattern doesn’t use much yarn so you will have plenty left for another project and I already have something in mind for the leftovers so stay tuned!
This first part of the tutorial will take you up to right before the thumb, so you will have plenty to do before I post the second part.
Autumn Diamonds Tutorial
Size and gauge
Circumference: 20 cm
Gauge: Crochet 11 waistcoat stitches and 13 rows with a 4mm hook to obtain 5cmx5cm.
Gauge in this pattern is not essential. Fair isle chart is repetitive and you can add necessary stitches for your size and fill in the pattern in a way that satisfies you. HOWEVER, PLEASE NOTE THE FABRIC MADE WITH THIS STITCH DOESN’T STRETCH, so please take that into account when deciding how many stitches to do.
Materials
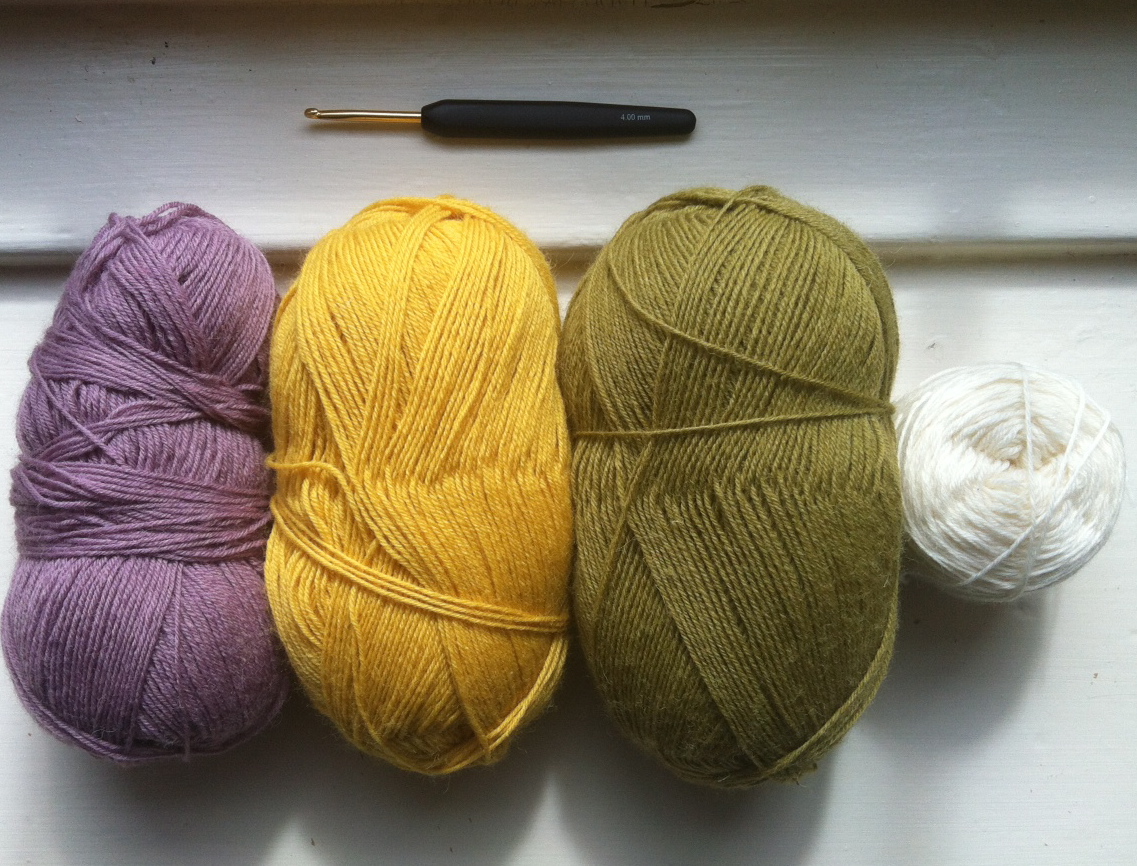
50g King Cole Merino in Aran (Colour A)
West Yorkshire Spinners Signature 4 ply – 1 ball in Pennyroyal (Colour B), 1 ball in Butterscotch (Colour C), 1 ball in Cardamom (Colour D) –> You will use VERY little of the last two yarns so you could use something from your stash if you don’t want to spend more on them.
4mm hook
Needle to weave in ends

Abbreviations
wst – waistcoat stitch
dc – UK double crochet
sl st – slip stitch
ch – chain
Instructions
We will be following the following chart for the first part of the pattern which will take you right before we start the thumb. You read it bottom-up, right to left, each row of the chart is actually a Round and each square is a wst. It starts from Round 3, first couple of rounds are simply two rounds using colour A (white). The tutorial will show you how to do the first few rounds so that you learn the technique and can apply it for the rest of the chart. It is the same pattern for both mittens.
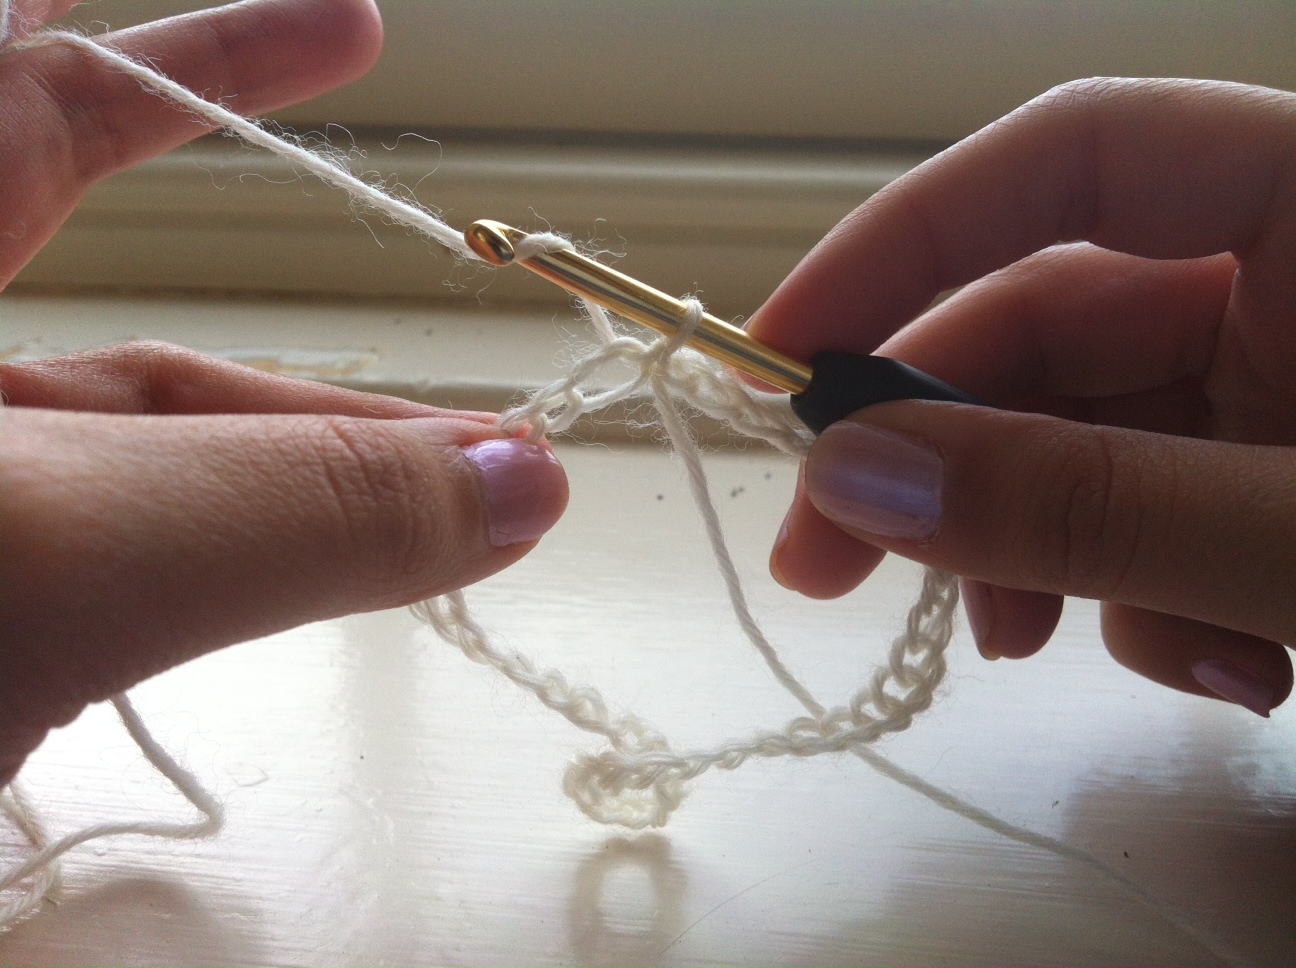
1. Foundation chain: With color A, chain 42

2. Making sure you don’t twist the chain, join the last chain to the first with a slip stitch


3. Pull on the yarn very tight to make the slip stitch as small as possible.

4. Chain 1, and then pull on the yarn tight again to make the chain as small as possible. These last two steps will be repeated for every round to make the seam less visible.


5. Round 1: Dc in first chain and every chain across. You need to crochet loosely all through the pattern to make it easier to do the waistcoat stitch.


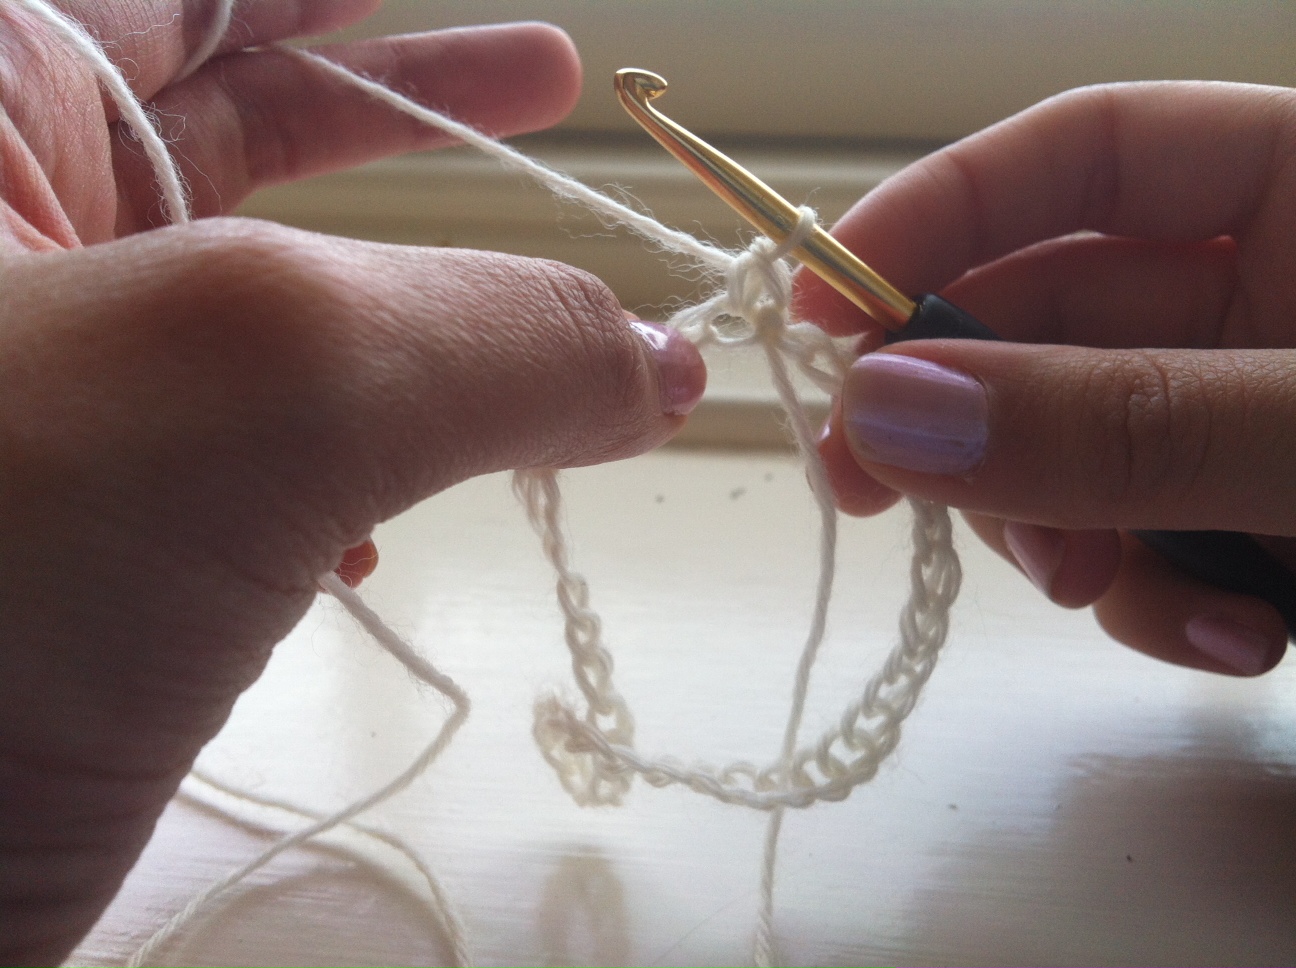
6. Slip stitch to first dc, remember to pull tight. Chain 1 and pull tight again. *It was pointed out by someone trying this pattern that it might be easier to start with foundation double crochet rather than what I have showed here, so please feel free to try this out. Here is a tutorial of foundation double crochet.

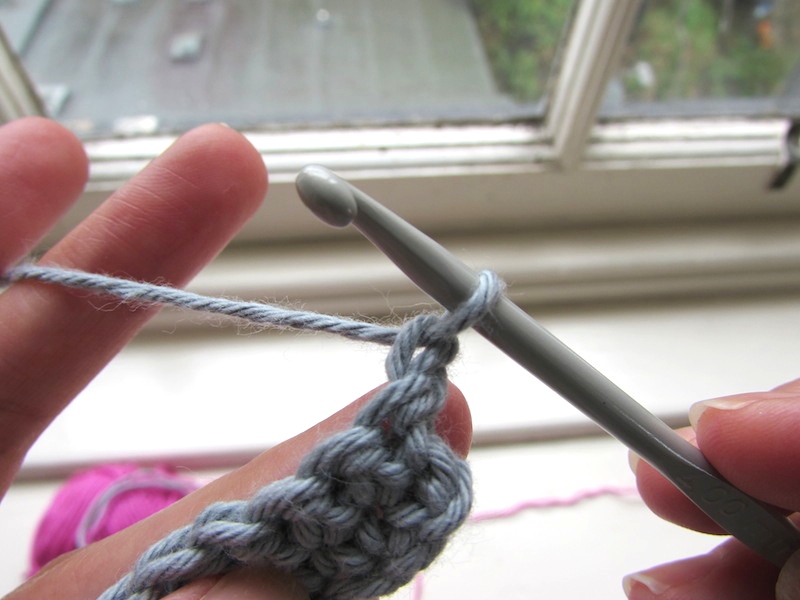
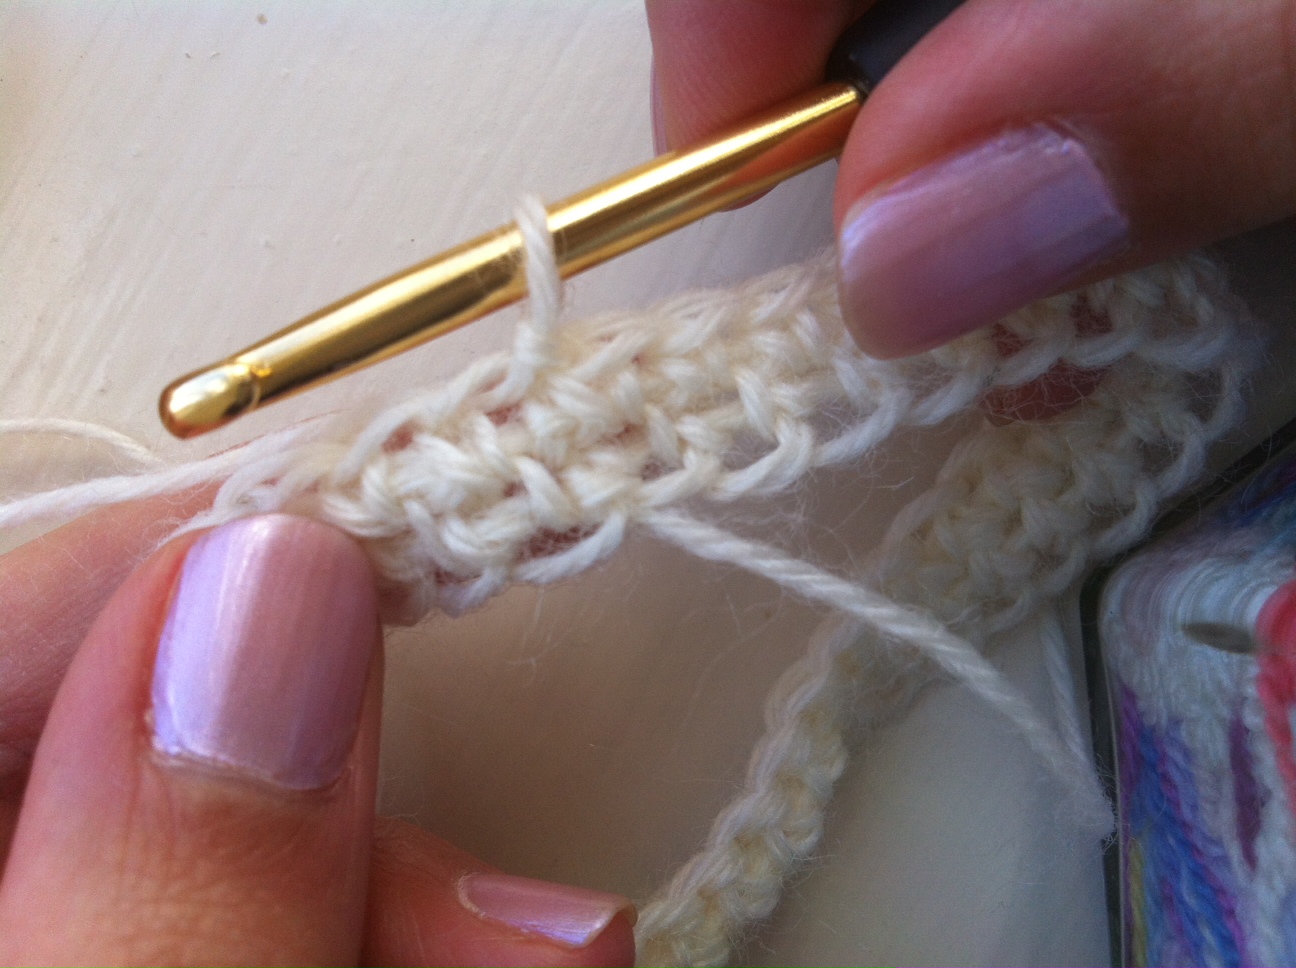
7. Round 2: On the first stitch, insert your hook in the post of the stitch, between the two strands that make the “V”. Yarn over and pull up a loop.


8. Yarn over and pull through two loops on hook. First wst done! (Here is a better tutorial for this stitch if it is still not clear)

9. Wst in next st and each st across.


10. Slip st to first st, and chain 1. Remember to pull tight!


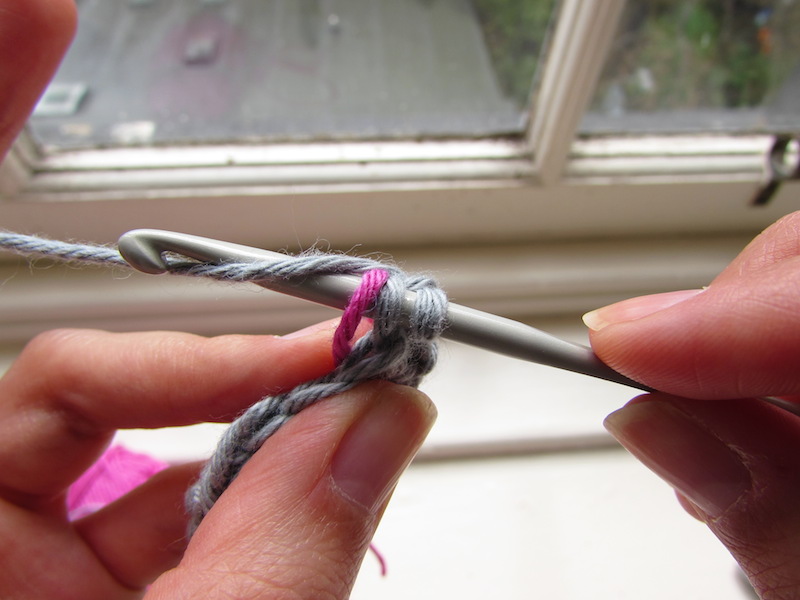
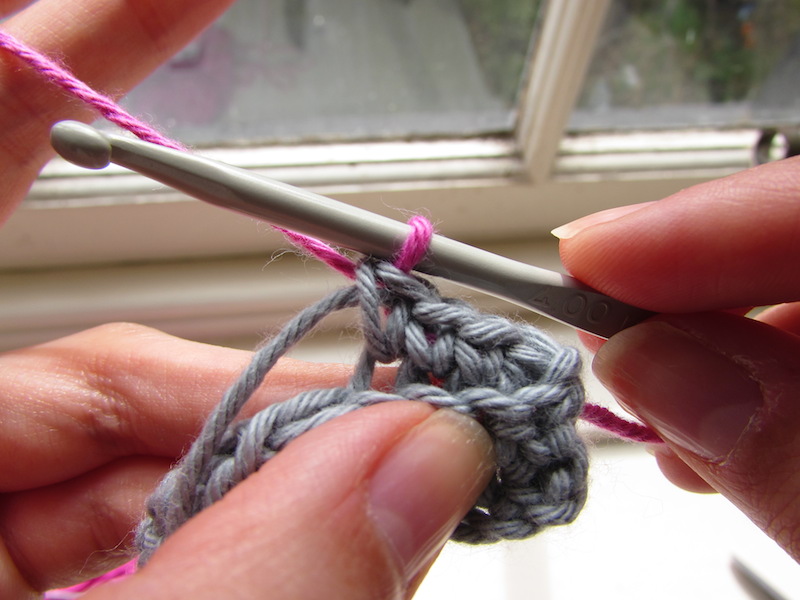
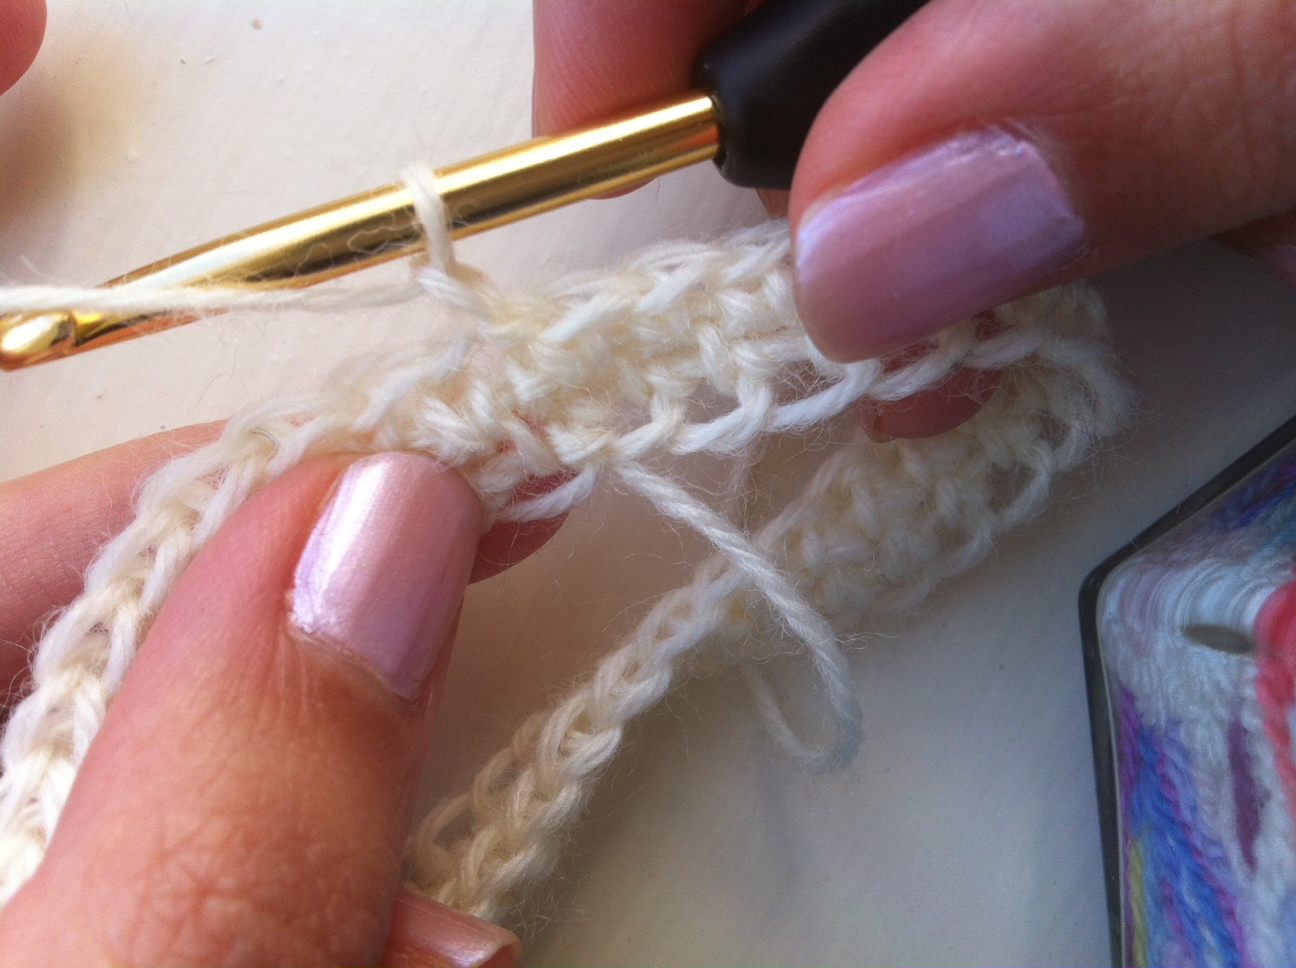
11. Round 3: We will introduce a new colour in the third round. The chart indicates that the first stitch is in colour A, and then you have 3 stitches in colour B. I will show you next how to make clean colour changes. Start your first wst: insert your hook inside the V, yarn over and pull up a loop.

12. Here is when you need to change colours. Keeping your two loops on the hook, make a slip knot with colour B.


13. Now finish the wst by pulling the new loop through the two you already had.


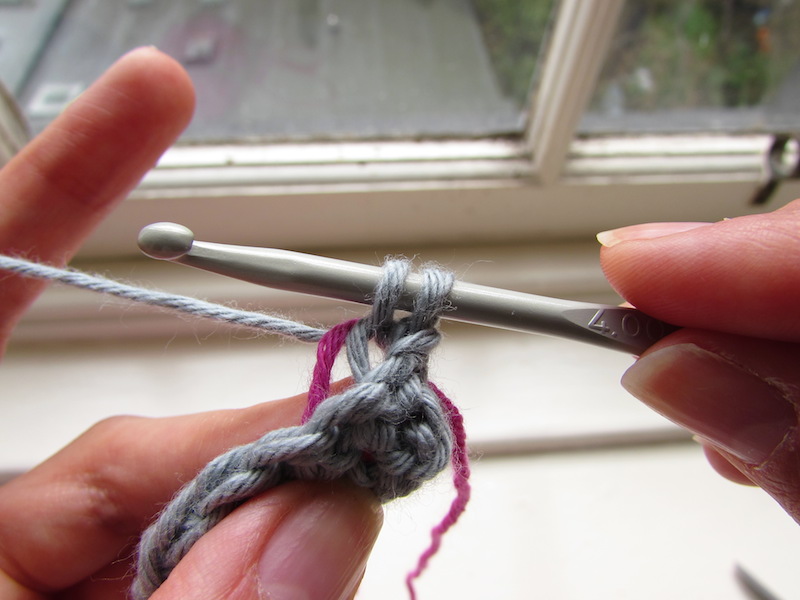
14. You just learned that you need to change colours in the last stitch of the previous colour. I will show you next how to not get your yarns tangled and get nice strands. Now the chart indicates we need 3 wst with colour B, then 3 in colour A and so on. So let’s do two stitches in colour B…


15. Start the third stitch up, insert hook in V, yarn over and pull up a loop. Now is time to organise your colours: put the white ball in front of you and the purple on the left. Make sure they are not tangled.


16. Drop colour B to your left, and grab colour A to finish the stitch. Pull colour A a bit to make sure that the last stitch you did on that colour is finished nicely. Then yarn over (don’t pull too tight so strand is not too tense) and pull through the two loops.


17. Now we need 3 white st, so we will repeat for the white: 2 stitches…


18. …and we change colour on the third. Insert hook inside the V, yarn over and pull up a loop. Now drop colour A and make sure you leave it in front of you.


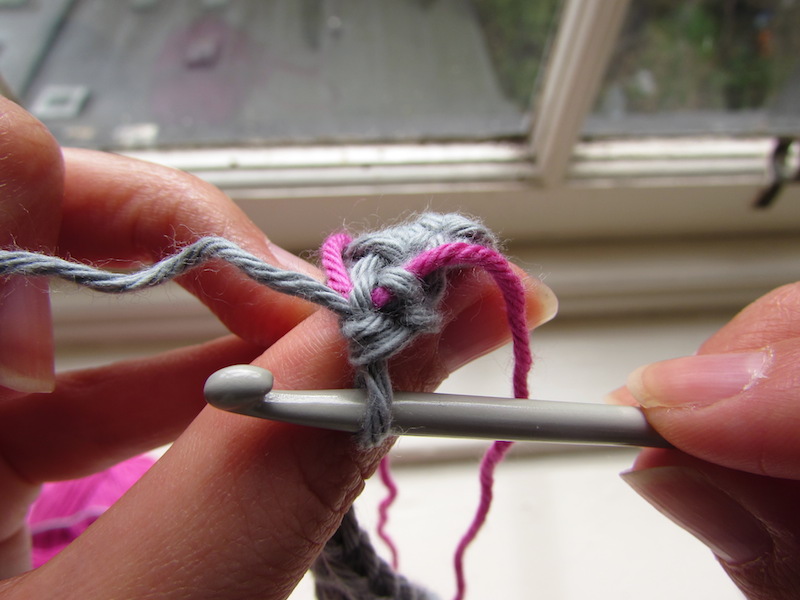
19. Now grab colour B again on your left. You will notice that colour B comes under colour A. If you keep your yarns where they are and change colours this way they will never get tangled up and you will get clean strands. Yarn over colour B and pull through both loops on hook.


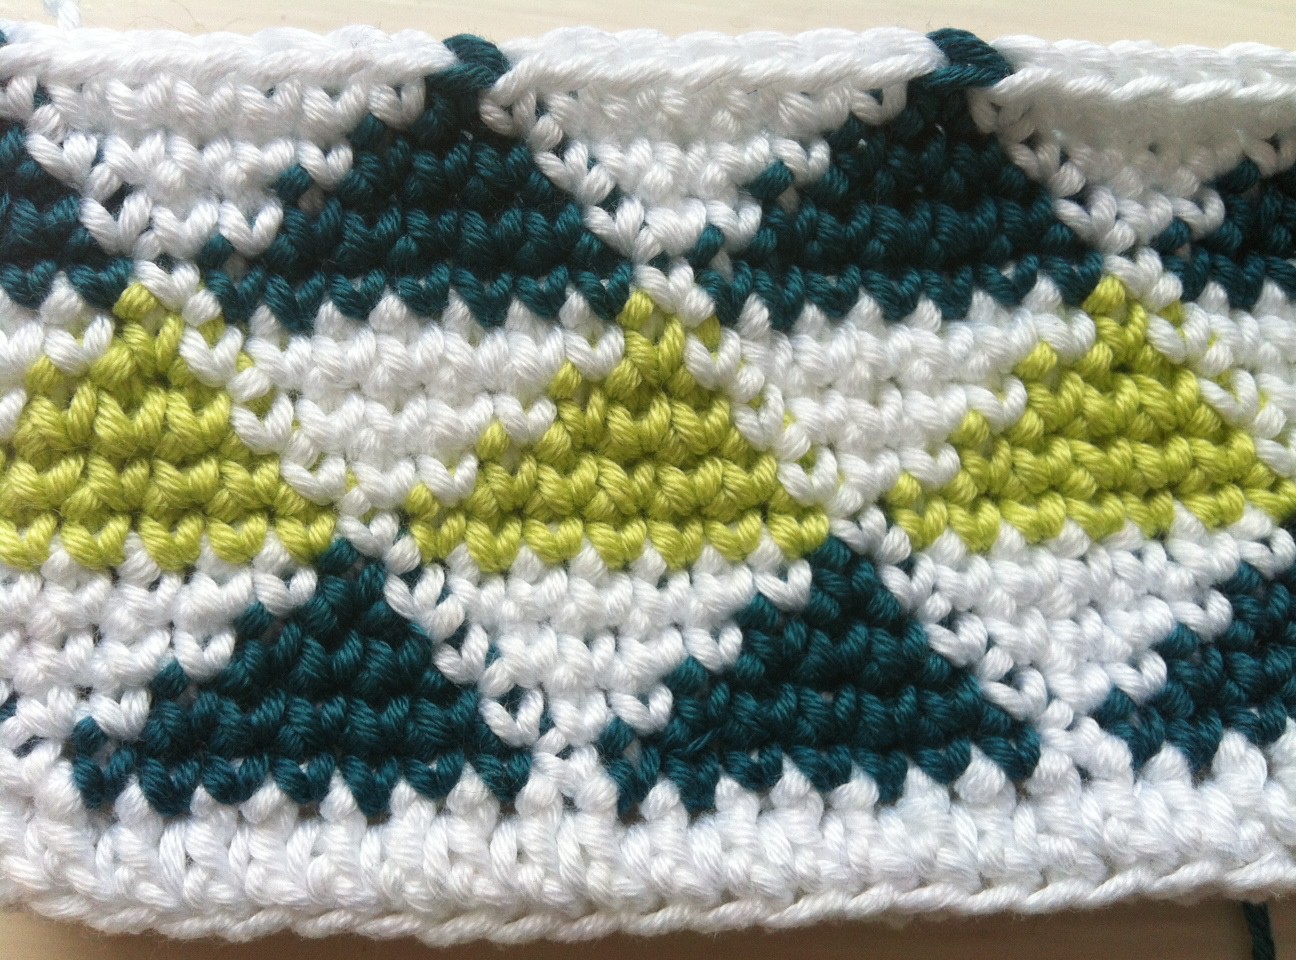
20. Your strands will look like this on the back. White ones will be higher and purple ones lower. Make sure that every time you pick up the new colour you pull on the yarn to make sure that the last stitch you made on that colour is finished nicely, but don’t yarn over with the new colour too tight or too loose so that the strands are not too tight that they will affect the tension or too loose that you might catch them too easily with something.

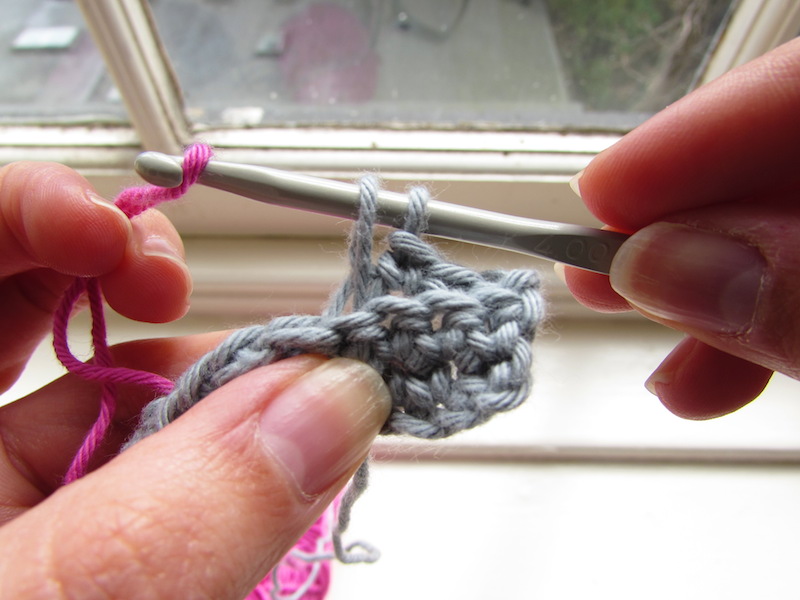
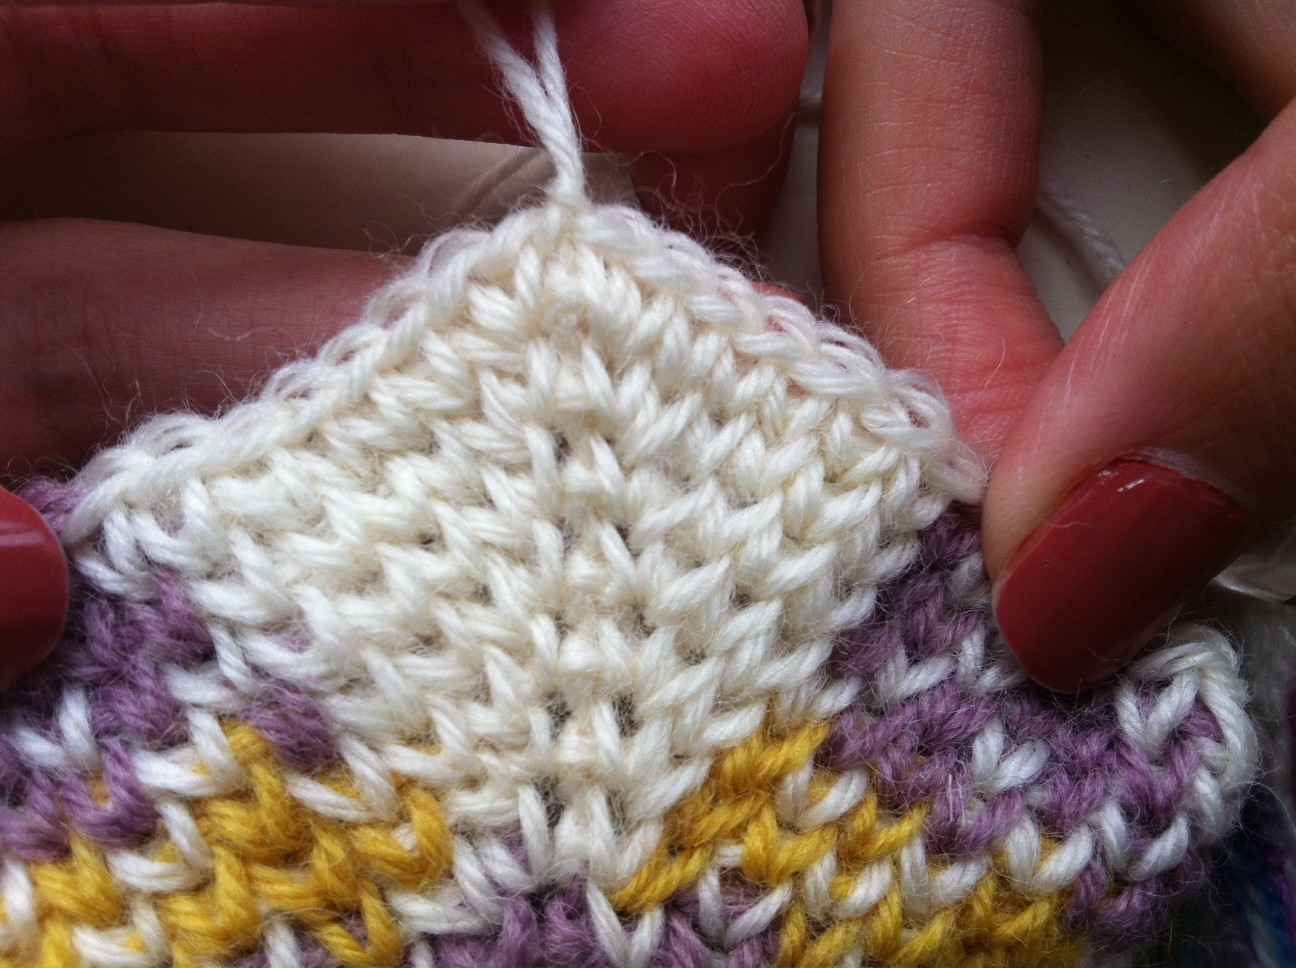
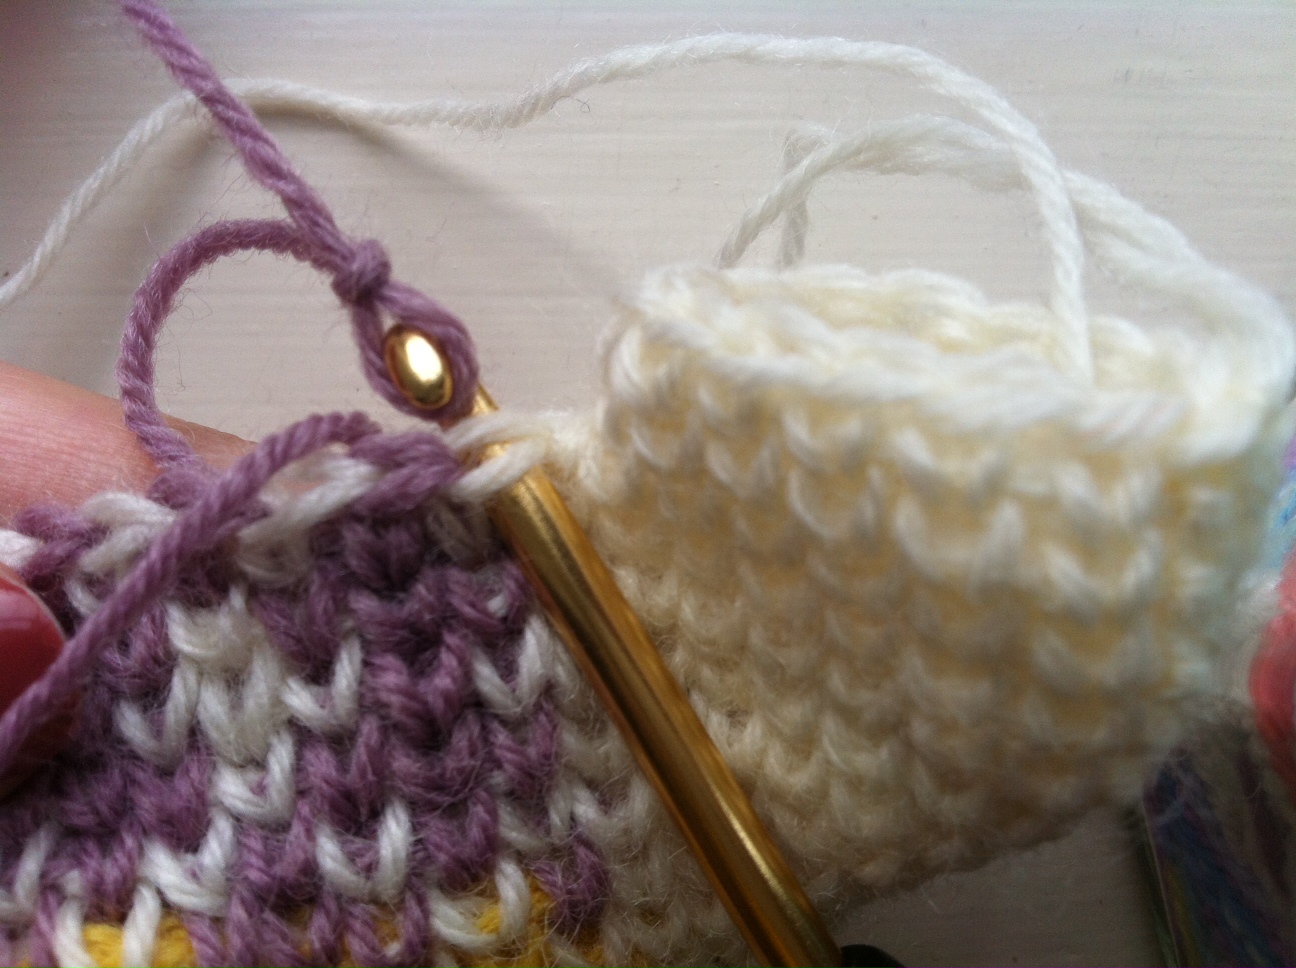
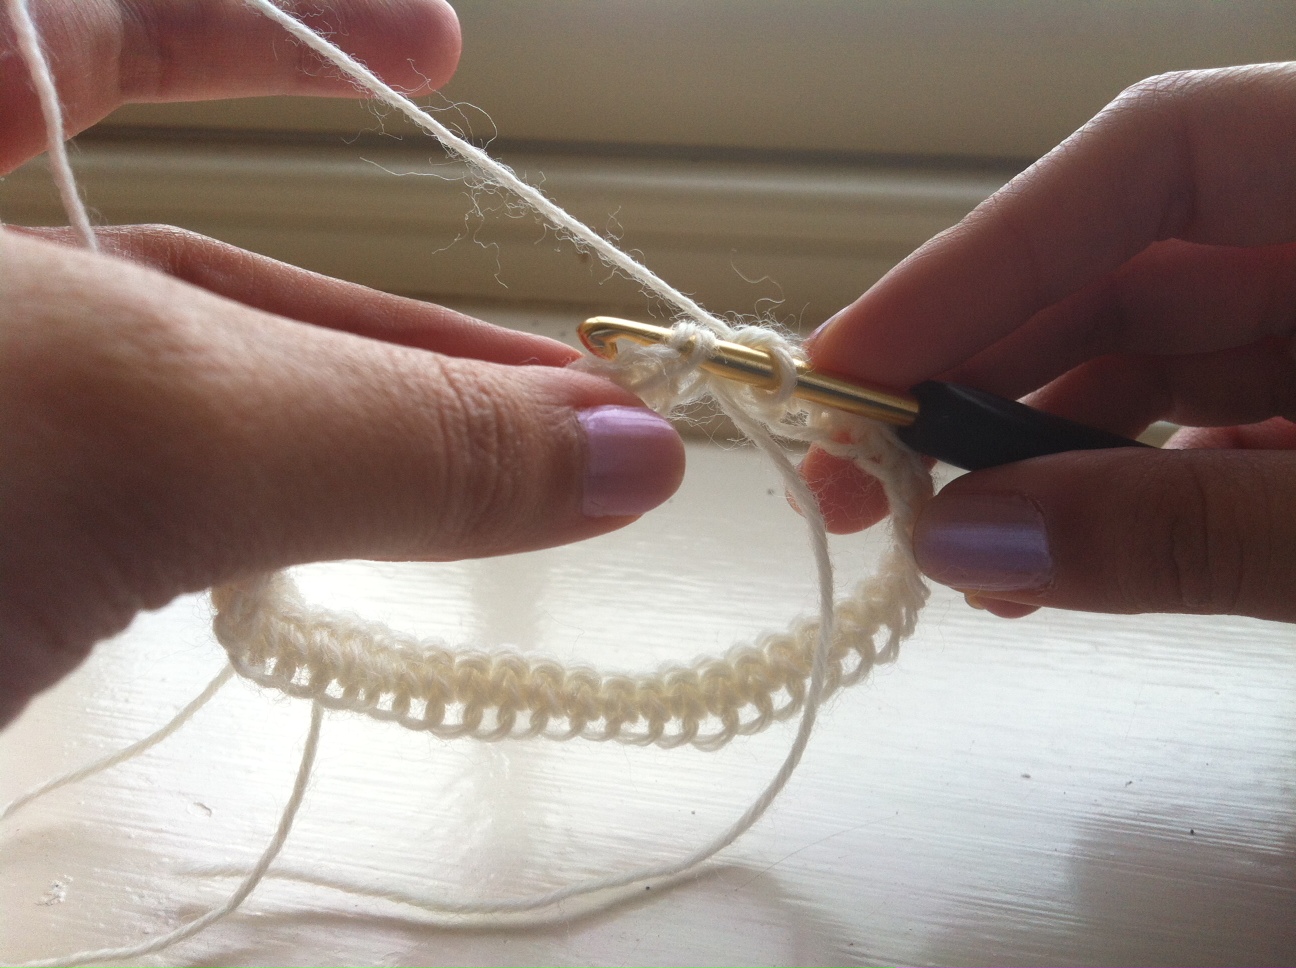
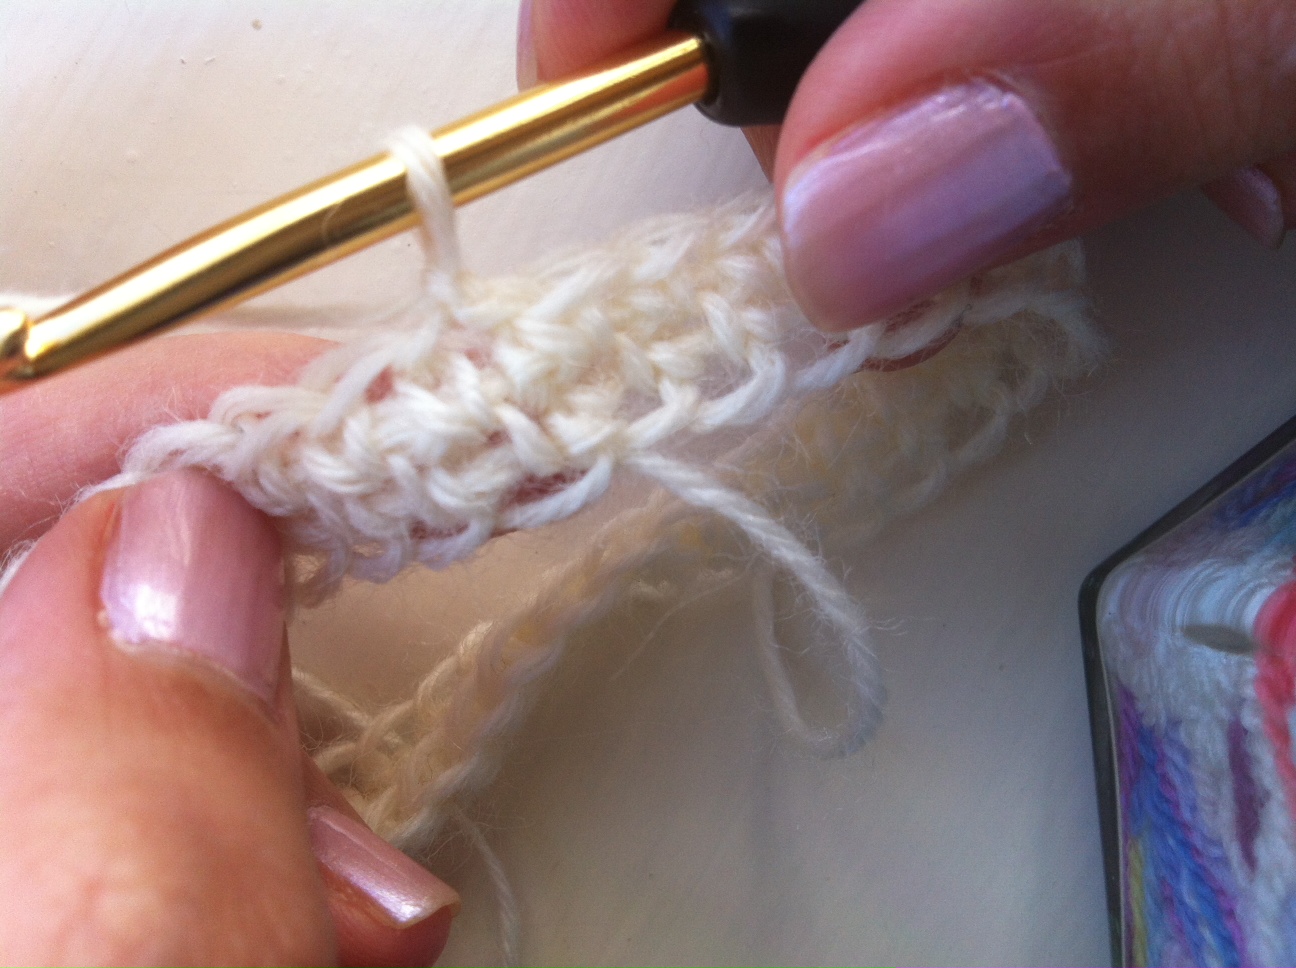
21. Continue with the chart until you finish the round. Slip stitch and chain 1, remember to pull tight. This is almost all the technique you need to continue with the chart. There only a couple of things left to show you: how to keep the length of your strands in check and what happens when you finish a round with one colour and have to start the next one with another. Let’s begin with the first one. Continue with the chart until the last stitch of Round 6, your mitten should look like this so far.

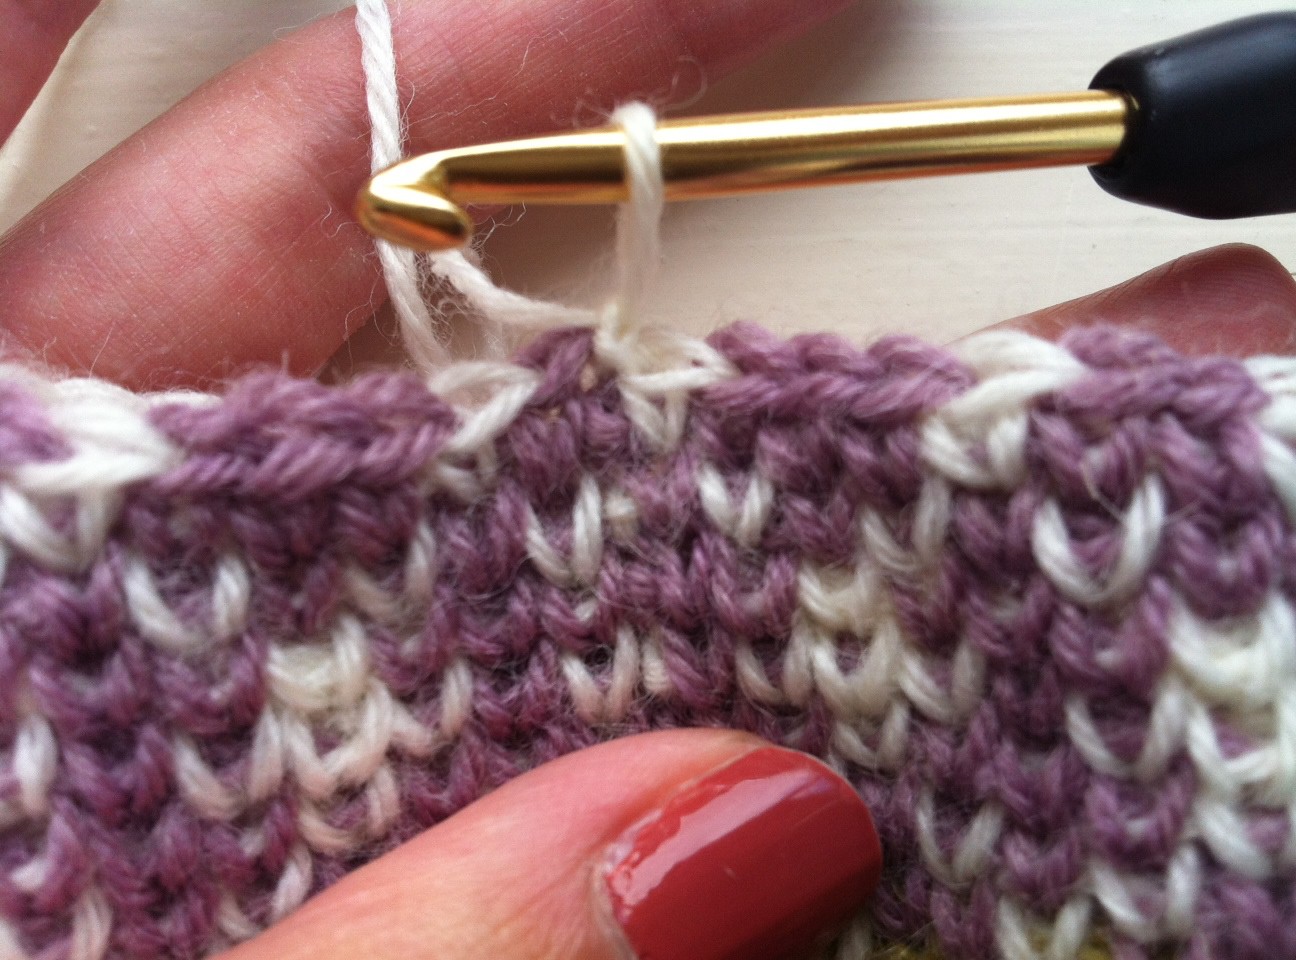
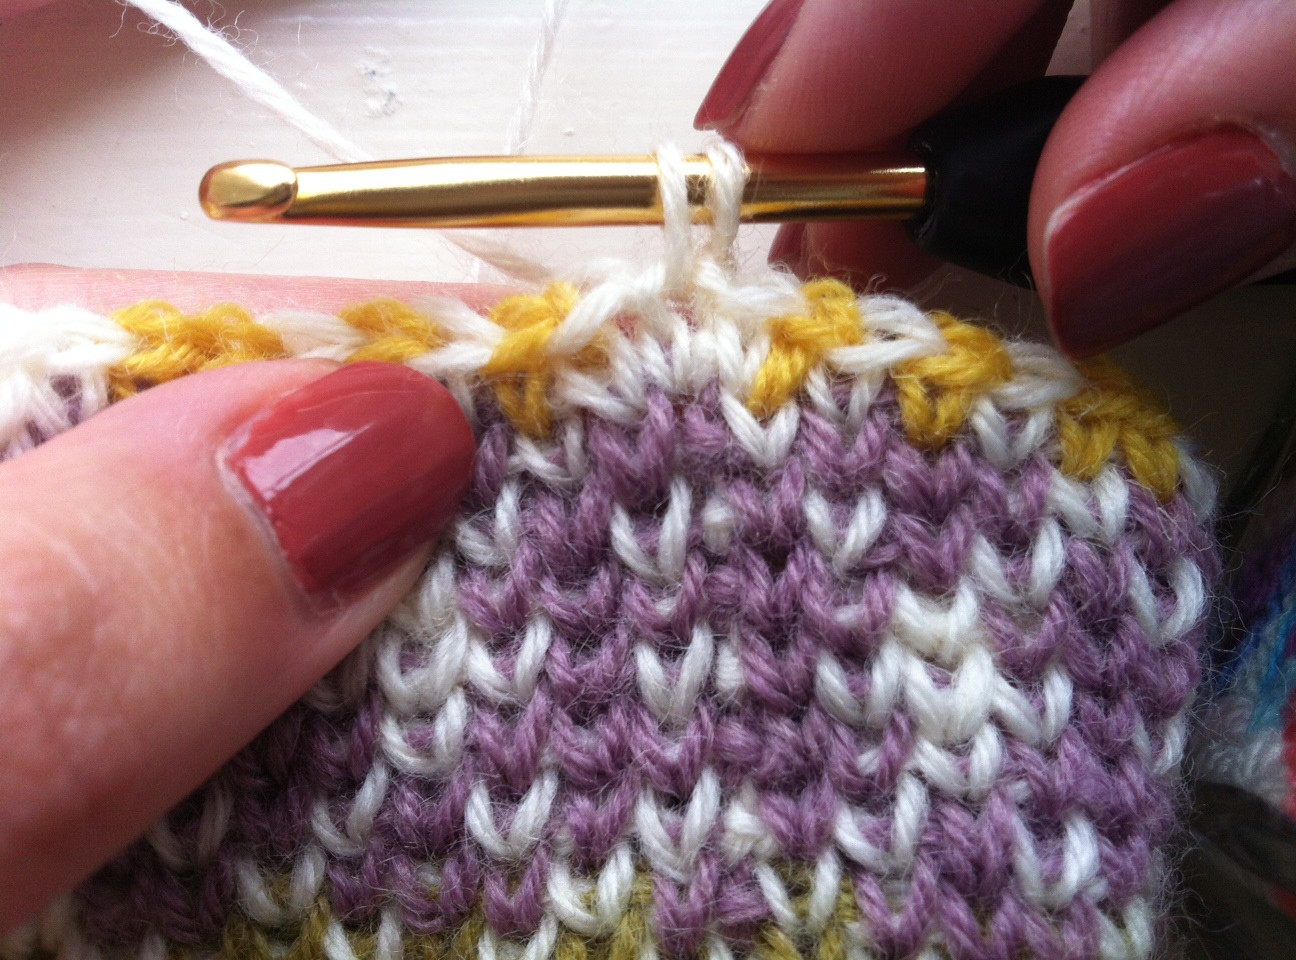
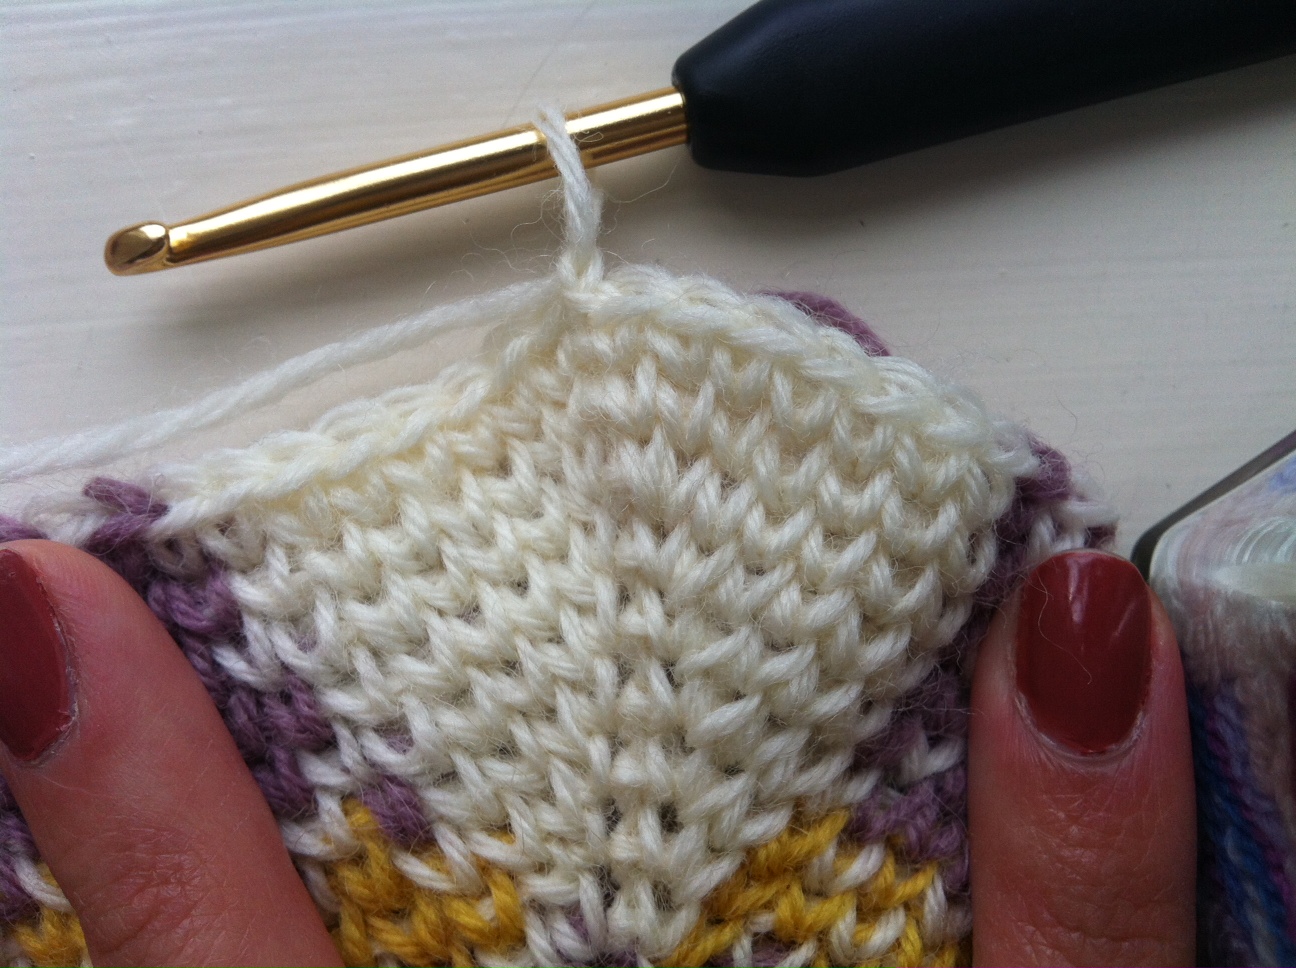
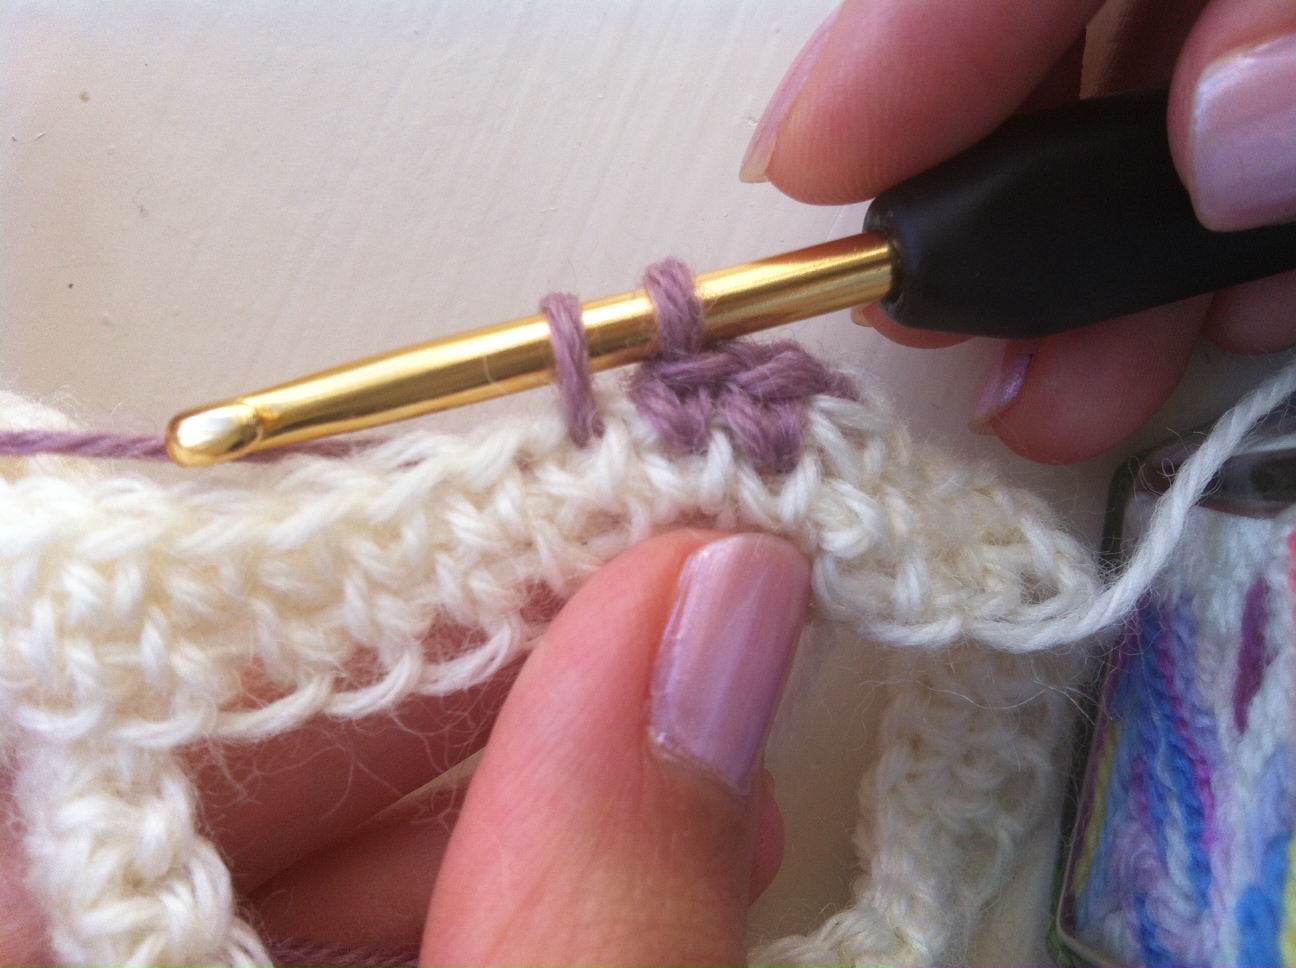
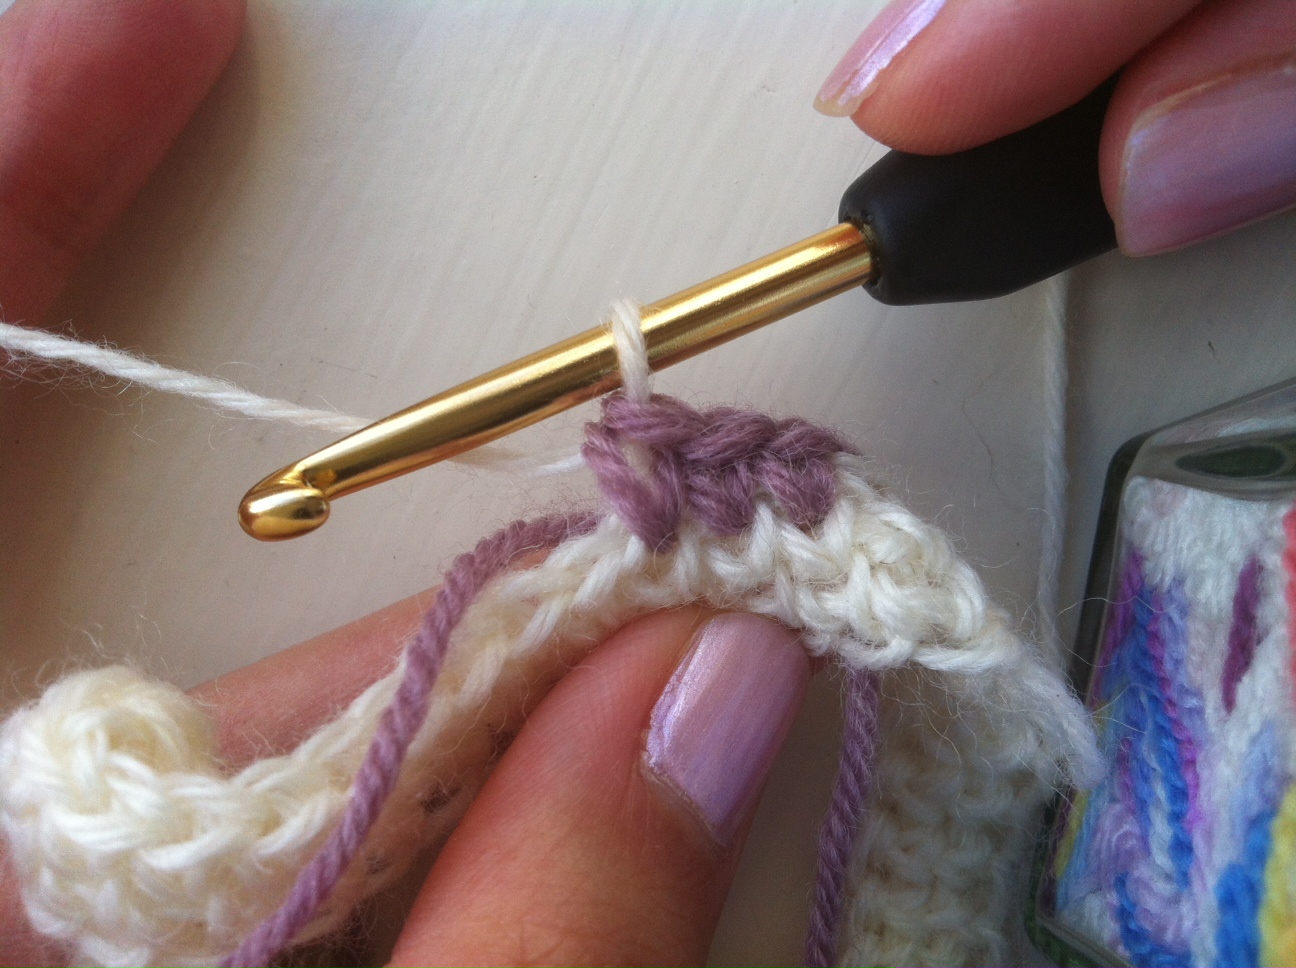
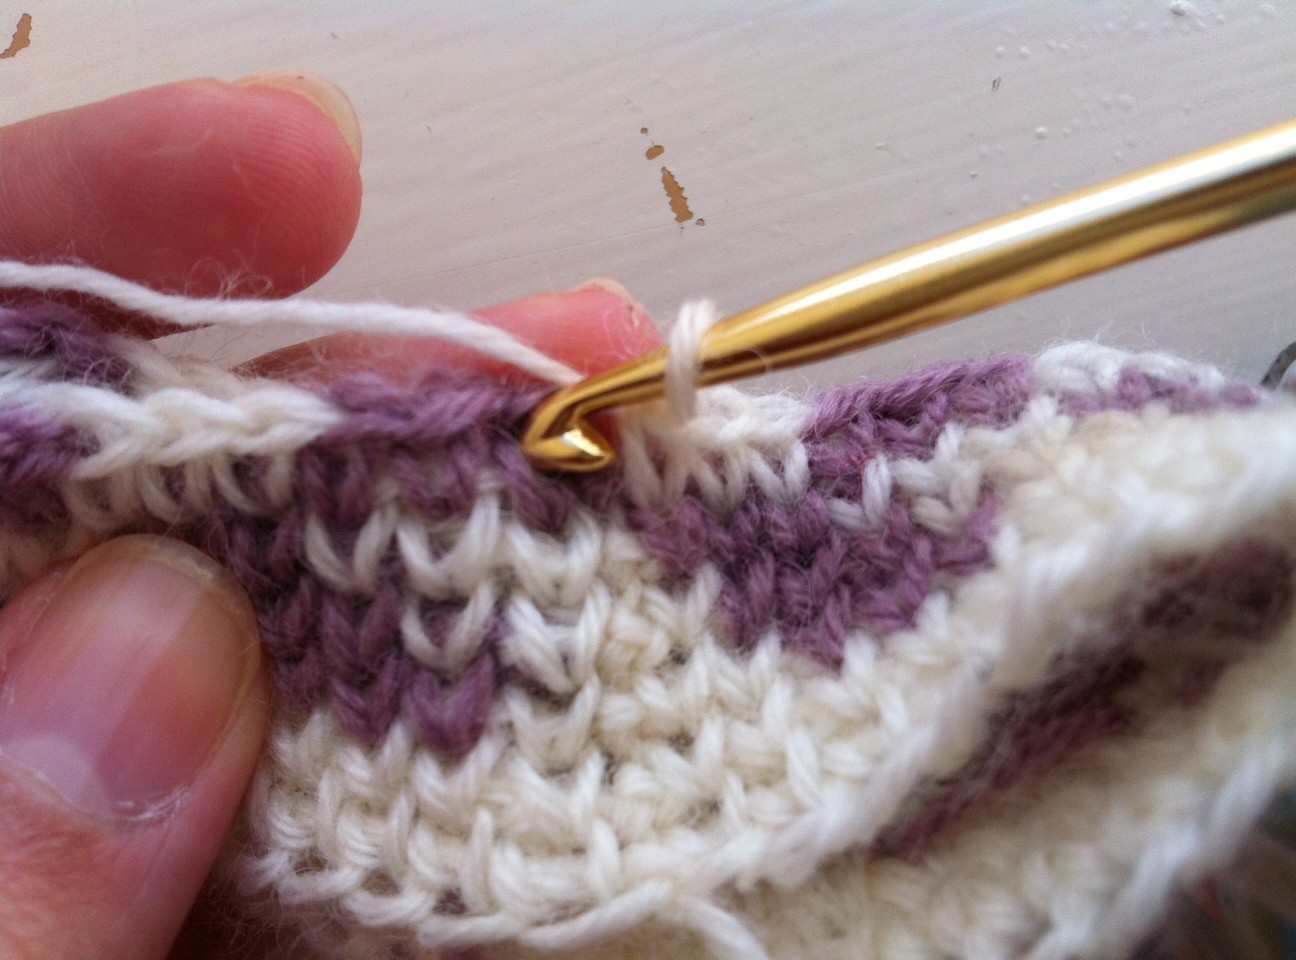
22. Here you will have to join and continue the next round in the same colour (white) for 3 more stitches. If you continue with the white as usual you will get a purple strand in the back that is 6 stitches long, I don’t usually let strands be longer than 3 stitches because they could get caught in something very easily so no matter how long a chart says I have to work with a specific colour, I always catch strands every 3 stitches. Let me show you how. First, join with a slip stitch to first stitch and chain one, pull tight as usual.


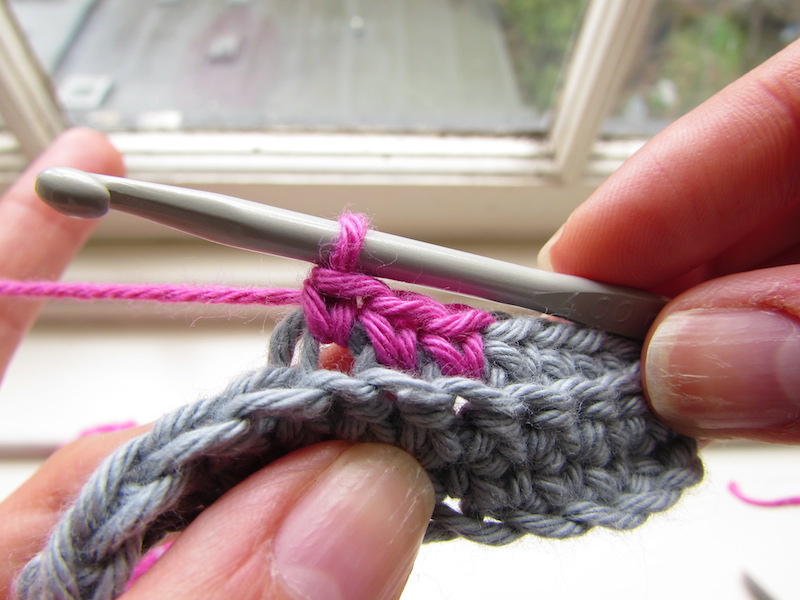
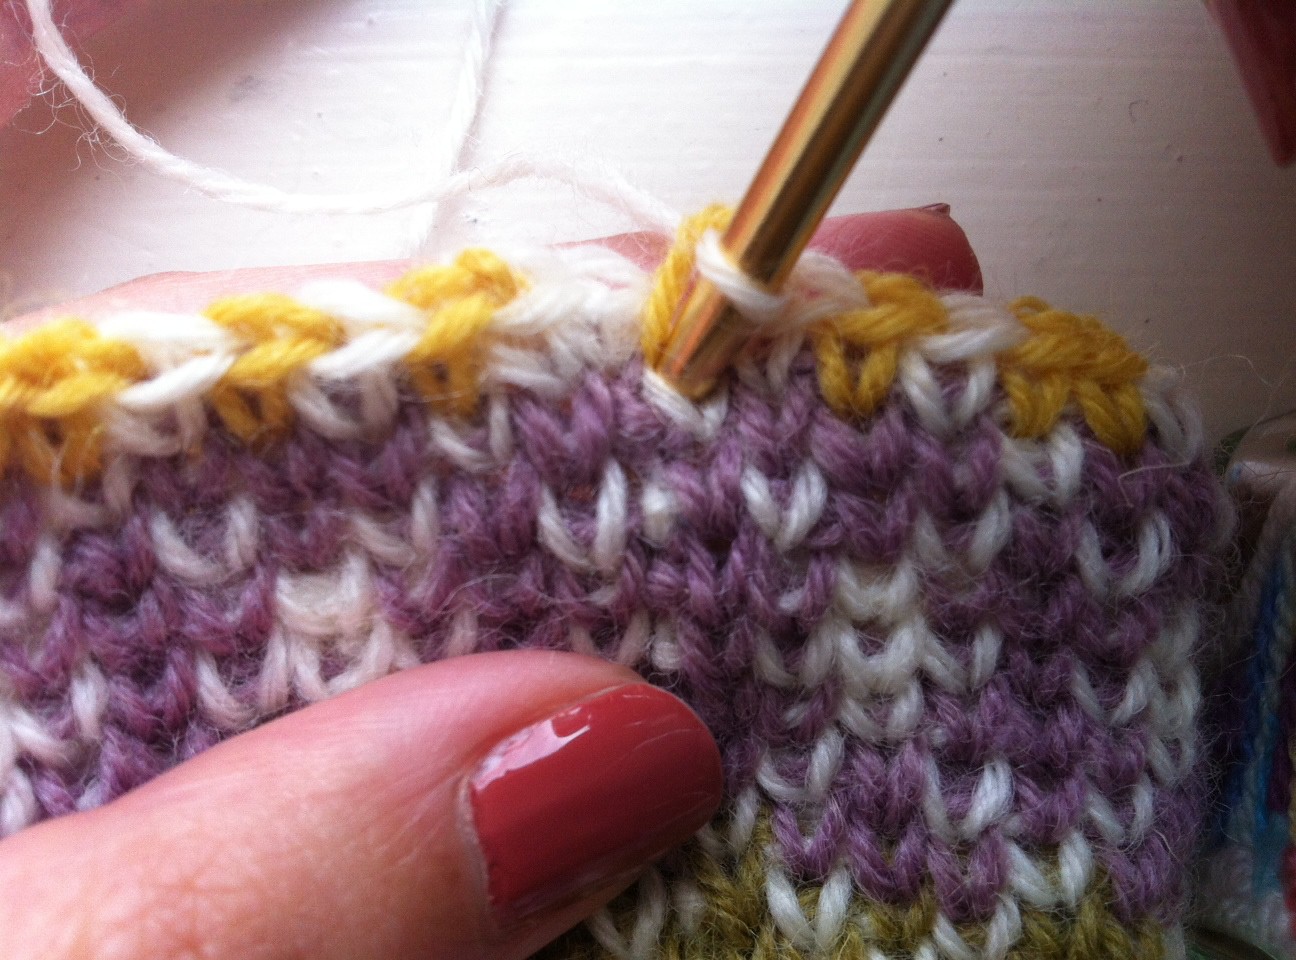
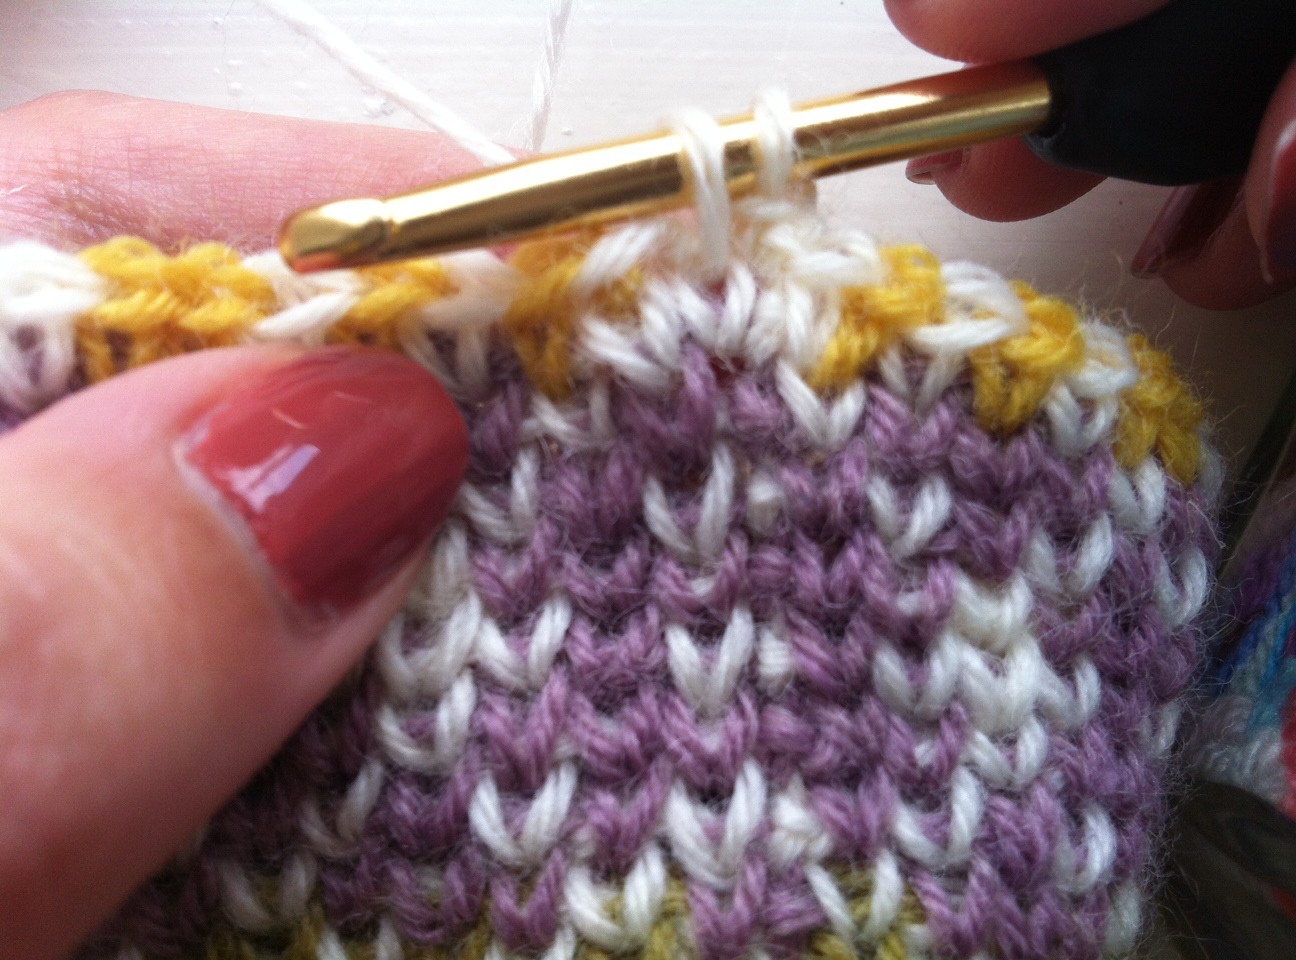
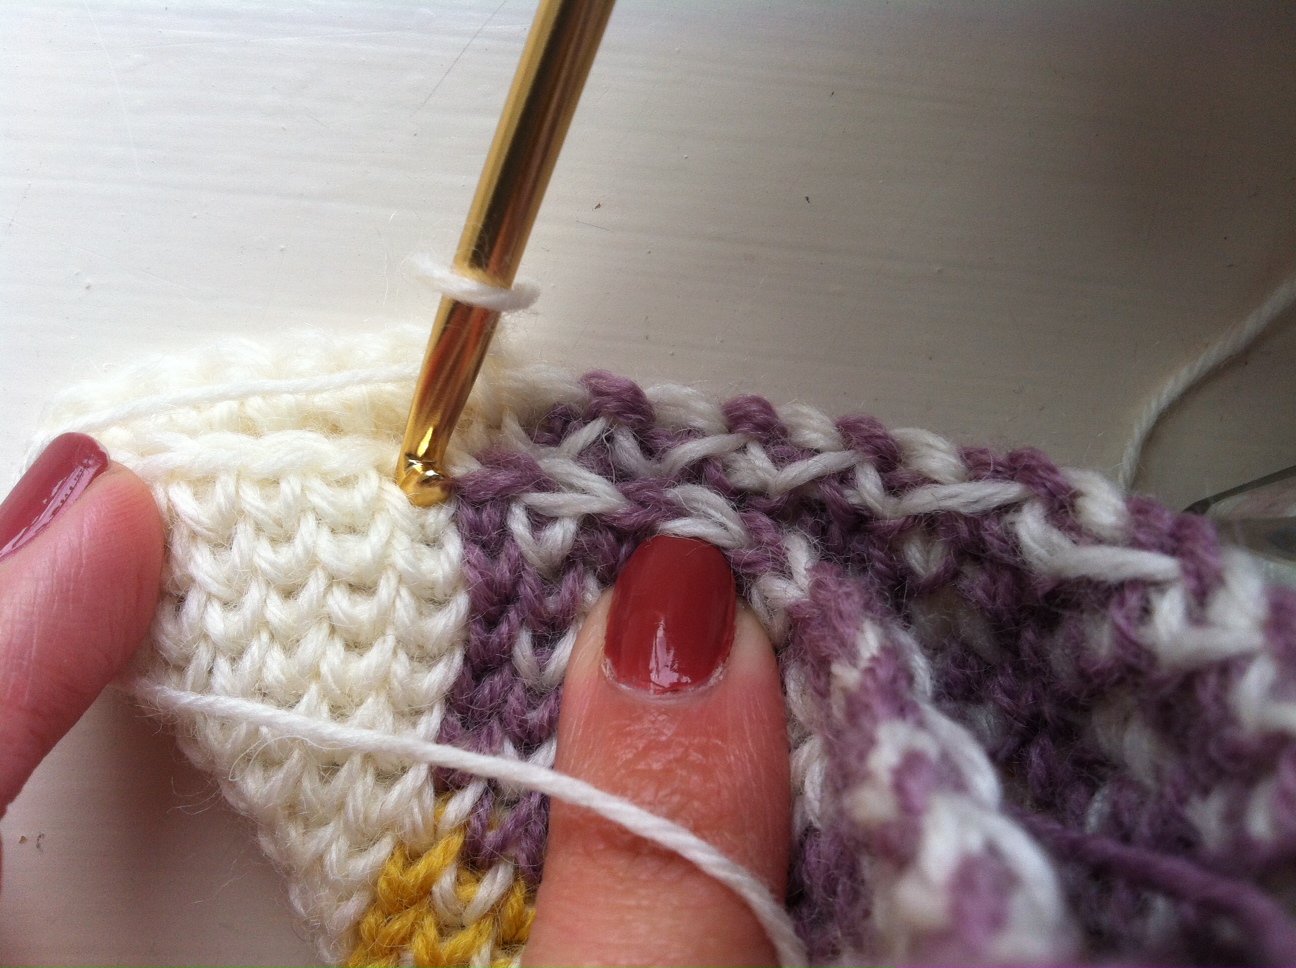
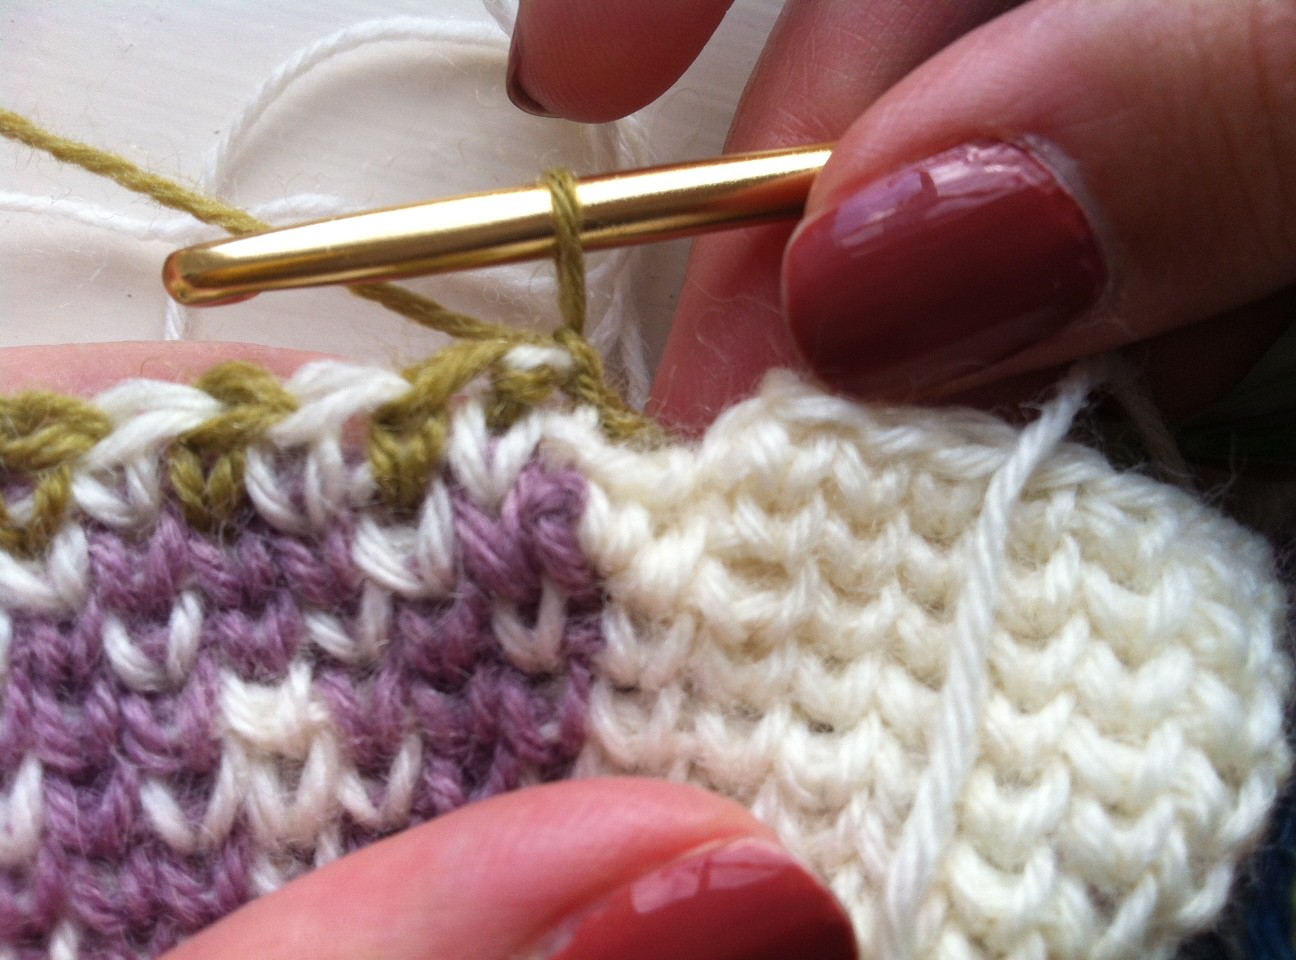
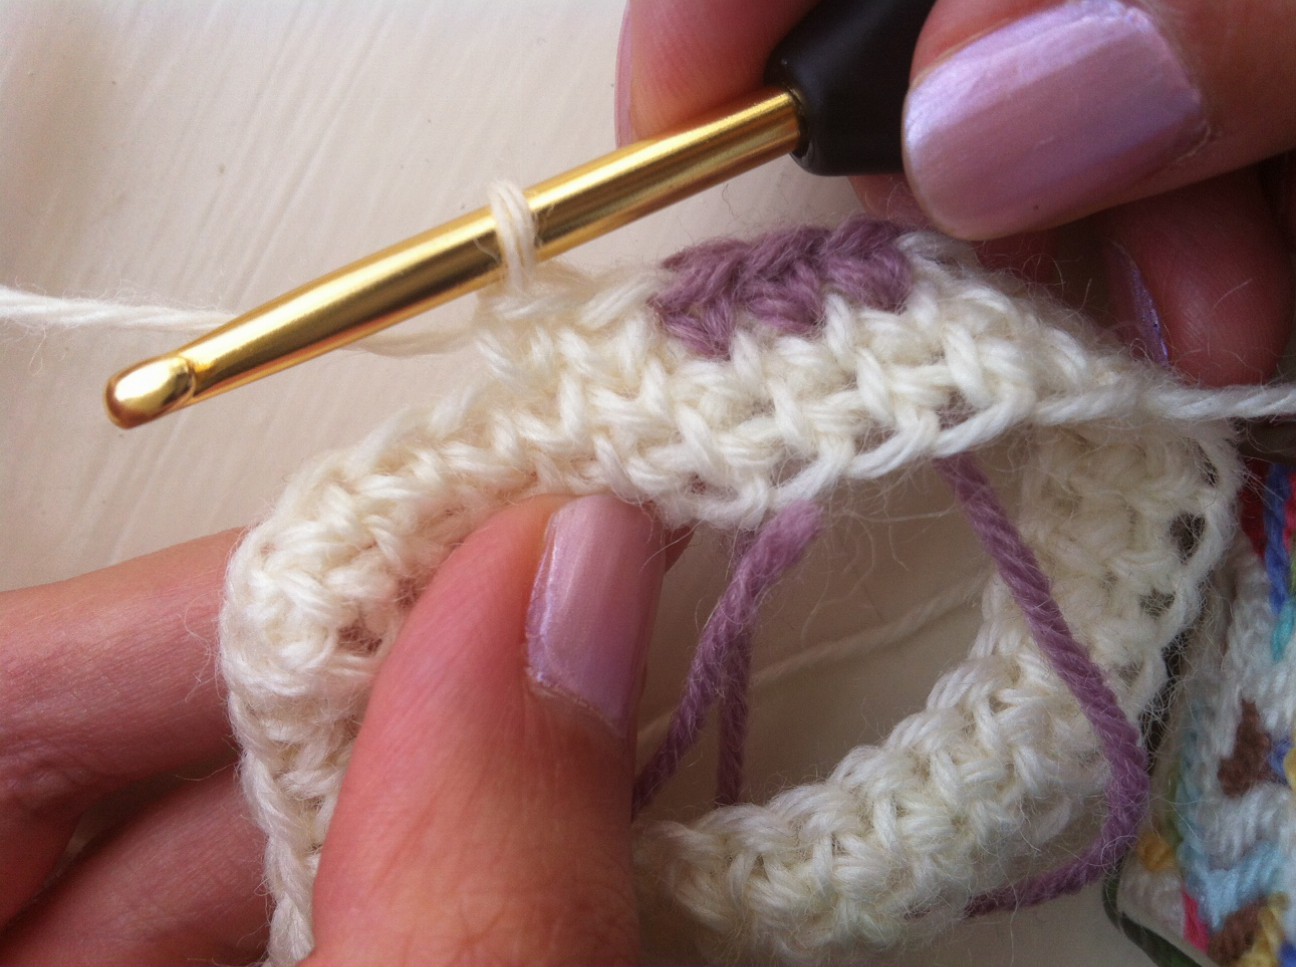
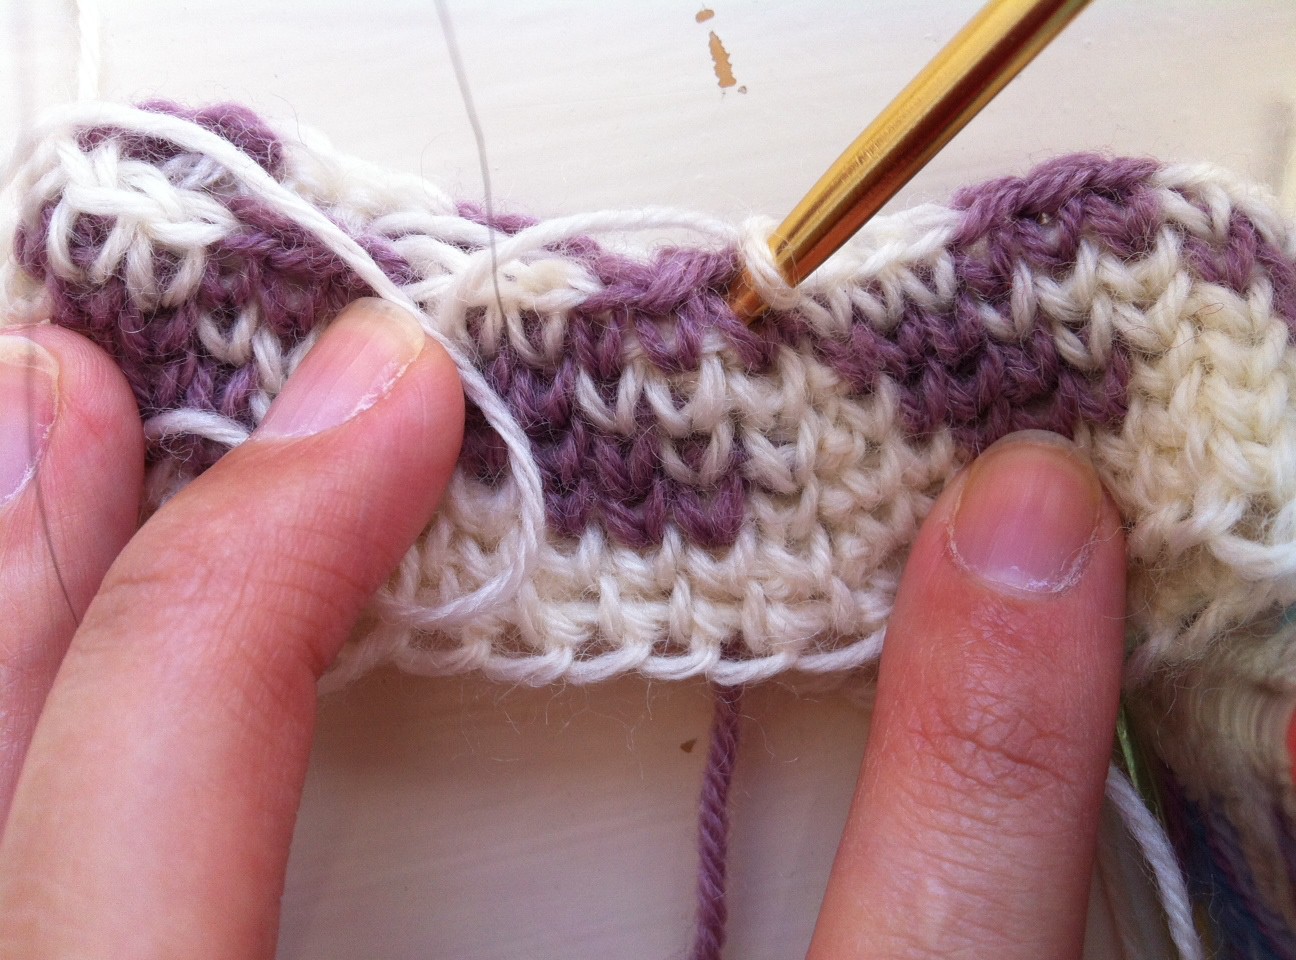
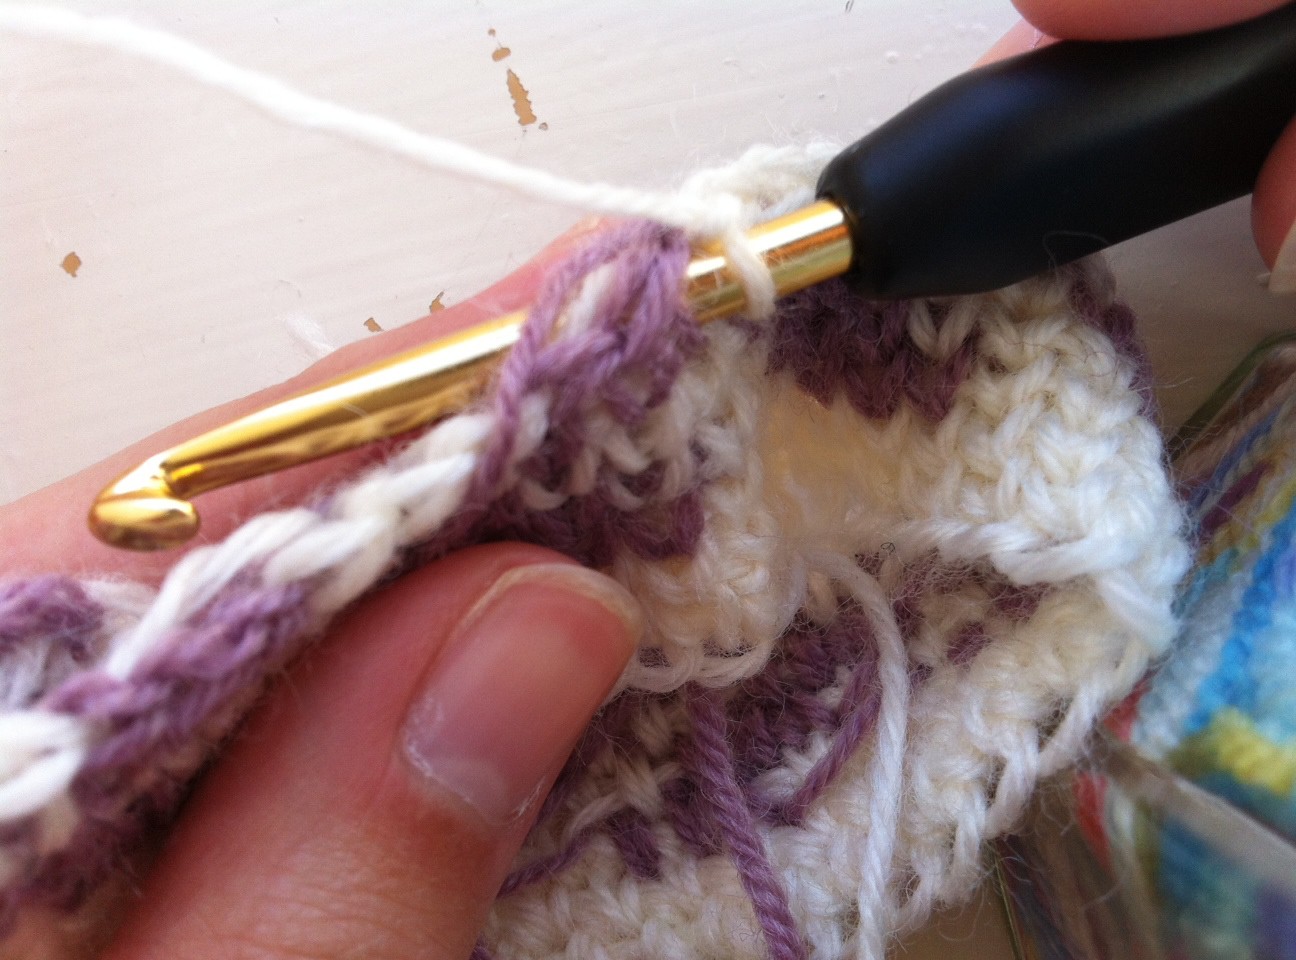
23. You have done 3 stitches in white in the last row (Round 6), so now it is time to catch the strand in the 4th stitch of the same colour, which in this case corresponds to the first stitch of Round 7. So start the stitch as usual by inserting the hook in the middle of the V (sorry about the hair in the way and my horrible nails!)

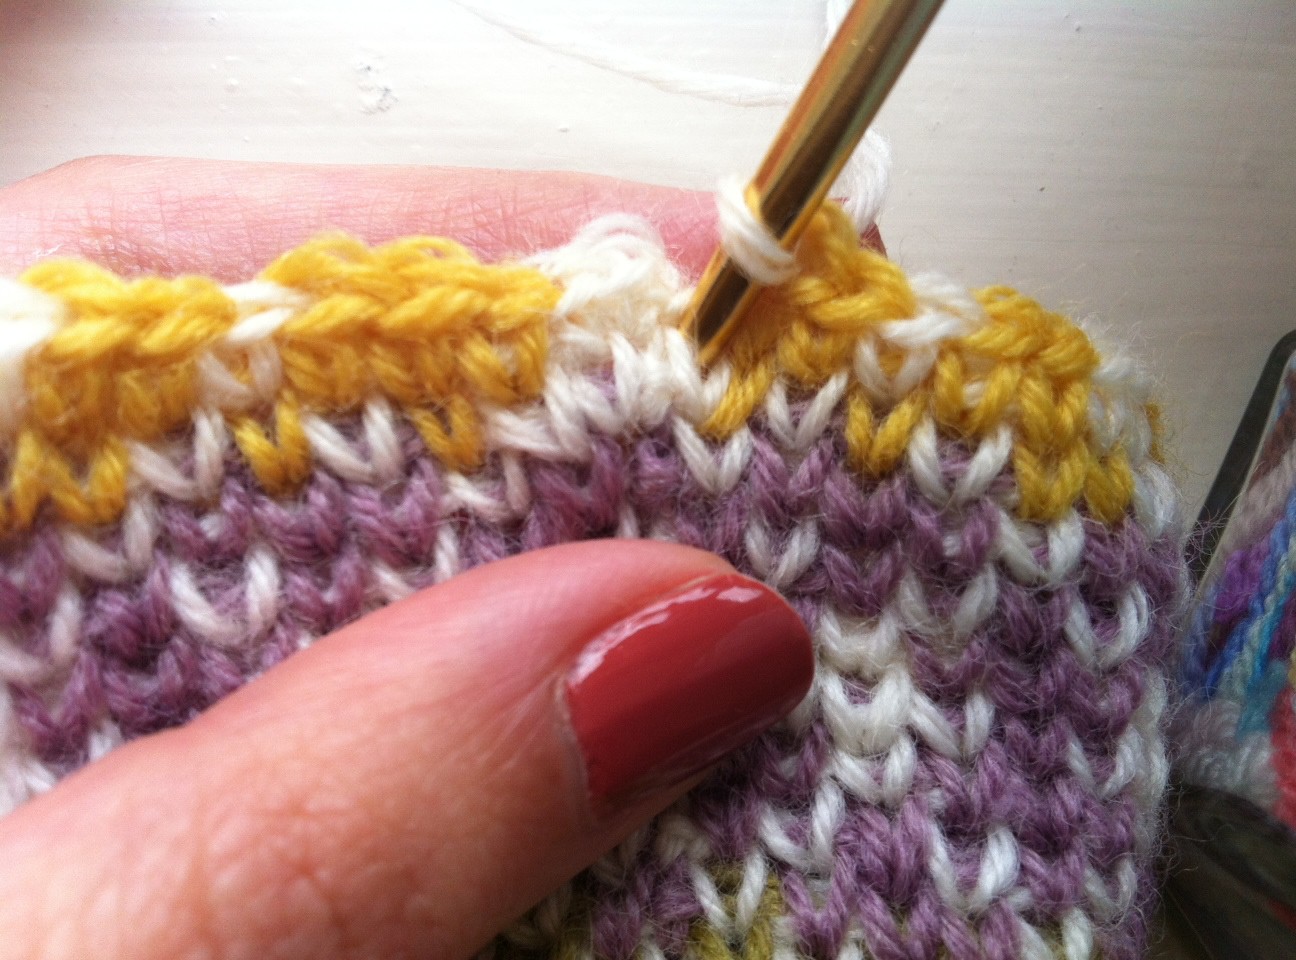
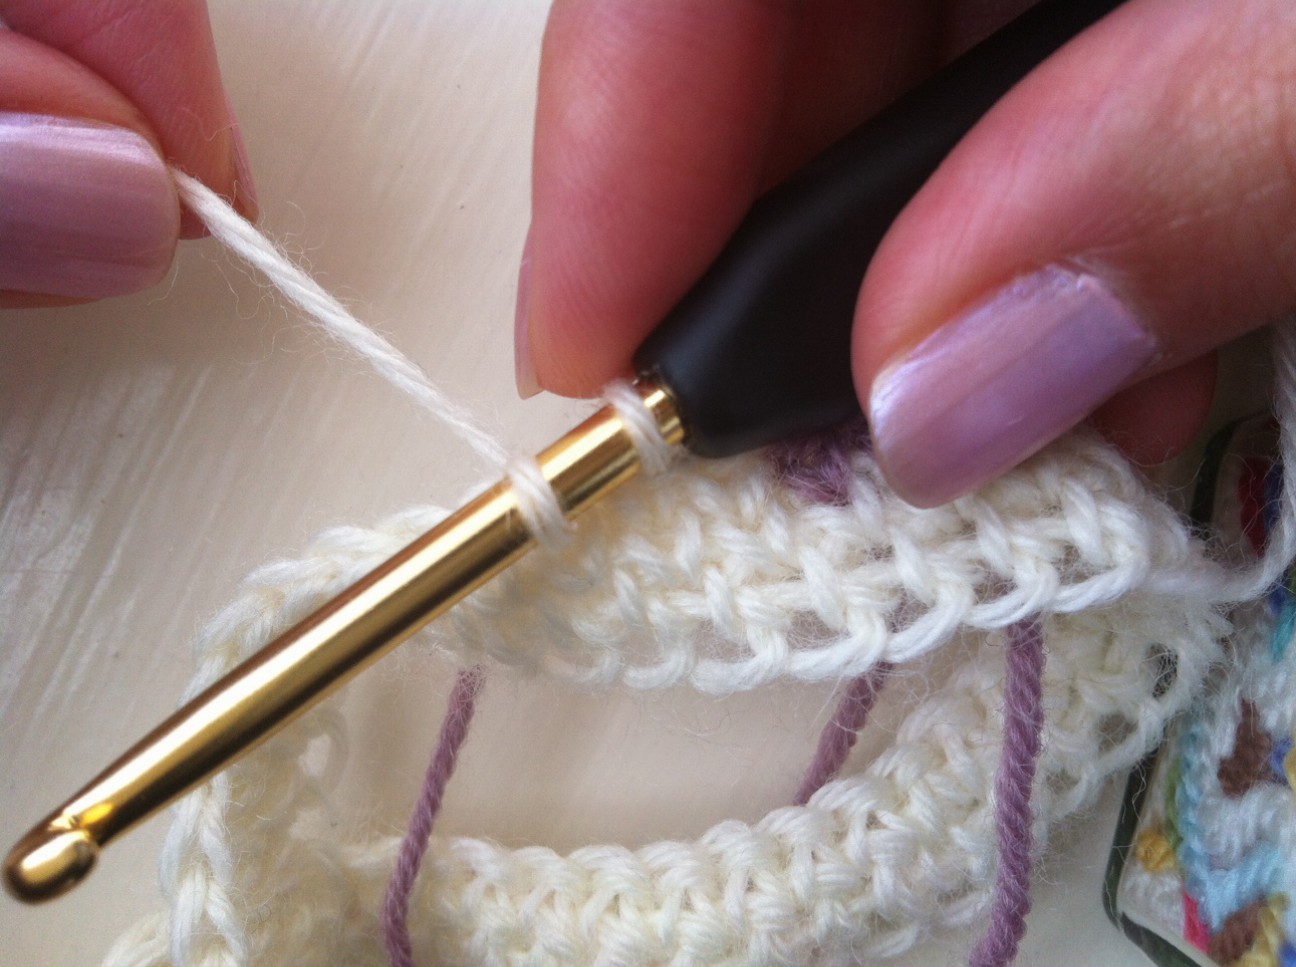
24. Now, before you yarn over with the white, make sure that the hook goes underneath the purple strand. Now yarn over with the white and finish the stitch as usual.


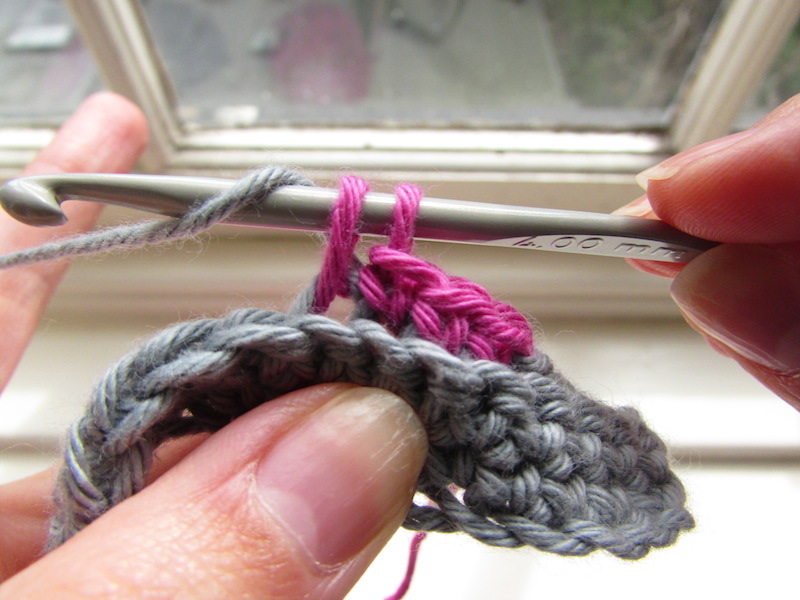
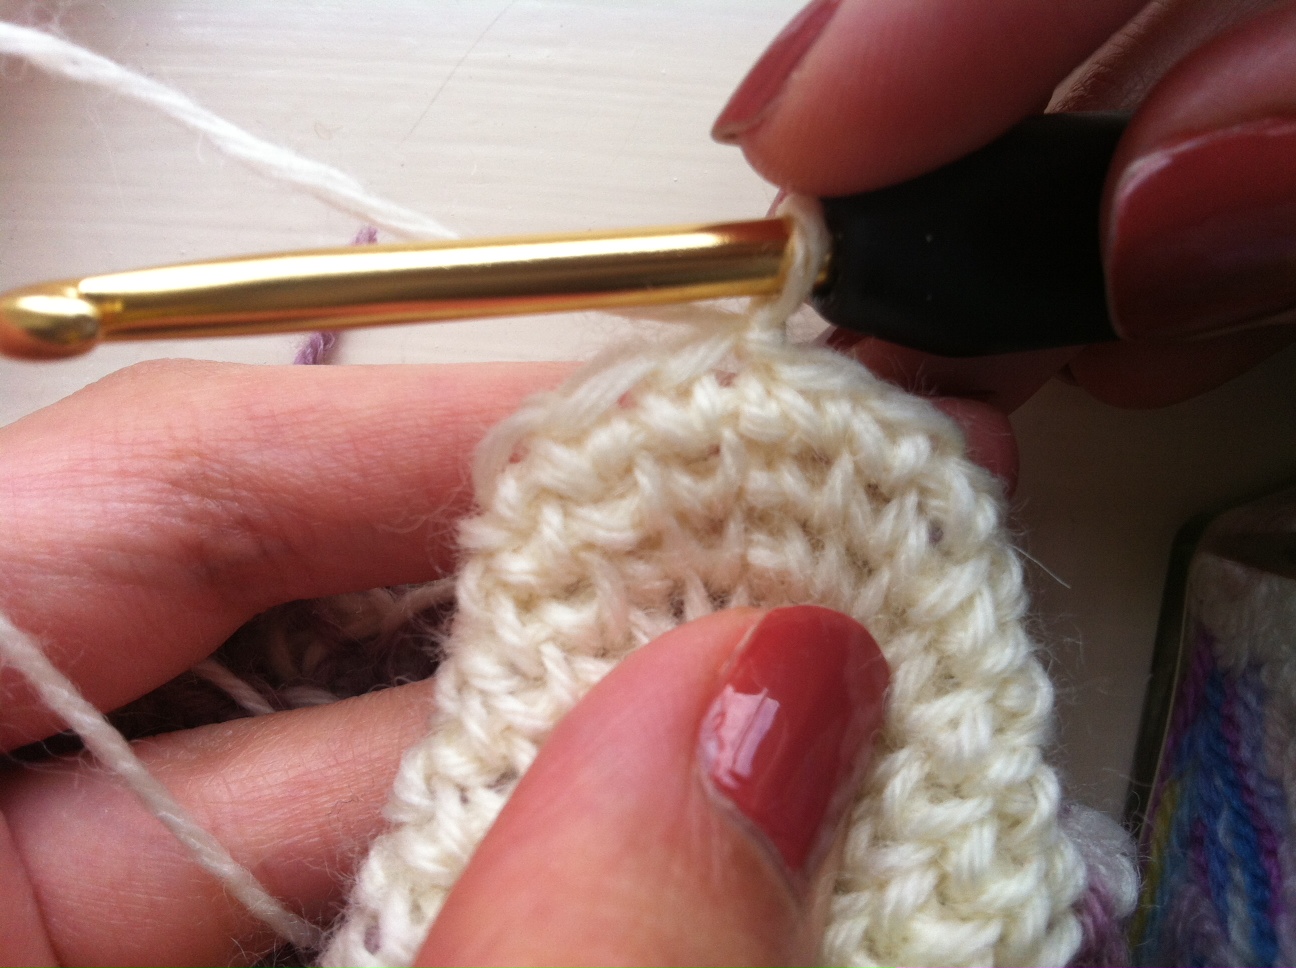
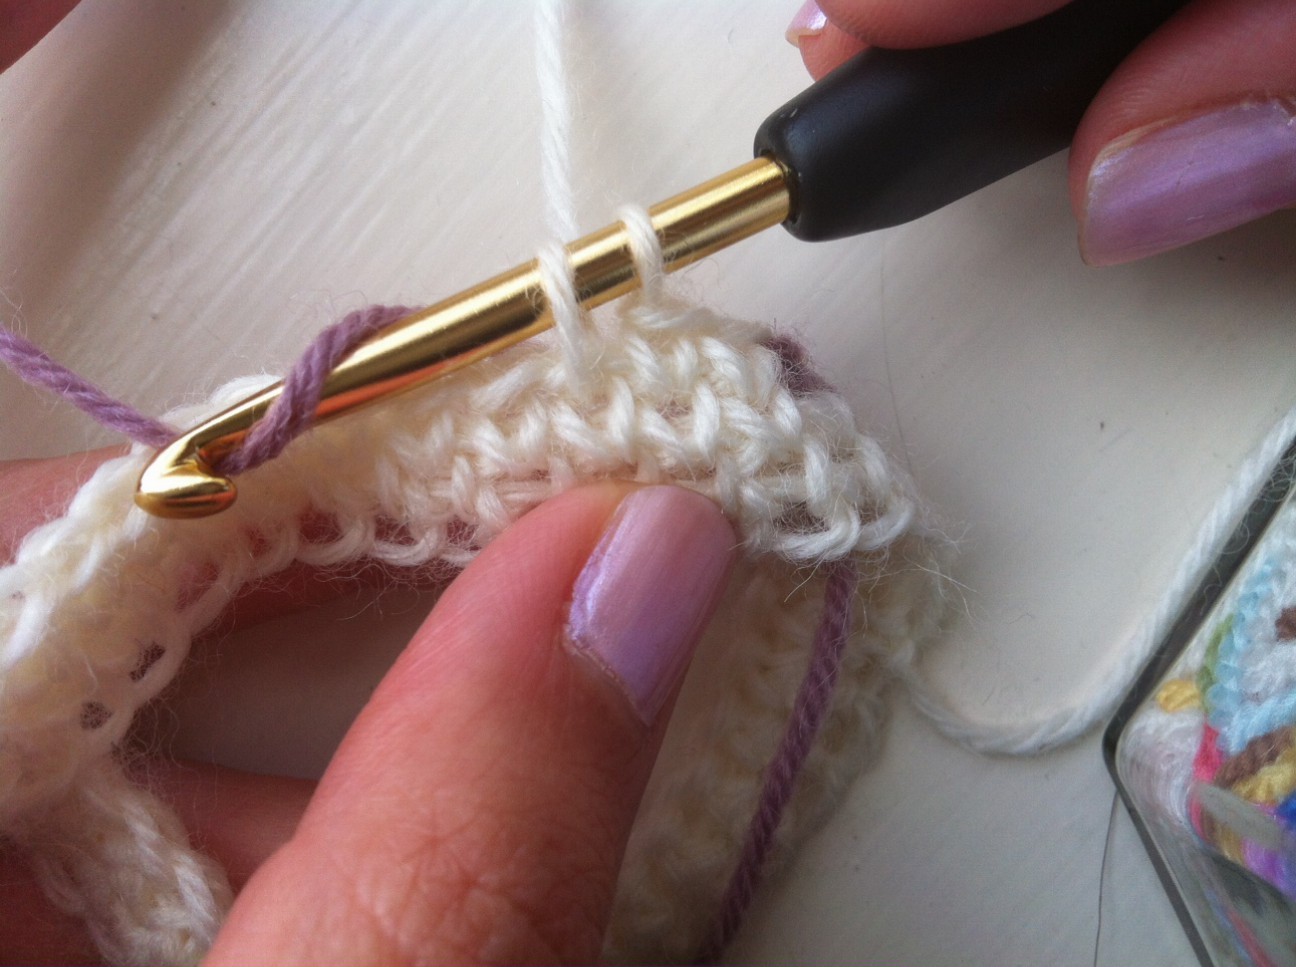
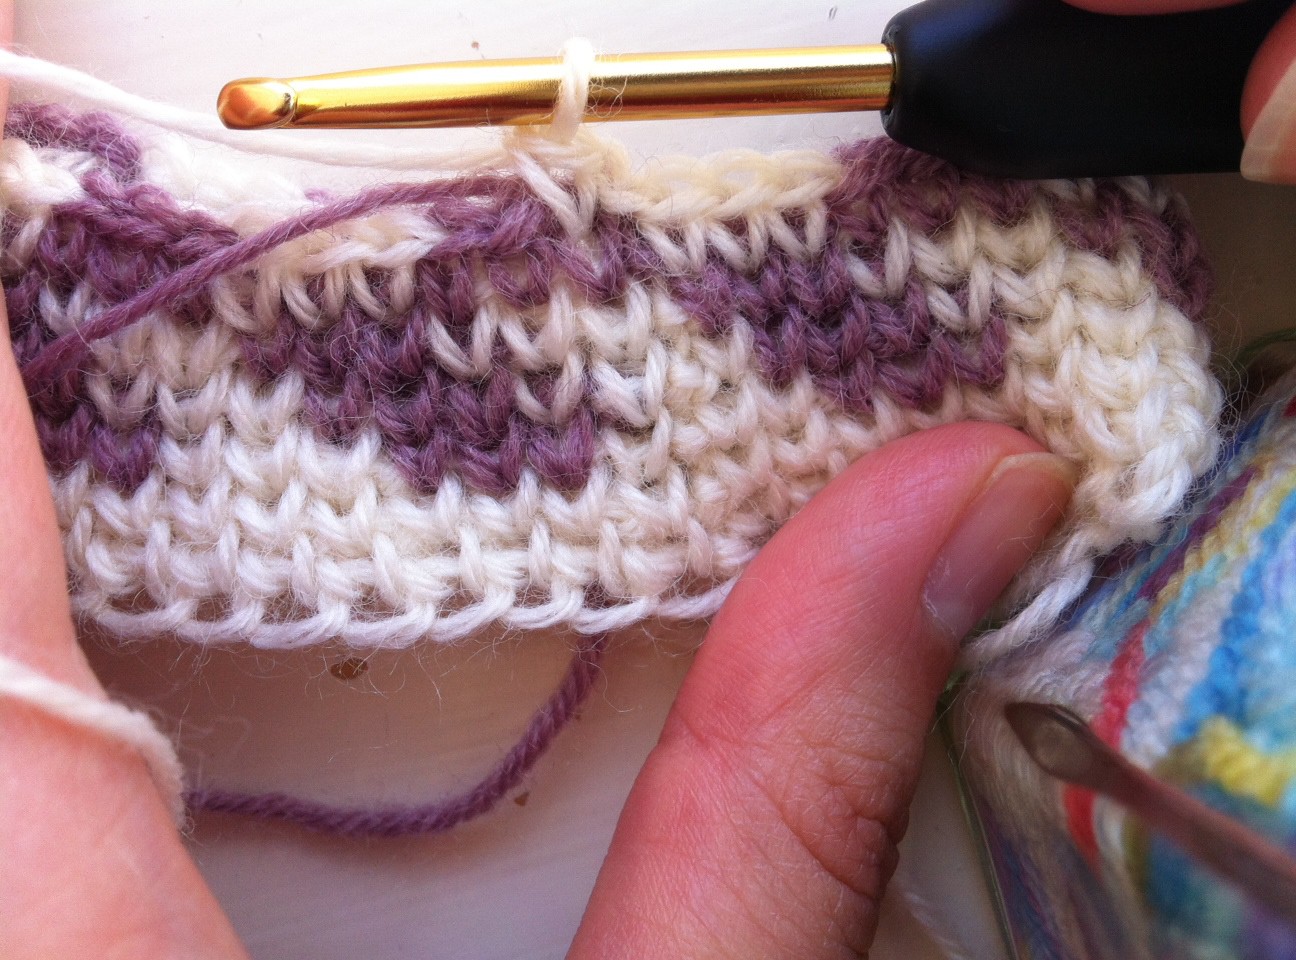
25. In the back, your caught strand will look like this. I JUST REALISED THIS HAPPENS FIRST WHEN YOU CHANGE FROM ROUND 5 TO 6! SORRY ABOUT THAT… make sure you catch your strand there as well.

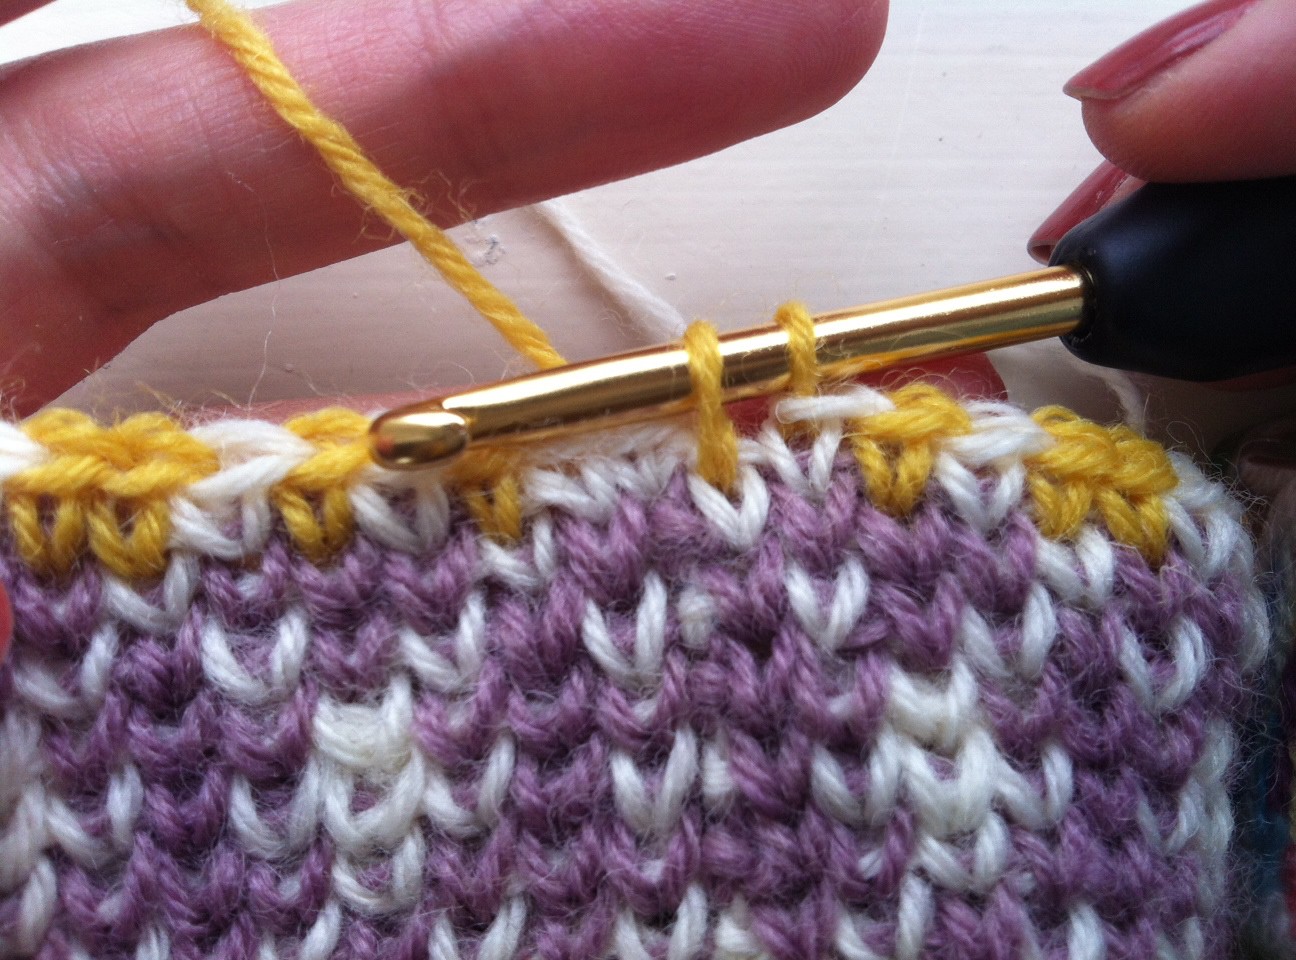
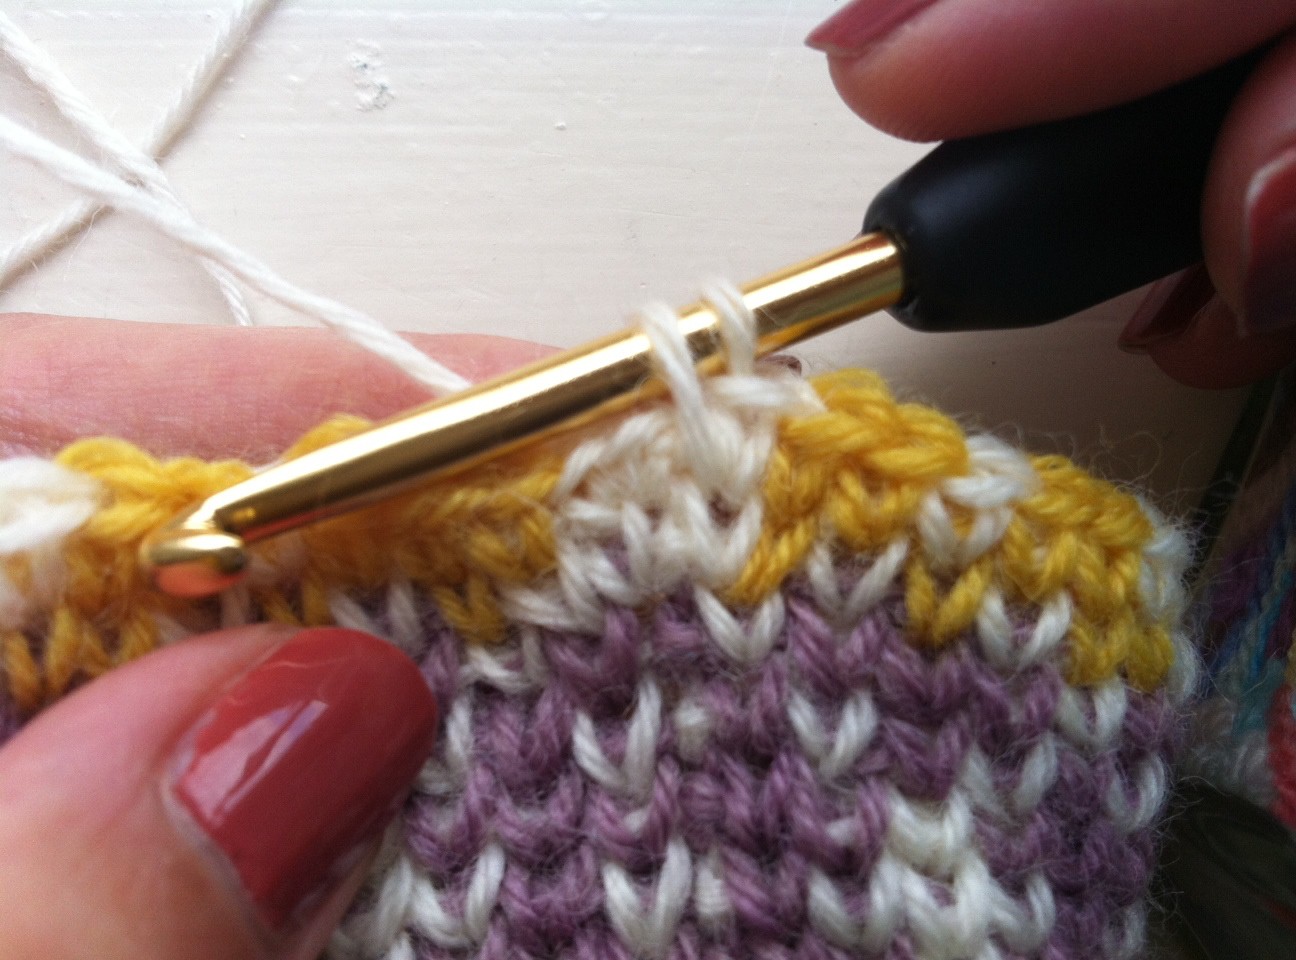
26. Continue with the chart normally. Now the final thing I wanted to make clear is how to change colours when you finish a round with one colour and start a new round with another. For example, this round finishes with colour B, and Round 8 starts with colour A. So continue with Round 7 until the last stitch and just like with any other colour change, before you finish the last purple stitch of this round change to the white, then slip stitch, chain 1 and continue the chart with the white. I was going to put more pictures but it is really the same as before so hope it is clear enough, just let me know if you have any questions.
Continue with the chart until you finish Round 35. In case you are wondering about when to cut the yarns, I did it every time I finished with one. For example, the first few rows of the chart are white and purple, then two rows of white, white and purple again, then white and yellow and so on. When I finished with the colour that isn’t white and changed to another, I would cut the old colour. So I would cut the purple if the next 3 rows of the chart are white and yellow (hope this makes sense, it is quite late!)
Uffff, that was long! Please ask if you have any questions. I will post the next part of tutorial soon and have added the pattern to Ravelry too, here is the link.
Have a great weekend!
x
Sol
 Hello there! I am posting today to share a fun tutorial with you. Remember my Moroccan bag? Well the pattern is still in the works but I realised it would be very useful to create a tutorial for the crochet colourwork techniques I use in my patterns and then I can refer you to them whenever necessary.


