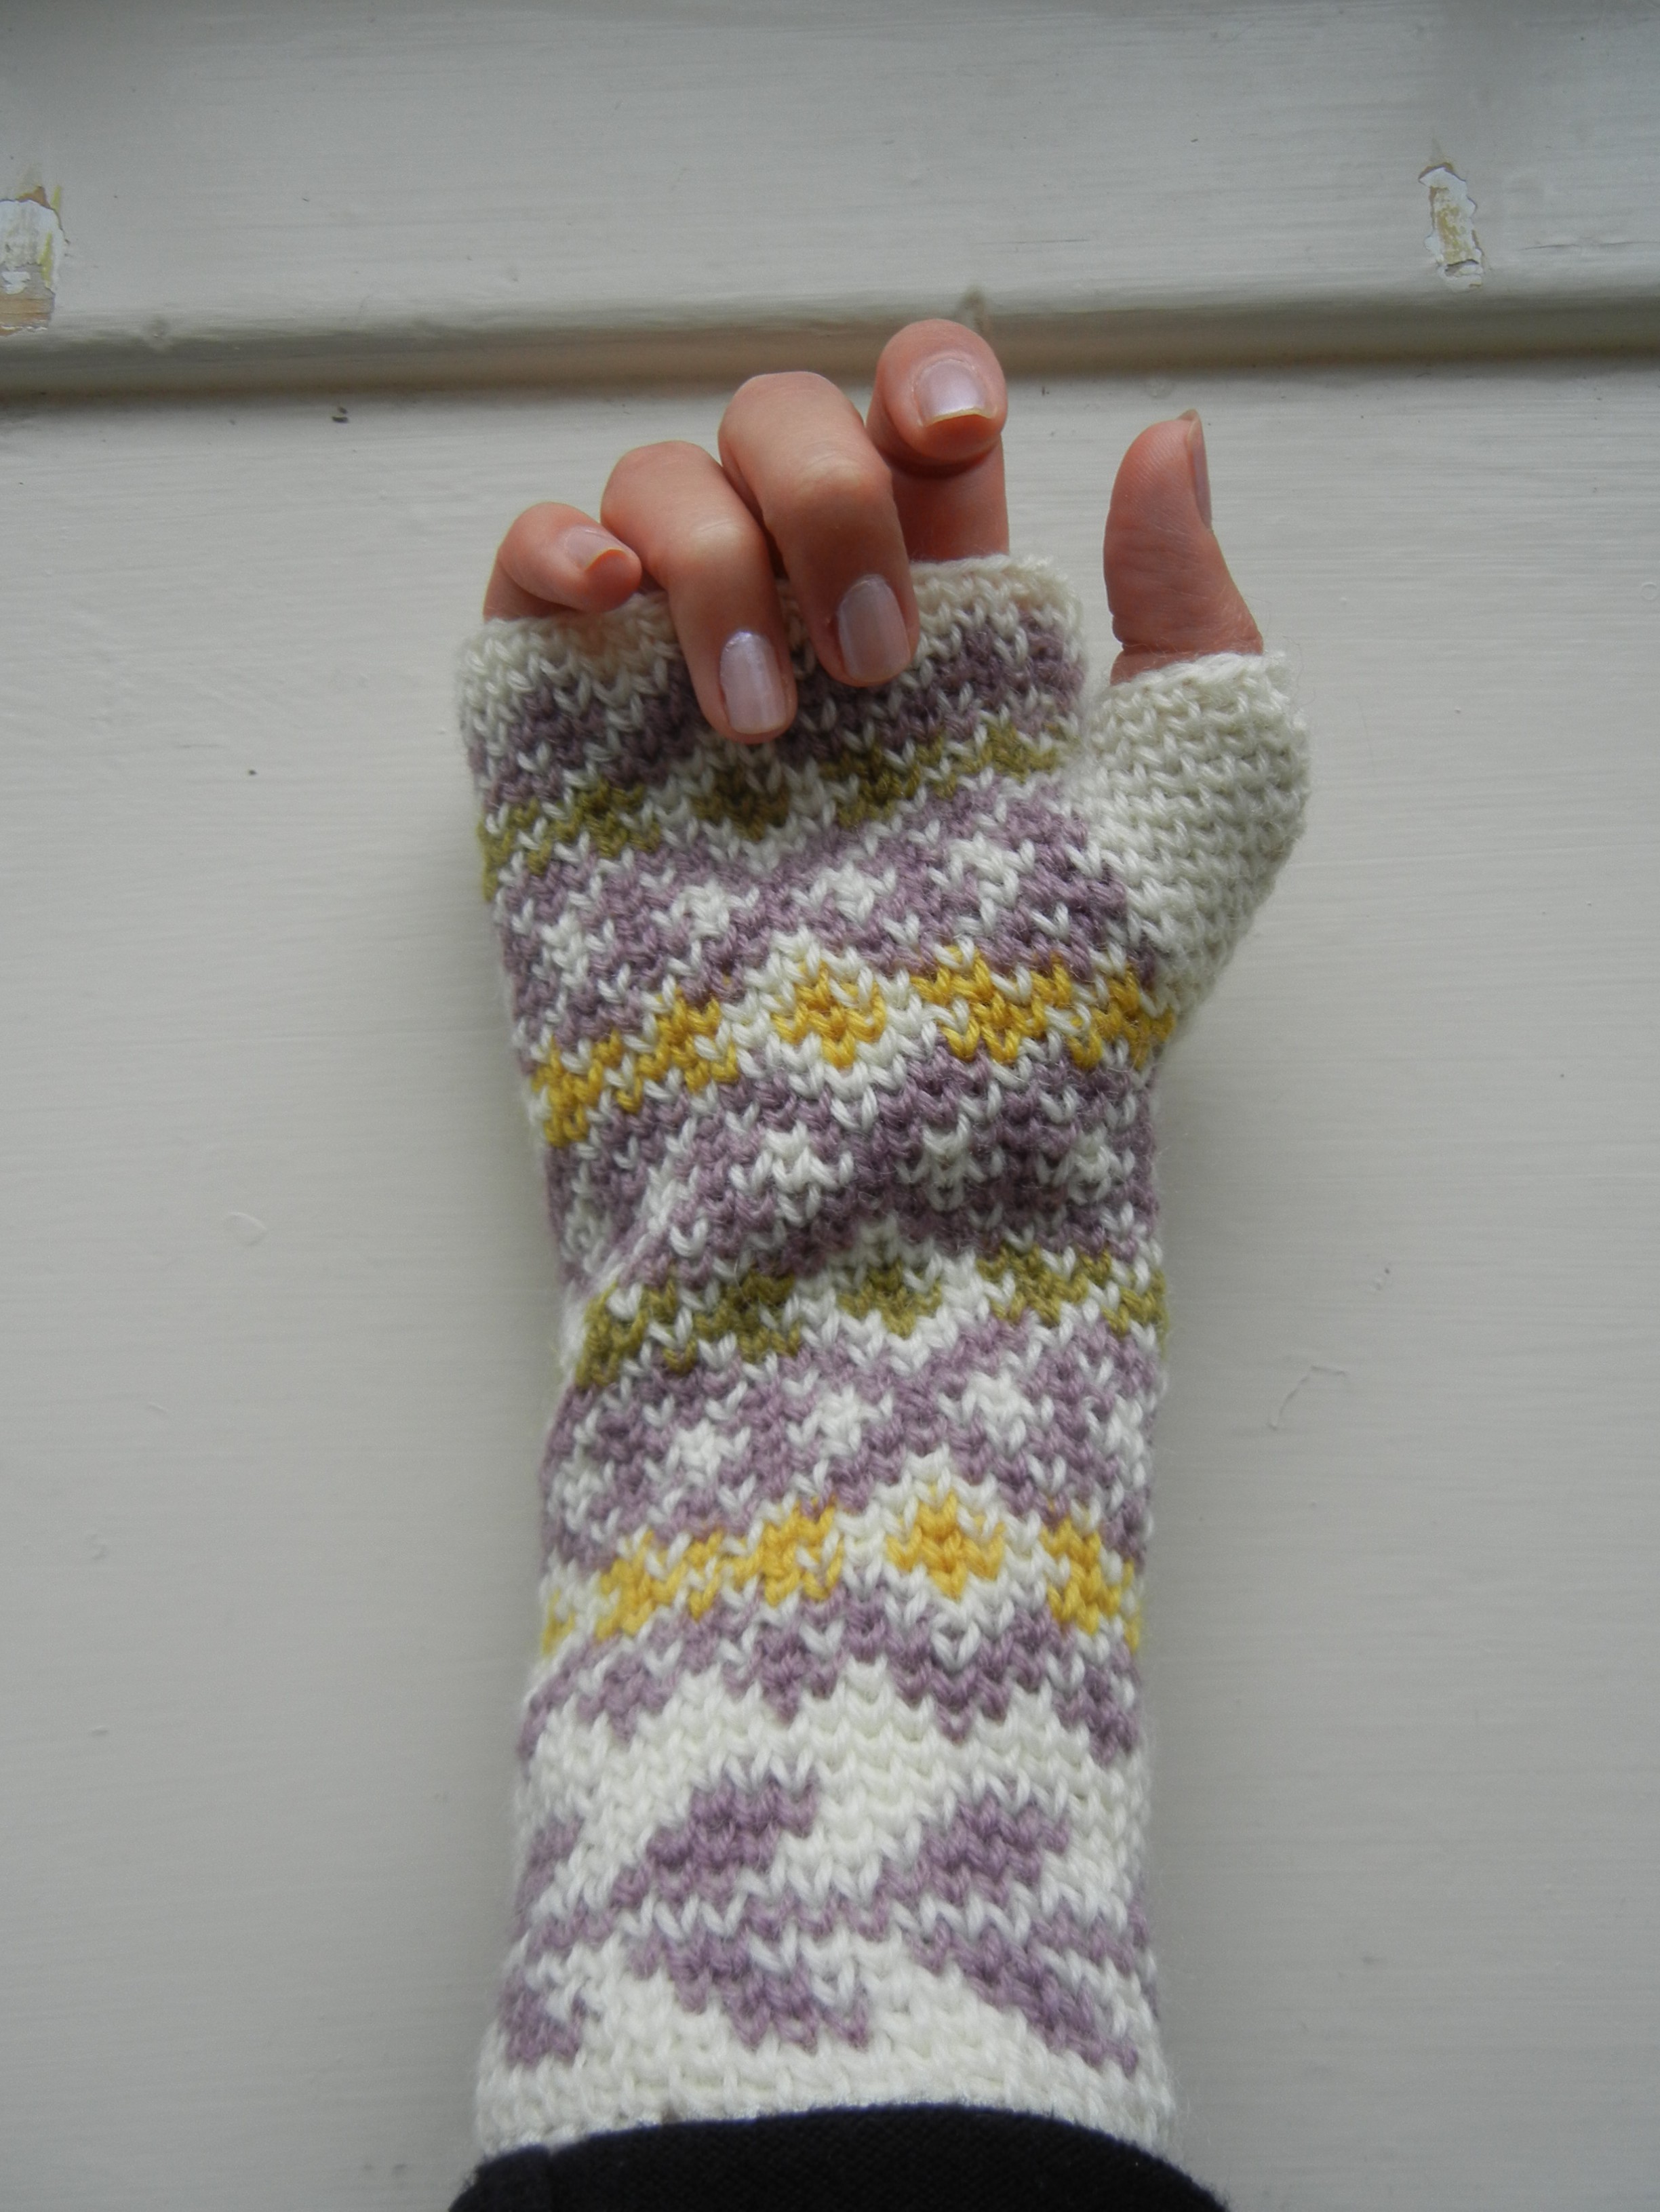
Hello my dear readers! Hope you had a great week. I have been a very busy bee and have just managed to finish the second part of the tutorial for my fair isle mitts. Not long to go but the thumb needs some further explanation. Let’s jump right into it!
Autumn Diamonds Tutorial Part II
Size and gauge
Circumference: 20 cm
Gauge: Crochet 11 waistcoat stitches and 13 rows with a 4mm hook to obtain 5cmx5cm.
Gauge in this pattern is not essential. Fair isle chart is repetitive and you can add necessary stitches for your size and fill in the pattern in a way that satisfies you.
Materials
50g King Cole Merino in Aran (Colour A)
West Yorkshire Spinners Signature 4 ply – 1 ball in Pennyroyal (Colour B), 1 ball in Butterscotch (Colour C), 1 ball in Cardamom (Colour D) –> You will use VERY little of the last two yarns so you could use something from your stash if you don’t want to spend more on them.
4mm hook
Needle to weave in ends
Instructions
I have a new chart for the rest of the pattern. As usual you read it bottom-up, right to left and every stitch is a wst unless it has a “dc” in which case it is a UK double crochet. I know it looks mad, but I explain everything below. If you have followed the instructions of pulling tight when you sl st and ch 1 then your seam should be almost invisible, if not try pulling harder!
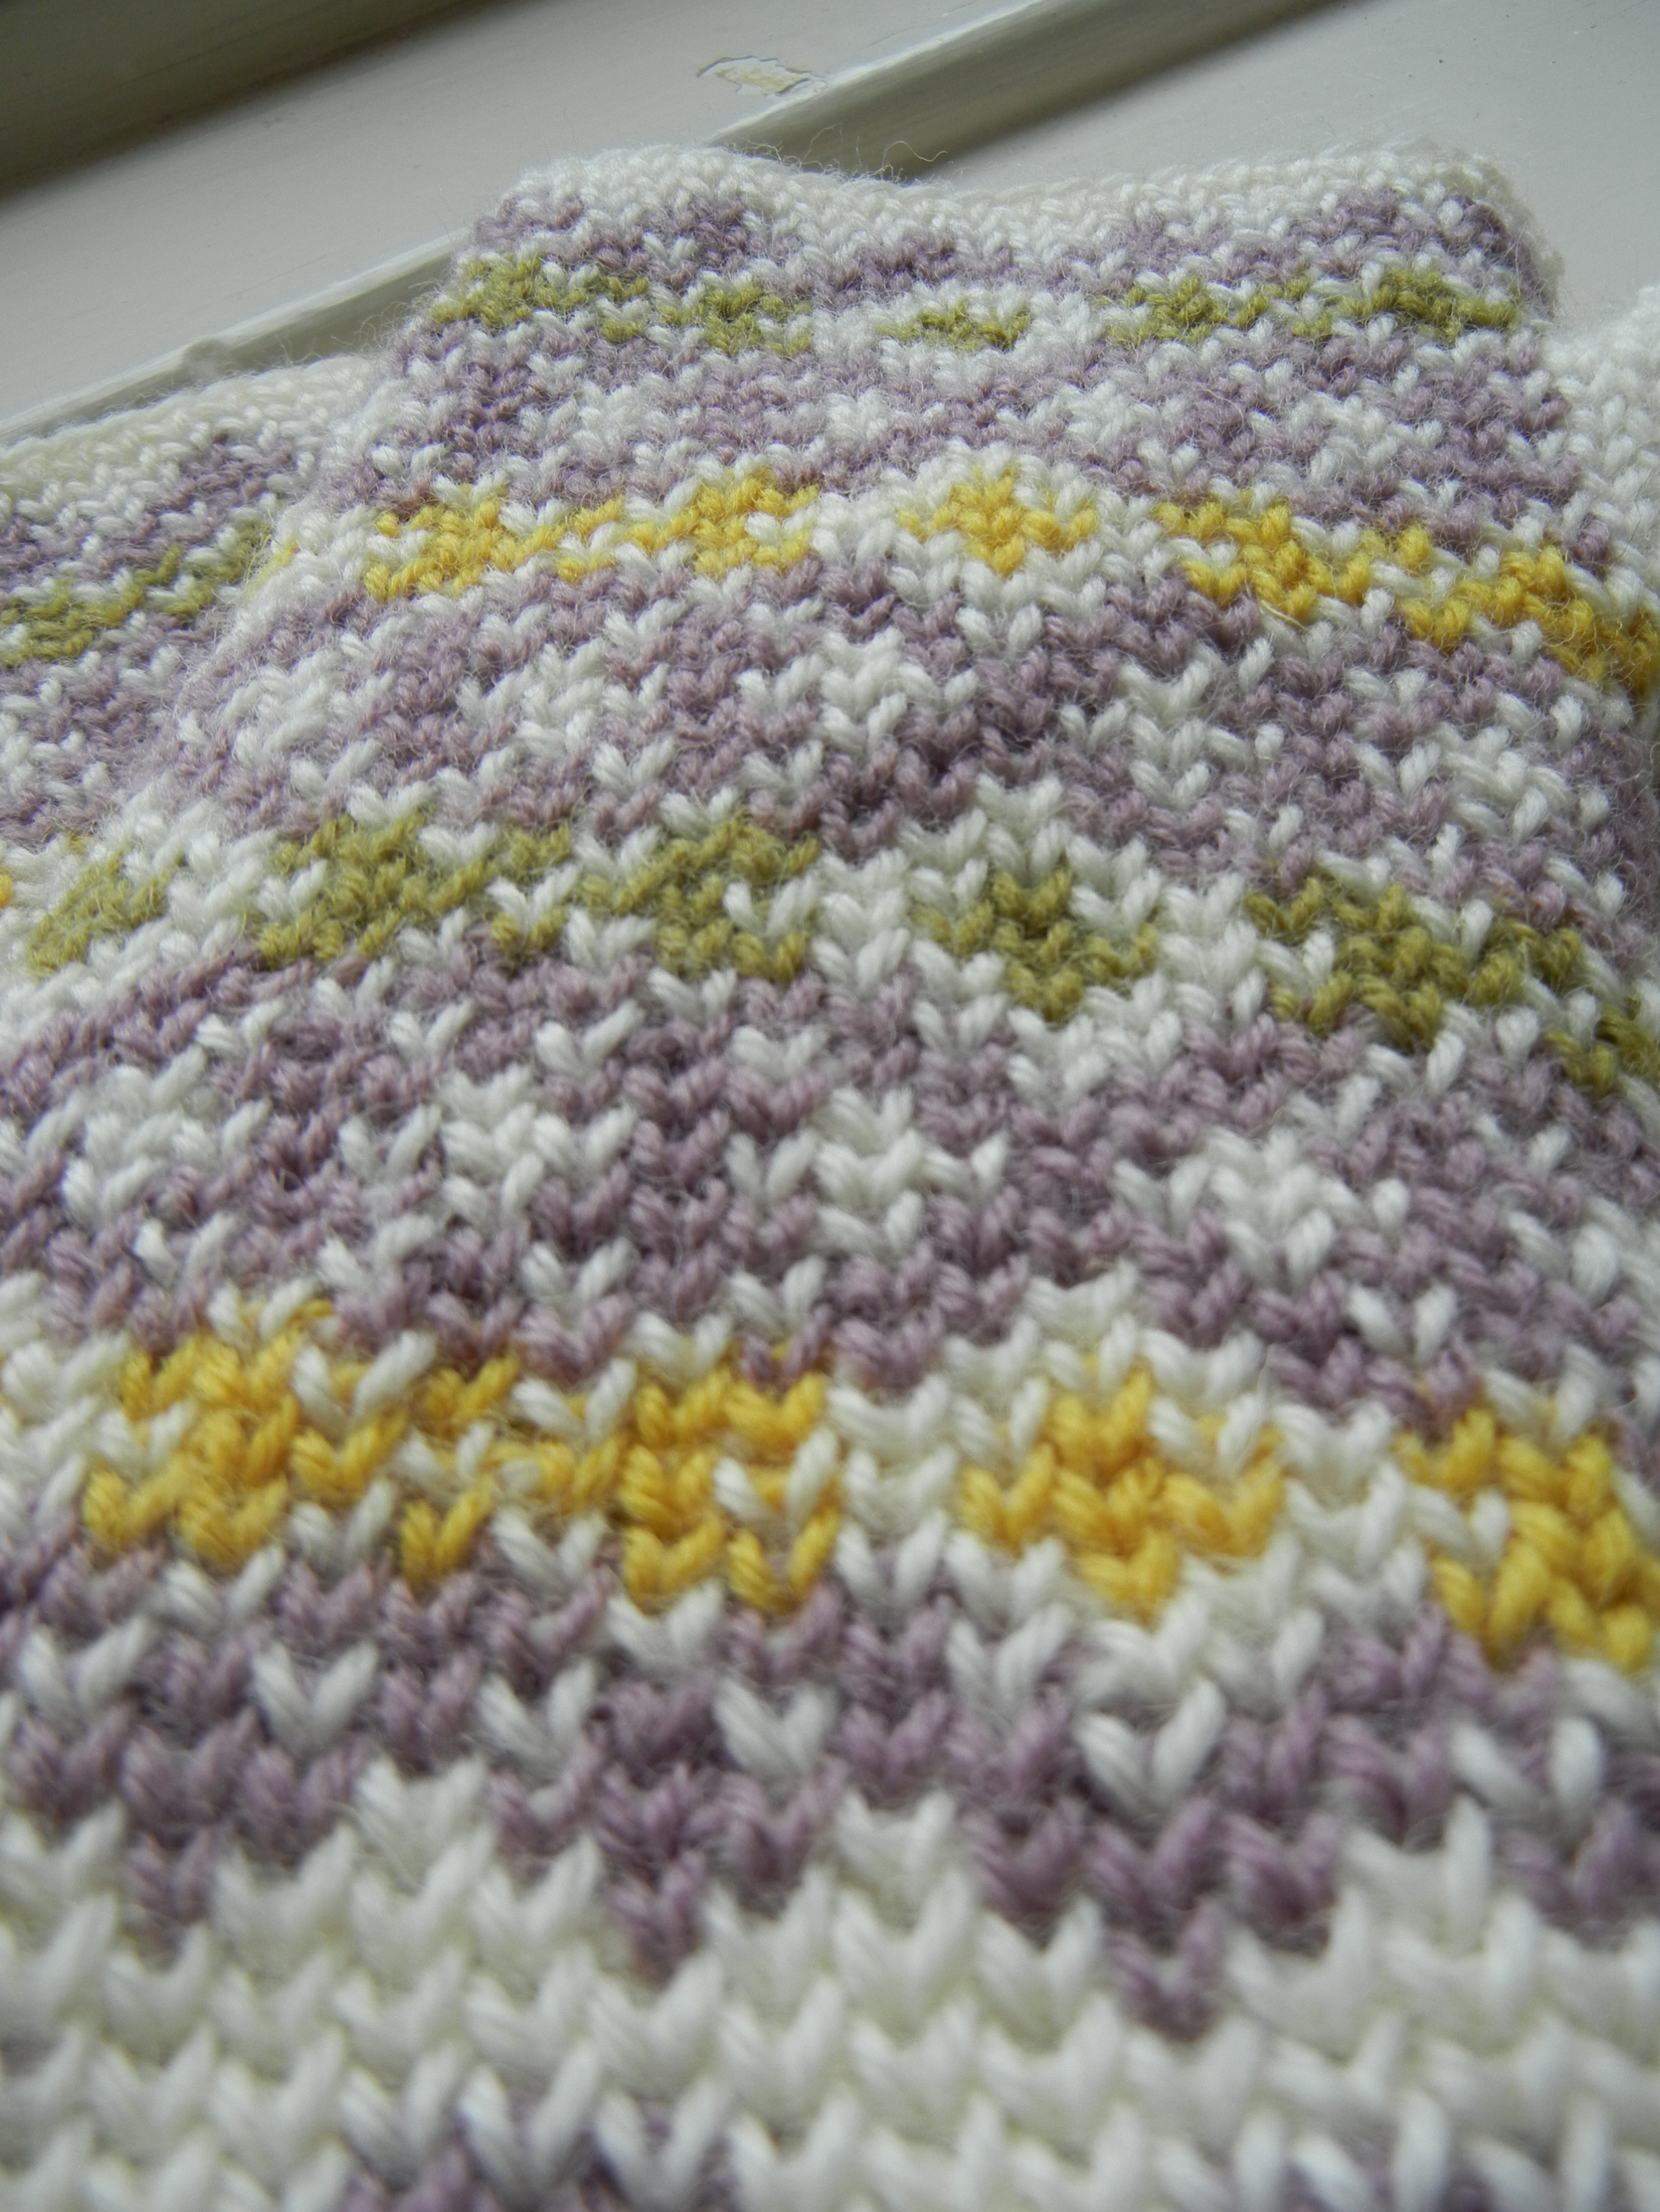
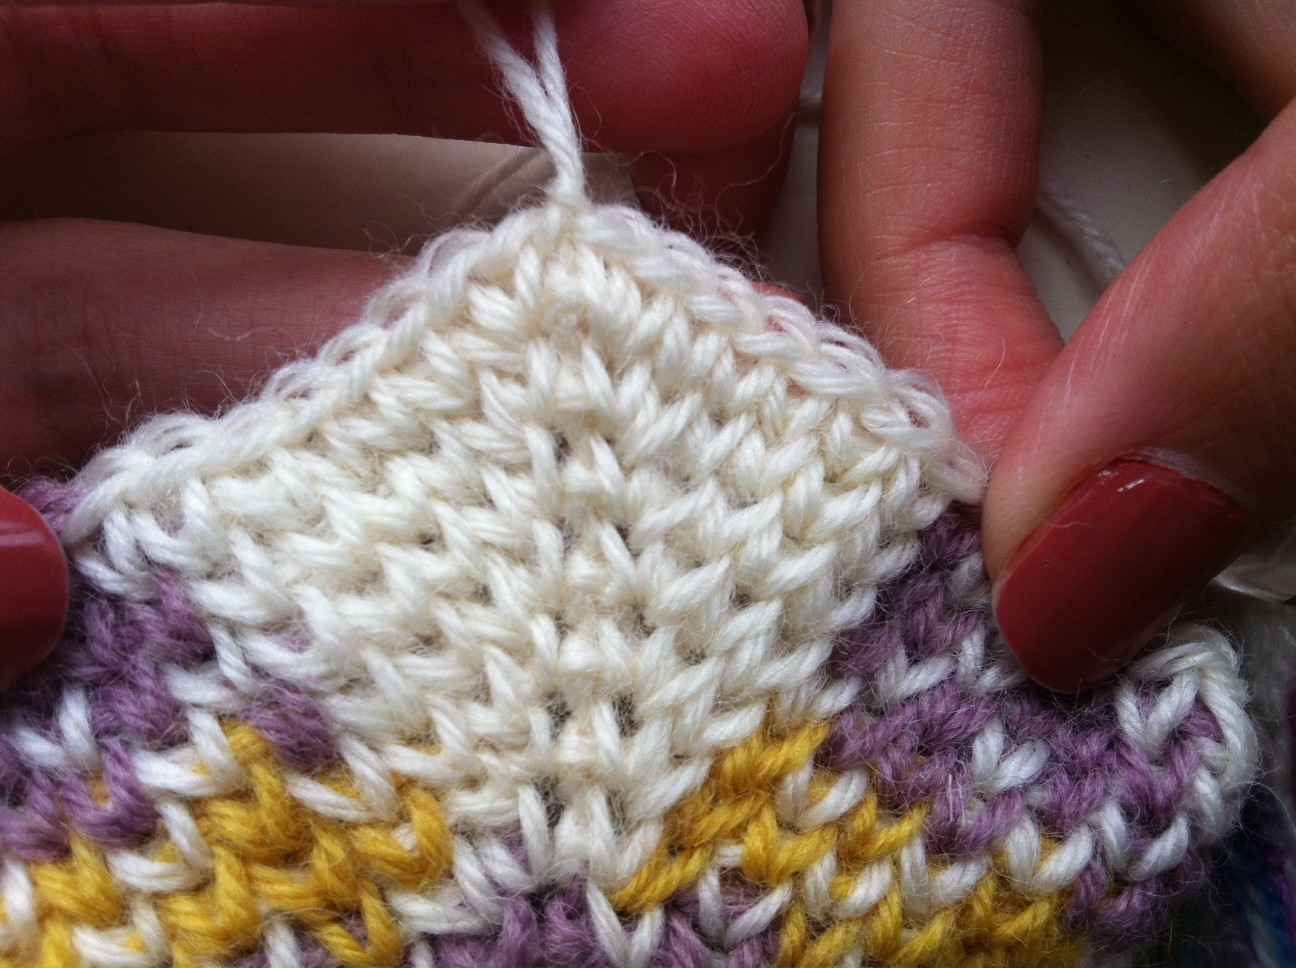
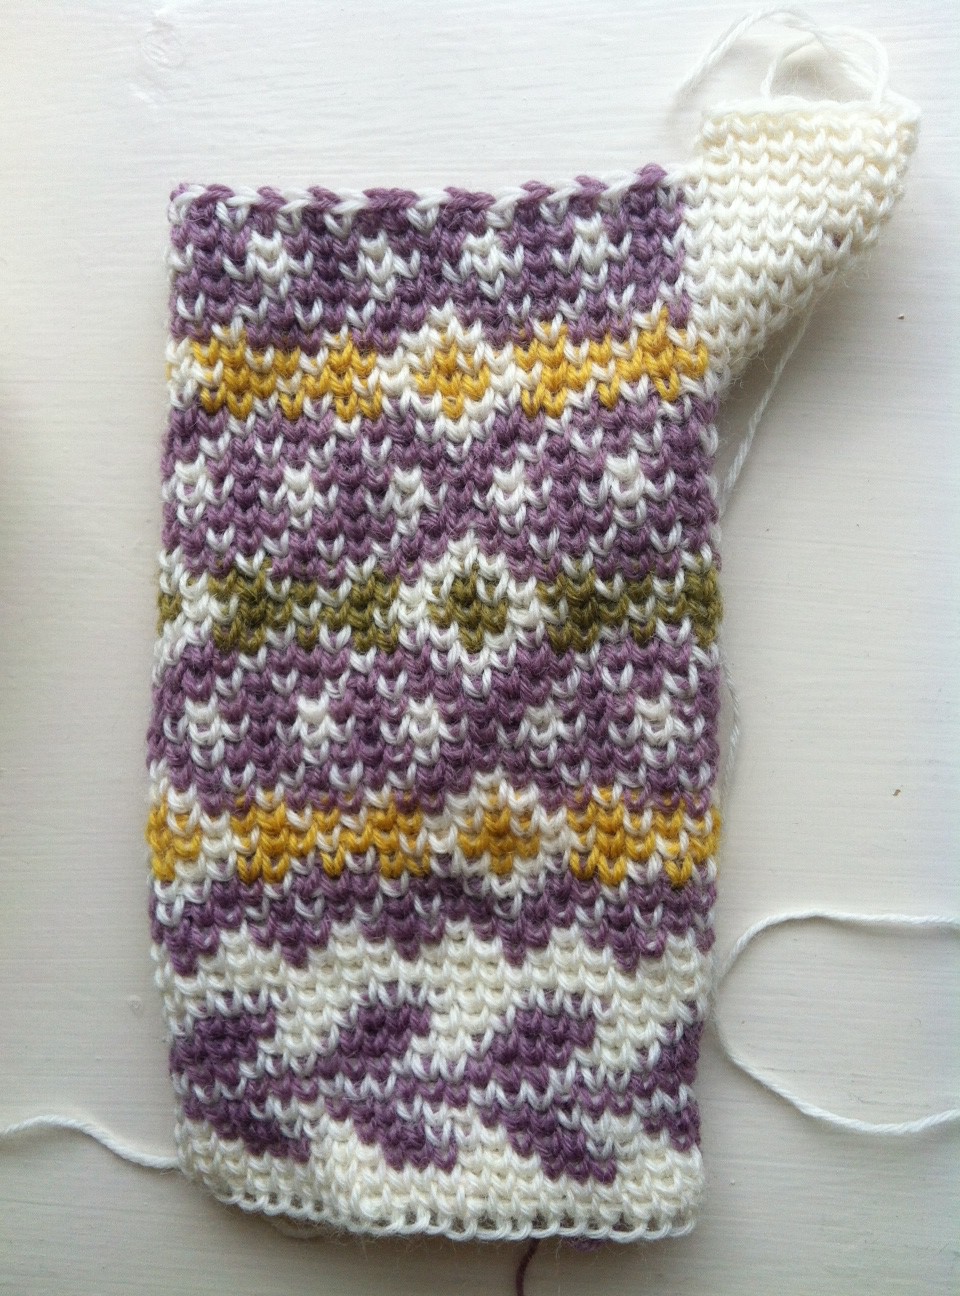
1. If you have followed the first part of this tutorial your mitten should look something like this.

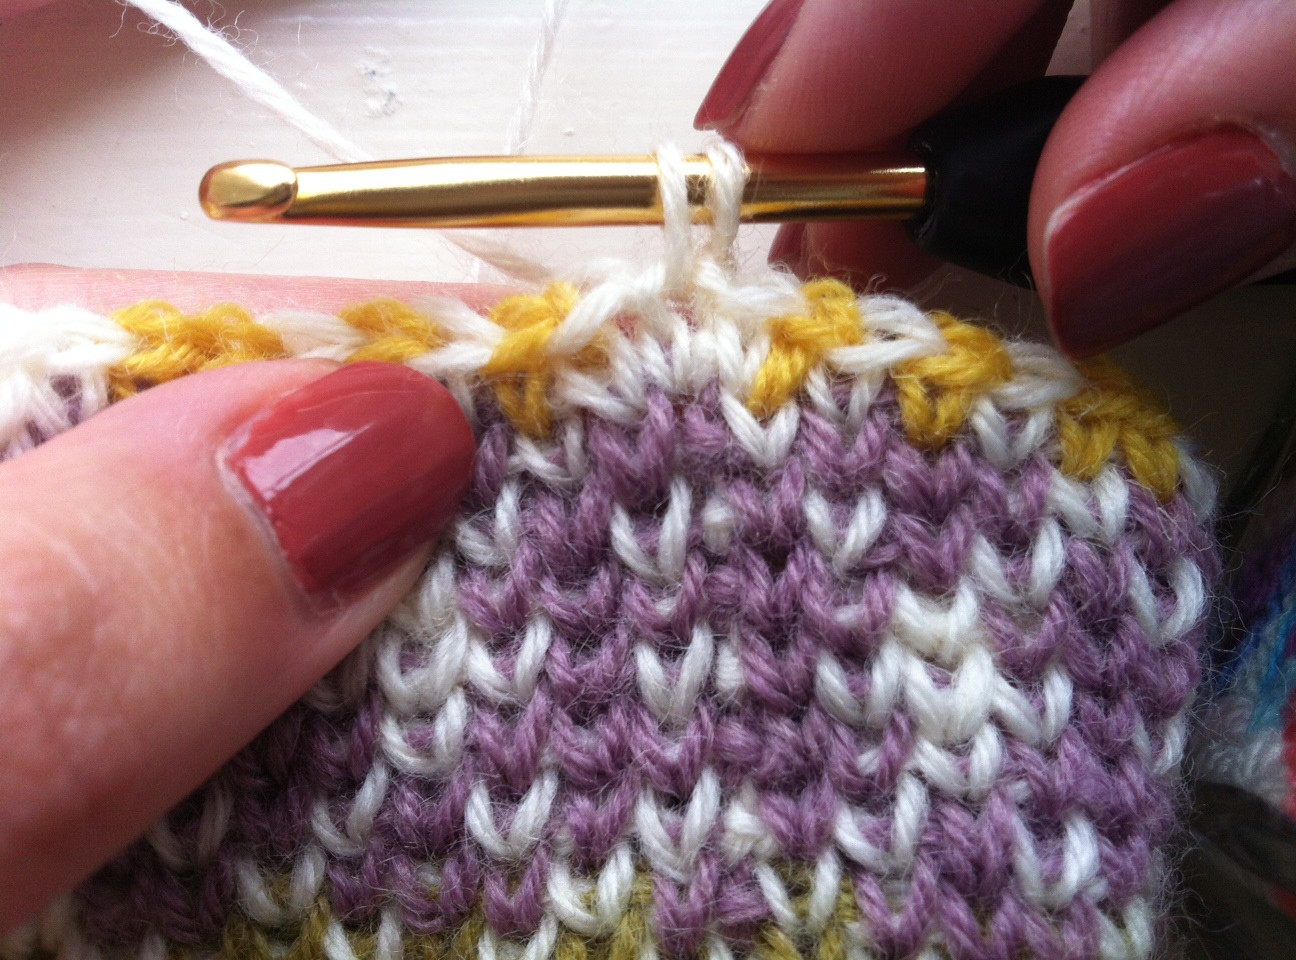
2. Now we will start shaping the thumb. You will do this by adding two stitches per round, one at the beginning and the other at the end. So you have finished Round 35, joined with a sl st to first st and chained 1 (remember to pull tight)…
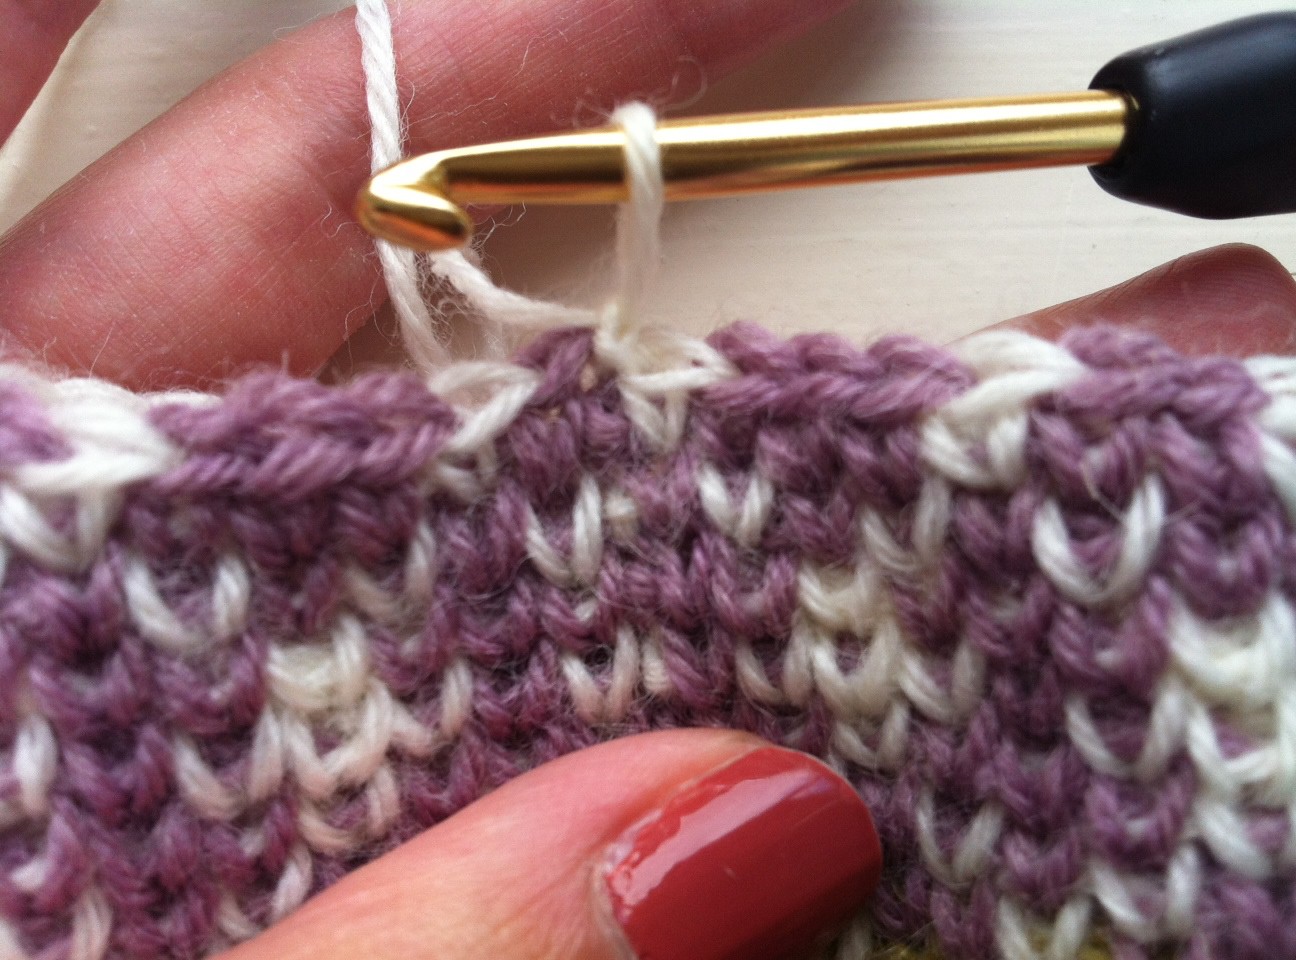
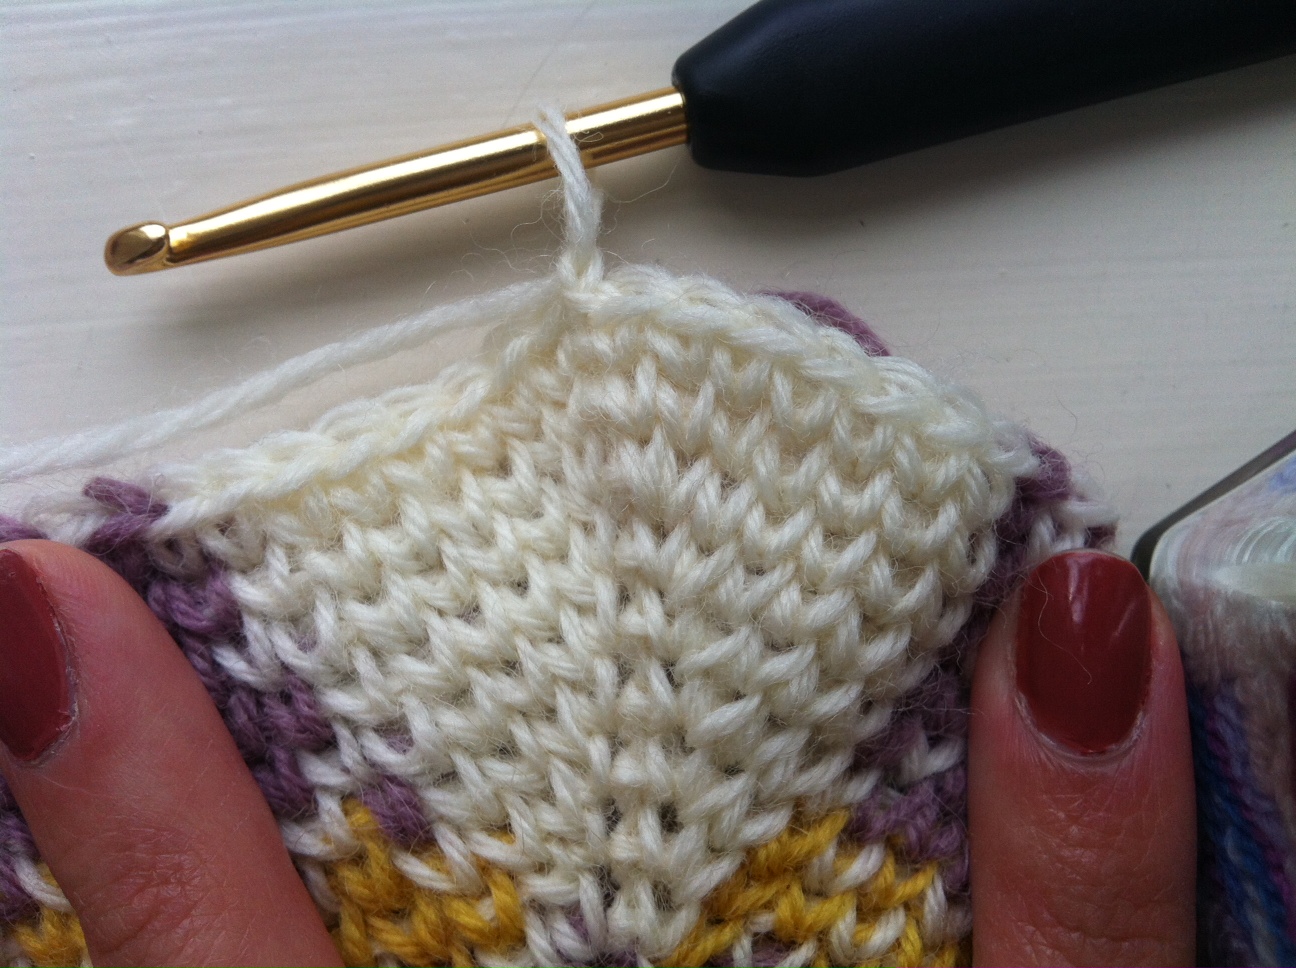
3. Now for Round 36 we will do the first increases. Instead of starting the round by making a wst, you will do a normal dc in the first st. So insert your hook in the first st…

4. And crochet a dc.


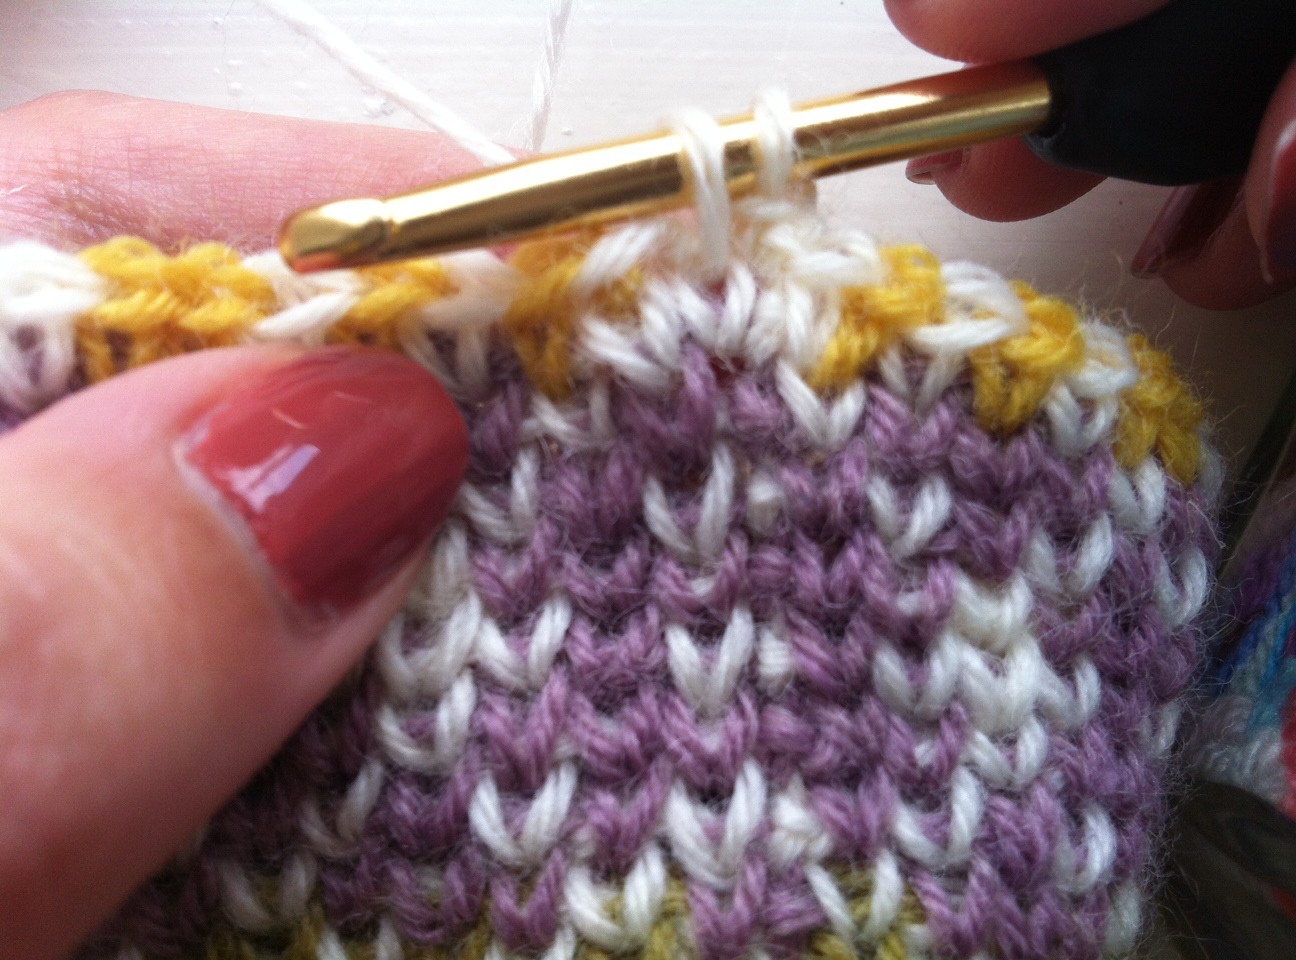
5. If you look at the chart the stitches that are dc are marked. Now you can continue the rest of the round following the chart using wst until the last st of the fair isle pattern which is yellow. Since the next increase stitch is white you will need to change colours before finishing.
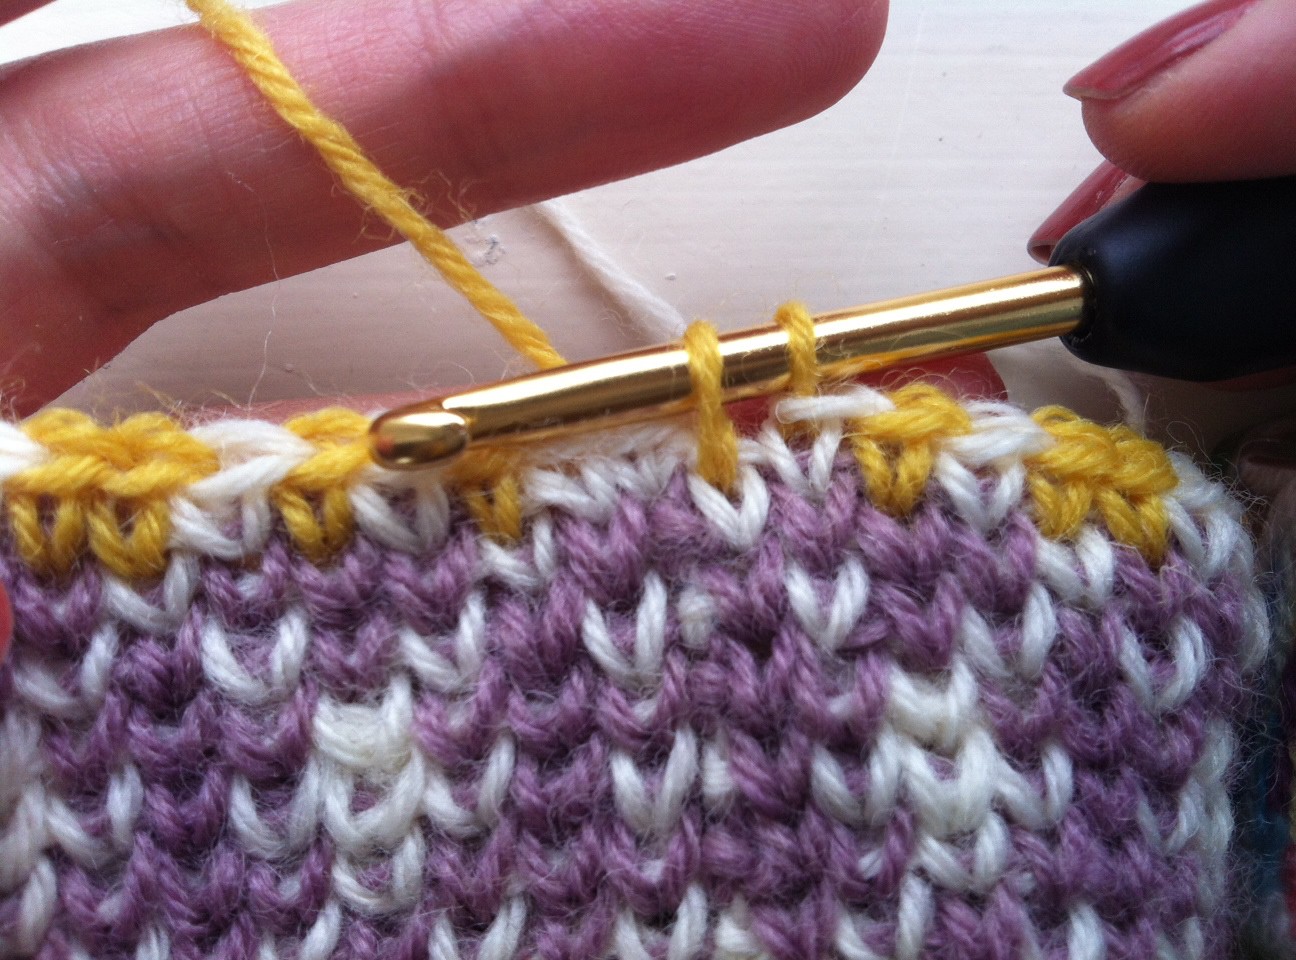


6. The increase now is made by doing another wst in the same st as the last you made.


7. Sl st to first st, ch 1 and pull tight.

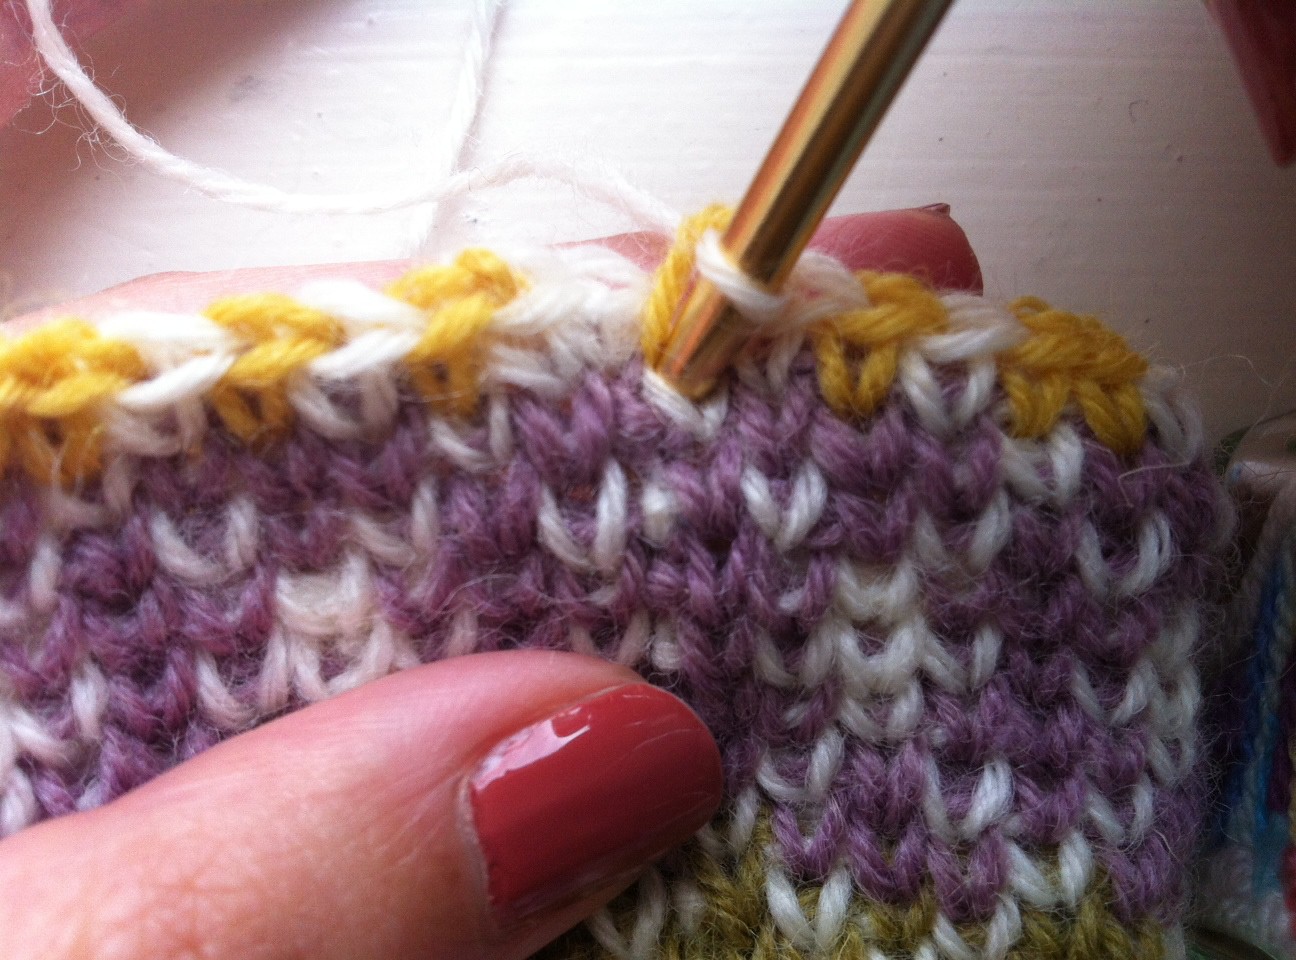
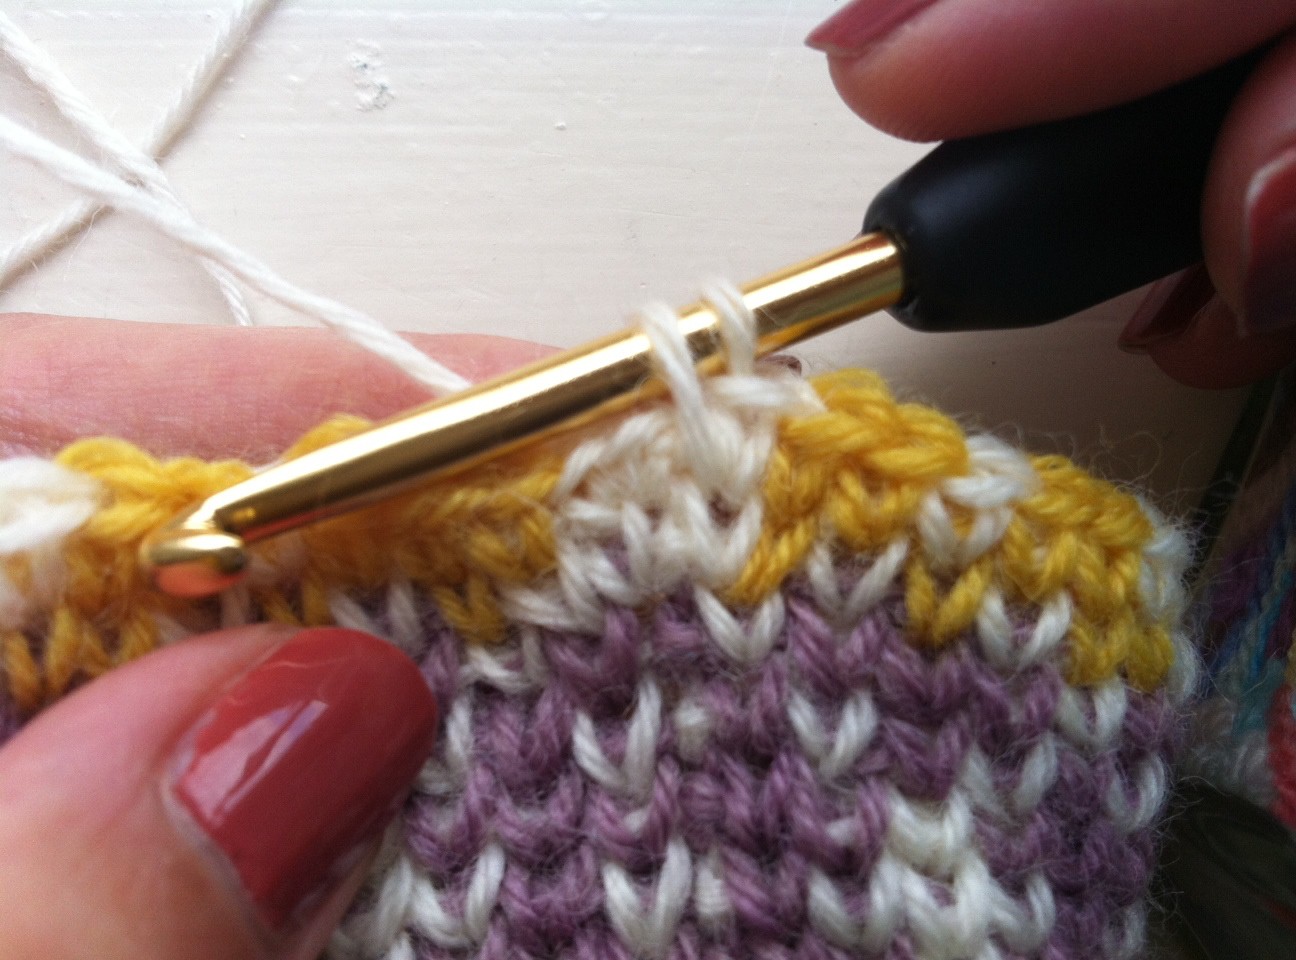
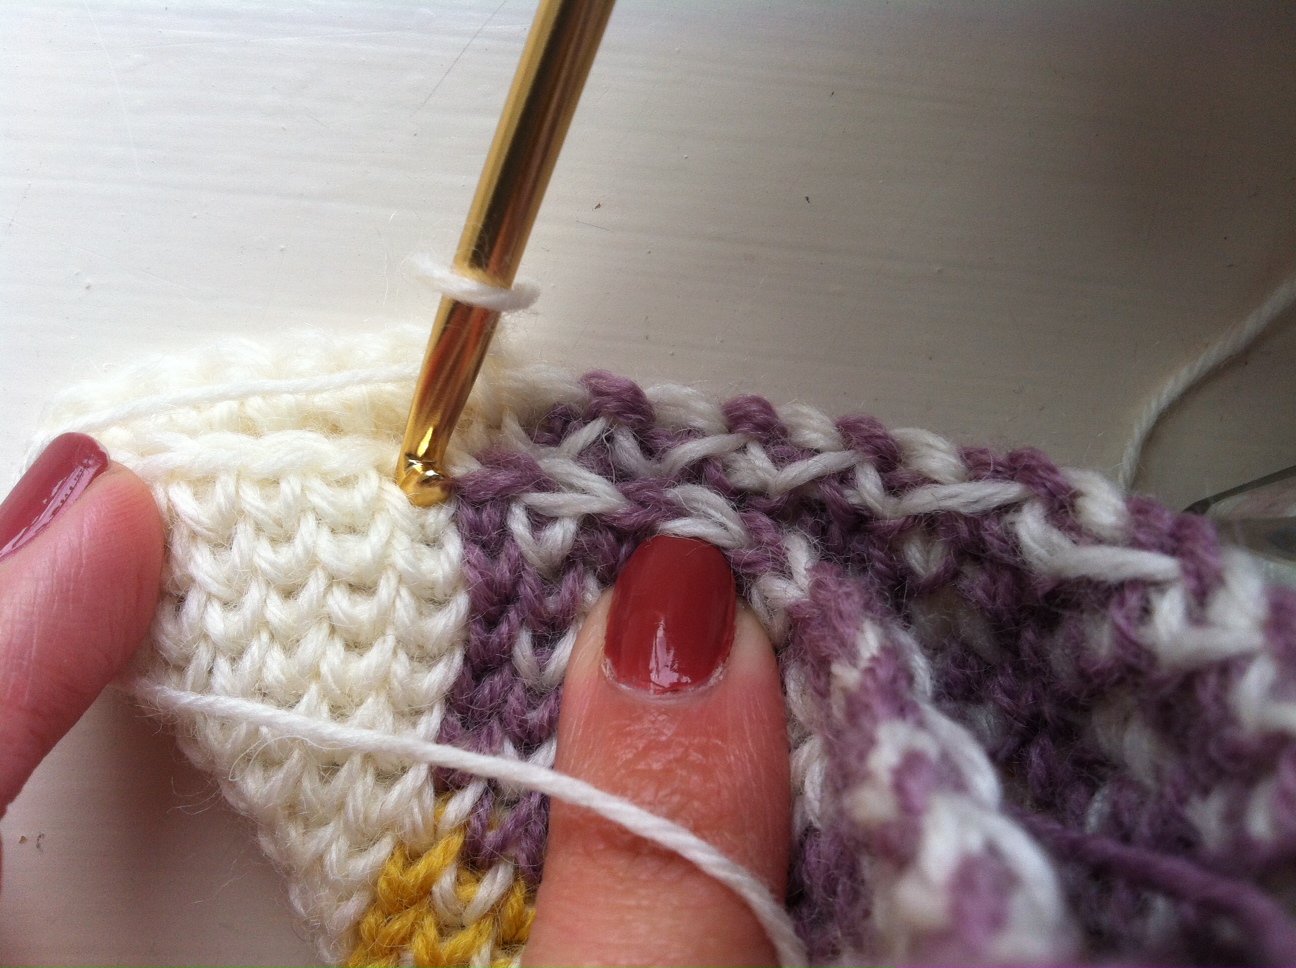
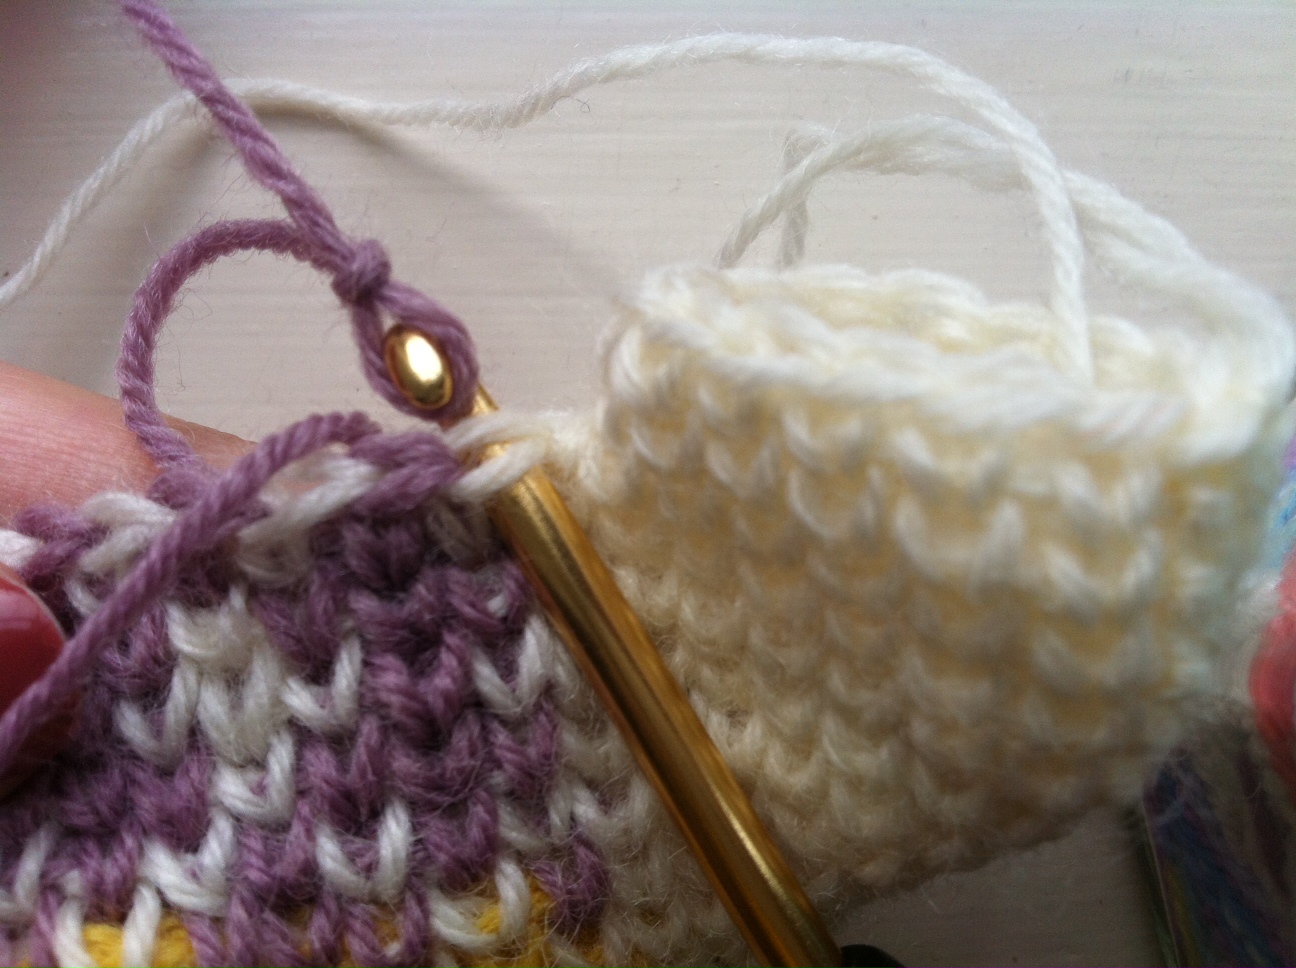
8. For Round 37 we increase again on the first and last st. So make a dc in the first st…

9. Now, the next stitch is the first increase we made in the last round, so it is part of the thumb and therefore it is a white st as well and also a wst since it doesn’t have a “dc” on the chart. So make a wst in the next stitch…


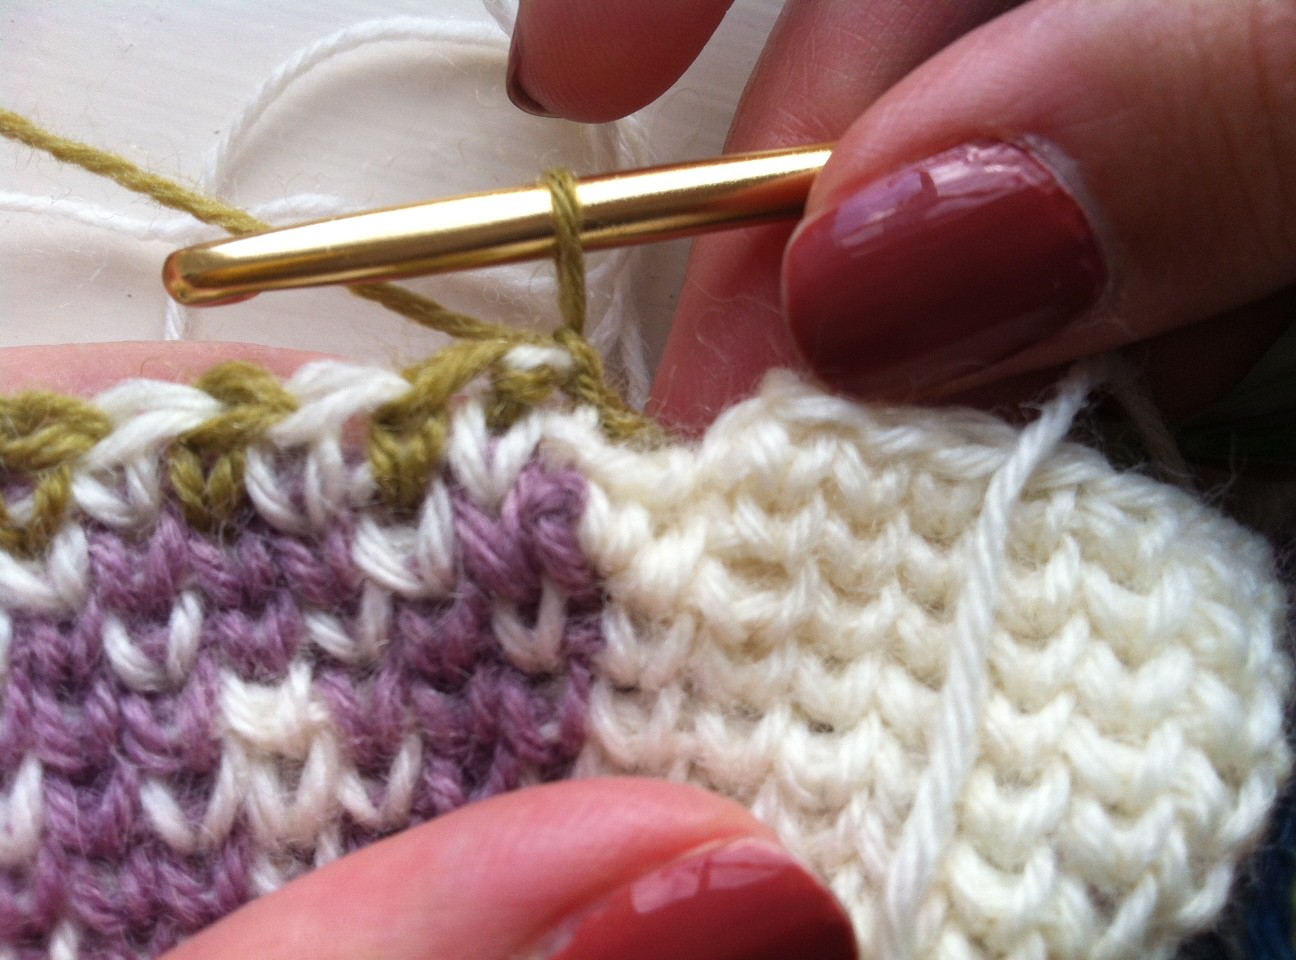
10. After the two stitches of the thumb continue with the chart until the last st of the main fair isle pattern, which is in yellow. Now the next st corresponds to the increase of the last round. Make a wst there…
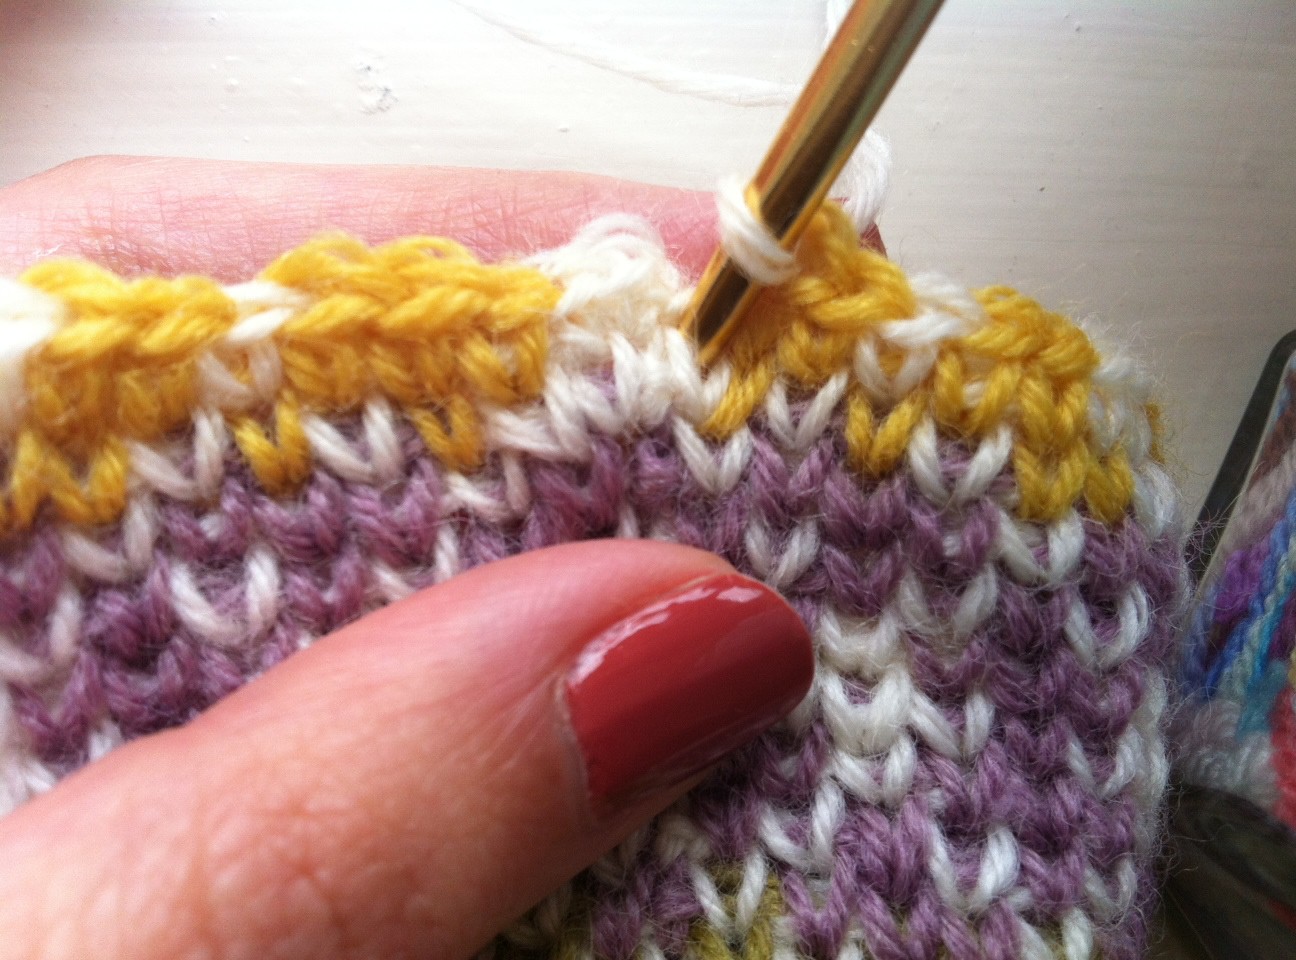


11. … and then make another wst in the same st. This is the second increase of the round, now you have 4 st that make the thumb.


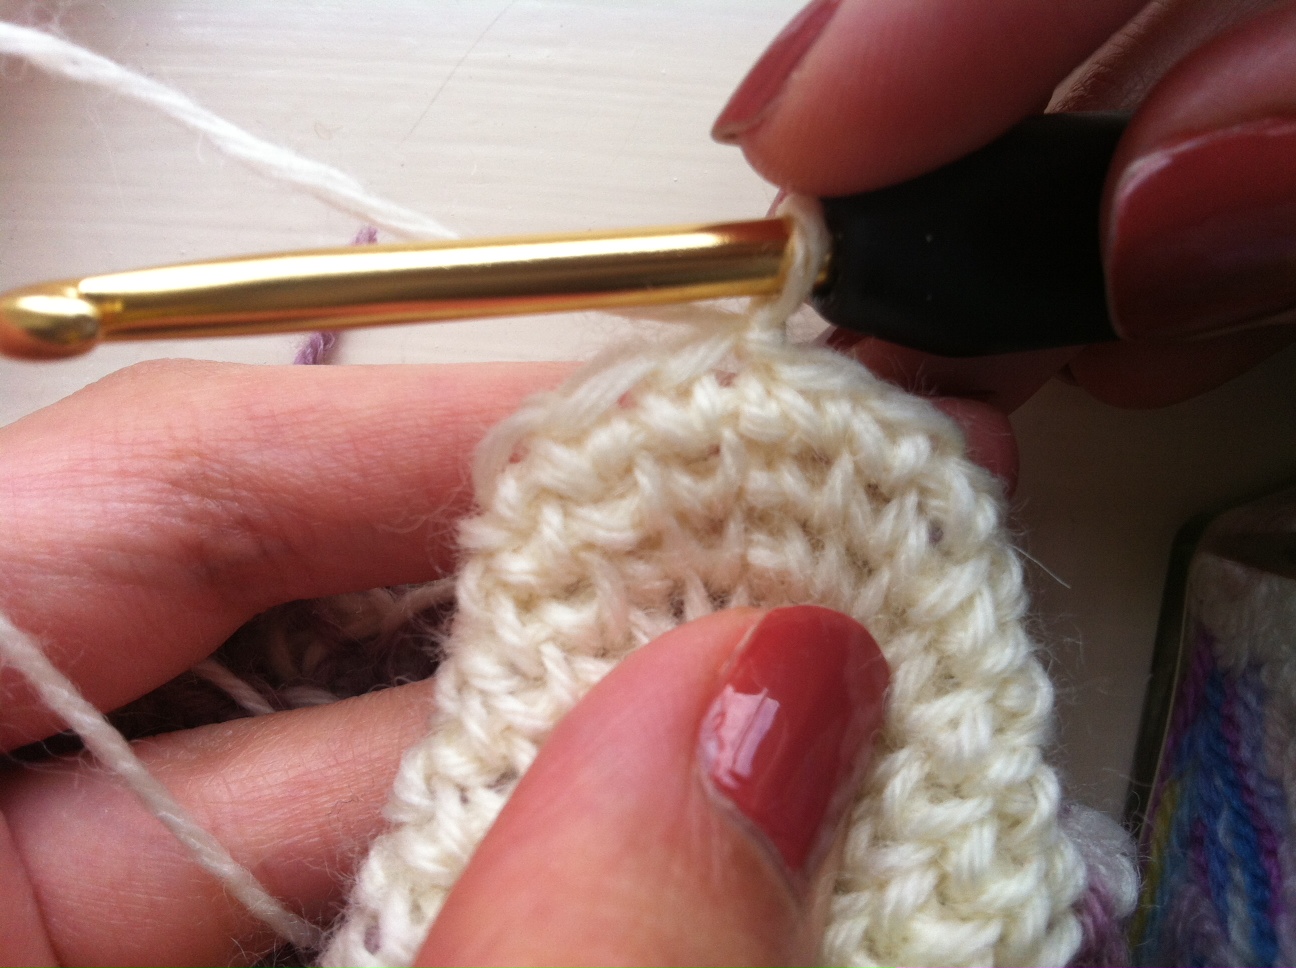
12. Sl st and ch 1. The main fair isle pattern will always have 42 st, but you will continue to add 2 st per round this way until you have 14 st on the thumb. Make sure you keep those 42 st for each round, for some rounds the fair isle pattern starts or finishes with white so it is easy to miss a st. Continue until Round 42, your thumb should look like this, with 14 st.

13. For Round 43 and 44 you will keep the same number of stitches for the thumb, so the first st in the round is no longer a dc, but a wst. Continue with Rounds 43 and 44 with no increases.

14. In Round 45 we will separate the thumb from the rest of the pattern. Your thumb should look like this.
15. Start Round 45 with 7 wst as the chart indicates.

16. Then instead of continuing with the fair isle pattern, you are going to do the next wst on the other side of the thumb.

17. Continue with the next 6 wst.

18. Slip st to first st and ch 1.


The chart for this design is not included in this tutorial, can make my own from the pictures, but would be easier if the chart was supplied. I realize this is a free pattern, and beggars shouldn’t be choosers, but a copy of the chart would be most appreciated!!! Thank you for the pattern, the waistcoat stitch is amazing!!
Hi Barb, thanks for stopping by. There is one chart per part of the tutorial and both can be found in each post. The one for this second part can be found through a link in the paragraph under “Instructions”. Here is the link as well if it is easier.
Hope you enjoy the pattern 😉
x
Sol
There is a copy of the chart on the Part 1 part of the pattern.
These are amazing! Can’t wait to try them! Thank you so much for sharing them. Brilliant!
Thank you! Glad you like them 🙂 and let me know if I you need any help! x Sol
Thank you for sharing this pattern. I can’t wait to get my yarn and get started!