Free pattern: Moroccan tote

IMG_0545

*Ravelry link

I know, it was so long ago when I first shared my Moroccan tote and promised to write a pattern for it. Life has been busy as usual and I have been focusing more on crocheting than designing lately since it was getting a bit too crazy: full-time job, blogging and pattern design weren’t leaving much time for anything else! So I took my time, posted a tutorial for the technique I used and now I can finally share the pattern with you. As usual, it is for free, but please refer back to me if you post it online or sell a finished product, including the chart which I created myself from the picture I used as inspiration.

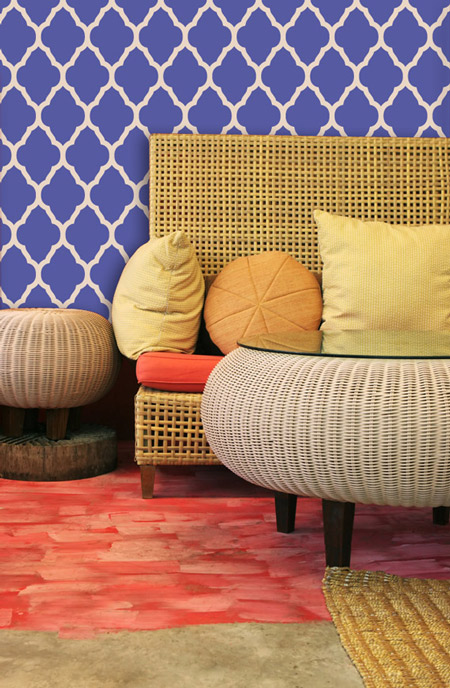
Royal Design Studio Stencils

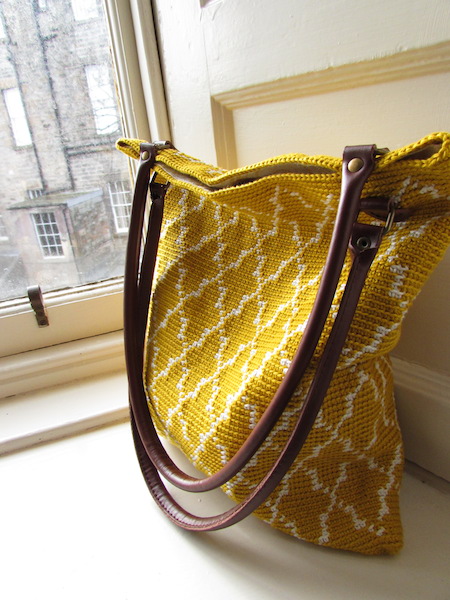
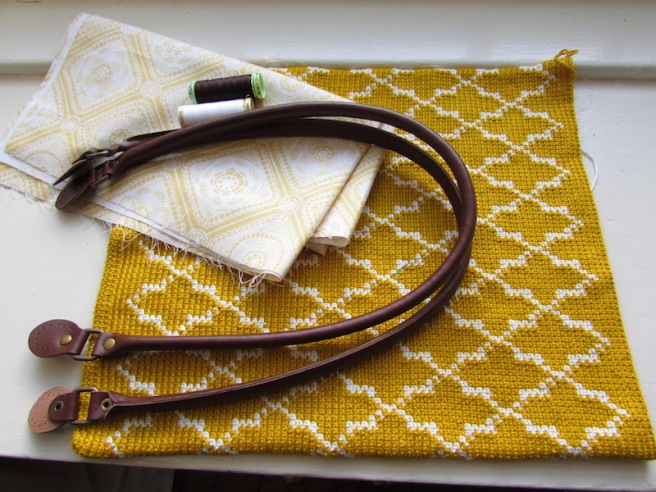
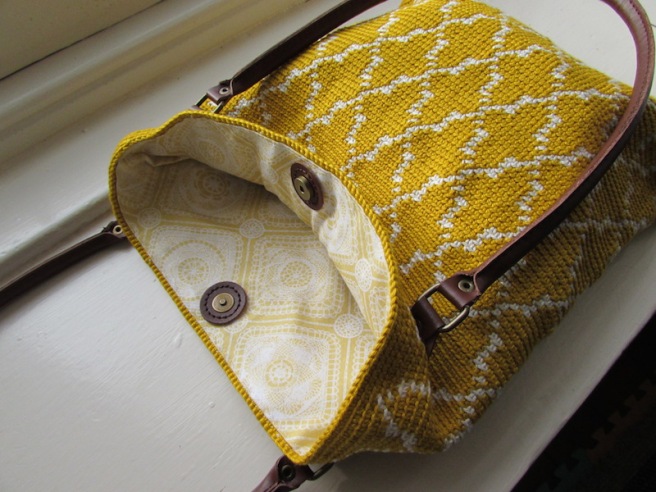
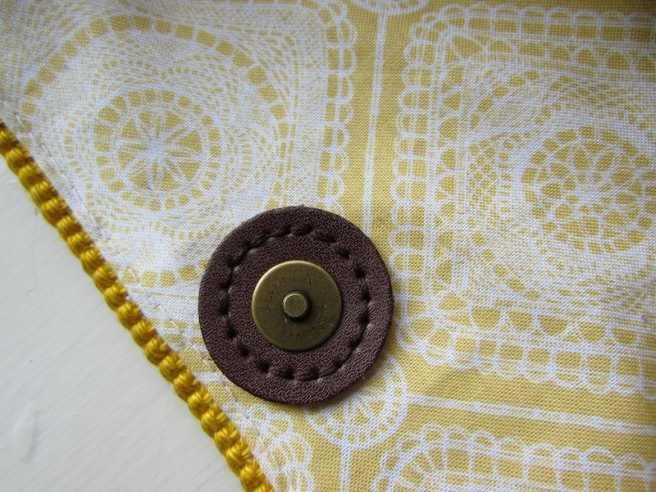
The pattern is for a tote and therefore it doesn’t have a big base for it. If you want it more as a handbag you can adapt the pattern to make the base bigger, just make sure you get a final count of stitches that is a multiple of 12, which is the stitch repeat for the pattern. I added leather handles, fabric lining and a magnetic clasp and I think those finishing touches really made the difference. You can find the handles and clasp I used here. The yarn is Cascade Ultra Pima, it has a beautiful shine to it which I really love and that gold colour is my favourite.

IMG_0395

IMG_0544

Before getting to the pattern I wanted to note that tapestry crochet can be tough on the hands. This bag is crocheted using a 2.5mm hook with a DK yarn, which is a lot smaller than what you would use for that yarn weight. If crocheting causes pain in your hands or wrists then please be aware that this pattern may be difficult for you, the stitches are very tight and you have to put more effort to get the yarn through so make sure you use a crochet hook that is comfortable for you. You could go up a hook size, but that will make the fabric a lot less dense and sturdy, which is what makes it good for a bag. It’s up to you, I just thought it would be good to make it clear from the start.

Moroccan tote pattern

IMG_0551

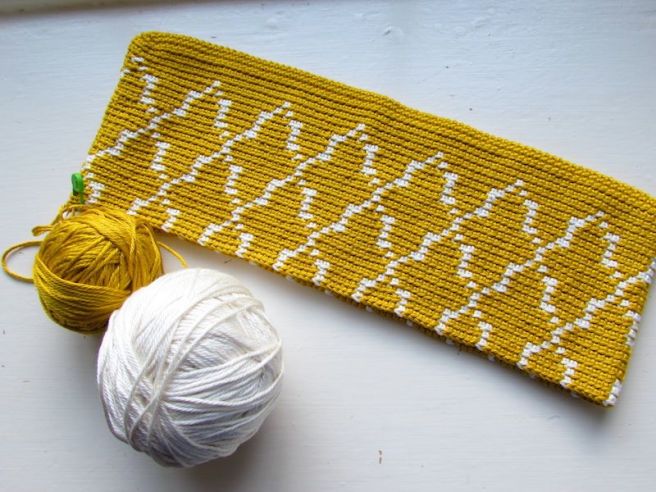
This bag uses tapestry crochet to create a nice dense fabric for a small tote. A small base is crocheted first and then the rest of the bag is worked in a beautiful moroccan pattern. The bag is worked in spirals all the way through, meaning that you don’t join each round which eliminates that sometimes noticeable slip stitch. Leather handles and a fabric lining complete the pattern to create the perfect summer tote.

IMG_0553

The tote measures 36cm x 30cm, with a gauge of 28 stitches and 22 rows in a 10cm square. You don’t have to get exact gauge, I prefer it tight like this since it creates a stiff fabric but see what works for you.

Materials

Cascade Ultra Pima DK, 2 skeins in Gold, 1 skein in Natural.

2.5mm hook

Tote leather handles

Magnetic clasp

Thread to match the colour of your handles

Fabric for lining

Stitch marker or yarn in contrasting colour

Abbreviations

Ch – Chain

St – Stitch(es)

Sl st – Slip stitch

dc – UK double crochet

Instructions

*If you don´t know how to work tapestry crochet you can check my tutorial here.

Base

The base is not worked in tapestry crochet, I find it a bit difficult to carry the other colour inside for these first few rounds but you are welcome to try if you prefer a thicker base.

As I have mentioned before, the hook size and yarn weight for this pattern create a very tight fabric, which makes stitches a bit more difficult to work. I find the easiest way to work a dc when working with a small hook like this is to always work one loop at a time, meaning: insert hook on st, yarn over and pull a loop. Now instead of yarning over and pulling through the two loops in one step you can do the following: yarn over pull through one loop, and now pull that loop through the last loop on your hook.

Ch 79.

Round 1: dc in 2nd ch from hook, place marker in st just made, 76dc, 4dc in last ch, turn and start working on other side of chain, 76 dc, 3dc in same ch where you worked marked st. Don’ turn (160 st)

From here onwards you will work in spirals, meaning that you won´t join the last and first st of each round with a sl st. You will move your marker up each row to know which is the first st of each round. Also, you will never turn your work.

Round 2: 2dc in marked st (remember to move your marker up to the first dc of those two to mark the first st of this row), 76dc, *2dc in next st, repeat from * for next 3 st, 76dc, **2dc in next st, repeat from ** twice (168 st).

Round 3: dc in marked st, move marker up, dc in each st across (168 st).

Body

For the body of the bag you will work using tapestry crochet, meaning that you will always carry the unused colour inside your stitches, even if the round is only one colour (like Rounds 1 and 2). You will also continue to move your marker up to know where your round started and you will ALWAYS work in the back loop only.

Rounds 1 to 77: Follow chart from right to left for each round. Each square is a dc worked in the back loop only, if you don’t know how to change colours in each round check this tutorial. Remember to bring the marker up at the beginning of each round (marked st is St 1 in chart for each round), and to work in spirals without joining each round. I recommend marking the first st of the first round of the body, and using another st marker to move up each round, so that if you forget to move your marker up you can use that first marker to work your way up and know which one is the first stitch (you can tell I am talking by experience here!).

As indicated in chart, repeat Rounds 3 to 18 a total of four times and follow the top chart for Rounds 67 to 77. When finished, sl st to first st of last round.

To create a lining I always follow this tutorial by Futuregirl, just omit the zipper part of the tutorial. Sew on the handles before sewing on the lining to hide the stitches, and use a strong thread for the handles. Finally, sew in the magnetic clasp.

And your tote is finished! Let me know if you have any questions,

Enjoy!

x

Sol

FREE Pattern: Cobbled Street Cowl

IMG_0242

*Ravelry link

It took forever for me to finally sit down and write this pattern but it is finally here. I haven’t really been designing much lately, in a bit of a dry spell at the moment. Have many ideas but haven’t been able to bring myself to start any of them. It takes quite a while for me to get to a finished object for my designs and I think I needed a break so have been enjoying crocheting other people’s designs for a bit. I have a couple that I should start since the yarn is waiting there for me, but I am definitely taking things a bit slower when it comes to designing.

IMG_0440

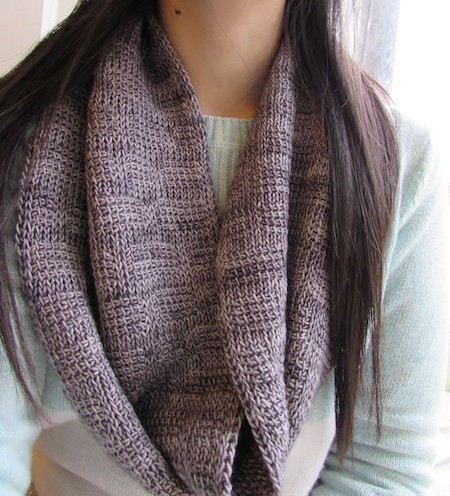
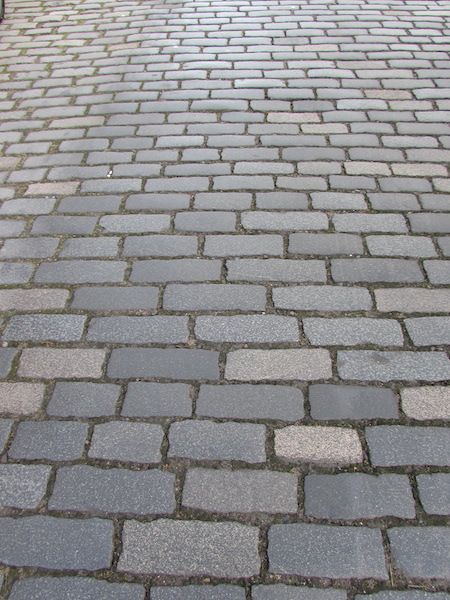
I love this cowl so much, it is one of my favourites along with my Uva shawl. As I mentioned in my ta-dah post this cowl is inspired on the beautiful cobbled streets in Edinburgh. It is a very simple tunisian pattern, uses two stitches and I have created an easy chart for you guys to follow. I would even recommend this as a first pattern for those who are learning tunisian: it uses basic stitches, no increases or decreases and you only need one skein of yarn. How perfect is that?

IMG_0460

The yarn I used is Madelinetosh Merino Light, it is a lovely yarn to work with and it feels even nicer after blocking. I was left with a bit of yarn from my skein but I liked the length so stopped there, it measures 18cm wide for 86cm long before joining both ends. Gauge is not really important but in case you are interested each pattern repeat (Rows 1 to 24) measures 18cm x 11.5cm.

IMG_0425


Cobbled Street Pattern

Materials:

4mm Tunisian crochet hook (30cm long)

Madelinetosh Merino Light 4ply: 1 skein in Tern

Needle to weave in ends.


Abbreviations

Ch – Chain

End st or “E” in chart– Last stitch on forward pass

Lp – Loop(s)

Sk – Skip

Sl st – Slip stitch

St – Stitch(es)

Tss or “|” in chart– Tunisian simple stitch

Tks or “V” in chart– Tunisian knit stitch

YO – Yarn over

Stitch Guide (Visit my tutorials page for photo tutorials)

Foundation forward pass: Insert hook on back bump of second ch from hook, YO and pull up a loop, *insert hook on back bump of next ch, YO and pull up a loop, repeat from * until last ch.

Return pass: YO and pull through 1 lp, *YO and pull through 2 lps, repeat from * until you have 1 lp on hook.

Tunisian Simple Stitch (Tss or | in chart): Skip first stitch, *insert hook from right to left under next front vertical bar, yarn over and draw up a loop; repeat from * across until last stitch, work last stitch normally. Work return pass.

Tunisian Knit Stitch (Tks or V in chart): Skip first stitch, *insert hook between front and back vertical bars of next stitch, yarn over and draw up a loop; repeat from * across until last stitch, work last stitch normally. Work return pass.

End St (E in chart): Last st of the forward pass is made into ch created by the return pass. Insert your hook under the vertical bar where you usually do it AND the strand behind it and pull up a loop.

Binding off: As with every row you start with one lp on your hook. For each stitch, insert hook as normal (depending on whether it is a Tss or Tks), YO and pull through both loops (through the st and the loop you had already). Continue until the last st.

Instructions

Ch 40. Work foundation forward pass (40st, each lp on the hook is a st). Work return pass.

Row 1 to 24: Follow chart for each row, reading it from right to left and from bottom to top. The chart indicates which stitches you must work in the forward pass. Work the return pass normally for each row.

Rows 25 to 192: Repeat Rows 1-24 seven times for a total of eight repeats. When you are in your last row work the binding off as you follow the pattern (see stitch guide). You can continue the pattern if you still have yarn to your desired length. Fasten off but don’t cut yarn.

Use mattress stitch to seam the two ends together. Weave in ends.

x

Sol

Train WIPs February

IMG_0395

I used to be a monogamous crocheter but at some point I found myself having 2 or 3 projects at the same time. Lately I have one project for home, usually something either big or a bit more complicated, and then a couple for my commute, which have to be easy to work and small enough to carry.

My home project at the moment is the Kolika top I mentioned in my last post, since it is a garment it requires my attention and the ability to try it on as I go, which would be a bit tricky to do while I commute (and even more weird than just crocheting on a train). For the train I have been working on two new designs: my moroccan tote and a pair of tunisian fingerless gloves with some leftover yarn from my Uva shawl.

IMG_0390

IMG_0392

I finished one mitt but I have to say the moroccan bag is getting all the spotlight lately, I just love how it is turning out. I have done quite a bit more since I took this picture, I am more than halfway through what will be a tote size bag. I will take some more pictures this weekend to show you how it is coming along.

IMG_0396

IMG_0400

I am browsing for some brown leather handles for it, very exciting 🙂

What is on your hook right now? Let me know in the comments, would love to hear what you guys are working on!

That is it for me today, I have to set some time aside to take pictures for another tunisian pattern, hope I get time to do that this weekend. I also want to tell you more about how those resolutions are coming along so expect another post on that soon. I am off now to do some yoga (told you the resolutions were doing well!), have a great weekend everyone!

x

Sol

Cobbled Street Cowl Ta-dah!

IMG_0332


IMG_0425

Hello my dear readers! How did January treat you? This month went incredibly fast for me, despite the bad weather and short days. I did get quite a lot of crochet time with all the travelling that my work requires, many train rides to just relax, crochet and listen to podcasts.

I have realised that crocheting in trains is where I enjoy it the most, and thinking about this today I realised there is a very simple reason for this: there is nothing else I have to be doing. We all have busy lives and you probably struggle just like me to fit in some crochet time in the day. Even if we managed this there is always something in the back of our minds that is screaming for our attention like laundry to fold, plates to clean, or sometimes in my case even having to make myself some food. When I am on the train, there is nothing else that I could be doing. I couldn’t possible use that time to clean or cook, or anything else for that matter and I think that is why crocheting on the train is such a bliss, because it gets all my attention and it fills up a time that otherwise would be “wasted”. I always want to be productive, can’t help it, its the engineer in me.

By the way, I am obsessed with a few podcasts lately, specially Woolful and Knit British. They are quite different, Woolful is the podcast of Ashley, in each episode she shares interviews with people in the fibre industry and you get to hear their fibre journey which is always so inspiring. Knit British is the podcast of Louise, and here she shares her love of yarn produced, spun or dyed in the UK. Be sure to check them out if you are looking for a new podcast.

The reason for this post is that my cobbled street inspired cowl is finished! This cowl was, as many of my projects recently, a lovely train companion. It is worked in tunisian crochet using only two stitches, it was very easy to work and the yarn is lovely. It really does remind me of cobbled streets so I am very pleased with how this turned out. It uses only one skein so it is a great little project if you want to start with tunisian crochet.

IMG_0446

IMG_0460

IMG_0340

The only problem I had with this project was that the yarn (Madelinetosh Merino Light 4ply) smelled a bit like vinegar when I bought it. It went away while I was crocheting with it but when I blocked it (just spraying some water)  it came back and it smelled awful! Had to do an intense wet blocking to get the smell off but it is all good now.

I will post this pattern soon, need to do a chart for it so may take a bit. I am not a fan of opening Excel when I am not in the office but will do it for you guys 🙂

Hope all is good with you, I am working on a couple more tutorials and of course some more patterns. I will share my progress of that Moroccan-inspired bag soon 🙂

Have a great day!

x

Sol


FREE pattern: Teardrops Chunky Cowl

IMG_0040

Chunky goodness! This pattern was a joy to work and it kept me company during all those train rides and lonely hotel nights. I liked it so much I started another one right after I finished the first! I am obsessive like that 😛

It uses just two tunisian stitches, simple stitch and double stitch which is just a variation of the first really. It uses a really big hook so I do recommend using the ones with the extension, I am not even sure they have sizes this big for the normal long tunisian hooks.

IMG_0038

I really like the contrasting colours for both cowls, they use different yarns and I explain the difference later on. I think it would look great with grey and a nice neon colour 🙂

The seams are hidden inside the cowl so that they are not visible, and the best thing is that you DON’T HAVE TO WEAVE IN ANY ENDS!

Enjoy 😉

Teardrops Chunky Cowl Pattern

IMG_0065

This tunisian crochet pattern is worked flat and then folded and sown to make it double. The inside of the fabric is therefore not shown so there is no need to weave ends since they can be left inside. It uses only two stitches and it works up very quickly.

I have two widths available depending on the type of chunky yarn you use, some are denser than others. If your yarn is approx. 100 mt per 100g then you will chain less stitches, if your yarn is closer to 140 mt per 100g then you can make your cowl wider with the same amount of yarn in grams.

If you don’t know how to work tunisian simple stitch or how to change colours at the beginning of the forward pass please refer to my tutorials page where you will find all you need to work this pattern, including how to read my tunisian crochet tutorials.

IMG_0051

The cowl in the denser yarn (barley and green) measures 34cm wide when worked flat (17cm finished width once folded) and is 80 cm long.

The grey/royal blue cowl is worked in a lighter chunky yarn and it measures 42cm when worked flat (21cm finished width once folded) and is also 80cm long.

For both I used 2 x 100g balls of the background colour, only a few grams left. You will need only one 100g ball for the contrasting colour.

For the grey/royal cowl I got a smaller gauge which meant that I obtained the same length with less amount of rows, I recommend you simply work as many as you can while following the pattern.

Materials

You can choose between the following yarns:

  • Woolyknit Lofty Chunky: This is a denser yarn with approx. 100m/100gr
    • 2 x 100g balls in Barley (used all 200g) – Colour A
    • 1 x 100g ball in Olive (used 50g) – Colour B
    • Gauge: 11 sts and 1o rows in 10cm x 10cm worked in pattern.

or…

  • Stylecraft Special Chunky: This is a lighter chunky yarn, with approx. 140m/100gr
    • 2 x 100g balls in Silver – Colour A
    • 1 x 100g ball in Royal – Colour B
    • Gauge: 10 sts and 9 rows in 10cm x 10cm worked in pattern.

You will also need:

  • 9mm tunisian crochet hook 30cm long or with extension
  • Needle to sew edges together (if you prefer it instead of slip stitch)

Abbreviations

ch – chain

st – stitch

Tss – tunisian simple stitch

Tdc – tunisian double crochet

lp – loop(s)

sl st – slip stitch

yo – yarn over

end st – last stitch of forward pass (see stitch guide below)

Stitch Guide

Foundation Row – Forward Pass: Chain number of stitches needed. Skip first chain, insert hook under back strand of next chain, yarn over and pull up a loop. Repeat until last chain.

Return Pass: Yarn over pull through one loop on hook, (yarn over and pull through two loops on hook) until you have one loop left on hook.

Last stitch of any forward pass (End st): Insert hook under last vertical bar and strand behind it, yarn over and pull up a loop.

Tunisian Simple Stitch (Tss): Insert hook from right to left under next front vertical bar, yarn over and pull up a loop.

Tunisian Double Crochet (Tdc): Yarn over, insert hook from right to left under next from vertical bar (as in Tss), yarn over and pull through two loops on hook. For this pattern you will work Tdc one row below than where you would usually work it.

To change colours at the start of next forward pass: work previous return pass normally until you have two loops left on your hook. Drop old colour and pick up new colour, yarn over and pull through two loops on hook.

Slip st as in Tss: Insert hook from right to left under next front vertical bar, pull through two loops on hook.

Slip st End st: Insert hook under last vertical bar and strand behind it, yarn over and pull through both loops on hook.

Instructions

There are only a few differences in the pattern for each cowl. The grey one is wider and has less amount of rows than the barley one. I will write the pattern for the barley/olive cowl and will note any differences in a parenthesis for the grey/royal blue one.

With A chain 35 (40). Work foundation forward pass, you should have 35 (40) st, each loop in the hook counts as a st. Work return pass.

Row 1: Skip first vertical bar, Tss in next st and each st across until last st, work End st. Work return pass.

Row 2 – 3: Repeat Row 1.

Row 4: Skip first vertical bar, Tss in next st and each st across until last st, work End st. Work return pass, change to B at the end of return pass. No need to cut yarns, you can carry it along on the back.

Row 5: Skip first vertical bar, Tss in next 2 st, 2Tdc one row below, *3 Tss, 2Tdc one row below, repeat from * until last four sts, Tss in next 3 sts, Tdc one row below, work End st. Work return pass, change to A at the end of return pass. No need to cut the yarn, you can carry it along on the back.

Row 6: Repeat Row 1.

Row 7 – 66 (7 – 60): Repeat Rows 1 to 6.

Row 67 – 71 (61 -65): Repeat Rows 1 to 5.

Row 72 (66): Skip first vertical bar, slip st as in Tss in next st and each st across until last st, slip st End st.

Fold the fabric lengthways so that the wrong side of the fabric is facing you and sew in the long edge to make a tube. You can use slip st or any other joining method you like. Turn the fabric over so that the right side is facing (make sure all the ends remain inside the tube) and close the tube to turn it into a cowl by sewing both edges together. You will be sewing one circumference against another so that you end up with something like a donut (I am not sure I am making any sense so please ask if you are totally lost!). Don’t sew the four layers together or you won’t be able to hide the seams on the inside of the cowl when you are wearing it. You can see the seam in the picture below.

IMG_0047

If you have any questions, please ask 🙂 Hope you give it a try!

x

Sol

Free Xmas Pattern and Tutorial: Mini Fair Isle Hats

photo 4

*Ravelry link*

Well we are definitely in holiday season: lights are starting to appear, Christmas songs can be heard in every shop and markets soon will follow in my part of the world. And what better way of getting into the Xmas spirit than crocheting this cute little fair isle ornaments!

This pattern works up very quickly, it only has two rows of colorwork but I have prepared a full tutorial so that you can follow it no matter what level of crochet you are comfortable with. I used a DK yarn and 3.5mm hook, but you could also use a 4mm (see the small difference in size in picture below).

photo 3

And here it is!

Mini Fair Isle Hats Tutorial

This pattern is worked in the round, starting with a row of foundation double crochet. It has two rounds of colourwork where the unused colour is carried as strands on the inside of the hat. The pompom gives the final touch for this cute little Xmas ornament.

Size

8cm (3″) tall

Materials

3.5mm hook (could be replaced for a 4mm if necessary)

DK yarn in two Xmas colours (or any of your preference), I used Stylecraft Special DK in Lipstick, Spring Green and Cream from a blanket I have in progress

Needle to weave in ends

 Pompom maker 2cm diameter (bought or made by yourself)

Abbreviations

ch – chain

st – stitch

sl st – slip stitch

fdc – UK foundation double crochet

dc – UK double crochet

dc2tog – UK double crochet decrease

BL – back loop of chain

Stitch guide

fdc: Follow this link for a tutorial.

dc2tog: insert hook in stitch, yarn over and pull up a loop, insert hook in next stitch, yarn over and pull up a loop, yarn over and pull through 3 loops on hook.

Notes:

  • When joining each round, slip stitch to first dc (not turning chain), pull very tight to make that stitch as small as possible, then chain one, and pull tight again to make that chain very small. This technique by Crochet Ever After helps keep a straight and less noticeable seam.
  • The first st of each round is done in the same st where you joined with a sl st.
  • I have written the instructions for the cream/red hat so those will be the colours I will reference to, just keep your own colours in mind when following the pattern.
  • Number of stitches in parenthesis shows how many stitches you should have at the end of the round.

Instructions:

1. With the cream colour make 24 fdc (here is a tutorial for this stitch). Make sure your tail is not too short, since you will be using it to close a little gap once finished.

IMG_2337

2. Form a circle making sure you are not twisting the stitches.

IMG_2338

3. Join to first st with sl st. Pull tight to make it as small as possible. As you can see there is a small gap, we will sew both sides together at the end.

IMG_2340

4. Keeping your hook where it is, make a slip knot with the other colour.

IMG_2341

5. Pull the red loop through the white one and pull tight (pull the white yarn tight as well).

IMG_2342

6. Ch 1, pull tight. You will continue working with the red yarn, leave the white in the back and don’t cut it since you will pick it up again soon.

IMG_2343

IMG_2345

7. Dc in the back loop (BL) of the same stitch where you did the sl st. From here onwards all dc should be in the back loop only. Dc in next st and every st across (24st).

IMG_2347

8. Join to first st of the round with sl st, pull tight.

IMG_2348

IMG_2349

9. Ch 1, pull tight (You should pull tight after the sl st and ch 1 when closing every round from here onwards, but won’t keep repeating it :P)

IMG_2350

IMG_2351

 10. Insert your hook in the BL of the first st (where you did the sl st) yarn over and pull up a loop. Drop the red yarn, yarn over with the white and pull through both loops on hook.

IMG_2354

IMG_2356

11. Insert your hook in the BL of next st, yarn over and pull up a loop.

IMG_2358

12. Drop white yarn, yarn over with red yarn and pull through two loops on hook.

IMG_2359

IMG_2360

13. You will repeat steps 10 to 12 until the end of the round (one red st, one white, one red, one white…), but first I will show you how to keep your yarns from tangling. Like on step 10, insert your hook in the BL of next st, yarn over and pull up a loop.

IMG_2361

14. If your yarns are tangled already, untangle them and put the white yarn on your left, the red one in front of you. Now you need to pick up the white yarn, so drop the red in front of you and pick up the white from your left. You will notice that the white goes under the red when doing this. Yarn over and pull through 2 loops.

IMG_2363

IMG_2364

IMG_2365

15. Let’s do one more so that it is clear. Insert your hook in BL of next st, yarn over and pull up a loop.

IMG_2370

16. Now drop your white yarn to your left, and pick up the red from the front.

IMG_2371

IMG_2372

17. Yarn over with the red and pull through both loops.

IMG_2373

IMG_2374

18. If you continue dropping the white to the left and the red to the from your yarns won’t get tangled. Continue this way until the last st, which should be a white one.

IMG_2375

19. Dc in last st without changing colour.

IMG_2376

IMG_2377

20. Still with the white yarn, sl st to first st and ch 1 (pull tight!)

IMG_2378

21. We will do the exact same steps for this round as for the last one, except we will do opposite colours, so if the st was red in the last round, in this round you will do a white one and so on. So the first st of the previous round is red (the one where you did the sl st), since we are working with a white yarn already we don’t need to change colours. Insert your hook in the BL of the first st, yarn over and pull up a loop.

IMG_2380

22. Drop your white yarn to the left and pick up the red in from of you. Yarn over and pull through both loops.

IMG_2382

23. Repeat steps 10 to 12 until last st of round, which should be a red st.

IMG_2386

24. Dc in last st without changing colours.

IMG_2388

25. Sl st to first st, ch 1.

IMG_2389

26. And you are done with the two rounds of colourwork! It is quite easy from here. Still with the red colour, dc in first st and each st across. Remember we haven’t increased or decreased so you should still have 24 st.

IMG_2390

27. Sl st to first st.

IMG_2391

28. Drop the red colour, pick up the white, yarn over and pull through loop on hook. Pull the red yarn tight.

IMG_2393

IMG_2394

29. Ch 1 with white and pull tight. You won’t be using the red yarn again so you can cut it now, leaving a tail long enough to weave in comfortably.

IMG_2395

IMG_2396

30. Dc in first st and each st across. Sl st to first st, ch 1.

IMG_2397

IMG_2398

31. Dc in first st, dc in next 3 st.

IMG_2399

32. Dc2tog in next 2 st (see stitch guide at the top).

IMG_2400

IMG_2401

IMG_2402

33. Continue this way (4dc, dc2tog in next 2 st) until the end. You should finish with one dc2tog in the last 2 stitches. Sl st to first st, ch 1. (20st)

IMG_2403

IMG_2404

IMG_2405

IMG_2406

IMG_2407

34. Dc in first st and each st across. Sl st to first st, ch 1.

IMG_2408

IMG_2409

35. Dc in first st, dc in next st, dc2tog in next two stitches.

IMG_2410

IMG_2411

IMG_2412

IMG_2413

36. Continue this way (2dc, dc2tog) until the end. You should finish with one dc2tog in the last 2 stitches. Sl st to first st and ch 1. (15st)

IMG_2415

IMG_2416

37. dc2tog in first two st, place a st marker in the st just finished.

IMG_2418

IMG_2419

IMG_2420

IMG_2421

38. dc2tog across until last st. Dc in last st. Sl st to marked st, ch 1 (8st).

IMG_2423

IMG_2424

IMG_2425

39. dc2tog in first two stitches, place a marker in st just made.

IMG_2426

IMG_2427

40. Dc2tog until the end. Sl st to marked st (4st). Fasten off.

IMG_2429

Weave in ends and close the small gap in the first round. You don’t need to close the gap at the top since the pompom will cover it. Make a pompom and attach it to the top, use a piece of yarn or ribbon to make string.

IMG_2433

Let me know if you have any questions, I know some pictures are not great but days are very grey at this time of year. I hope to get better with the pictures with time 🙂

If you want to make the Santa hat in the first picture you just need to make a the first white row of fdc in white and then change to red for the rest of the pattern without changing colours. Easy peasy!

x

Sol

Free Pattern: Uva Shawl

DSCN2545

Ravelry link

I am very excited to share another pattern with you, this time a shawl I have named “Uva” which means “grape” in Spanish. I just can’t help thinking of grapes when I look at it! This shawl uses just two stitches, dc and dtr, and it is so easy to make. I used Ginger’s Hand Dyed Splendor in Wine O’Clock (read about this yarn here) and I just love the final result.

DSCN2559

I mentioned I would recommend other yarns for this pattern that are a bit more budget friendly (but if you can buy this yarn I definitely recommend it), you could really use any other 4ply yarn, and even a DK one would still be OK, but here are some recommendations for my UK readers:

Yeoman Yarns Sport 4 ply – This yarn is 100% merino wool sold in 400gr cones for a bit less than 20 pounds, I have used it in shawls and it is lovely, great stitch definition. You will have plenty leftover to make other things with it as well.

Wendy Merino 4ply: This is a very nice yarn and it is sold in 50gr balls so that you can just get what you need for this project.

King Cole Merino Blend 4 ply: I used this yarn for my fingerless mitts and I think it is quite good for the price. You can buy it in balls or cones and some stores like Ginger Twist Studio sell them by weight (multiples of 50g) so that you can get just what you need.

Hope that helps 😉 And here is the pattern!

DSCN2547

Uva Shawl Pattern

This pattern has an increase section and a decrease section. Basically you are working the shawl sideways: you start on one end of the shawl with very few stitches and increase every two rows until you get to the middle section, then start decreasing until you have very few stitches again and get to the other end of the shawl.

The shawl measures 140cm long and it is 36cm at the widest part. Gauge is not very important, because of the way the shawl is constructed you can simply work up until you have a bit over half the yarn leftover and then start decreasing. If you prefer to work according to gauge you can work the pattern (one row of the stitch pattern repeat explained below followed by one row of dc). With a 3.5mm hook and 4ply yarn you should get 20 st and 22 rows in 10cmx10cm.

Materials

2 x 100g skeins Ginger’s Hand Dyed Splendor 4ply in Wine O’Clock (used 160gr/640m). See above for other yarn options.

3.5mm hook

Needle to weave in ends

Abbreviations

ch – chain

dc – UK double crochet

dtr – UK double treble

Stitch Guide

UK double treble: yarn over hook twice, insert hook in stitch, yarn over and pull up a loop, (yarn over pull through 2 loops on hook) 3 times.

dc2tog: insert hook in stitch, yarn over and pull up a loop, insert hook in next stitch, yarn over and pull up a loop, yarn over and pull through 3 loops on hook.

DSCN2572

Tip for an easier way to follow the pattern: 

Imagen 4This pattern is very simple an easy to follow without thinking about it much or counting the stitches in each row. The instructions are below and you can just follow each line all the way through the many rows but I thought I would share an easy way to do this pattern that you would find out eventually but why not save you some time!

Ok so, this pattern starts with an increase section and finishes with a decrease section. I will explain it for the increase one since it comes first and after understanding that one the decrease will come easy to you. When you are in the increase section yo do a row of the stitch pattern (let’s call that to the rows that have the little bobbles), followed by a row of dc in every stitch all the way until the last st where you do two dc, therefore you increase 1dc every two rows.

Now, the rows with the stitch pattern (with the bobbles) are very easy to do without thinking about them because there are no increases or decreases, and no matter in what part of the shawl you are a stitch pattern row will be a repeat of 6 stitches with just a couple of things to bear in mind.

Let’s see the 6 stitches: dtr, dc, dtr, dc, dc, dc (or dtr, dc, dtr, 3dc). Now imagine you are in ANY row where you do the stitch pattern repeat: You always ch 1 and dc in first st. Now start your 6-stitch-repeat (dtr, dc, dtr, 3dc) all the way until you get to the last st. No matter in what part of the 6-stitch-repeat you ended up, dc in the last dc and turn for the next row (which in the increase section will be an increase row and in the decrease section will be a decrease row). So that is all: dc in first st, dc in last st, and fill the space in between with as many repeats of the 6-stitch-repeat as you can fit, no matter if the last repeat is not a full one.

So let’s put it in practice so that you see how easy it is. Let’s say you are in Row 18 so you have just finished an increase row that left you with 11 sts to work.

So ch 1, dc in first st, start with the 6-stitch-repeat and stop when you have one stitch left: you do the repeat once, then start the second one: dtr, dc, dtr…. and then you have only one st left, so you stop the repeat and do a dc.

This is for EVERY stitch pattern row, even for the decrease section. In this section the only difference is that you do a decrease row instead of an increase row, meaning that you dc all the way through until the last two stitches, where you do a dc2tog.

I would advise you start following the pattern until Row 11 and then try this tip to continue working your shawl.

Notes

  • Beginning chain does not count as a st.
  • Turn your work after each row.
  • It doesn’t really matter if you chain 1 and then turn, or turn and chain 1. See what you like best and go with that.
  • Stitch number at end of row instruction corresponds to number of sts in that row. If this doesn’t appear in the row it means it has the same number of sts as the last one.

uva1

Instructions

Increase section
Ch4.

Row 1: dc in second ch from hook, 2dc. Turn (3 st).

Row 2: ch 1, 3dc. Turn.

Row 3: ch 1, 2dc, 2dc in last dc. Turn (4st).

Row 4: ch 1, dc in first dc, dtr, 2dc. Turn.

Row 5: ch 1, 3dc, 2dc in last dc. Turn (5st).

Row 6: ch 1, dc in first dc, (dtr, dc) two times, dc. Turn.

Row 7: ch 1, 4dc, 2dc in last dc. Turn (6st).

Row 8: ch 1, dc in first dc, (dtr, dc) two times, dc. Turn.

Row 9: ch 1, 5dc, 2dc in last dc. Turn (7st).

Row 10: ch 1, dc in first dc, (dtr, dc) two times, 2dc. Turn.

Row 11: ch 1, 6dc, 2dc in last dc. Turn (8st).

Row 12: ch 1, dc in first dc, (dtr, dc) two times, 3dc. Turn.

Row 13: ch 1, 7dc, 2dc in last dc. Turn (9st).

Row 14: ch 1, dc in first dc, (dtr, dc) two times, 2dc, dtr, dc. Turn.

Row 15: ch 1, 8dc, 2dc in last dc. Turn (10st).

Row 16: ch 1, dc in first dc, (dtr, dc) two times, 2dc, dtr, 2dc. Turn.

Row 17: ch 1, 9dc, 2dc in last dc. Turn (11st).

Row 18: ch 1, dc in first dc, (dtr, dc) two times, 2dc, (dtr, dc) two times. Turn.

Row 19: ch 1, 10dc, 2dc in last dc. Turn (12st).

Row 20: ch 1, dc in first dc, (dtr, dc) two times, 2dc, (dtr, dc) two times, dc. Turn.

Row 21: ch 1, 11dc, 2dc in last dc. Turn (13st).

Row 22: ch 1, dc in first dc, (dtr, dc) two times, 2dc, (dtr, dc) two times, 2dc. Turn.

Row 23: ch 1, 12dc, 2dc in last dc. Turn (14st).

Row 24: ch 1, dc in first dc; *dtr, dc, dtr, 3dc, rep from * until last st, dc in last dc. Turn.

Row 25: ch 1, dc in each st across until last st, 2dc in last dc. Turn (15st)

Row 26: ch 1, dc in first dc; *dtr, dc, dtr, 3dc, rep from * until last 2 st, dtr, dc in last dc. Turn.

Row 27: ch 1, dc in each st across until last st, 2dc in last dc. Turn (16st)

Row 28: ch 1, dc in first dc; *dtr, dc, dtr, 3dc, rep from * until last 3 st, dtr, 2dc. Turn.

Row 29: ch 1, dc in each st across until last st, 2dc in last dc. Turn (17st)

Row 30: ch 1, dc in first dc; *dtr, dc, dtr, 3dc, rep from * until last 4 st, (dtr, dc) two times. Turn.

Row 31: ch 1, dc in each st across until last st, 2dc in last dc. Turn (18st)

Row 32: ch 1, dc in first dc; *dtr, dc, dtr, 3dc, rep from * until last 5 st, (dtr, dc) two times, dc in last dc. Turn.

Row 33: ch 1, dc in each st across until last st, 2dc in last dc. Turn (19st)

Row 34: ch 1, dc in first dc; *dtr, dc, dtr, 3dc, rep from * across. Turn.

Row 35: ch 1, dc in each st across until last st, 2dc in last dc. Turn (20st)

Repeat Rows 24 to 35 (twelve rows) nine times. You will have 143 rows in total and 74 sts in Row 143.

Row 144: ch 1, dc in first dc; *dtr, dc, dtr, 3dc, rep from * until last st, dc in last dc. Turn.

Row 145: ch 1, dc in each st across until last st, 2dc in last dc. Turn (75st)

Row 146: ch 1, dc in first dc; *dtr, dc, dtr, 3dc, rep from * until last 2 st, dtr, dc in last dc. Turn.

Row 147: ch 1, dc in each st across until last st, 2dc in last dc. Turn (76st)

Row 148: ch 1, dc in first dc; *dtr, dc, dtr, 3dc, rep from * until last 3 st, dtr, 2dc. Turn.

Row 149: ch 1, dc in each st across. Turn (76st)


Decrease Section

Row 1: ch 1, dc in first dc; *dtr, dc, dtr, 3dc, rep from * until last 3 st, dtr, 2dc. Turn.

Row 2: ch 1, dc in each st across until last st, dc2tog in last two st. Turn (75st).

Row 3: ch 1, dc in first dc; *dtr, dc, dtr, 3dc, rep from * until last 2 st, dtr, dc in last dc. Turn.

Row 4: ch 1, dc in each st across until last st, dc2tog in last two st. Turn (74st).

Row 5: ch 1, dc in first dc; *dtr, dc, dtr, 3dc, rep from * until last st, dc in last dc.

Row 6: ch 1, dc in each st across until last st, dc2tog in last two st. Turn (73st).

Row 7: ch 1, dc in first dc; *dtr, dc, dtr, 3dc, rep from * across. Turn.

Row 8: ch 1, dc in each st across until last st, dc2tog in last two st. Turn (72st).

Row 9: ch 1, dc in first dc; *dtr, dc, dtr, 3dc, rep from * until last 5 st, (dtr, dc) two times, dc in last dc. Turn.

Row 10: ch 1, dc in each st across until last st, dc2tog in last two st. Turn (71st).

Row 11: ch 1, dc in first dc; *dtr, dc, dtr, 3dc, rep from * until last 4 st, (dtr, dc) two times. Turn.

Row 12: ch 1, dc in each st across until last st, dc2tog in last two st. Turn (70st).

Repeat Rows 1 to 12 nine times, you will have 120 rows in total and will finish Row 120 with 16 st.

Row 121: ch 1, dc in first dc; *dtr, dc, dtr, 3dc, rep from * until last 3 st, dtr, 2dc. Turn.

Row 122: ch 1, dc in each st across until last st, dc2tog in last two st. Turn (15st).

Row 123: ch 1, dc in first dc; *dtr, dc, dtr, 3dc, rep from * until last 2 st, dtr, dc in last dc. Turn.

Row 124: ch 1, dc in each st across until last st, dc2tog in last two st. Turn (14st).

Row 125: ch 1, dc in first dc; *dtr, dc, dtr, 3dc, rep from * until last st, dc in last dc. Turn.

Row 126: ch 1, dc in each st across until last st, dc2tog in last two st. Turn (13st).

Row 127: ch 1, dc in first dc, (dtr, dc) two times, 2dc, (dtr, dc) two times, 2dc. Turn.

Row 128: ch 1, dc in each st across until last st, dc2tog in last two st. Turn (12st).

Row 129: ch 1, dc in first dc, (dtr, dc) two times, 2dc, (dtr, dc) two times, dc. Turn.

Row 130: ch 1, dc in each st across until last st, dc2tog in last two st. Turn (11st).

Row 131: ch 1, dc in first dc, (dtr, dc) two times, 2dc, (dtr, dc) two times. Turn.

Row 132: ch 1, dc in each st across until last st, dc2tog in last two st. Turn (10st).

Row 133: ch 1, dc in first dc, (dtr, dc) two times, 2dc, dtr, 2dc. Turn.

Row 134: ch 1, dc in each st across until last st, dc2tog in last two st. Turn (9st).

Row 135: ch 1, dc in first dc, (dtr, dc) two times, 2dc, dtr, dc. Turn.

Row 136: ch 1, dc in each st across until last st, dc2tog in last two st. Turn (8st).

Row 137: ch 1, dc in first dc, (dtr, dc) two times, 3dc. Turn.

Row 138: ch 1, dc in each st across until last st, dc2tog in last two st. Turn (7st).

Row 139: ch 1, dc in first dc, (dtr, dc) two times, 2dc. Turn.

Row 140: ch 1, dc in each st across until last st, dc2tog in last two st. Turn (6st).

Row 141: ch 1, dc in first dc, (dtr, dc) two times, dc. Turn.

Row 142: ch 1, dc in each st across until last st, dc2tog in last two st. Turn (5st).

Row 143: ch 1, dc in first dc, (dtr, dc) two times, dc. Turn.

Row 144: ch 1, dc in each st across until last st, dc2tog in last two st. Turn (4st).

Row 145: ch 1, dc in first dc, dtr, 2dc. Turn.

Row 146: ch 1, dc in each st across until last st, dc2tog in last two st. Turn (3st).

Row 147: ch 1, 3dc. Turn.

Row 148: ch 1, dc in first dc, dc2tog in last two st. (2st).

Don’t cut yarn.


Edging 

With right side of shawl facing you, turn to work on bottom edge of the shawl.

Row 1: ch 1, 1dc per row until middle of the shawl (Row 149), 3dc, 1dc per row until the end. Turn (301 sts). Don’t worry too much about where you do the dc and it is fine if you miss a row at some point, try to get the amount of stitches required to get the edge to match up better, though it is not the end of the world if it doesn’t 😉

Row 2: ch 1, *(dc, ch3, dc) in next st, skip 1dc, 3dc, repeat from * until last st, (dc, ch 3, dc) in last st.

Fasten off.

Block lightly (steam block or pin it to the size you want, spray it with some water and let it dry).


As usual, please let me know if you have any questions, hope you like it!

x

Sol
Free pattern and tutorial: Autumn Diamonds Part II

DSCN2532

Hello my dear readers! Hope you had a great week. I have been a very busy bee and have just managed to finish the second part of the tutorial for my fair isle mitts. Not long to go but the thumb needs some further explanation. Let’s jump right into it!

Autumn Diamonds Tutorial Part II

Size and gauge

Circumference: 20 cm

Gauge: Crochet 11 waistcoat stitches and 13 rows with a 4mm hook to obtain 5cmx5cm.

Gauge in this pattern is not essential. Fair isle chart is repetitive and you can add necessary stitches for your size and fill in the pattern in a way that satisfies you.

Materials

50g King Cole Merino in Aran (Colour A)

West Yorkshire Spinners Signature 4 ply – 1 ball in Pennyroyal (Colour B), 1 ball in Butterscotch (Colour C), 1 ball in Cardamom (Colour D) –> You will use VERY little of the last two yarns so you could use something from your stash if you don’t want to spend  more on them.

4mm hook

Needle to weave in ends

Instructions

I have a new chart for the rest of the pattern. As usual you read it bottom-up, right to left and every stitch is a wst unless it has a “dc” in which case it is a UK double crochet. I know it looks mad, but I explain everything below. If you have followed the instructions of pulling tight when you sl st and ch 1 then your seam should be almost invisible, if not try pulling harder!

1. If you have followed the first part of this tutorial your mitten should look something like this.

1

2. Now we will start shaping the thumb. You will do this by adding two stitches per round, one at the beginning and the other at the end. So you have finished Round 35, joined with a sl st to first st and chained 1 (remember to pull tight)…

3

3. Now for Round 36 we will do the first increases. Instead of starting the round by making a wst, you will do a normal dc in the first st. So insert your hook in the first st…

4

4. And crochet a dc.

5

6

5. If you look at the chart the stitches that are dc are marked. Now you can continue the rest of the round following the chart using wst until the last st of the fair isle pattern which is yellow. Since the next increase stitch is white you will need to change colours before finishing.

8

9

10

6. The increase now is made by doing another wst in the same st as the last you made.

11

12

13

7. Sl st to first st, ch 1 and pull tight.

14

8. For Round 37 we increase again on the first and last st. So make a dc in the first st…

15

16

9. Now, the next stitch is the first increase we made in the last round, so it is part of the thumb and therefore it is a white st as well and also a wst since it doesn’t have a “dc” on the chart. So make a wst in the next stitch…

17

18

27

10. After the two stitches of the thumb continue with the chart until the last st of the main fair isle pattern, which is in yellow. Now the next st corresponds to the increase of the last round. Make a wst there…

19

20

21

11. … and then make another wst in the same st. This is the second increase of the round, now you have 4 st that make the thumb.

22 23

24

12. Sl st and ch 1. The main fair isle pattern will always have 42 st, but you will continue to add 2 st per round this way until you have 14 st on the thumb. Make sure you keep those 42 st for each round, for some rounds the fair isle pattern starts or finishes with white so it is easy to miss a st. Continue until Round 42, your thumb should look like this, with 14 st.

25

26

13. For Round 43 and 44 you will keep the same number of stitches for the thumb, so the first st in the round is no longer a dc, but a wst. Continue with Rounds 43 and 44 with no increases.

40

14. In Round 45 we will separate the thumb from the rest of the pattern. Your thumb should look like this.

41

15. Start Round 45 with 7 wst as the chart indicates.

42

16. Then instead of continuing with the fair isle pattern, you are going to do the next wst on the other side of the thumb.

a

b

17. Continue with the next 6 wst.

d

18. Slip st to first st and ch 1.

e

19. You will work the next two rounds of the thumb making 1 wst in each of the 14 st. When you finish the second round (third round of thumb separated from rest of pattern), sl st to first st. Fasten off. Your mitt will look like this so far.
36
35
 20. Now we just need to finish the rest of the fair isle pattern, so we have to go back to Round 45 of the chart, which begins with a st in purple. So insert your hook in the first st of the fair isle chart (as you would normally underneath the two strands that make the ch), then make a slip knot with the purple colour…
37
38
21. … Pull it through, yarn over and pull through one loop on hook. Pull tight and now you can begin the first wst as usual.
55
22. Insert your hook in between the strands that make the V and pull up a loop.
56
23. Next st is in white but we need to add this yarn since we cut the white we were using when we finished the thumb. So with the 2 loops on the hook make a slip knot with the white…
57
24. … and pull through both loops on hook.
58
25. Continue the fair isle chart until the last st of Round 45. Now, before we join with the first st of this round, we will do a small trick to make sure that there is not a big hole where the join is.
47
26. Insert your hook in the white st of the thumb closest to the last st you made…
48
27. … and make a dc.
49
50
28. Now turn around and make a dc in the st that is closest to the first st of the round (the one I am pointing with my right thumb)…
51
52
53
29. Now simply join to first st of the round with a sl st and chain 1. You are ready for Round 46.
54
30. First st of Round 46 is white, followed by green. Continue with the round normally and for this round and all the rest forget about those 2 extra st we did on Round 45. So when you finish the fair isle chart for Round 46 with a green st…
59
31. Simply turn around and join with a slip st to the first st of the round, ch 1 and you are ready for the next.
60
61
32. And that is it everyone! Continue with the chart until Round 54 and fasten off. Weave in all the ends.
DSCN2538
Ufffff… I know, that was very long, hope it is useful and as usual please let me know if anything isn’t very clear.
Cheers!
x
Sol

Free pattern and tutorial: Autumn Diamonds – Part I

DSCN2533

*Ravelry link*

Hello there! As promised, I have taken some time to post my latest pattern because I wanted to make a tutorial for you guys. Since it was turning out to be quite a long tutorial I decided to post it in two parts, and here is the first one! I ended up taking the photos by myself so they are not perfect but I hope they are clear enough and I promise the next tutorial will be better.

DSCN2532

About the pattern, they are fingerless mittens with fair isle motifs using waistcoat stitch. I came across this stitch while looking in Google for ways to work fair isle patterns with crochet. I found a very nice and detailed explanation of the stitch here if you want more information, and it is a lot better than my tutorial 😛 The pattern is worked in the round and leaving the unused colour as strands in the back.

DSCN2535

The yarn is West Yorkshire Spinners in 4 ply and King Cole Merino. If you are in the Edinburgh area you can get it from Jess at Ginger Twist Studio. The pattern doesn’t use much yarn so you will have plenty left for another project and I already have something in mind for the leftovers so stay tuned!

This first part of the tutorial will take you up to right before the thumb, so you will have plenty to do before I post the second part.

 Autumn Diamonds Tutorial

Size and gauge

Circumference: 20 cm

Gauge: Crochet 11 waistcoat stitches and 13 rows with a 4mm hook to obtain 5cmx5cm.

Gauge in this pattern is not essential. Fair isle chart is repetitive and you can add necessary stitches for your size and fill in the pattern in a way that satisfies you. HOWEVER, PLEASE NOTE THE FABRIC MADE WITH THIS STITCH DOESN’T STRETCH, so please take that into account when deciding how many stitches to do.

Materials

50g King Cole Merino in Aran (Colour A)

West Yorkshire Spinners Signature 4 ply – 1 ball in Pennyroyal (Colour B), 1 ball in Butterscotch (Colour C), 1 ball in Cardamom (Colour D) –> You will use VERY little of the last two yarns so you could use something from your stash if you don’t want to spend  more on them.

4mm hook

Needle to weave in ends

2

Abbreviations

wst – waistcoat stitch

dc – UK double crochet

sl st – slip stitch

ch – chain

Instructions

We will be following the following chart for the first part of the pattern which will take you right before we start the thumb. You read it bottom-up, right to left, each row of the chart is actually a Round and each square is a wst. It starts from Round 3, first couple of rounds are simply two rounds using colour A (white). The tutorial will show you how to do the first few rounds so that you learn the technique and can apply it for the rest of the chart. It is the same pattern for both mittens.

1. Foundation chain: With color A, chain 42

3

2. Making sure you don’t twist the chain, join the last chain to the first with a slip stitch

4

7

3. Pull on the yarn very tight to make the slip stitch as small as possible.

8

4. Chain 1, and then pull on the yarn tight again to make the chain as small as possible. These last two steps will be repeated for every round to make the seam less visible.

9

10

11

5. Round 1: Dc in first chain and every chain across. You need to crochet loosely all through the pattern to make it easier to do the waistcoat stitch.

14

15

6. Slip stitch to first dc, remember to pull tight. Chain 1 and pull tight again. *It was pointed out by someone trying this pattern that it might be easier to start with foundation double crochet rather than what I have showed here, so please feel free to try this out. Here is a tutorial of foundation double crochet.

16

7. Round 2: On the first stitch, insert your hook in the post of the stitch, between the two strands that make the “V”. Yarn over and pull up a loop.


17
18
19
8. Yarn over and pull through two loops on hook. First wst done! (Here is a better tutorial for this stitch if it is still not clear)

20

9. Wst in next st and each st across.

21

22

23

24

24a

10. Slip st to first st, and chain 1. Remember to pull tight!

b

c

d

e

11. Round 3: We will introduce a new colour in the third round. The chart indicates that the first stitch is in colour A, and then you have 3 stitches in colour B. I will show you next how to make clean colour changes. Start your first wst: insert your hook inside the V, yarn over and pull up a loop.

24c

12. Here is when you need to change colours. Keeping your two loops on the hook, make a slip knot with colour B.

24d

25

13. Now finish the wst by pulling the new loop through the two you already had.

26

27

14. You just learned that you need to change colours in the last stitch of the previous colour. I will show you next how to not get your yarns tangled and get nice strands. Now the chart indicates we need 3 wst with colour B, then 3 in colour A and so on. So let’s do two stitches in colour B…

30

31

15. Start the third stitch up, insert hook in V, yarn over and pull up a loop. Now is time to organise your colours: put the white ball in front of you and the purple on the left. Make sure they are not tangled.

32

33

34

16. Drop colour B to your left, and grab colour A to finish the stitch. Pull colour A a bit to make sure that the last stitch you did on that colour is finished nicely. Then yarn over (don’t pull too tight so strand is not too tense) and pull through the two loops.

36

37

38

17. Now we need 3 white st, so we will repeat for the white: 2 stitches…

40

41

18. …and we change colour on the third. Insert hook inside the V, yarn over and pull up a loop. Now drop colour A and make sure you leave it in front of you.

42

43

19. Now grab colour B again on your left. You will notice that colour B comes under colour A. If you keep your yarns where they are and change colours this way they will never get tangled up and you will get clean strands. Yarn over colour B and pull through both loops on hook.

44

45

46

20. Your strands will look like this on the back. White ones will be higher and purple ones lower. Make sure that every time you pick up the new colour you pull on the yarn to make sure that the last stitch you made on that colour is finished nicely, but don’t yarn over with the new colour too tight or too loose so that the strands are not too tight that they will affect the tension or too loose that you might catch them too easily with something.

47

21. Continue with the chart until you finish the round. Slip stitch and chain 1, remember to pull tight. This is almost all the technique you need to continue with the chart. There only a couple of things left to show you: how to keep the length of your strands in check and what happens when you finish a round with one colour and have to start the next one with another. Let’s begin with the first one. Continue with the chart until the last stitch of Round 6, your mitten should look like this so far.

50

22. Here you will have to join and continue the next round in the same colour (white) for 3 more stitches. If you continue with the white as usual you will get a purple strand in the back that is 6 stitches long, I don’t usually let strands be longer than 3 stitches because they could get caught in something very easily so no matter how long a chart says I have to work with a specific colour, I always catch strands every 3 stitches. Let me show you how. First, join with a slip stitch to first stitch and chain one, pull tight as usual.

51

52

23. You have done 3 stitches in white in the last row (Round 6), so now it is time to catch the strand in the 4th stitch of the same colour, which in this case corresponds to the first stitch of Round 7. So start the stitch as usual by inserting the hook in the middle of the V (sorry about the hair in the way and my horrible nails!)

53

24. Now, before you yarn over with the white, make sure that the hook goes underneath the purple strand. Now yarn over with the white and finish the stitch as usual.

55

56

57
58

25. In the back, your caught strand will look like this. I JUST REALISED THIS HAPPENS FIRST WHEN YOU CHANGE FROM ROUND 5 TO 6! SORRY ABOUT THAT… make sure you catch your strand there as well.  

59

26. Continue with the chart normally. Now the final thing I wanted to make clear is how to change colours when you finish a round with one colour and start a new round with another. For example, this round finishes with colour B, and Round 8 starts with colour A.   So continue with Round 7 until the last stitch and just like with any other colour change, before you finish the last purple stitch of this round change to the white, then slip stitch, chain 1 and continue the chart with the white. I was going to put more pictures but it is really the same as before so hope it is clear enough, just let me know if you have any questions.

Continue with the chart until you finish Round 35. In case you are wondering about when to cut the yarns, I did it every time I finished with one. For example, the first few rows of the chart are white and purple, then two rows of white, white and purple again, then white and yellow and so on. When I finished with the colour that isn’t white and changed to another, I would cut the old colour. So I would cut the purple if the next 3 rows of the chart are white and yellow (hope this makes sense, it is quite late!)

Uffff, that was long! Please ask if you have any questions. I will post the next part of tutorial soon and have added the pattern to Ravelry too, here is the link.

Have a great weekend!

x

Sol

Toreador Free Pattern

IMG_1666

*Ravelry link*

I promised this pattern long ago, sorry for the wait! Have been working on my geometric pattern and hadn’t been able to get my head out of it long enough to write this one, but it is finally here. This pattern uses Tunisian and normal crochet. If you are not familiar with Tunisian crochet this pattern is really simple, check out the following videos to get the basics and a detailed explanation of the two stitches I used.

Tunisian Crochet – Foundation Rows, Simple Stitch, and Slip Stitch Bind Off

Cross Stitch

I crocheted the scarf first, then did the edging and finally joined it to make it a cowl/infinity scarf. I blocked it after I had done this so it was folded, it wasn’t ideal but worked just fine. You could block it before joining it if you have somewhere big enough to do this.

IMG_1663

Toreador Pattern

Materials:

6mm Tunisian crochet hook (30cm long)

5mm crochet hook

Yeoman Fifty/Fifty 2ply in Toreador (I used 72g)

Needle to weave in ends.


Abbreviations

Ch – Chain

End st – Last stitch on forward pass

Lp – Loop(s)

Sk – Skip

Sl st – Slip stitch

St – Stitch(es)

Tss – Tunisian simple stitch

Txs – Tunisian cross stitch

YO – Yarn over

dc – UK double crochet

tr – UK treble


Stitch Guide

Foundation forward pass: Insert hook on back bump of second ch from hook, YO and pull up a loop, *insert hook on back bump of next ch, YO and pull up a loop, repeat from * until last ch.

Return pass: YO and pull through 1 lp, *YO and pull through 2 lps, repeat from * until you have 1 lp on hook.

Txs:  Skip 1 st, Tss in next st, return to sk st and Tss over last st made.

End St: Last st of the forward pass is made into ch created by the return pass. Insert your hook under the vertical bar where you usually do it AND the strand behind it and pull up a loop (check the video links to see this in detail).

Binding off: As with every row you start with one lp on your hook. For each stitch, insert hook as normal (depending on weather it is a Tss or Txs), YO and pull through both loops (through the st and the loop you had already). Continue until the last st.

IMG_1518

Ch 44. Work foundation forward pass (44st, each lp on the hook is a st). Work return pass.

Row 1: Skip first vertical bar, Tss in next 3 st, Txs 2 times, *Tss in next 4 st, Txs 2 times, repeat 4 times from *, Tss in next 3 st, End st. Work return pass. (44 st)

Row 2 – 197: Repeat Row 1.

Row 198: Repeat Row 1 binding off each st (not leaving the st on the hook). Don’t cut yarn.


Edging

The edging requires a number of stitches multiple of 6. I found it in a Japanese crochet book and have written instructions as clear as I can and also pasted an image of the chart to make it easier to understand.

Turn your work so that you are working on the long edge of the scarf. Change to a 5mm crochet hook.

Row 1: Ch 1, dc in next stitch until the end. Turn (198st).

Row 2: Ch 1, dc in next st, *ch 7, 2tr on 4th ch from hook, ch 3, sl st to ch where you did the 2tr, ch 3, sk 5st from previous row, dc in next st, repeat from * until last st. Cut yarn, fasten off.

Repeat Rows 1 and 2 for other long edge. Join two shorter edges and wet block.

Japanese Crochet Book
Crochet Lace Japanese Crochet Book – ISSUU


Here is the Ravelry link. Please let me know if you have any questions!

x

Sol