Yarn and more yarn

Hello my dear readers! How is 2015 treating you? Life has been quiet around here, it was hard to get back to work and the routine after the holidays but I think I am finally settling in again.

I did a bit of yarn shopping in December so wanted to share my latest buys with you. I have decided not to buy any more yarn until the Edinburgh Yarn Festival (EYF), the vendors have been announced and there are so many stalls (so exciting!!!) so I want to save some money to get some lovely things there. Now, I won’t buy more yarn but I will use a gift voucher for a local yarn shop that my lovely boyfriend gave me for Christmas. I think that now that yarn is taking over the flat he finally realised that really all I want in life is yarn 🙂

If you are planning to go to the Edinburgh Yarn Festival let me know if you would like to meet up, we can do some yarn shopping together, wouldn’t that be lovely 🙂 I am also thinking to take one of the crochet classes so give me a shout if you are thinking the same, a class buddy is always necessary!

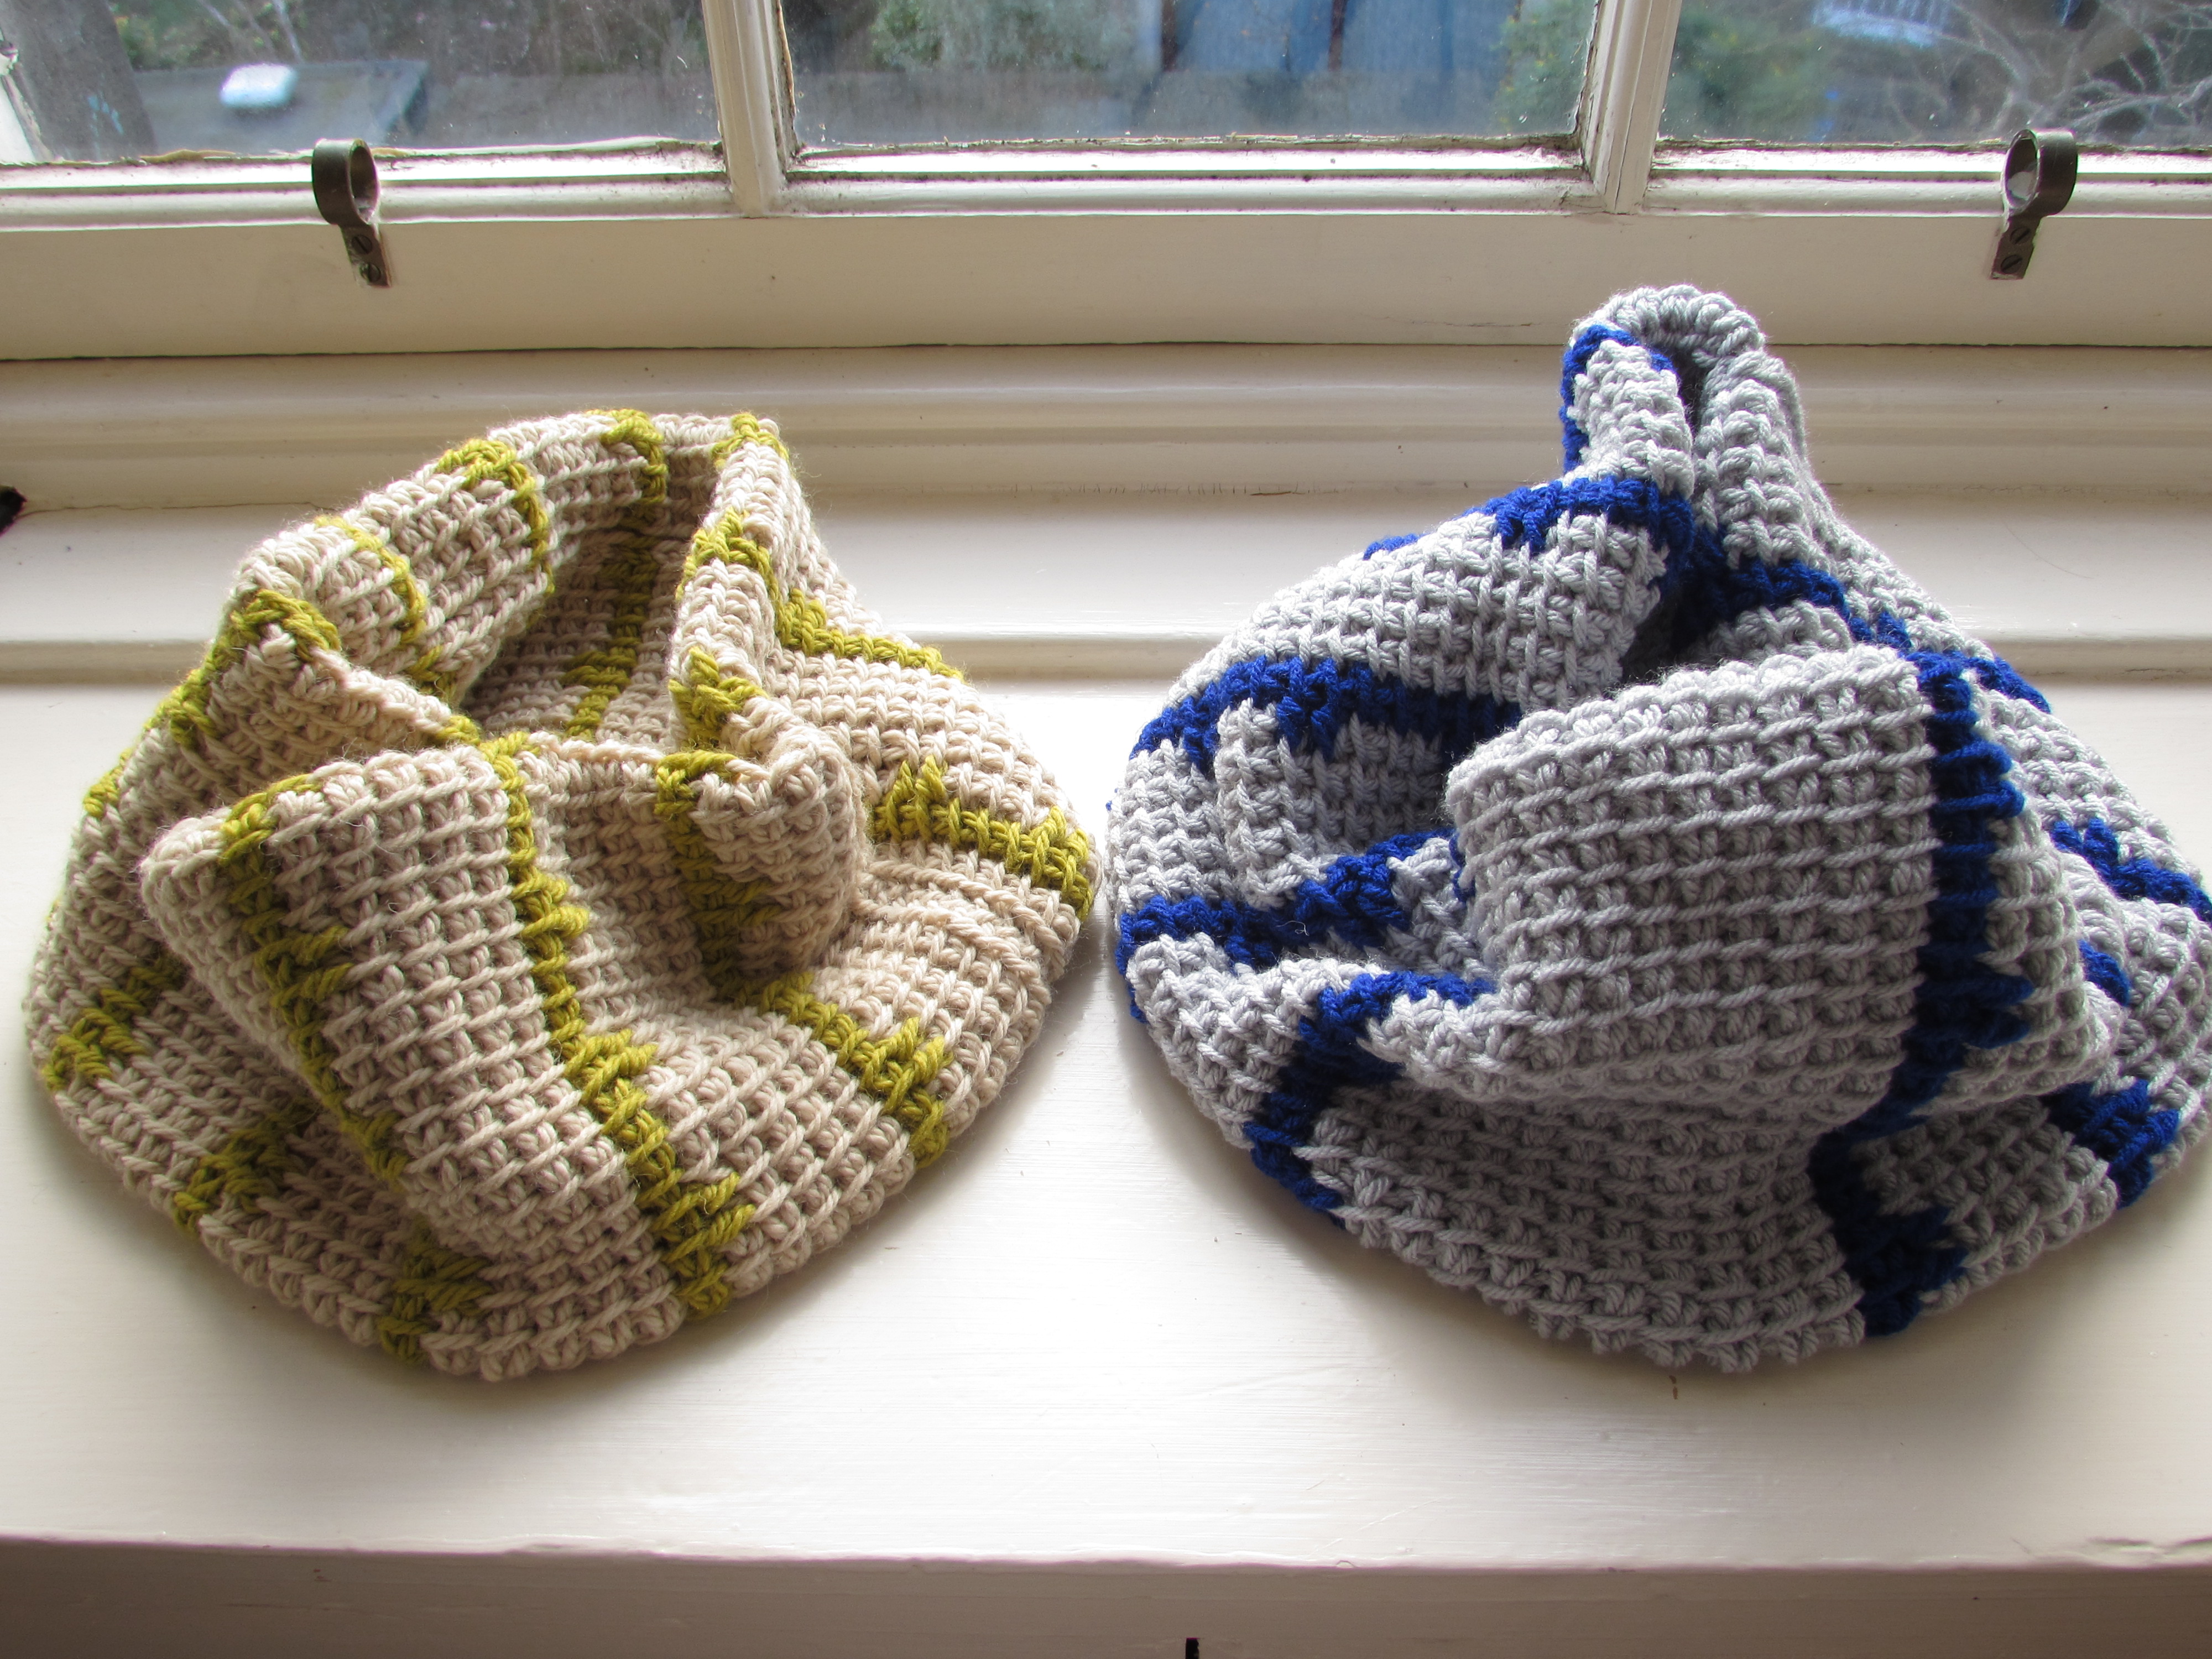
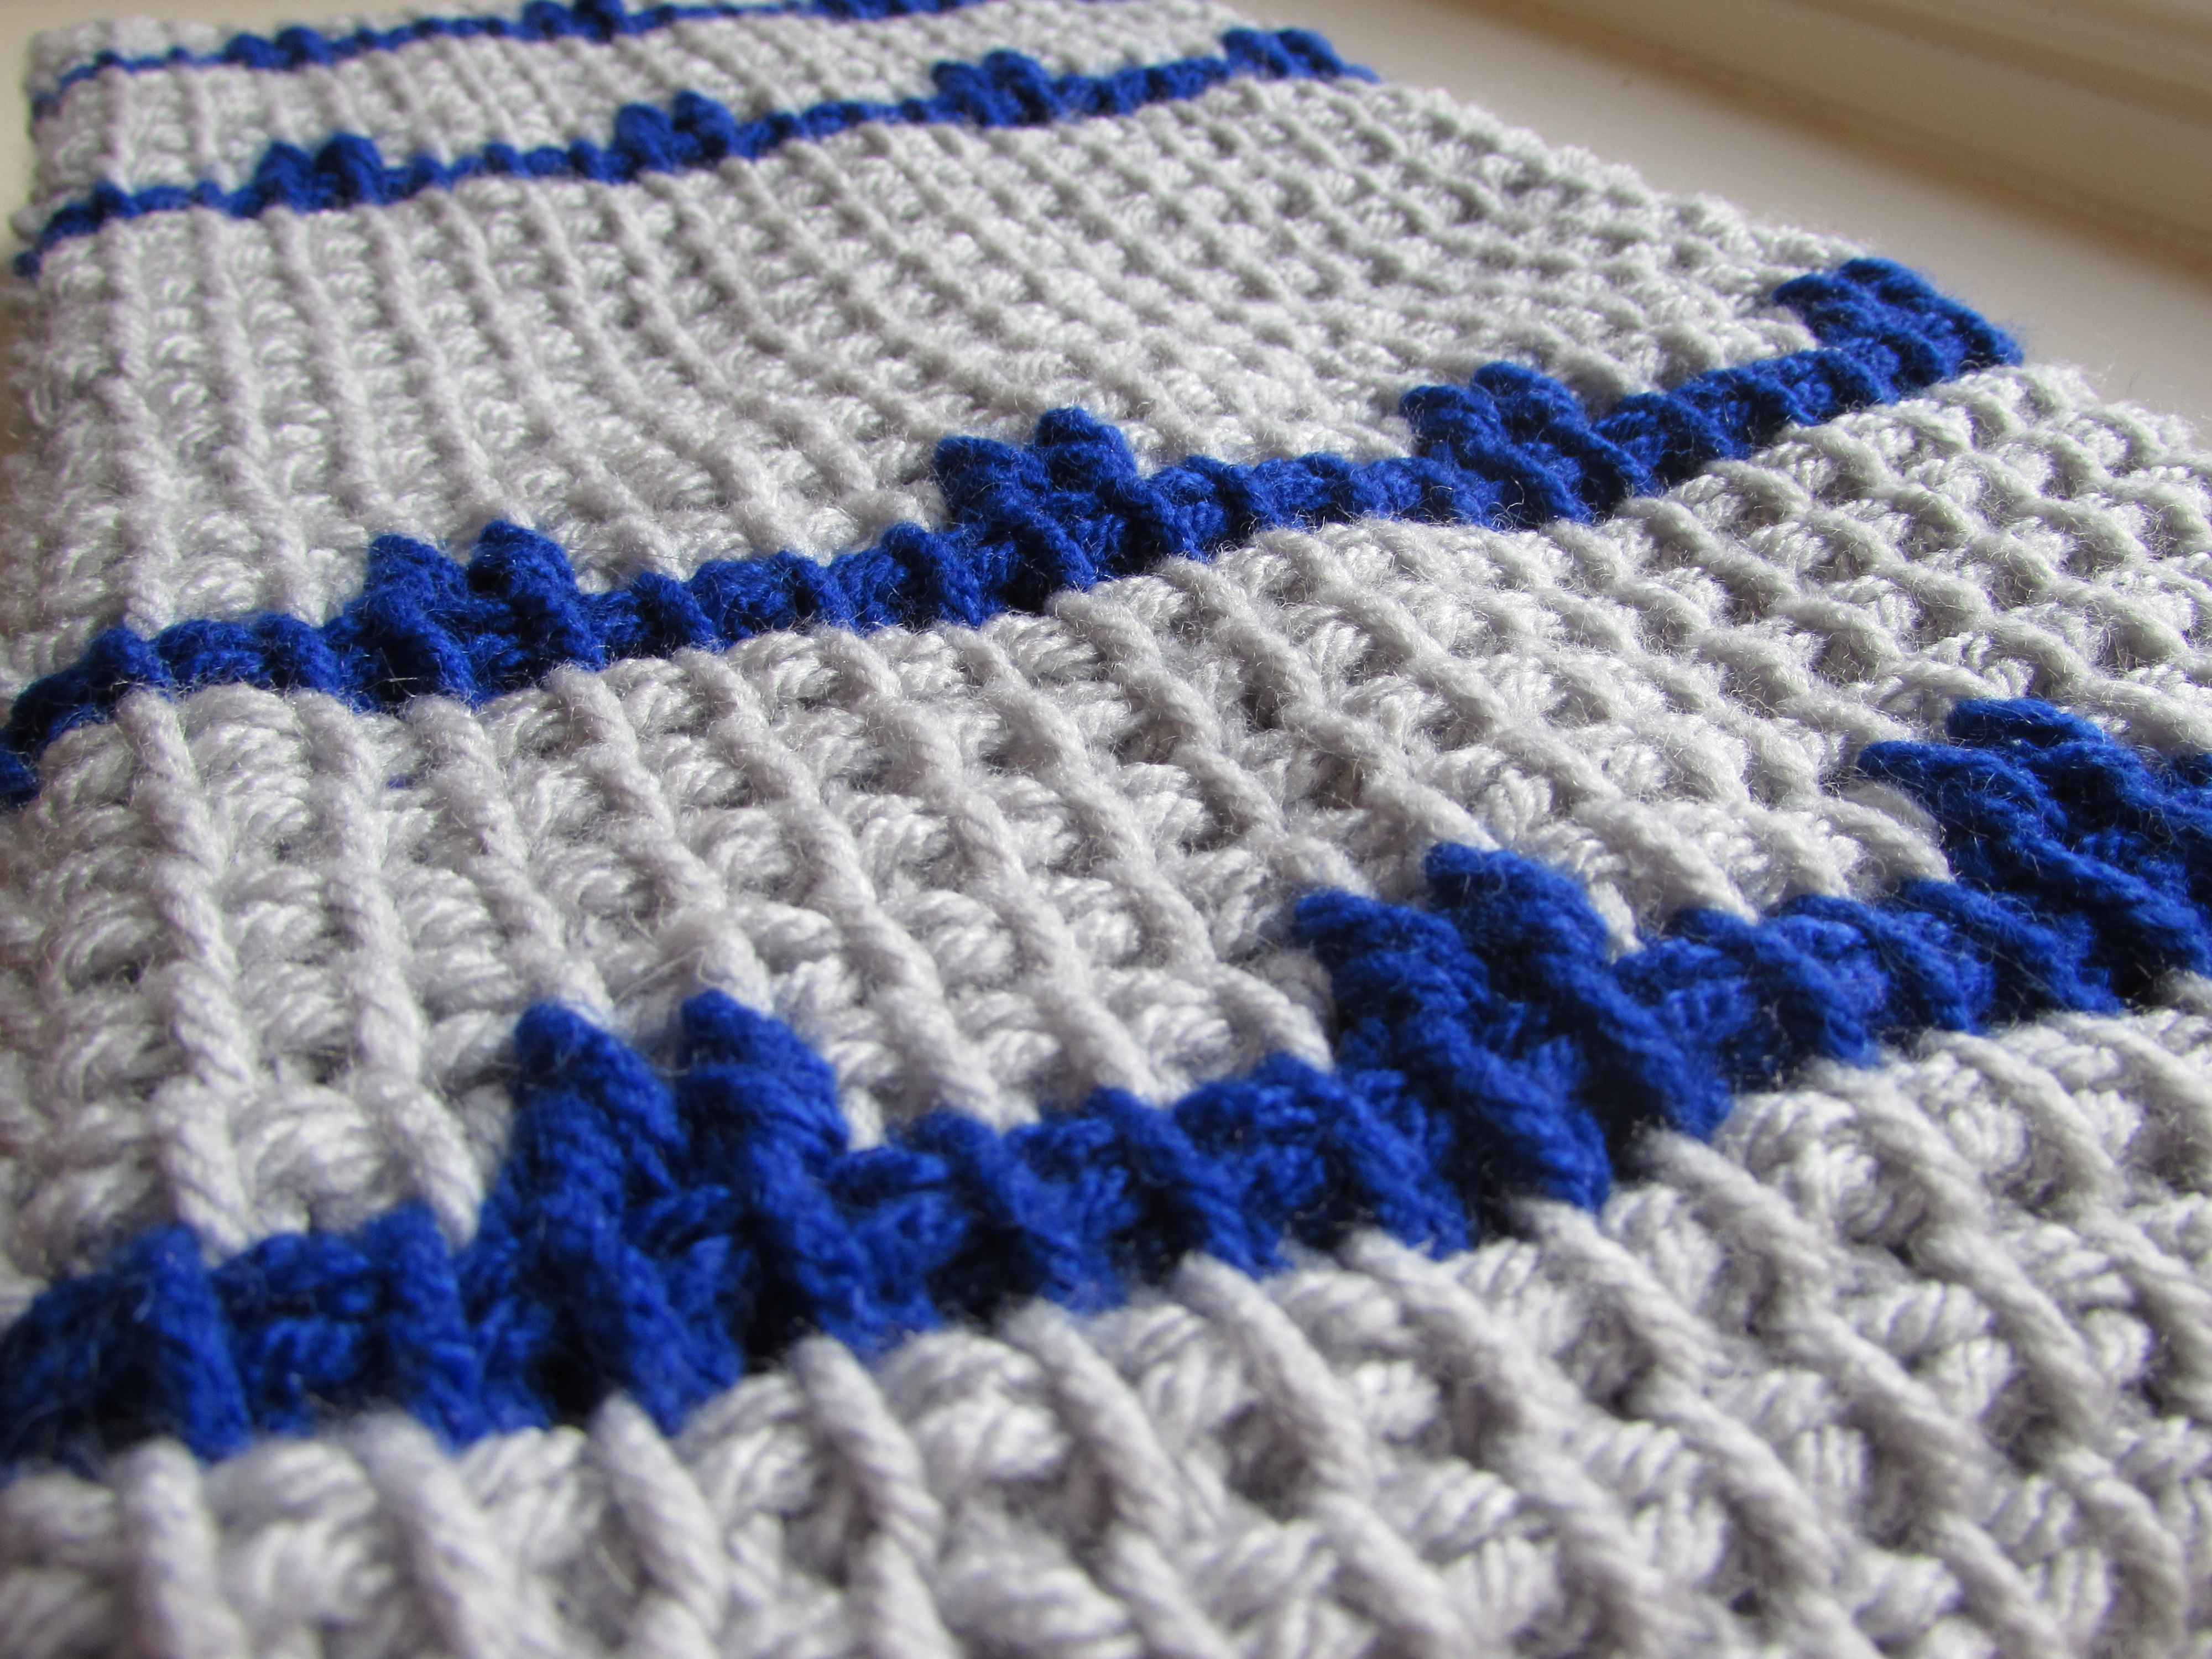
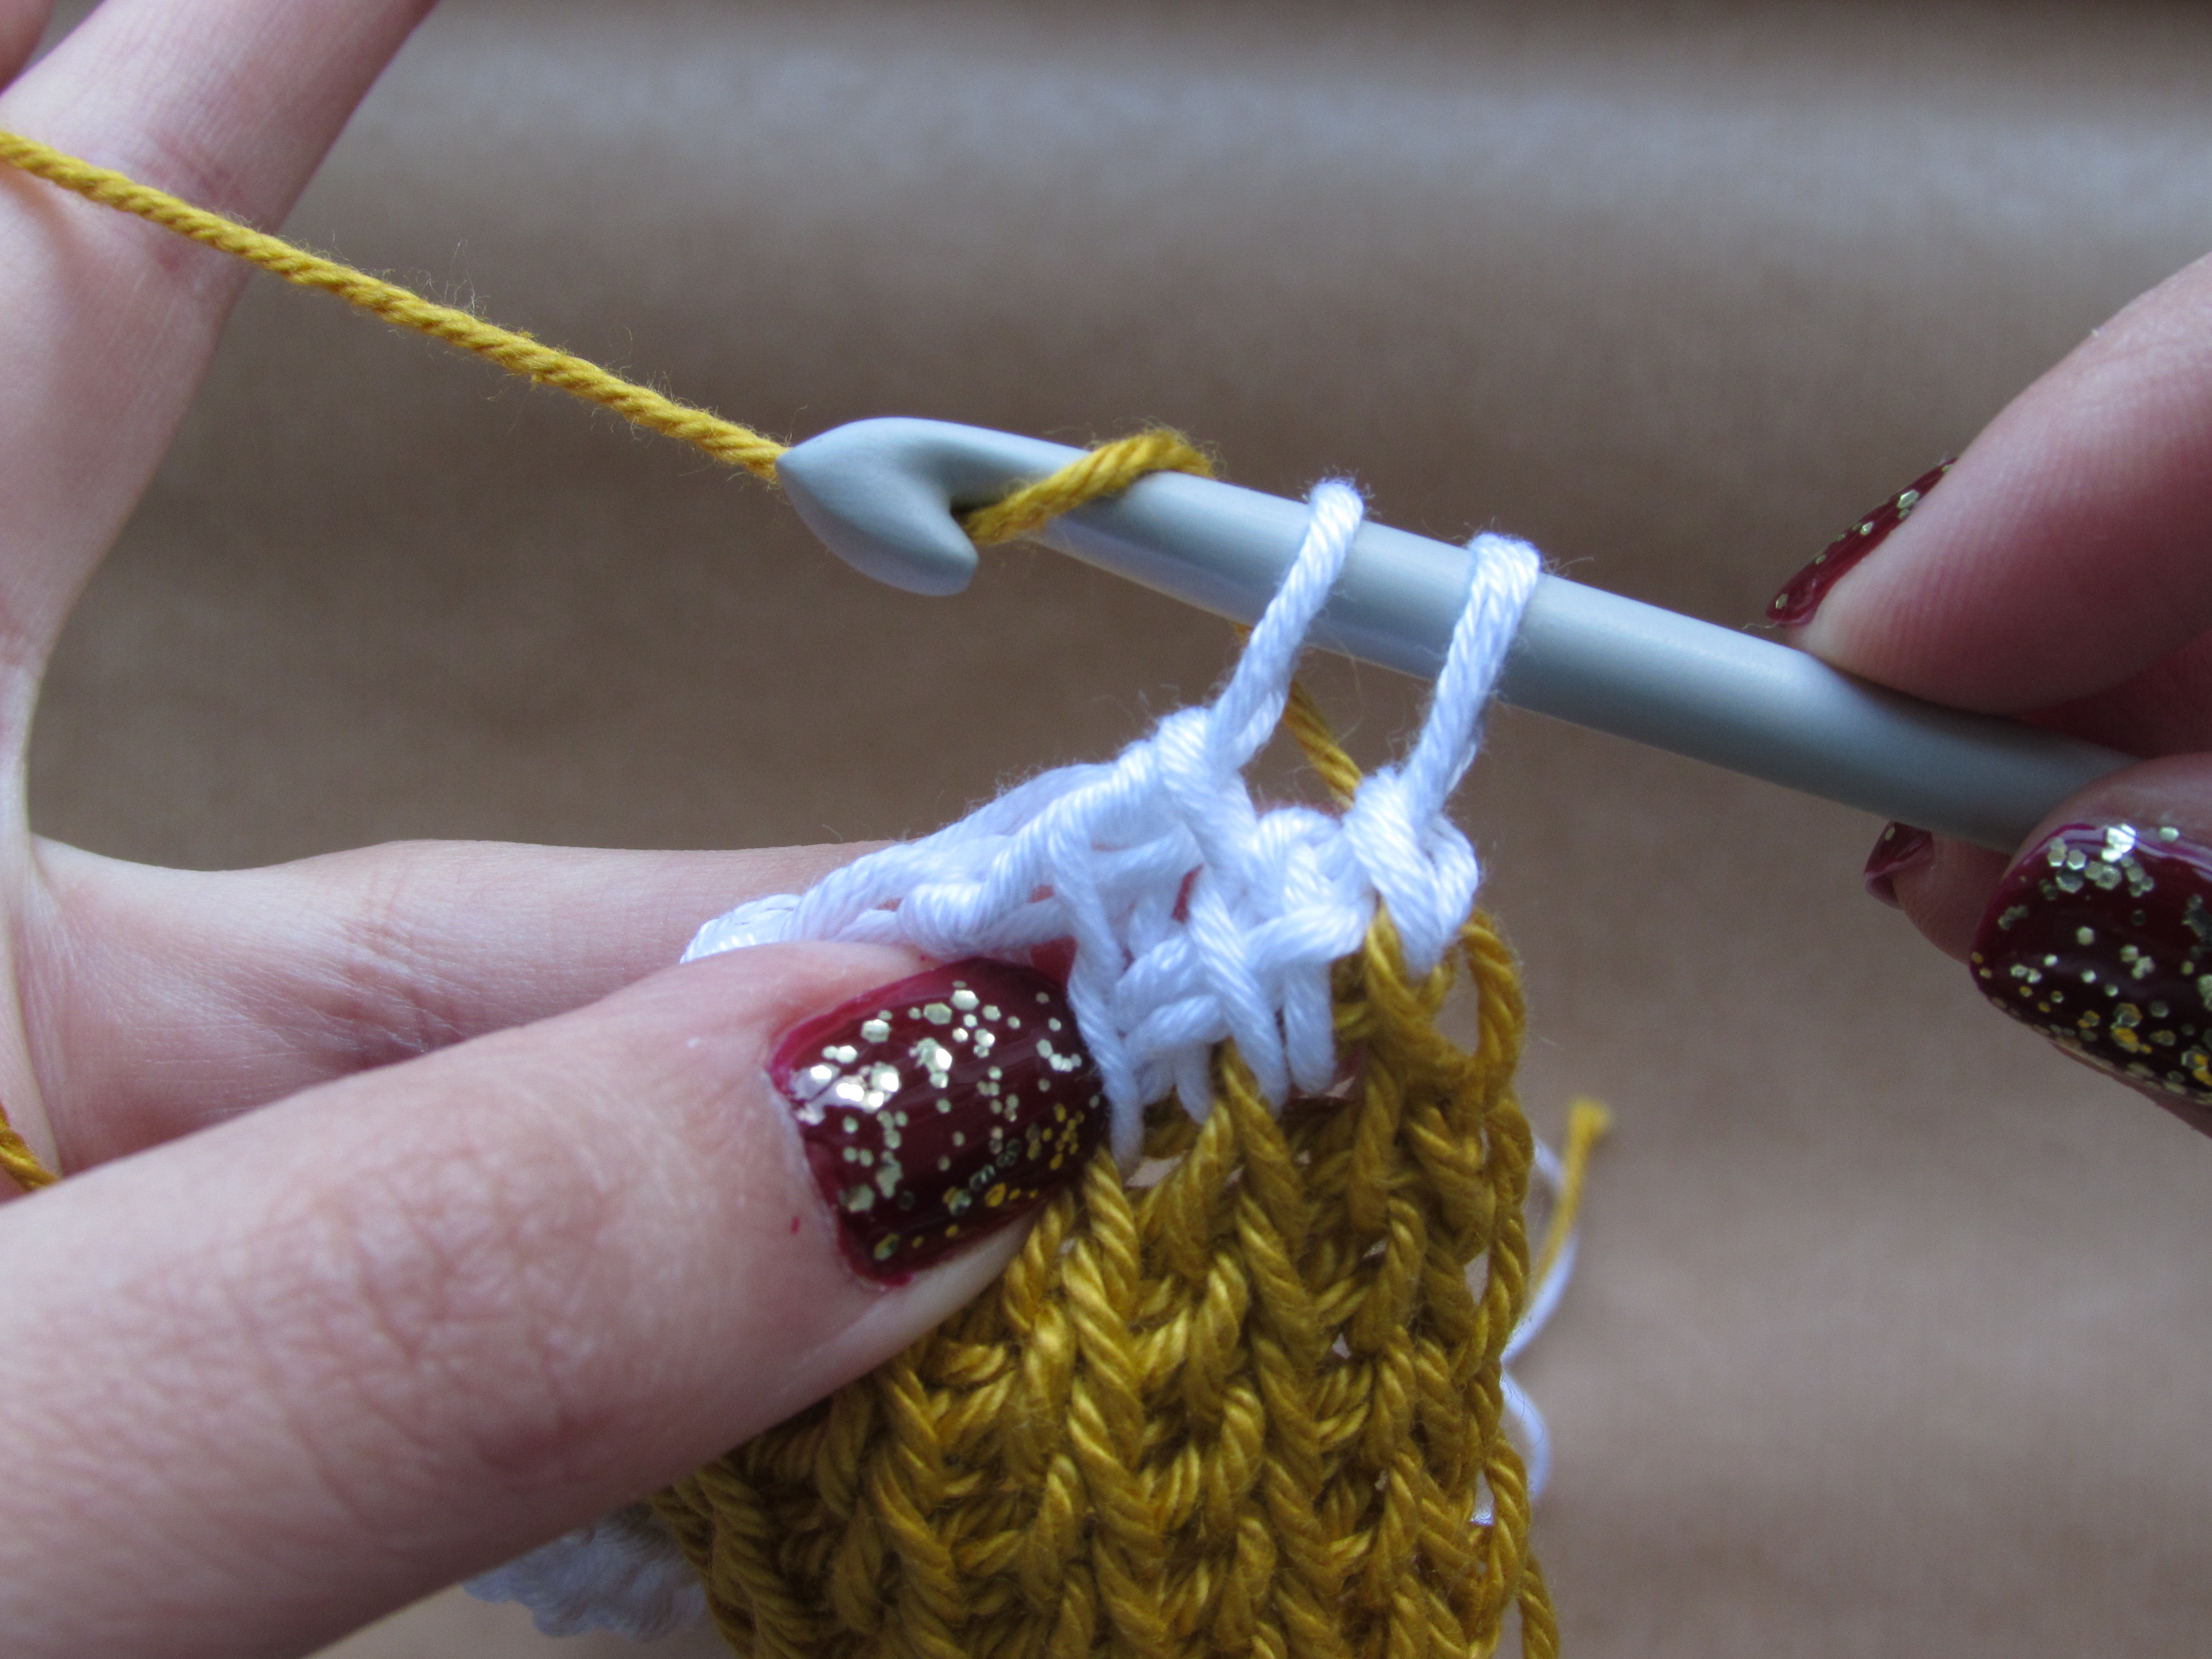
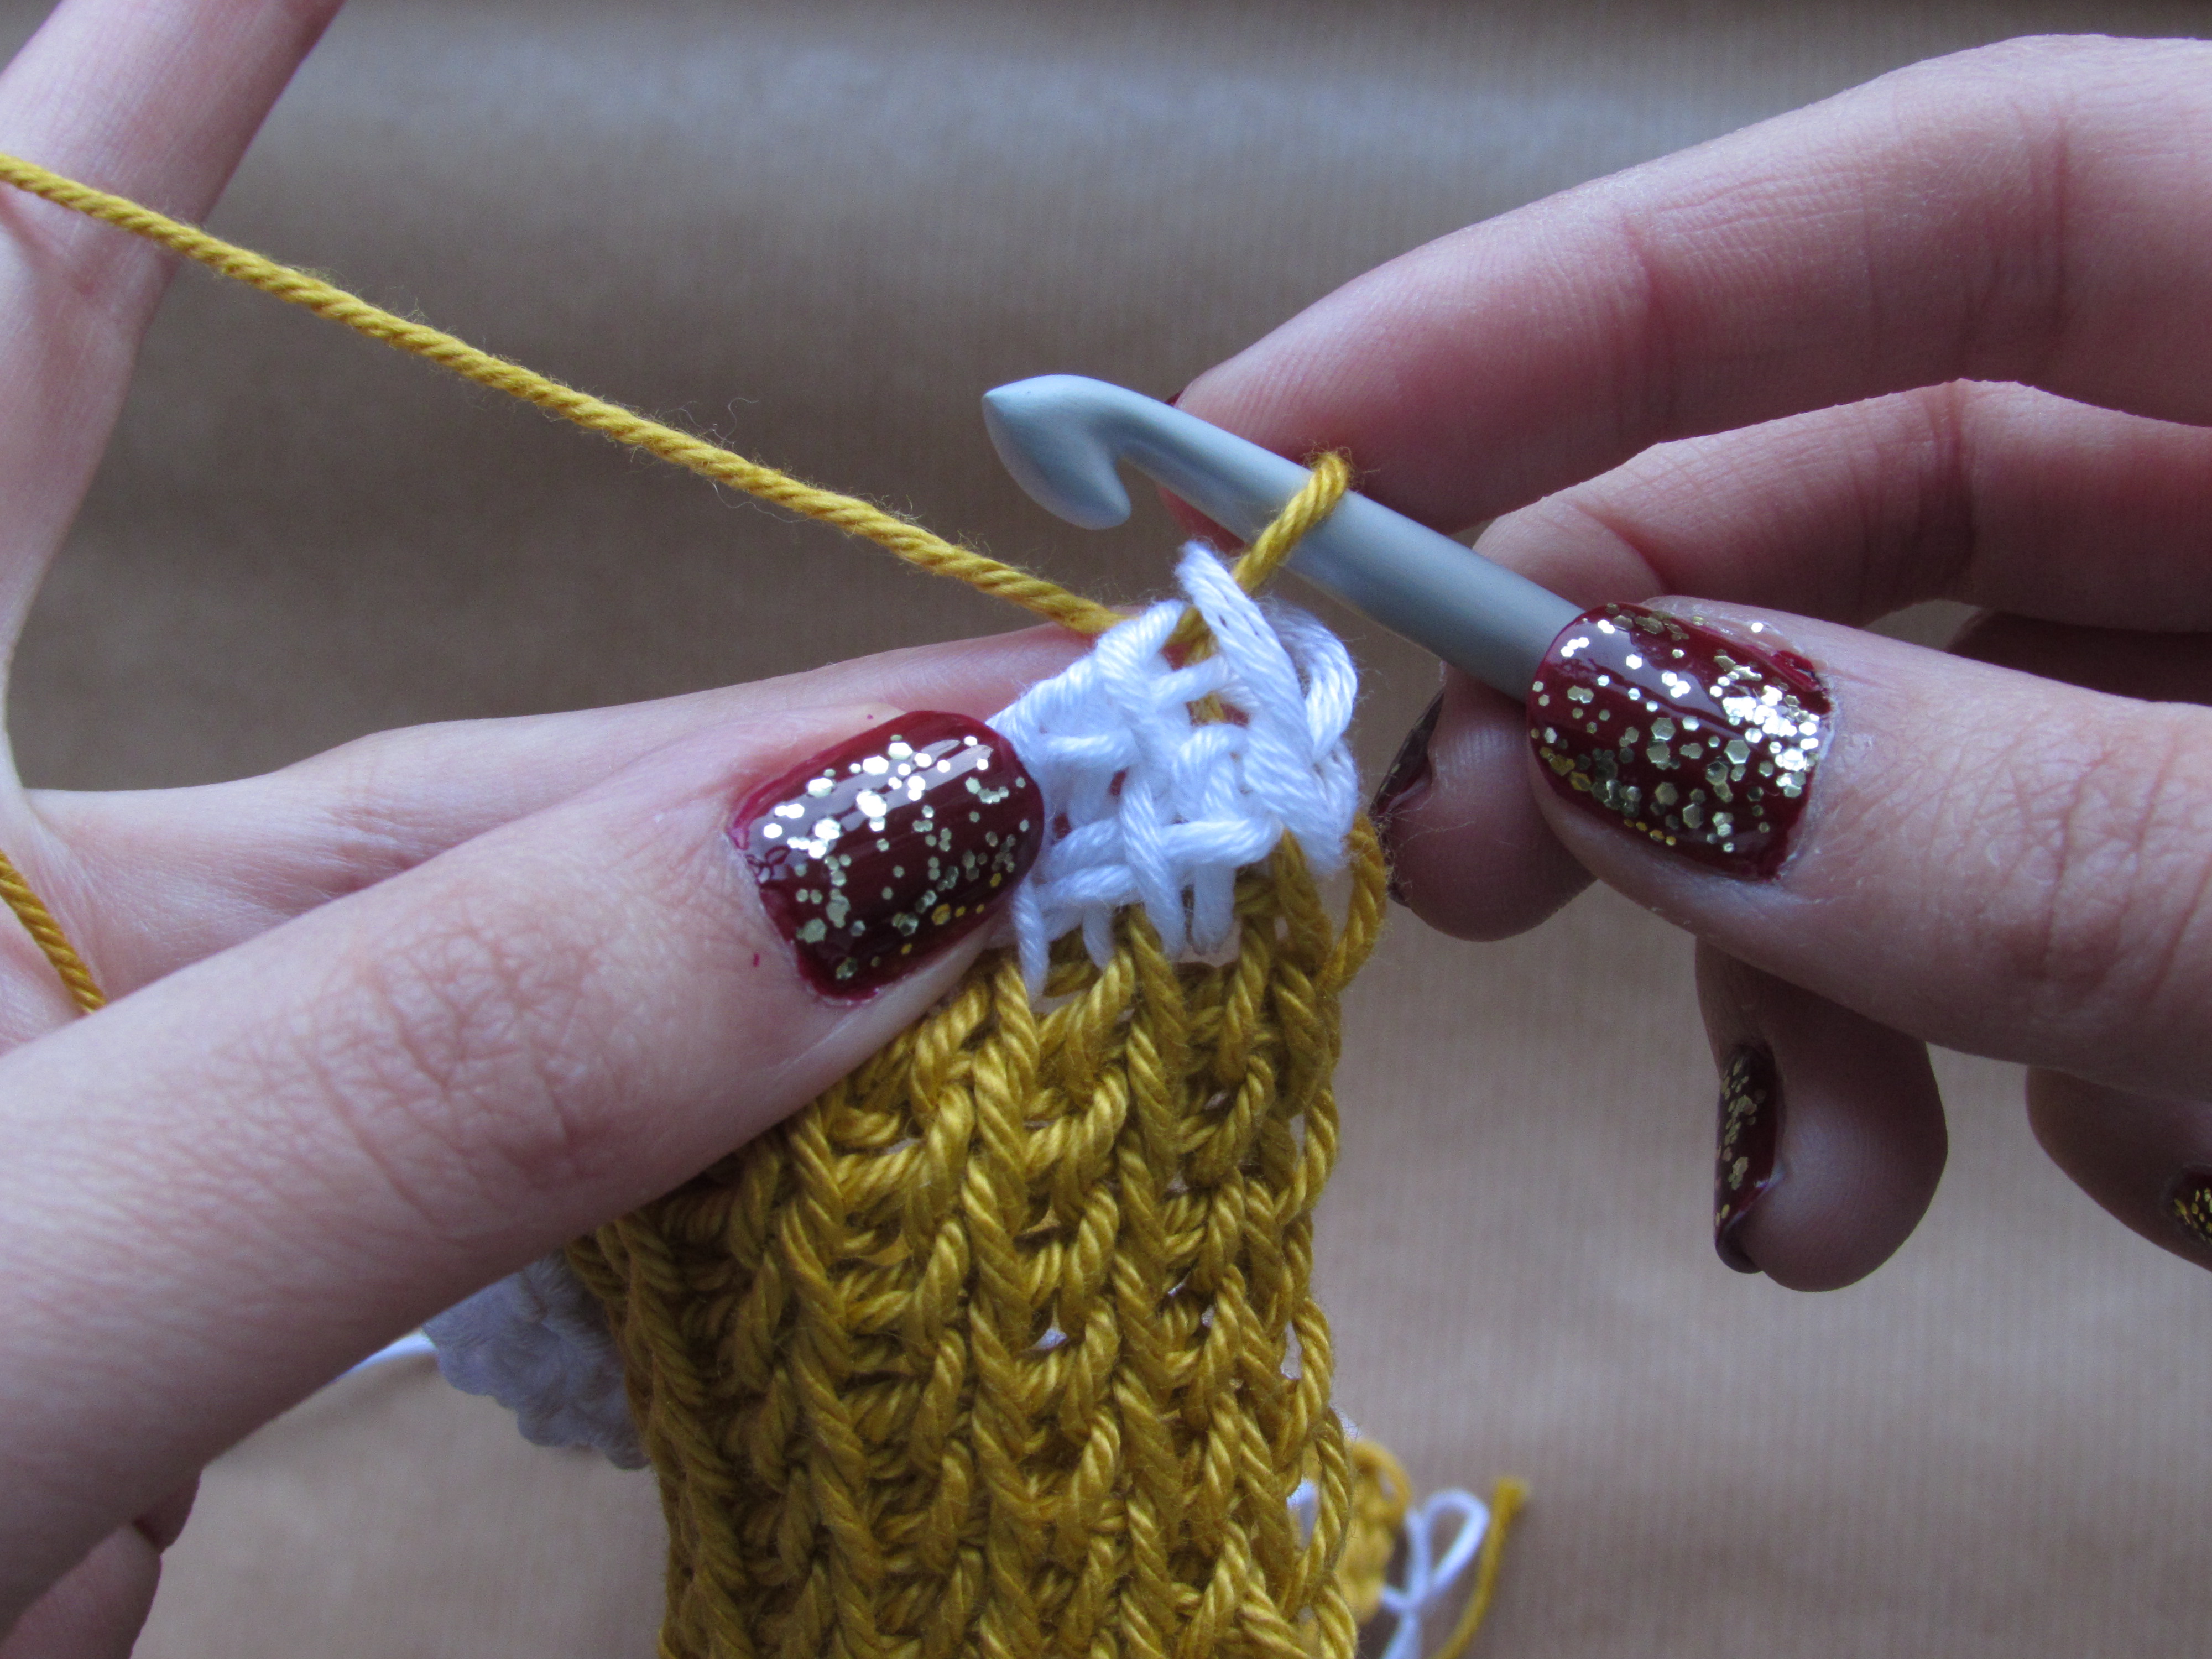
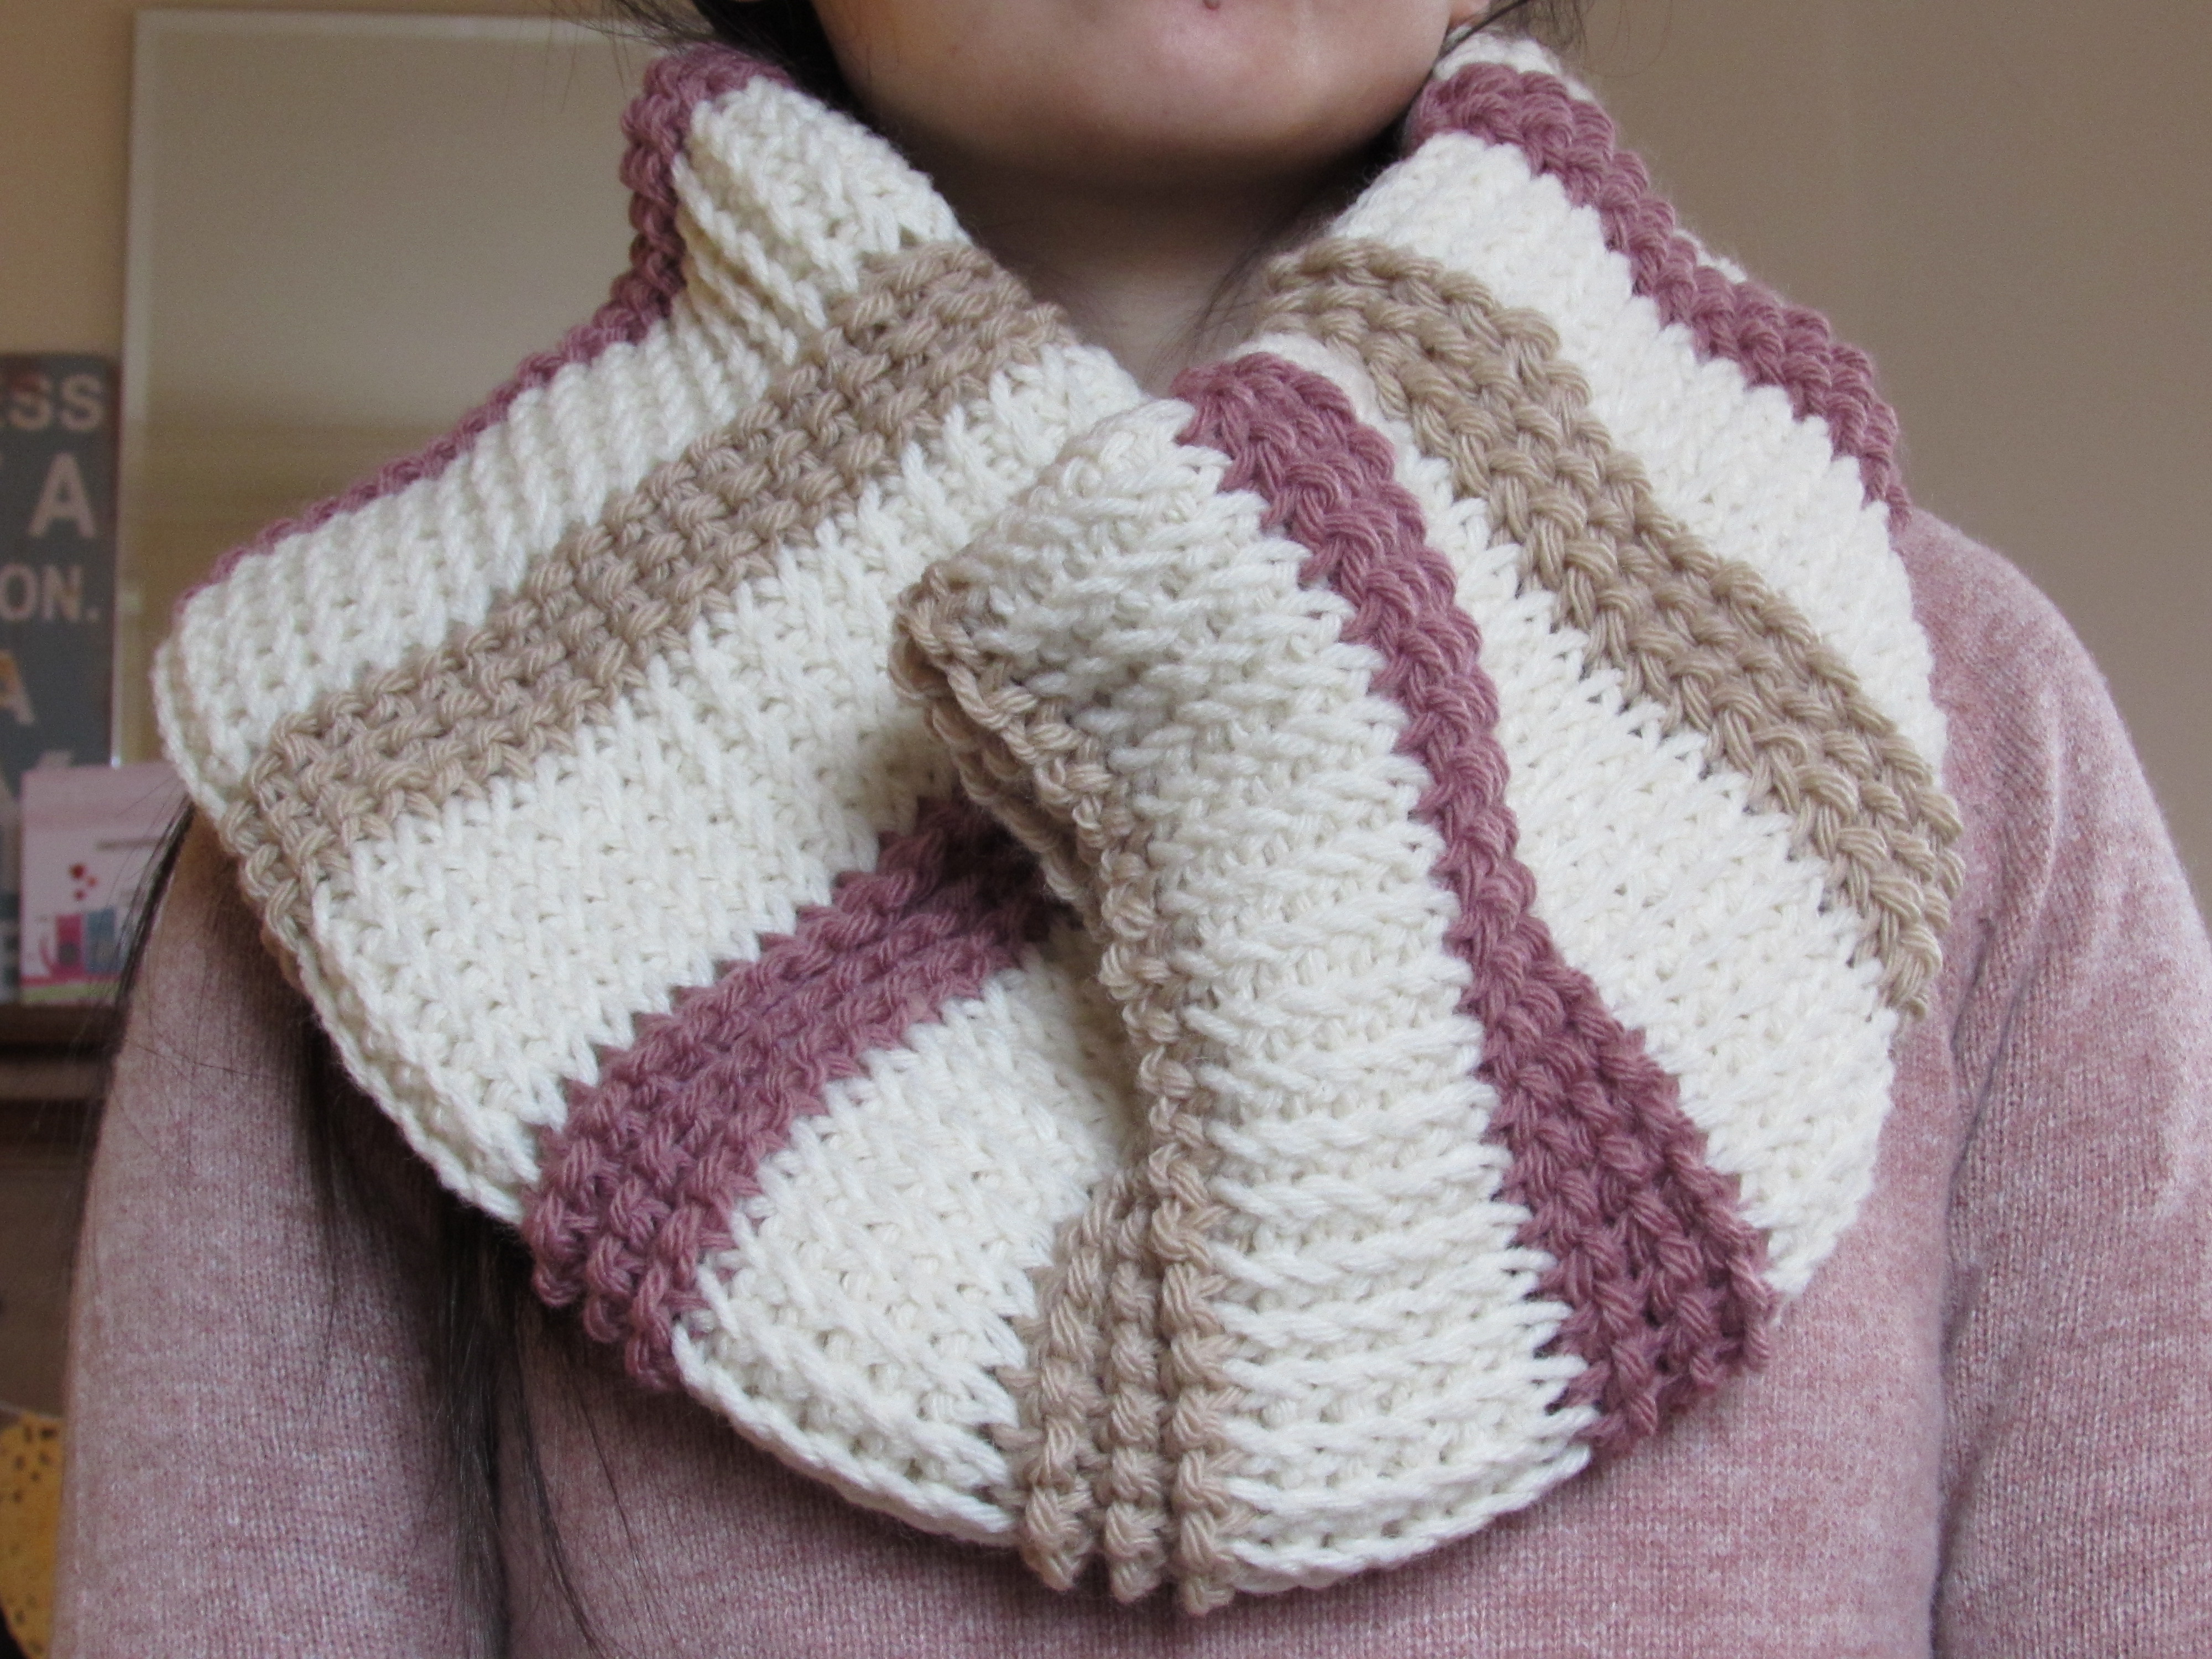
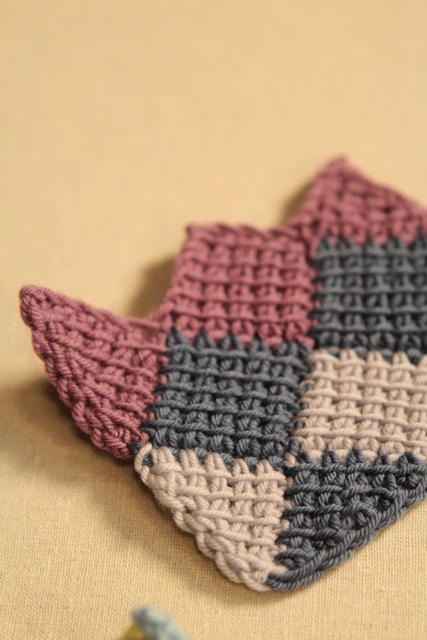
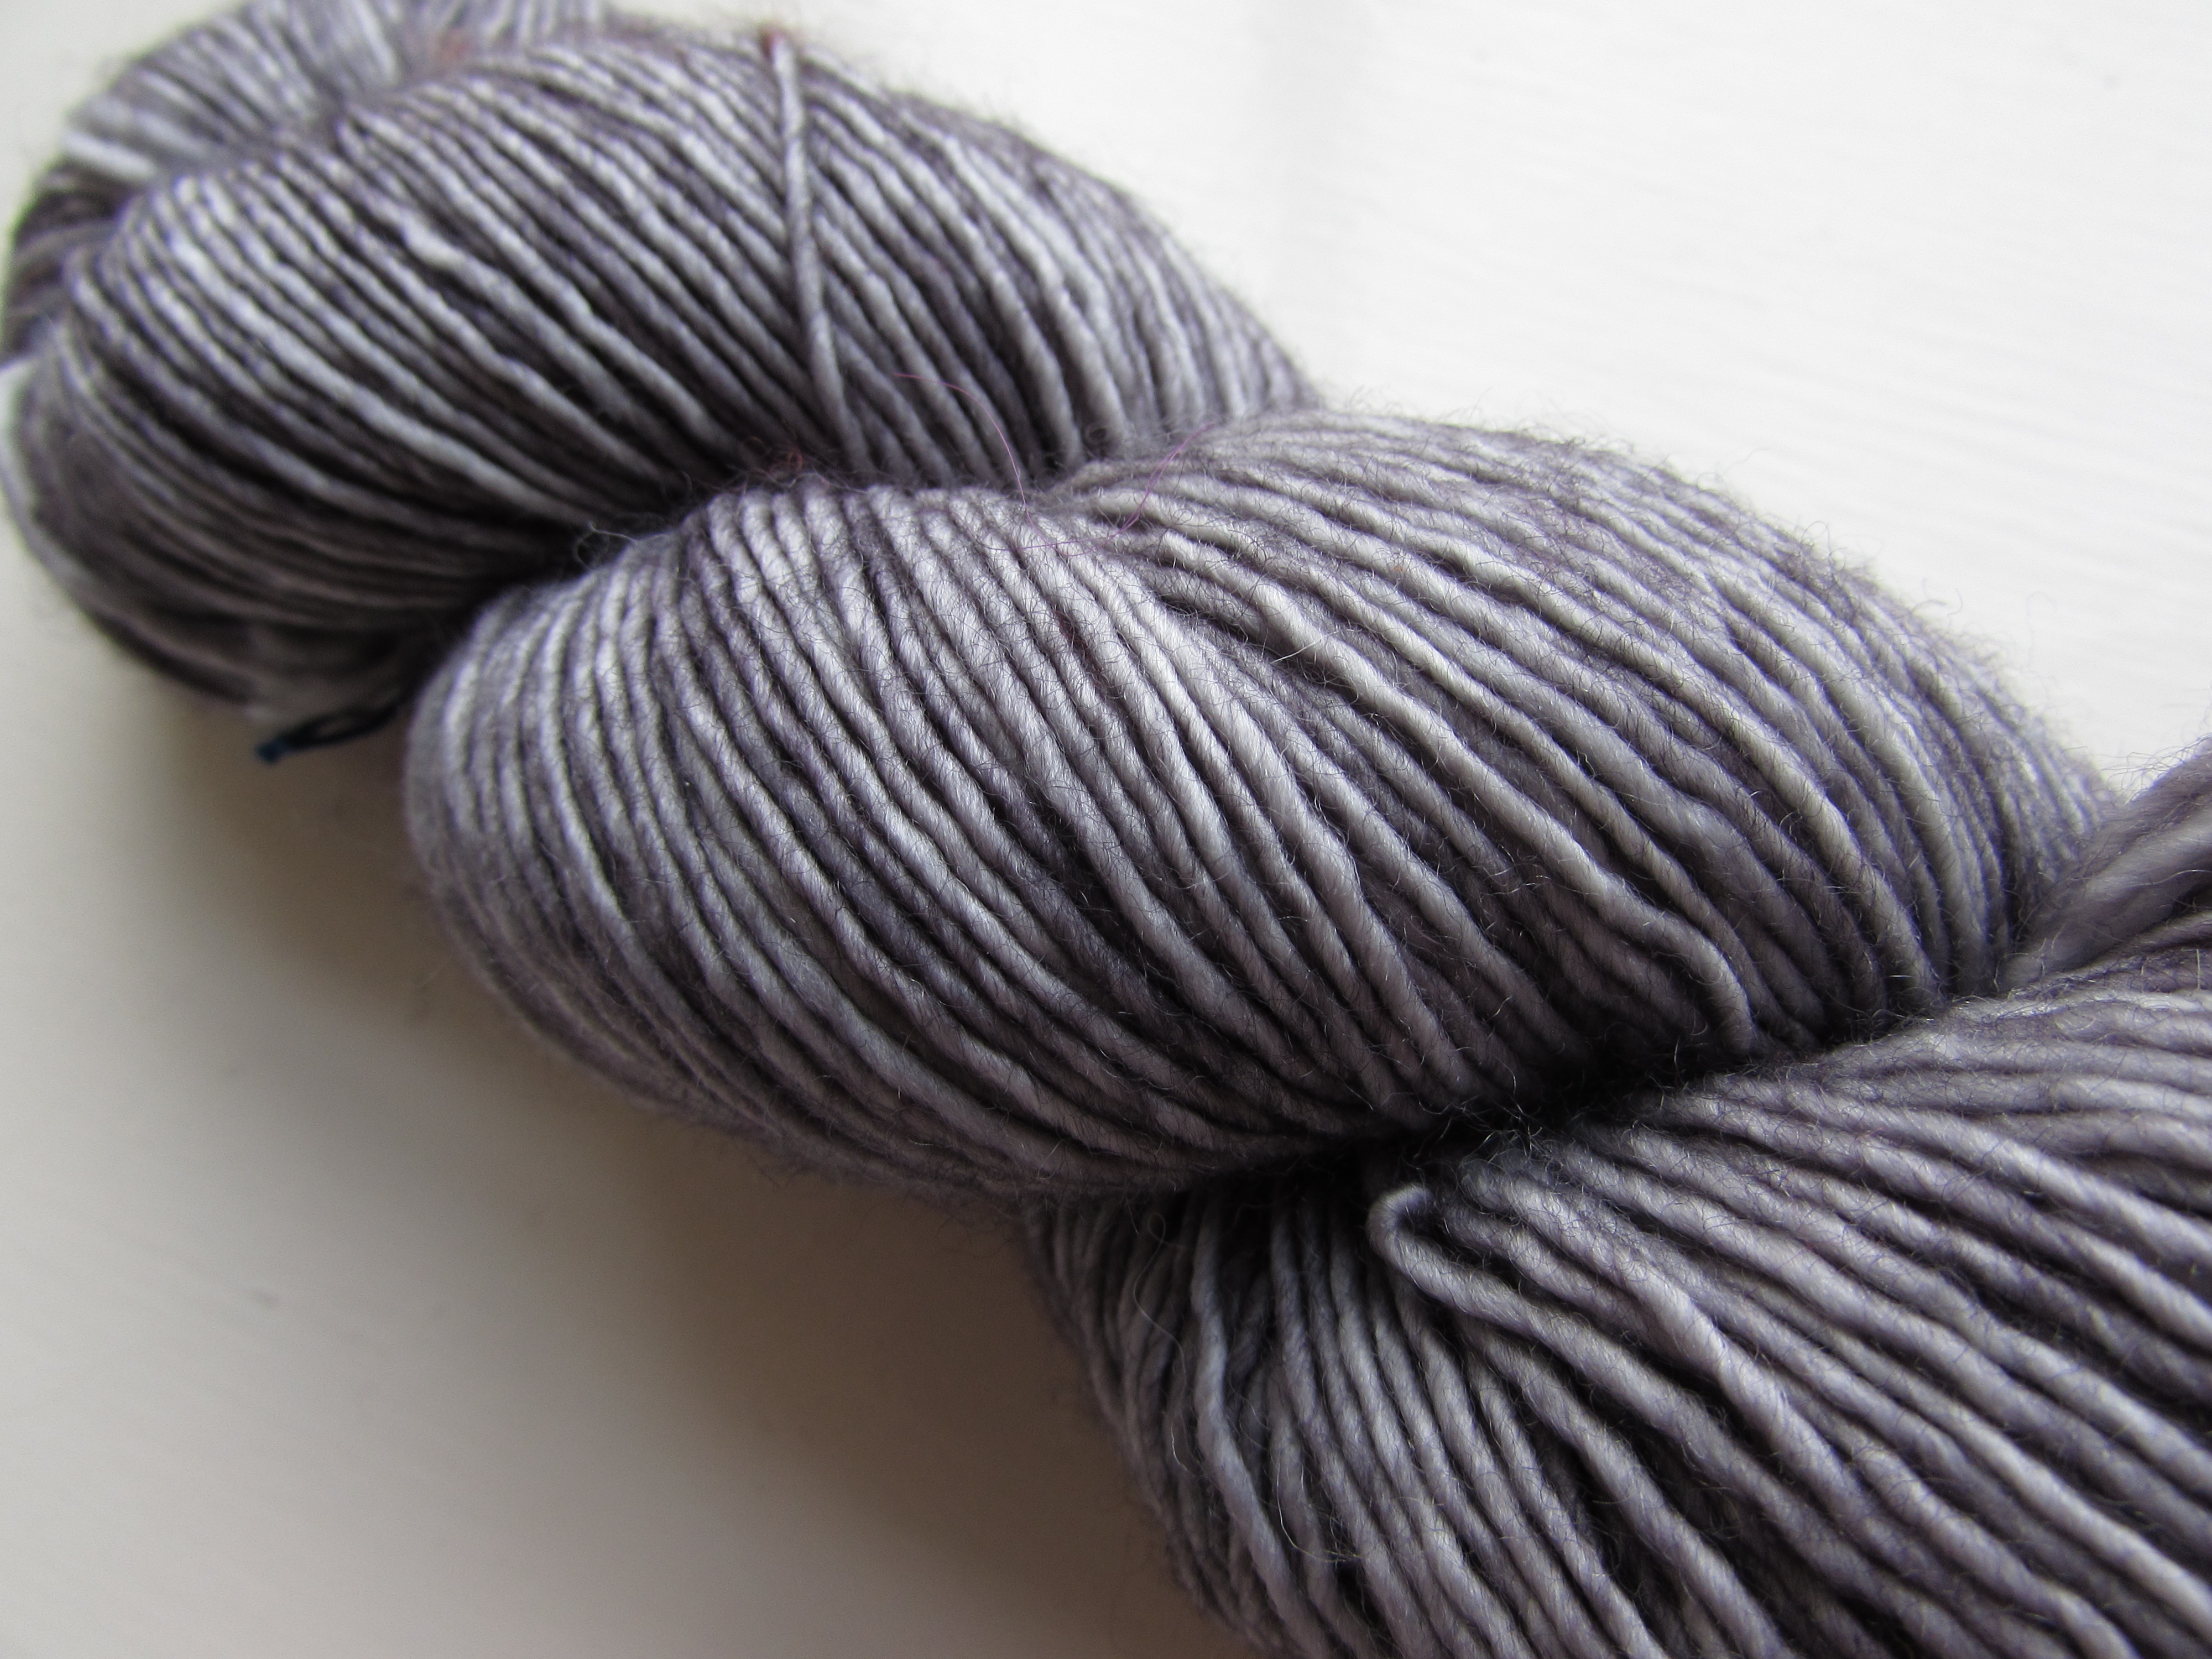
Now, about my latest yarn buys, I will begin with this beautiful Madelinetosh yarn, is Merino Light 4ply in a lovely greyish colour. I bought this at Be Inspired Fibres, there are so many beautiful yarns from all over the world in this shop and they will be at the EYF as well. It is already being worked into a cowl and I am loving how this looks with tunisian crochet. The cowl is inspired in the beautiful cobbled streets in Edinburgh, will post pictures and pattern soon!

IMG_0162

IMG_0163

At Be Inspired I also got a bit of Artesano Alpaca and Alpaca Silk in 4ply, I believe this will become that honeycomb cowl that sparked the idea to start my tunisian crochet tutorials, the colours are the same as my tunisian vest and of course only realised once I got home… 😛

IMG_0169

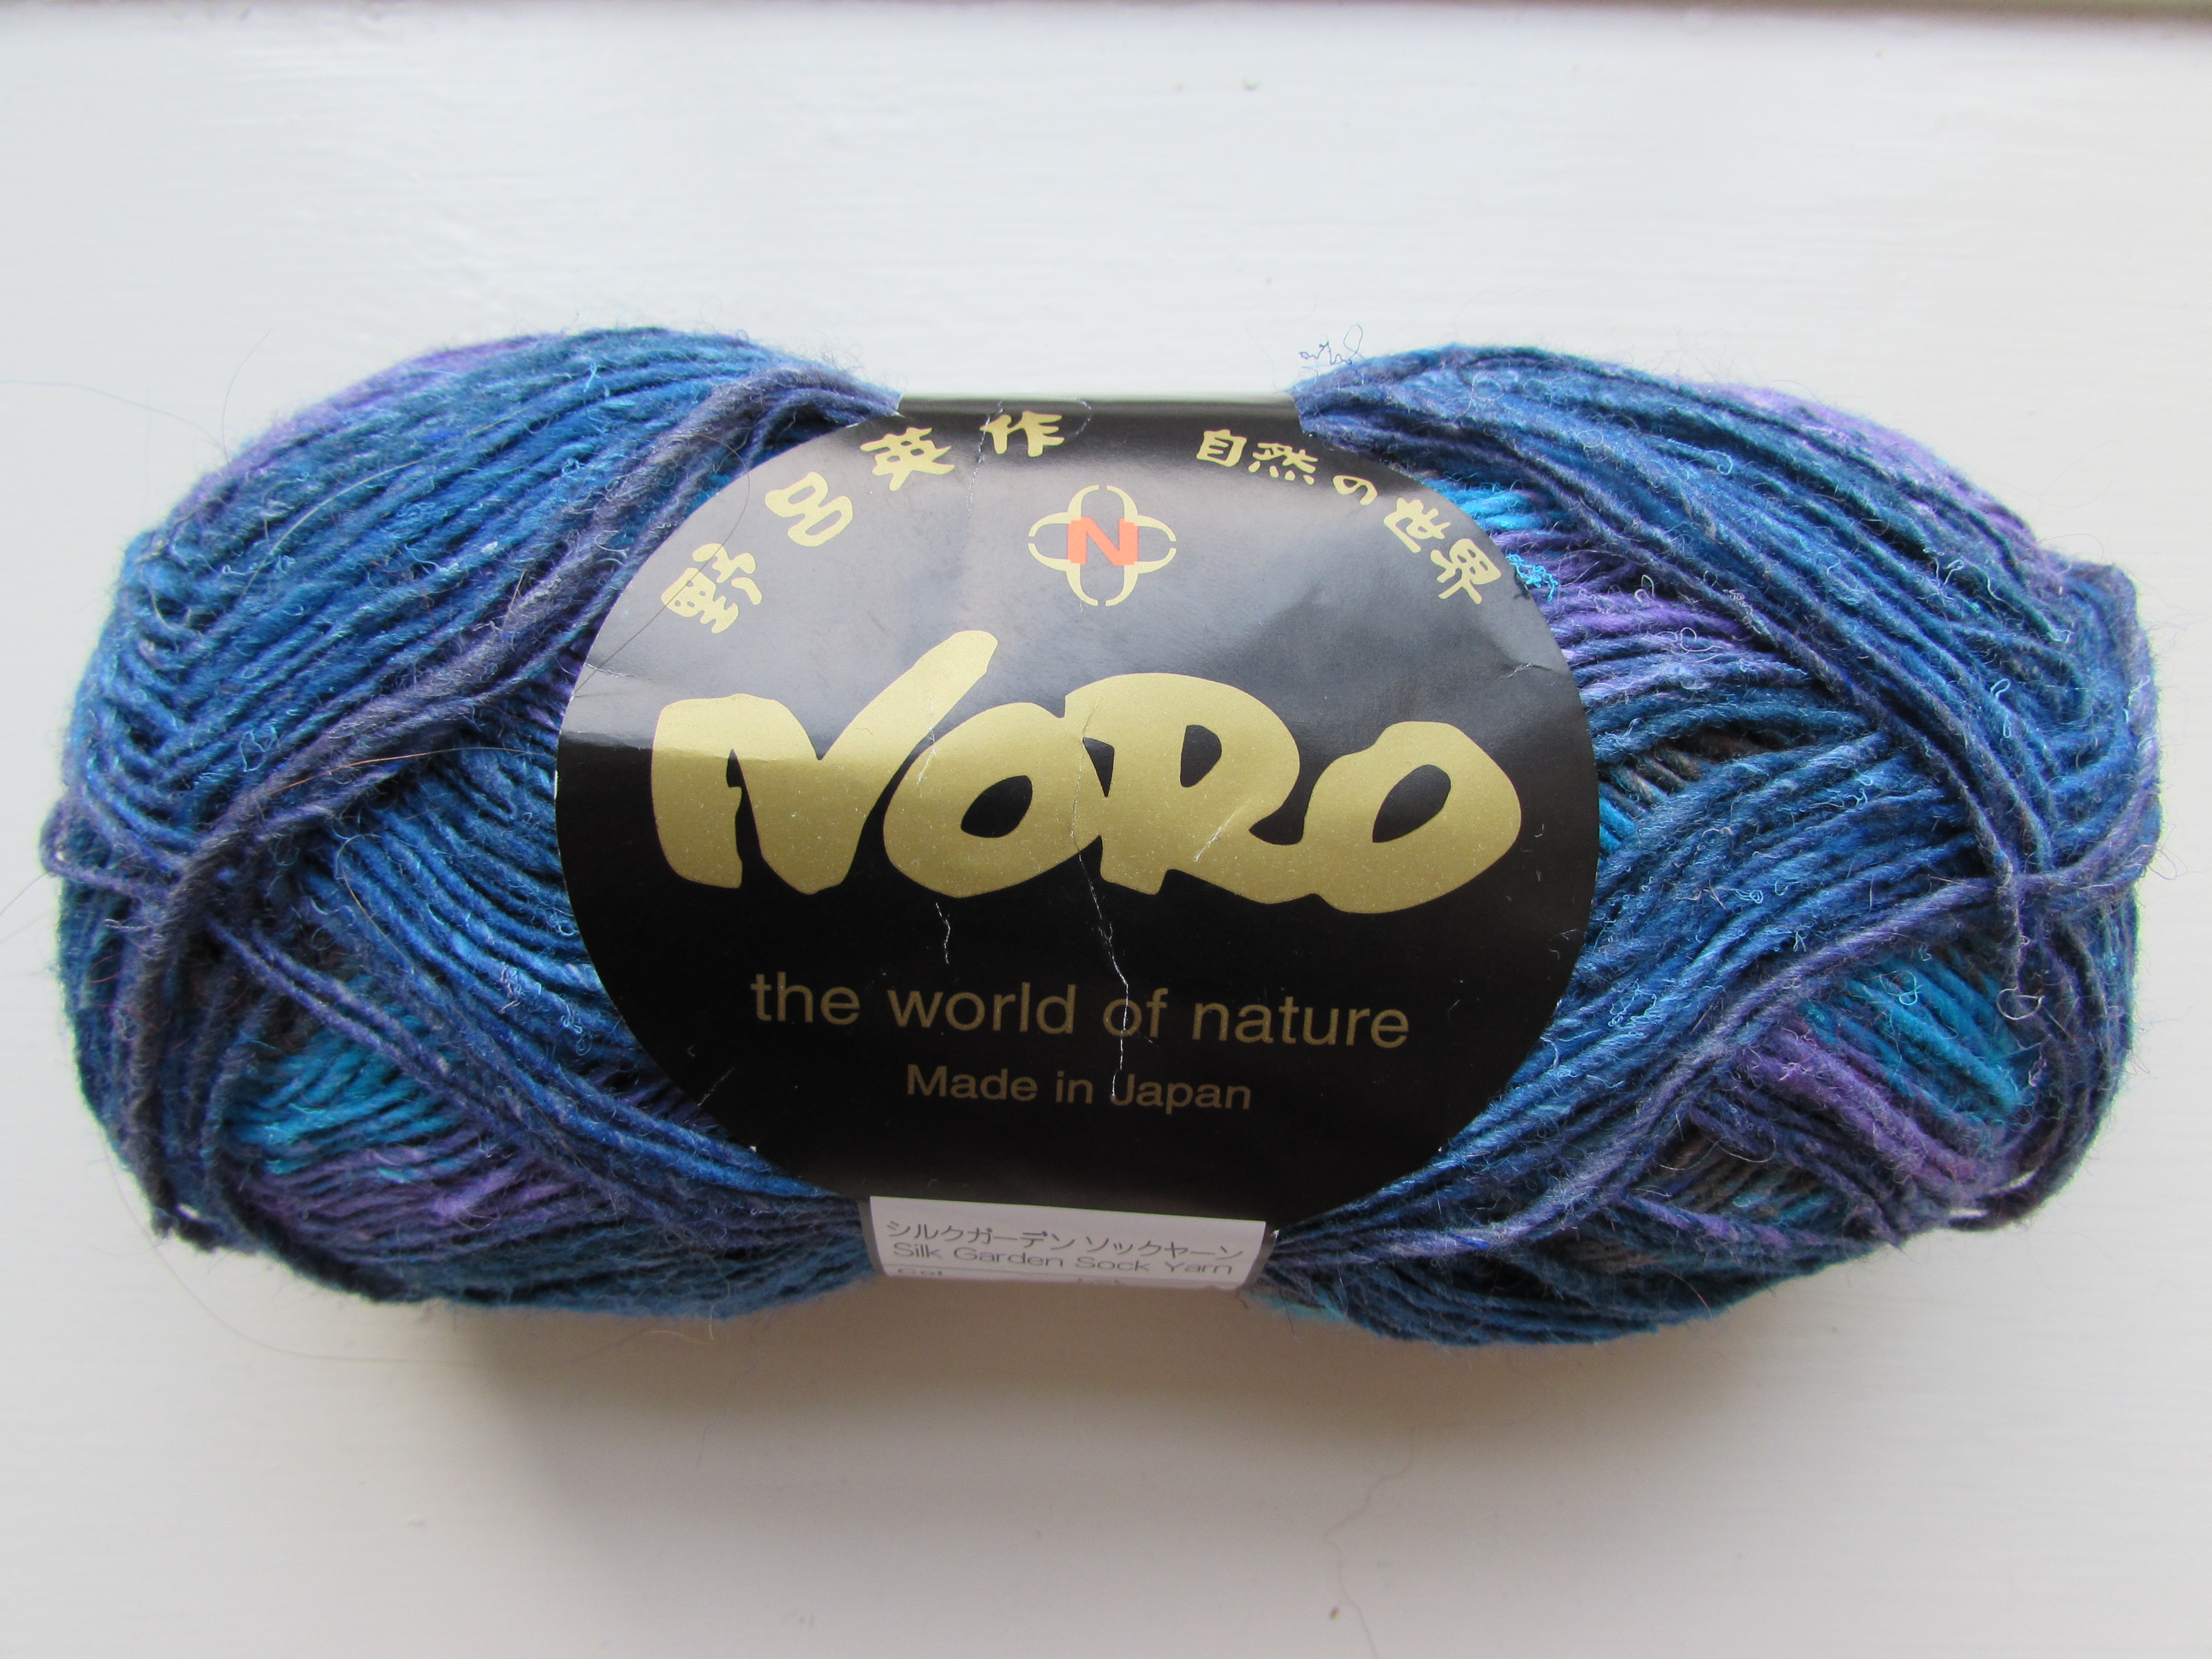
As part of a yarn exchange we did at my knitting group Christmas party I got this lovely Noro yarn, I see some tunisian fingerless gloves in the future! I think tunisian simple stitch would look great with the colour changes in this yarn.

IMG_0173

I also got this lovely Brigantia yarn in DK weight at Ginger Twist Studio, I have been eyeing this yarn for some time so happy to finally get to work with it. I am doing a sample for a class project, this New Year may bring some teaching opportunities so will keep you updated but it is all so very exciting!

IMG_0203

IMG_0204

Finally I also got this from Jess at Ginger Twist: an adorable crochet for my keys! I love it, for me it is only decorative but you could actually use it in those times of crochet emergency 😛

IMG_0208

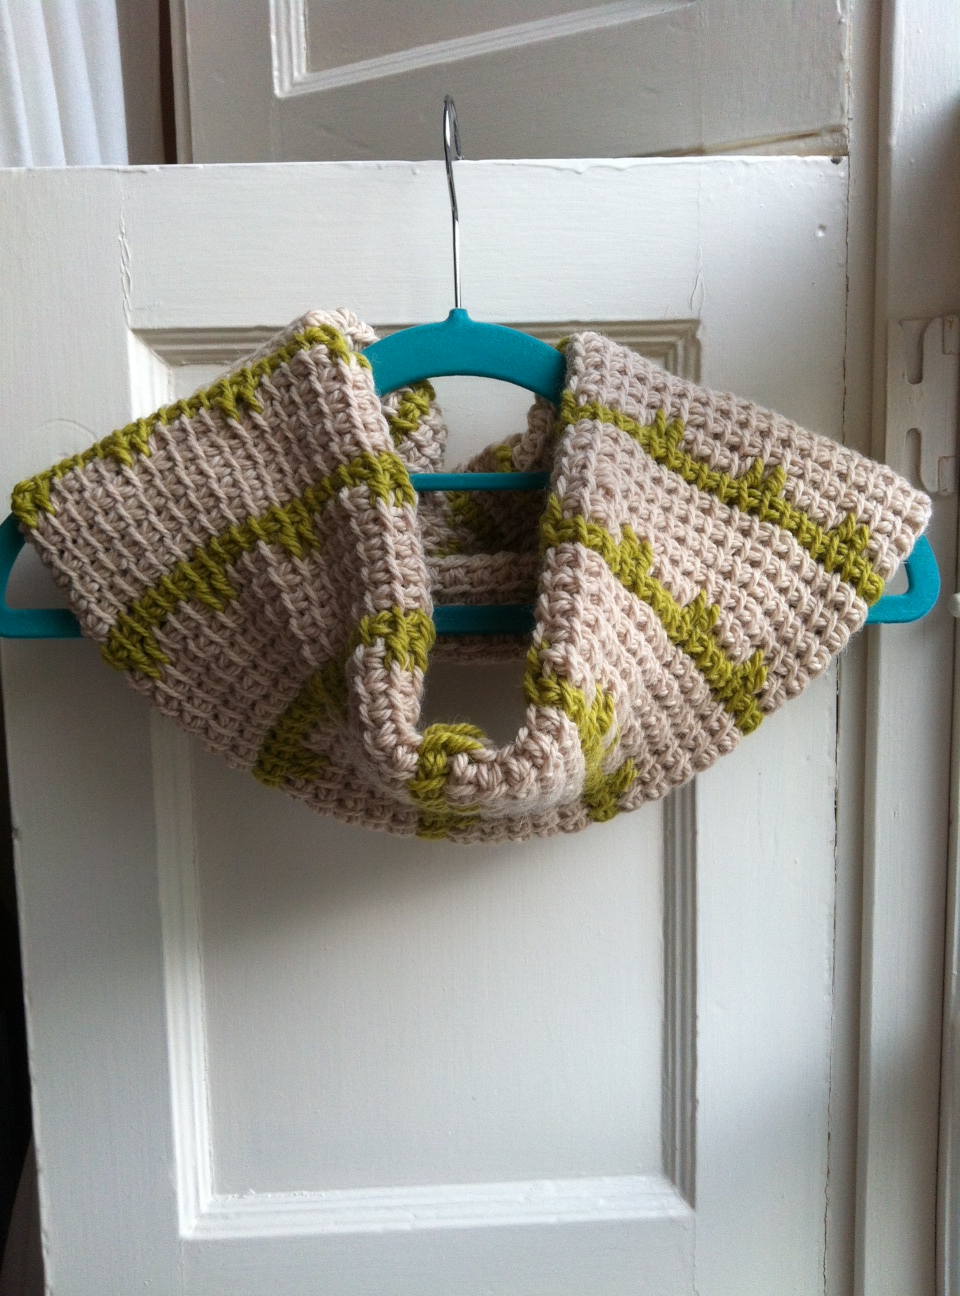
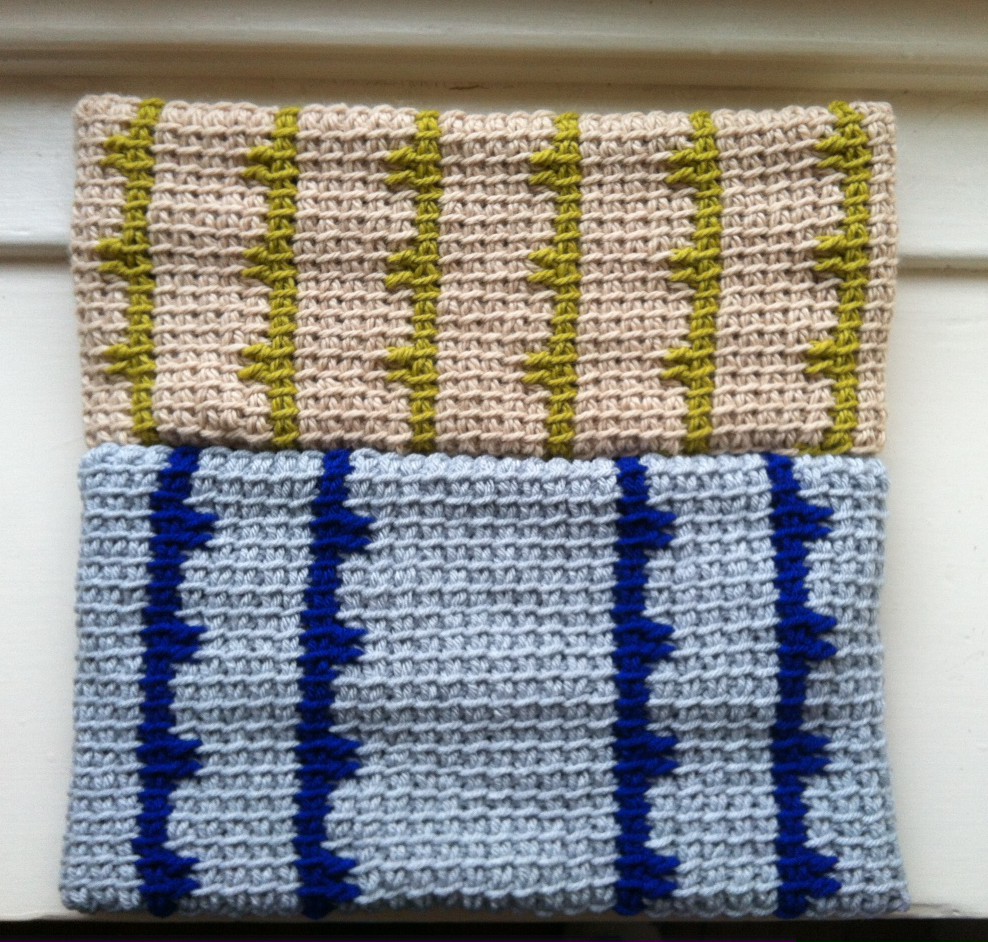
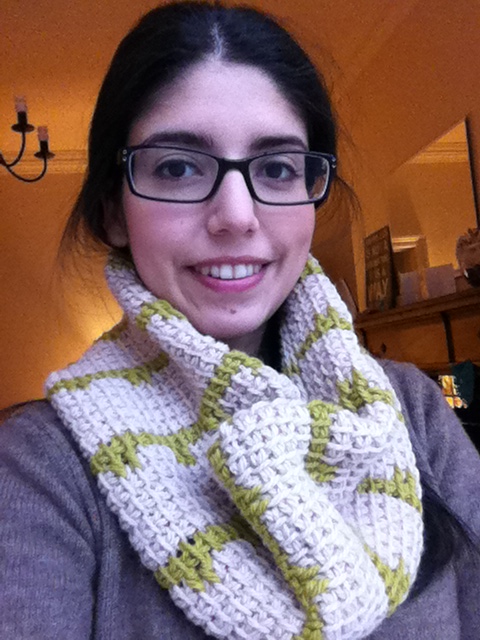
I’ve been hooking away these days and loving every minute of it. It has given me a lot of time to think about what I hope for this year, do you think a New Year resolutions post is too late? I think getting it in writing will help and one of my resolutions is to expand this blog and talk a bit more about life in my corner of the world. I think I will just start working on it and hope you will forgive me for being a little late to the party (or boarding the bus using the back door as we would say where I come from).

I have enjoyed every minute of this blog journey and want it to grow (and me alongside it), I hope to continue to interest you with patterns, colours and yarn goodness if you allow me since it is an honour to have my blog be a small part of your day or of your own crafty journey. Will be back soon with those resolutions…

Hope you have a lovely day!

x

Sol

FREE pattern: Teardrops Chunky Cowl

IMG_0040

Chunky goodness! This pattern was a joy to work and it kept me company during all those train rides and lonely hotel nights. I liked it so much I started another one right after I finished the first! I am obsessive like that 😛

It uses just two tunisian stitches, simple stitch and double stitch which is just a variation of the first really. It uses a really big hook so I do recommend using the ones with the extension, I am not even sure they have sizes this big for the normal long tunisian hooks.

IMG_0038

I really like the contrasting colours for both cowls, they use different yarns and I explain the difference later on. I think it would look great with grey and a nice neon colour 🙂

The seams are hidden inside the cowl so that they are not visible, and the best thing is that you DON’T HAVE TO WEAVE IN ANY ENDS!

Enjoy 😉

Teardrops Chunky Cowl Pattern

IMG_0065

This tunisian crochet pattern is worked flat and then folded and sown to make it double. The inside of the fabric is therefore not shown so there is no need to weave ends since they can be left inside. It uses only two stitches and it works up very quickly.

I have two widths available depending on the type of chunky yarn you use, some are denser than others. If your yarn is approx. 100 mt per 100g then you will chain less stitches, if your yarn is closer to 140 mt per 100g then you can make your cowl wider with the same amount of yarn in grams.

If you don’t know how to work tunisian simple stitch or how to change colours at the beginning of the forward pass please refer to my tutorials page where you will find all you need to work this pattern, including how to read my tunisian crochet tutorials.

IMG_0051

The cowl in the denser yarn (barley and green) measures 34cm wide when worked flat (17cm finished width once folded) and is 80 cm long.

The grey/royal blue cowl is worked in a lighter chunky yarn and it measures 42cm when worked flat (21cm finished width once folded) and is also 80cm long.

For both I used 2 x 100g balls of the background colour, only a few grams left. You will need only one 100g ball for the contrasting colour.

For the grey/royal cowl I got a smaller gauge which meant that I obtained the same length with less amount of rows, I recommend you simply work as many as you can while following the pattern.

Materials

You can choose between the following yarns:

  • Woolyknit Lofty Chunky: This is a denser yarn with approx. 100m/100gr
    • 2 x 100g balls in Barley (used all 200g) – Colour A
    • 1 x 100g ball in Olive (used 50g) – Colour B
    • Gauge: 11 sts and 1o rows in 10cm x 10cm worked in pattern.

or…

  • Stylecraft Special Chunky: This is a lighter chunky yarn, with approx. 140m/100gr
    • 2 x 100g balls in Silver – Colour A
    • 1 x 100g ball in Royal – Colour B
    • Gauge: 10 sts and 9 rows in 10cm x 10cm worked in pattern.

You will also need:

  • 9mm tunisian crochet hook 30cm long or with extension
  • Needle to sew edges together (if you prefer it instead of slip stitch)

Abbreviations

ch – chain

st – stitch

Tss – tunisian simple stitch

Tdc – tunisian double crochet

lp – loop(s)

sl st – slip stitch

yo – yarn over

end st – last stitch of forward pass (see stitch guide below)

Stitch Guide

Foundation Row – Forward Pass: Chain number of stitches needed. Skip first chain, insert hook under back strand of next chain, yarn over and pull up a loop. Repeat until last chain.

Return Pass: Yarn over pull through one loop on hook, (yarn over and pull through two loops on hook) until you have one loop left on hook.

Last stitch of any forward pass (End st): Insert hook under last vertical bar and strand behind it, yarn over and pull up a loop.

Tunisian Simple Stitch (Tss): Insert hook from right to left under next front vertical bar, yarn over and pull up a loop.

Tunisian Double Crochet (Tdc): Yarn over, insert hook from right to left under next from vertical bar (as in Tss), yarn over and pull through two loops on hook. For this pattern you will work Tdc one row below than where you would usually work it.

To change colours at the start of next forward pass: work previous return pass normally until you have two loops left on your hook. Drop old colour and pick up new colour, yarn over and pull through two loops on hook.

Slip st as in Tss: Insert hook from right to left under next front vertical bar, pull through two loops on hook.

Slip st End st: Insert hook under last vertical bar and strand behind it, yarn over and pull through both loops on hook.

Instructions

There are only a few differences in the pattern for each cowl. The grey one is wider and has less amount of rows than the barley one. I will write the pattern for the barley/olive cowl and will note any differences in a parenthesis for the grey/royal blue one.

With A chain 35 (40). Work foundation forward pass, you should have 35 (40) st, each loop in the hook counts as a st. Work return pass.

Row 1: Skip first vertical bar, Tss in next st and each st across until last st, work End st. Work return pass.

Row 2 – 3: Repeat Row 1.

Row 4: Skip first vertical bar, Tss in next st and each st across until last st, work End st. Work return pass, change to B at the end of return pass. No need to cut yarns, you can carry it along on the back.

Row 5: Skip first vertical bar, Tss in next 2 st, 2Tdc one row below, *3 Tss, 2Tdc one row below, repeat from * until last four sts, Tss in next 3 sts, Tdc one row below, work End st. Work return pass, change to A at the end of return pass. No need to cut the yarn, you can carry it along on the back.

Row 6: Repeat Row 1.

Row 7 – 66 (7 – 60): Repeat Rows 1 to 6.

Row 67 – 71 (61 -65): Repeat Rows 1 to 5.

Row 72 (66): Skip first vertical bar, slip st as in Tss in next st and each st across until last st, slip st End st.

Fold the fabric lengthways so that the wrong side of the fabric is facing you and sew in the long edge to make a tube. You can use slip st or any other joining method you like. Turn the fabric over so that the right side is facing (make sure all the ends remain inside the tube) and close the tube to turn it into a cowl by sewing both edges together. You will be sewing one circumference against another so that you end up with something like a donut (I am not sure I am making any sense so please ask if you are totally lost!). Don’t sew the four layers together or you won’t be able to hide the seams on the inside of the cowl when you are wearing it. You can see the seam in the picture below.

IMG_0047

If you have any questions, please ask 🙂 Hope you give it a try!

x

Sol

How to read my tunisian crochet patterns

Toreador Wrap
Toreador FREE pattern

Hi everyone, I wanted to do a quick post about my tunisian crochet patterns and make sure there is no confusion when following them. Unlike normal crochet, tunisian patterns are not widely available or known, and it can be a bit different to follow.

If you have followed my tutorials or if you are familiar with tunisian crochet you will know by now that there is this thing called the “undefined row”. Whenever you are working tunisian crochet, if you can see X rows in total, you will have X-1 rows defined with a certain stitch pattern and one last row undefined. This makes following tunisian patterns a bit confusing: “If I can see ten rows in my work (nine defined rows and one undefined), do I work the instruction for Row 10 or 11?”

I will clear this regarding my patterns. I did a bit of research and this is the most common way I have found to write tunisian patterns.

First, I will always begin with a foundation row, and then I will continue with “Row 1”. Now, you might say, “Wait… isn’t the foundation row the first row?” Well, technically yes but not yet… and it all comes down to that undefined row. When you finish your foundation row for any pattern you will have a “row” but this won’t be any particular stitch. It is only on the next row that you will define that row, which will be indeed the first row of your pattern, which is why the instruction says “Row 1”.

So… whenever you are following one of my patterns the instruction for, let’s say Row 3, will be the instruction which will define Row 3 of your pattern as a certain stitch, and by the time you are finished with it you will have 4 rows: 3 defined and 1 undefined.

IMG_2548

It sounds more confusing than it is, let’s try one more example. Let’s say you started your pattern yesterday and you are picking it up again today but you are not sure were you left off. You count your rows and realise you have 7 rows in total: six of them look like a specific stitch and the 7th one is still undefined. Where do you pick up the pattern? Row 7 or 8? Well, in this case you will have to continue the pattern with Row 7, since the instruction for Row 7 is the one that will define that row as a specific stitch pattern (even if this means that by doing this you will be adding the undefined 8th row to your pattern).

I know it can take a bit to get used to but I though it would be useful to clear it up. No one really explained it to me when I started working tunisian crochet and it would’ve saved me a lot of time and effort to know if from the start!

As usual if you are struggling just leave me a comment and I will get back to you as soon as I can 🙂

Have a great day!

🙂

Sol


My 2015 project queue

Happy New Year everyone! I hope this year brings you loads of good things, including loads of crochet of course 🙂 I have been thinking about what projects I want to start working on this new year, I have loads of magazines and books but put them aside on 2014 to spend more time designing. I will continue to work on my own patterns but I do miss working on other people’s designs, there are such lovely things out there that I want to give a try.

This is a long list and I am aware that there is probably not enough time in the year to crochet all this and also do my own patterns, but a girl can dream right?

Let’s start with magazines, I went through my collection and narrowed down my crochet wish list to the following patterns:

  • Leaps Cardigan by Annelies Baes: I came across this cardi on Issue 57 of Inside Crochet and immediately fell in love. As you know I am always in the lookout for some wearable crochet and this pattern definitely hits the mark.
© Tailor Made Publishing
  • Penelope Top by Jennifer Reid: Another find from Inside Crochet, this top is gorgeous and can see myself wearing it all summer long. I think that the alpaca in the yarn used makes it look even nicer so will try to find a similar yarn to the one used by the designer.
© Tailor Made Publishing
  • Rockin Red Dress by Doris Chan: I purchased a few more Interweave Crochet issues during the holiday sales and there were quite a few projects I really liked. I always check the patterns on Ravelry and was surprised to find that most of the ones I had liked had very poor ratings and comments of badly written patterns. I am not sure if this is common for Interweave Crochet, I had an idea that their patterns weren’t so throughly checked and I believe I had mentioned it before, but I didn’t think it would be that bad. Anyway, I did find a beautiful crochet dress by Doris Chan, she is quite a famous designer and her pattern had good reviews. I have found that for Interweave magazines it is safer to look for patterns with known names, I guess they have a reputation to keep and more experience as well. I have never crocheted a dress but this is really stunning.
© Harper Point
© Harper Point
  •  Quartz Lace Top by Dora Ohrenstein: You know by now that I am a fan of Dora Ohrenstein, but didn’t know this pattern was hers until I looked it up just now! I saw it on Ravelry a while ago but found it recently in one of the Interweave magazines I bought.
© Harper Point
© Harper Point

Moving on to books now… I have purchased a few books this year, haven’t reviewed them yet but thought I could still list the projects that are at the top of my wish list. As you can imagine some designers will sound familiar!

Haru from Everyday Crochet by Doris Chan: I found this book at a charity shop at a very cheap price so had to get it. My favourite pattern is this striped long cardigan, I love how colourful it is.

2498422374_d9cac59beb_z


  • Buttoned Capelet from Hook, Stitch, Give by Kat Goldin: There are quite a few things I would like to make from this book including this beautiful capelet, I am so drooling over that yarn!

IMG_0197

  • Slouch and Bobble Hat from Hook, Stitch, Give by Kat Goldin: Love the hat, love the colours, love the pompom. Love, love, love.

024527 Crochet_Gifts_cover JKT.indd

© Dora Ohrenstein
© Dora Ohrenstein

Finally, I have a few patterns found on Ravelry and other places… and then I’m done I promise!

© Caro Sheridan
© Caro Sheridan
  • Freyja by Aoibhe Ni: I purchased the Legendary Shawls eBook and still have many left to do… this one is at the top of the list though!
© www.halfadreamaway.com
© http://www.halfadreamaway.com
  • San Marino Bag by Hooked: I have never liked crochet bags, I had never really found a pattern that doesn’t look a bit tacky but this one caught my eye. I love that the kit comes with the handles as well.

CR060K1-San-Marino-Bag_grande


As you can see I am drawn to garments, mostly because I can’t design garments yet so I look for other designers for these patterns. Have plenty of ideas for accessories for this new year so as usual, stay tuned 🙂

Let me know in the comments if you have any patterns in your queue for next year that you can’t wait to try!

x

Sol

Tunisian Crochet 101: Changing colours (forward pass)

IMG_0118

It has taken a while but I am finally back with another tunisian crochet tutorial. I am taking a break from stitches and will teach you how to change colours, simply because my new pattern requires this and I thought it would be easier if there was a tutorial available.

There are a few ways of changing colours in tunisian crochet and I will only go through one today, changing colours at the start of the forward pass. This gives a clean colour change and it is what you would use for stripes. I will cover the other types of colour change in the future but this is the most basic one.

I will also explain how to change colours and stitch at the same time as part of this tutorial, it will be useful for my next pattern. If you are following any tutorial of course you will have the instructions for each row and this will tell you when to change to each colour and what to do if you are also changing stitches but this tutorial will help if you are playing with stitches and decide to create something by yourself. I think tunisian crochet is quite good for creating your own scarves by just changing stitches and colours, it gives a very nice look.

So let’s look at our sample so far!

We left off with a few rows of tunisian knit stitch (Tks), I can see six rows defined as Tks in my sample. Let’s say then that I want to work seven rows of Tks and then change colour and change back to tunisian simple stitch (Tss) at the same time for a couple of rows. If you only want to learn how to change colours then this is not important of course.

IMG_0079

First, I need to work the return pass on this row.  So yarn over and pull through one loop.

IMG_0082

IMG_0083

Yarn over and pull through two loops, repeat until you have two loops left of your hook. This is the difference when changing colours: in a normal return pass you yarn over and pull through one loop and then yarn over and pull through two loops all the way until you have just one loop left on your hook. In this case we are stopping just before working the last part of the return pass.

IMG_0085

IMG_0086

You do this because if you want to have a different colour at the beginning of the next forward pass you need to change colours at the end of the return pass. Now, keeping those two loops on your hook do a slip knot (this is not strictly necessary but I still do it) with the new colour.

IMG_0087

Pull the loop with the new colour through the two loops on your hook finishing the return pass.

IMG_0088

If you just wanted to know how to change colours and you are not changing the stitch as well that is it! You just continue working your stitches with the new colour.

If you want to know how to also change stitch at the same time then stick with me for a little bit. We said we wanted seven rows of Tks in yellow and two rows of Tss in the new colour. If you work normal crochet you would probably think that since you are now working with the white and you want Tss for this colour then that is what you should work now. But no! If you look at the sample you will see that even though we have the seven rows in yellow, not all of them are defined as Tks.

So… even though you are working with the white yarn, you will work this row as tunisian knit stitch because as I have said before what you do in each row will define the stitch of the previous row and create a new undefined row for you to work next. Therefore, insert your hook on the next stitch (remember we always skip the first one) as Tks between both vertical bars.

IMG_0089

Yarn over and pull up a loop.

IMG_0091

Continue all the way through until the last stitch, which you know by now is worked the same regardless of which type of stitch you are using. Insert your hook under two loops (I explain this in detail on my tunisian simple stitch tutorial) yarn over and pull up the last loop of the row.

IMG_0092

IMG_0094

IMG_0095

IMG_0101

Work return pass normally. So now you will have seven rows of Tks in yellow as you wanted and one undefined row in white. Since you know that what you do next will define that undefined row then you will have guessed that it is now that you start working Tss.

IMG_0102

So insert your hook as Tss.

IMG_0103

Yarn over and pull up a loop.

IMG_0104

IMG_0105

Continue working Tss until the last stitch, work last stitch normally.

IMG_0107

We said we wanted two rows of Tss in white. If I worked the return pass normally now I would actually see two rows in white: one defined as Tss and one undefined. Since two rows is all I need then you will need to change colours at the end of this return pass.

So work the return pass until you have two loops left on your hook. You now see your two rows in white and this is what tells you to change colours, it doesn’t matter if that last row is not defined yet, you will define that next.

IMG_0108

Drop the white, yarn over with the yellow and pull through the last two loops. For two rows I wouldn’t bother cutting the yarn, you can just carry it along in the back if it works for you.

IMG_0111

IMG_0112

You now need to work Tss, since that is what you want for that last white row. So insert your hook as Tss on the second stitch.

IMG_0113

Yarn over and pull up a loop.

IMG_0114

IMG_0115

Continue until last stitch, work last stitch normally.

IMG_0118

You can see now that we have what we wanted! Seven rows of Tks and two rows of Tss in the new colour. If you work the return pass you will have a new undefined row in yellow, ready to become any stitch you want.

IMG_0119

That is it for today everyone, hope that is clear and as usual let me know if you have any questions. Will post the pattern for the first chunky cowl soon now that you know all about changing colours!

x

Sol

More chunky goodness

IMG_0030

Did you have a nice Christmas everyone? I hope so 🙂 I just wanted to share a quick post, remember my chunky obsession? Here is the latest finished project! I think I am finally done with chunky yarns for the moment… moving on to 4ply next, a spring cowl maybe? We will see! I am not sure if it is the holidays or just having time for myself but have been feeling very inspired lately and patterns are swimming around my head, it is a very nice feeling indeed.

IMG_0013

I will post this pattern once I post the tutorial for tunisian reverse simple stitch, very easy stitch and it gives a lovely texture as you can see in the pictures.

IMG_0191

I better get back to all that leftover food and some more crochet time in front of the TV… hard times!

x

Sol

Merry Xmas everyone! (Feliz Navidad!)

IMG_0210

It takes me a while to get into the Christmas spirit, but I always get there in the end. I want to wish every one of you a lovely and happy Christmas with your loved ones. Hope there is loads of food, drink and happy crochet moments by the fire.

I wanted to share some pictures of my tree, it doesn’t have many ornaments I’m afraid since I haven’t collected many in the few Christmas I have spent away from home. However, there are some very special decorations hanging from this tree and they have been handmade by the amazing people from a knit club here in Edinburgh. We meet every Monday, rain or shine, get our needles and hooks out and just eat, knit, crochet and talk with each other. It is definitely one of my favourite times of the week when I am not away somewhere for work and I have met some pretty amazing ladies so I am very thankful to have found it. If you live in the area we meet on Mondays from 4ish to 8ish at the Safari Lounge in London Road.

IMG_0221

We do an ornament exchange as part of our Christmas party and that is why my tree has the prettiest of decorations, the mousie on top of the tree is definitely my favourite and it couldn’t go anywhere else than at the top, of course!

For those of you who like me are far away from home this Christmas I send you all my love since it can be a hard time. Remember all the blessings and the people you have met in your new country who are now your family as well. I always Skype with my family while they are having their Christmas dinner, they put a laptop in the middle of the table and we chat and open presents, isn’t technology amazing?

IMG_0211

Well my dear readers, enjoy this merry time , hope you get loads of yarn under the tree and that all your crocheted gifts fit perfectly!

x

Sol

Class Review: Tunisian Crochet with Dora Ohrenstein

tunisiancrochetdvdcover_3
Interweave Store

Ufff… I am so glad it is finally holiday time! Which means loads of time to crochet and plenty of food, love it 🙂 As I mentioned in my last post I have been very busy at work and since I am still working on my next tunisian crochet next tutorial I thought I could write a review in the meantime.

Ever since I discovered Craftsy I have been loving online classes and have also been downloading a few videos from Interweave Crochet which teach you specific techniques. It is so relaxing to watch them in the evenings at the hotel when I am away for work and I have finished a couple of them so I thought I should share my thoughts here.

In this post I will review an Interweave Crochet video download called “Tunisian Crochet with Dora Ohrenstein”. I bought this on a sale for US$5, the normal price is US$19.99 so it was quite a bargain. I first heard of Dora because I enrolled in her tunisian crochet Craftsy class, and if you follow my blog you know I loved it. Dora is a great teacher, she explained everything very well and I really liked her. She even answered one of my questions in the forum and was very helpful. Even though I am still working on the pattern from that class (definitely on my list to finish before next year) this has nothing to do with her skills as a teacher and more to do with me working on too many projects at once. Anyway, since I loved her class I decided to download this video and see if I could get a bit more knowledge about tunisian crochet and learn a few more techniques.

The video lasts two hours and it starts with the basic tunisian stitches to then move on to more complicated techniques. She talks about lace stitches, textured fabrics, tunisian in the round, entrelac and others. I think what I enjoyed the most about the video was that it shows you the scope of different fabrics you can get with tunisian crochet and the amazing textures you can get. It gives an overview of what you can achieve with this technique much beyond the basic stitches.

e03bc5e5b2af1a35ca6012fe58252ac4
Interweave Store

Now, if you want to not only see but learn how to do all these different stitches and techniques then this video is not the one for you. She goes through the basic stitches very quickly, she just does one row of 8 stitches for each of them (simple stitch, knit stitch and purl stitch) and then moves on to more complicated ones. The problem is that she doesn’t go through all the stitches she shows, and the ones she does explain are not in detail or from start to finish. She would have started a sample with the stitch and do one or two rows to show you how to work the stitch but no more than that. You wouldn’t know how to begin a sample with that stitch or how to end it, and there is no document with the class where the stitches are explained in detail. I think that she tried to fit in too many things in the class and that meant she couldn’t go into much detail for any of them. I would prefer to learn something from start to finish rather than know a little bit about a lot of stitches.

One thing I did find very useful is that she explained a few different ways of increasing and decreasing stitches and the pros and cons of each, I already knew most of them but I did learn a few things and it was good to see all the different ways explained in one place. She also had good tips about how to convert knit patterns to tunisian crochet and avoid disappointment and I also liked the explanation of how to do a tunisian cable which I hadn’t seen before. The video comes with a pattern for a vest that I didn’t particularly like, though I did like the stitch pattern.

238970-3-1

One last thing to note is that Dora Ohrenstein also wrote a book about tunisian crochet with different stitches and patterns, and this class seems to be a good tool if you have the book, since quite a few of the stitch patterns can be found in detail there so the video gives you a visual aid. I have the book and will write a review on another post, I will only say that if you had to choose between the video and the book I would definitely go for the book!

All in all, I enjoyed this class, I really like Dora as a teacher and I learned a few things I hadn’t seen before but I think she tried to cover too much in two hours and that meant that even though you see all the beautiful things you can do with tunisian crochet you won’t find all the information you need to learn them in this video, and it will be harder if you are only starting with tunisian crochet.

Having said that if you find this product in an offer and would like to see what tunisian crochet can do, if you really like the pattern that comes with it or if you own Dora’s book and would like to see how some of the stitches are worked then I recommend you get this. I don’t believe I would pay the full price but for the US$5 I paid it is very good value for money and I did really enjoy it.

That’s me for today! Will be back soon with tutorials, more reviews and new patterns 🙂

x

Sol

Quality over quantity

Hello everyone! I am sitting at the lobby of a hotel in Dublin, I am here for work and since I have 15 minutes before having to walk to the office I thought I would write a post for you. I was going to write a review of a video download for a tunisian crochet class but I changed my mind while walking from my room to here.

I have been very busy at work these past few weeks and have not had much time for crocheting or taking photos for my tutorials. The strange thing is that I have been feeling very guilty about this and it is a feeling that has hovered over me every day this week, that I need to post something in the blog because I can’t let a whole week pass without posting something… right?

Last week I read a blog post (can’t remember from where but I can look for it later) about the new trends in blogging, and one of them was quality over quantity. Professional bloggers (I mean those who make their living out of blogging) are cutting down the amount of posts per day and focusing on sharing good content rather than making sure there are X amount of posts on their blogs. They are making sure each post is a story worth sharing, with good quality pictures, graphics and I guess with a good amount of love. The interesting thing is that sharing less posts hasn’t meant losing followers, quite the opposite actually.

I love writing posts for you guys but just like everyone else, sometimes I don’t have the time for it. The holidays are coming and then I will have plenty of time to work on my patterns and tutorials and I will catch up on everything, but for now a 15-min post is all I can give you guys. I know this post is to convince myself rather than you and I am sure all the lovely people who have subscribed to my blog will understand this but I just wanted to explain why I haven’t and will not post for a few days. I have a few tutorials, patterns  and reviews coming up though so stay tuned! There is plenty of crochet love to share and I will be back once life stops getting in the way 😉

Have a nice day 🙂

x

Sol

The chunky cowl craze

photo 3

How are you? Thanks for stopping by 🙂 I wanted to write a quick post to share this mad, crazy love I have developed for really chunky and cosy cowls!

My mum came to visit a couple of months ago and of course we went shopping to Primark. Given the difference in temperature between home and here (even in October) she bought this chunky white cowl for a trip up to the Highlands, which I didn’t particularly like at all when she showed it to me. When she was leaving though, she decided she couldn’t take that back home since she would never wear it and left it for me despite my assurance that I had enough scarves and cowls already.

Then one day I wore it out for a cold day shopping in town, and I LOVED IT. So warm, cosy and the fact that is chunky just makes it even better. And then the craze began… I went over to Ginger Twist Studio to see Jess and get some nice chunky yarn to make myself a lovely tunisian crochet chunky cowl.

photo 1

A week later, I bought some more chunky yarn from Deramores and now I have two finished cowls in a new tunisian pattern and another new design on the way! I know… I get so easily obsessed. It has been the most relaxing thing to crochet on train journeys though… just the perfect project except for the fact that I have to carry one extra bag for my chunky yarn. It is worth it of course 🙂

photo 8

As you can see from the pictures it is the same pattern for both cowls just different sizes depending on the heaviness of the yarn. The cream/green one was done with Woolyknit Lofty Chunky which I got from Ginger Twist, lovely dense and warm yarn. The grey/royal blue one used Stylecraft Life Chunky which is less heavy and a bit fluffier. I used the same amount of yarn in grams for both (approx. 150g) which allowed the grey one to be a bit bigger but since the yarn is not as dense you can mould the cowl around you very nicely. The cream/green one is more stiff but just the perfect size to keep you warm without it being uncomfortable in any way.

photo 5

I leave you with the pictures in the meantime but I will post the pattern soon. I am trying to figure out the best way to do it since it does involve changing colours and stitch pattern in tunisian crochet and it can be a bit confusing (it is dead simple once you understand it I swear) so I think I will post how to do this as part of my Tunisian Crochet 101 series and then post the pattern after that with links to the tutorial.

photo 11

The second chunky cowl pattern is still in progress, will post pictures of the finished product after a few more train rides 🙂 Hopefully I will have satisfied my crazy chunky needs by then!

x

Sol